TL;DR
Prime for Young Adults — start your free trial
Fast free delivery, streaming and member deals for eligible 18–24 year olds.
Try it freeAs an affiliate, we earn on qualifying purchases.
Tripods for macro work need a low minimum working height, independently spreading legs, a short or removable center column, and enough rigidity to keep the camera aligned across slow exposures or focus stacks. Keep the center column down, use a timer or remote release, and add a focusing rail when millimeter-level camera movement matters.
A tripod can feel rock solid at eye level and become nearly useless when the subject is a mushroom sitting 4 centimeters above wet soil. For close-up work, the deciding feature is often not maximum height or headline load capacity. It is whether the support can place your lens low, close, and steady without turning its legs into a fence around the subject.
Macro photography amplifies every small problem. A soft breeze moves a flower like a sail, a finger pressing the shutter sends a faint tremor through the camera, and a framing change of 2 millimeters can cut off an antenna or shift the sharp plane behind an insect’s eye. At 1:1 magnification, depth of field may measure only a few millimeters or less.
I will show you which tripod features matter in real shooting, when a geared head or focusing rail earns its place, and why your release technique matters as much as the legs. You will also learn when to leave the full tripod in the bag and use a beanbag or flat plate instead. The goal is simple: more sharp frames, less wrestling with hardware, and a camera that stays exactly where you put it.
Measure minimum working height from the ground to the mounted lens center, not merely to the bare tripod platform.
Choose independently spreading legs and a short, removable, or absent center column for reliable ground-level framing.
Keep the center column down and use a 2-second timer or remote release to remove two common sources of macro blur.
Use a geared head for deliberate framing and an Arca-compatible focusing rail for repeatable camera movement at high magnification.
Switch to a beanbag or flat plate when fungi, frost, or low flowers sit below the tripod’s practical minimum height.
Tripods for Macro Work: Getting Low and Staying Steady
Macro photography turns tiny weaknesses into visible blur. The right support must put the lens near soil level, preserve millimeter-precise framing, and remain still through slow exposures or an entire focus stack.
The features that put the lens where the subject lives
Maximum height and headline payload ratings matter less than a support’s lowest practical camera position. Head height, lens diameter, the camera body, and the column design all raise the optical axis beyond the catalog figure.
Independent angles
Each leg can splay around roots, rocks, plants, and uneven soil. Look for multi-angle stops that approach 80–90 degrees for a broad, low stance.
Short or removable column
A full-length center column is usually the main barrier to ground-level framing. A short column lets the camera settle directly above the leg junction.
Column-free platform
Systematic-style platforms remove the obstruction entirely, reduce leverage, and often provide the most rigid low position for deliberate macro work.
Lateral reach
A horizontal column can overhang a subject while keeping legs outside the frame and away from reflectors, diffusers, or delicate vegetation.
Fewer, thicker sections
Large-diameter leg tubes and fewer joints flex less than numerous thin sections. Keep the thinnest leg segments retracted whenever terrain allows.
Build in headroom
Choose a rating comfortably above the camera, head, rail, and lens weight. Published maximums do not describe resistance to vibration or head droop.
Mount the real head and camera, flatten the legs, then measure from the ground to the center of the lens. That is the minimum working height your mushroom, frost crystal, or low flower will notice.
Macro support priorities
A useful field tripod balances access, rigidity, and control. The closer the reproduction ratio moves toward life size, the less tolerance remains for vibration and imprecise positioning.
At 1:1, a tiny shift can clip an antenna, move the sharp plane behind an insect’s eye, or disturb stack alignment. Precision is not a luxury—it is part of basic framing.
Choose the head for speed—or for millimeters
The support must stay where it is locked. A head that sags after your hand leaves the camera can undo careful leg placement and turn close framing into repeated guesswork.
Geared head
Independent controls adjust tilt, roll, and direction without releasing the entire camera. This is the traditional choice for static subjects, tabletop work, and critical edge placement.
Firm ball head
Fast repositioning suits butterflies, bees, and wind-tossed flowers. Use a strong lock and independent pan control, then watch for the composition settling after release.
A geared rail moves the entire camera forward or backward while the lens setting stays fixed. It preserves framing and magnification more reliably than turning the focus ring during high-magnification work.
What works near ground level?
A full tripod offers the widest adjustment range, but it is not automatically the best tool. Subject height, terrain, lighting access, and the need for measured movement should decide what leaves the bag.
| Support | Best use | Ground access | Main advantage | Main limitation |
|---|---|---|---|---|
| Low tripod | Flowers, tabletop subjects, focus stacks | ✓ Adjustable | Precise framing and repeatable camera position | ~ Legs may block light or press into plants |
| Beanbag | Fungi, insects on paths, uneven soil | ✓ Very low | Fast, broad contact on rough surfaces | ✗ Fine changes require lifting the camera |
| Flat plate | Frost, moss, subjects almost on the ground | ✓ Lowest | Leaves space for an LED or reflector | ✗ Limited height and leveling range |
| Small clamp | Railings, branches, rigid studio stands | ~ Site dependent | Keeps the ground clear around the subject | ✗ Requires a safe, solid attachment point |
On wet slopes, tether the camera even when the support is only centimeters high. A low platform can still slide across rock, leaves, or mud.
Five setup steps before the shutter fires
Rigid legs are only half the system. Touch, shutter movement, wind, poor balance, and changing focus can each introduce blur or alignment errors.
Spread the legs
Use a broad stance and keep the center column fully down.
Retract thin sections
Favor thicker tubes and lock every joint firmly.
Center the load
Use the rail or lens foot to reduce front-heavy leverage.
Remove touch
Use a remote release or a two-second self-timer.
Control vibration
Use EFCS or electronic shutter and shelter the subject from wind.
Get low. Remove leverage. Stop touching the camera.
The Low-Height Features That Put Your Lens Where the Subject Lives
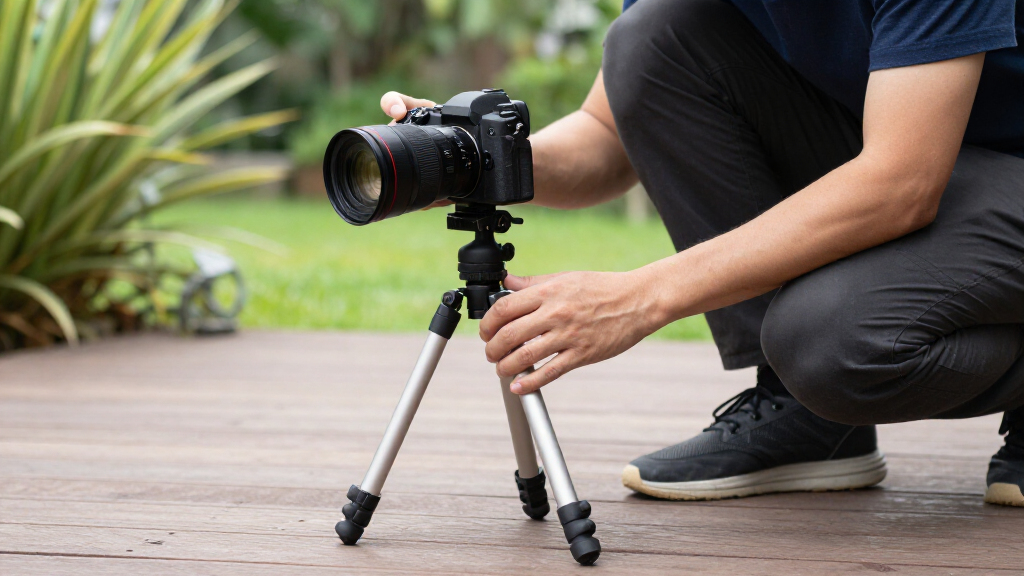
Tripods for macro work perform best when their legs spread independently to roughly 80–90 degrees and the center column can be shortened, removed, or omitted. Those features reduce minimum working height, letting your camera settle near moss, fungi, and low flowers without hanging awkwardly between raised legs.
Minimum working height means the lowest practical lens position you can use while the camera remains controllable. Catalog measurements do not always tell the full story because the head, camera body, lens diameter, and column design all add height. A tripod listed at 10 centimeters may place the optical axis several centimeters higher once you mount a head and camera.
On a woodland floor, that difference becomes obvious. Suppose you find a thumbnail-sized mushroom under a curled copper leaf. Legs with independent angle settings can straddle roots and stones, while a fixed-angle tripod may force you to move the camera backward and reach for a longer focal length.
A full-length center column is the usual obstacle. Reversing it can place the camera upside down between the legs, but controls become harder to reach and the setup sways more readily. I treat column reversal as a useful backup, not my preferred answer for getting low and staying steady.
- Independent leg angles: Each leg can rest on a different level or spread around plants and rocks.
- Short or removable column: The camera can sit above the leg junction instead of being held up by a long tube.
- Column-free platform: A systematic-style design often provides the cleanest ground-level position.
- Lateral column: The camera can reach over a subject while the legs remain outside the composition and lighting area.
Field rule: Measure the distance from the ground to the lens center, not merely the tripod platform. That is the height your subject will notice.
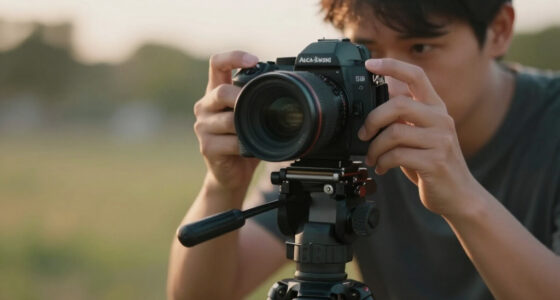
macro tripod with low minimum height
As an affiliate, we earn on qualifying purchases.
As an affiliate, we earn on qualifying purchases.
A Clear Comparison of the Supports That Work Near Ground Level
Tripods for macro work, beanbags, and flat plates solve different low-angle problems. A full tripod gives the widest adjustment range, a beanbag conforms to uneven ground, and a plate reaches the lowest viewpoint. Your subject height, surface, and need for precise movement should decide which support leaves the bag.
| Support | Best use | Main advantage | Main limitation |
|---|---|---|---|
| Low tripod | Flowers, tabletop subjects, focus stacks | Precise framing and repeatable camera position | Legs may block light or press into plants |
| Beanbag | Fungi, insects on paths, rough soil | Very low, fast, and stable on uneven ground | Small framing changes require lifting the camera |
| Flat plate | Subjects almost touching the ground | Places the camera only a few centimeters above the surface | Limited height and leveling range |
| Small clamp | Railings, branches, studio stands | Keeps the ground clear around the subject | Needs a rigid, safe attachment point |
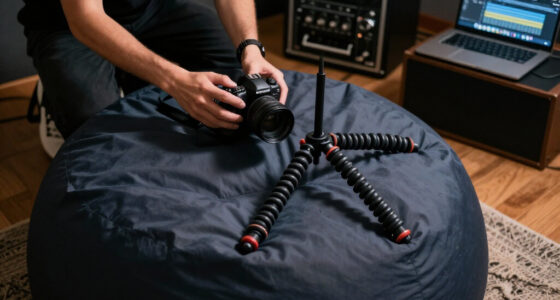
I often prefer a beanbag when the camera needs to sit beside a mushroom cap on damp, leaf-covered soil. The bag settles around small stones like bread dough around walnuts, creating a broad contact patch without three legs pushing into the scene. A folded rain cover beneath it keeps mud away from the camera.
A flat plate works even lower. It can hold a compact head close to a patch of frost crystals while leaving room for a small LED panel or reflector. Use a camera strap as a safety tether on slopes because a low support can still slide across wet rock.
The full tripod wins when you need repeatable, measured adjustment. During a 30-frame stack of a stationary beetle specimen, a beanbag may hold the camera securely, but a tripod and rail let you move forward in controlled steps. The right support is the one that removes friction from the shot rather than adding hardware for its own sake.
tripod with independently spreading legs
As an affiliate, we earn on qualifying purchases.
As an affiliate, we earn on qualifying purchases.
The Head and Rail Choices That Make Millimeters Easy to Control
Tripods for macro work need a head that can change framing without sagging after you lock it. A geared head offers the finest control, while a firm ball head works faster for moving subjects. Add a focusing rail when you need to shift the entire camera forward or backward by millimeters.
A geared head adjusts each axis separately. Turn one knob and the lens tilts slightly downward; turn another and the horizon rotates without releasing the whole camera. When a dewdrop sits at the corner of your frame, that measured movement feels like guiding a needle through fabric rather than chasing the composition with a loose ball.
A ball head remains useful for butterflies, bees, or flowers that keep changing position. It moves quickly, but lower-quality models can droop after locking, especially with a long macro lens angled downward. Frame a little high, release your hand gently, and watch whether the composition settles before taking the exposure.
A focusing rail is a geared slider that moves the camera while the focus setting remains fixed. At high magnification, moving the camera often gives you cleaner control over the focus plane than turning the lens ring, which may also alter magnification and framing. An Arca-compatible rail also makes it easier to balance a front-heavy lens over the head.
For example, imagine photographing the ridged face of an old watch at 1:1. You set the lens near its desired magnification, frame the dial, and move the rail until the nearest engraved number becomes sharp. For a stack, you then advance the rail in small, repeatable steps until the far edge of the hands enters focus.
Check before releasing the camera: A clamp and plate may look compatible while engaging only along a narrow edge. Seat the plate fully, tighten the clamp, and test the setup with one hand beneath the camera.
Arca-Swiss compatible focusing rail
As an affiliate, we earn on qualifying purchases.
As an affiliate, we earn on qualifying purchases.
Five Setup Steps That Remove Shake Before You Press the Shutter
A sharp macro frame comes from controlling the whole support system, not simply buying rigid legs. Keep the center column down, settle every foot, remove hand contact during exposure, choose the right shutter mode, and block wind. Each step removes a different source of blur that magnification makes painfully visible.
- Spread the thick leg sections first. Use the fewest sections needed and avoid extending thin bottom tubes unless the terrain demands it.
- Leave the center column unextended. A raised column behaves like a monopod perched on top of the tripod.
- Trigger without touching the camera. Use a remote release or a 2-second self-timer so finger pressure has time to fade.
- Reduce internal vibration. DSLR users can choose mirror lockup or live view; mirrorless users can use electronic first-curtain or a fully electronic shutter when the subject and lighting suit it.
- Control movement around the subject. Shield flowers from wind, wait between gusts, and keep your bag or clothing from brushing the legs.
One breezy morning, you may set a perfectly rigid tripod beside a bluebell and still get a soft photograph. The support is steady, but the flower nods through the focus plane during a half-second exposure. A small diffuser held as a windbreak, placed outside the frame without touching the stem, can improve the result more than heavier legs.
A hook beneath the platform can accept a camera bag as ballast, but let the bag rest lightly on the ground so it does not swing. On a wooden deck, avoid walking during exposure; footsteps travel through the boards like ripples across a shallow pond. Stability starts beneath the tripod feet.
Image stabilization usually belongs off when the camera is locked down, unless your camera or lens manual says its system detects tripod use [2]. Some stabilization systems can hunt for movement that is not present. Check the maker’s guidance for your exact body and lens rather than treating one setting as universal.
geared tripod head for macro photography
As an affiliate, we earn on qualifying purchases.
As an affiliate, we earn on qualifying purchases.
Why Focus Stacking Changes What You Need From a Tripod
Focus stacking turns tripod stability from a helpful feature into a requirement for dependable alignment. The camera must hold the same framing through dozens of exposures while focus moves across the subject. Even a small shift makes stacking software work harder and can create doubled edges, missing hairs, or soft halos.
At 1:1, depth of field can shrink to a few millimeters or less. Stopping down seems like the simple answer, but diffraction often begins to soften fine detail beyond roughly f/11 to f/16 at macro distances [1]. A stack lets you shoot several sharper slices at a moderate aperture and combine them later.
The exposure penalty adds another reason for solid support. At life size, a lens set to f/16 behaves roughly like f/32 for exposure, which can stretch a natural-light shutter speed from a manageable fraction of a second into a long pause [1]. The fern stays green and luminous, but every faint tremor writes itself into the frame.
Many current mirrorless cameras can capture an automated focus-bracket sequence. That speed helps with slight subject movement, yet it does not excuse a loose head or flexible center column. A camera firing 40 frames rapidly still needs the first and final image to share the same boundaries.
For a practical example, place a small seashell at a slight angle on a table. Focus on the nearest ridge, choose a moderate aperture such as f/5.6 or f/8, and bracket until the rear lip becomes sharp. Keep lighting, white balance, and exposure fixed so the stack does not flicker between frames.
Stacking rule: Stabilize the camera, but also stabilize the scene. A motionless tripod cannot rescue a flower that twists, a leaf that flutters, or daylight that changes between frames.
A Practical Buying Checklist That Puts Field Use Ahead of Specifications
The most useful macro setup has a low working position, rigid upper leg sections, secure locks, a suitable head, and comfortable controls. Treat payload numbers as rough guidance, then judge the complete load: camera, lens, collar, plate, rail, head, flash bracket, and any diffuser attached to the support.
The most important aspects become clear when you rehearse a real shot. Mount your heaviest body and macro lens, angle them downward, and check whether the head creeps after locking. Spread the tripod low and confirm that your hands can reach the controls without pressing against a leg.
- Test the minimum height: Mount the head and camera because platform height alone can mislead you.
- Check legs with independent angles: Uneven rocks, roots, and steps rarely give all three feet the same surface.
- Favor fewer, thicker sections: They usually resist twisting better than many narrow sections, though they pack longer.
- Inspect the column: A short, split, removable, or absent column is usually better for macro tripods.
- Leave payload headroom: Choose a support rated comfortably above your complete working kit, since ratings do not follow one shared industry test.
- Try the locks: Twist locks pack neatly; flip locks provide an obvious visual sign that they are closed.
Carbon fiber weighs less and tends to settle vibration faster, which helps on a long walk with a lens, rail, and diffuser. Aluminum costs less, and its extra mass can feel reassuring beside a stream or on firm ground. Either material can produce sharp work when the joints, locks, and shooting method are sound.
Imagine a photographer who mostly works at a kitchen table and another who hikes five kilometers to photograph alpine flowers. The first may welcome a heavier aluminum tripod with a geared head; the second may accept a lighter travel design and carry a flat plate for soil-level subjects. Your regular shooting conditions matter more than a fashionable material or towering maximum height.
Frequently Asked Questions
Do you really need a tripod for macro photography?
You need a tripod for static subjects, slow natural-light exposures, and focus stacking. Handheld macro works well with flash or a fast shutter, especially for insects that rarely pause, but a fixed support gives you more control over framing and repeated exposures.
Is a ball head or geared head better for macro work?
A geared head is better for precise, independent movement on each axis, while a ball head is faster when the subject changes position. If you use a ball head, choose one with a firm lock and test for downward droop after tightening it.
What is a focusing rail, and do you need one?
A focusing rail is a geared platform that moves the whole camera toward or away from the subject. You may not need one for casual close-ups, but it becomes extremely useful for high-magnification framing and focus stacks that require small, repeatable movements.
Should you turn off image stabilization when using a tripod?
You should usually turn stabilization off when the camera is fully locked down, unless the maker says your lens or body detects tripod use [2]. Leave it active if you are using a loose head, working from a flexible support, or following different instructions for your exact equipment.
How much tripod weight capacity do you need for macro?
Choose a rating comfortably above the total weight of your camera, macro lens, head, rail, and accessories. Payload ratings vary between makers, so headroom matters more than matching your kit weight exactly; the head must also resist creeping when the lens points downward.
Conclusion
Your first question about any macro support should be simple: can it put the lens at subject height without becoming flexible or awkward? A modest tripod with wide-spreading legs, a lowered column, and a careful release method will often beat a taller model carrying a more impressive specification sheet. Add a rail when tiny, repeatable movements become part of your process.
Before your next shoot, practice setting the camera 10 centimeters above the floor and make a slow exposure without touching it. If the frame stays fixed and the controls remain easy to reach, you have a useful macro setup. Then take it outside, settle the feet among the leaves, and wait for the wind to go quiet.
Fall yard work Picks
leaf blowers
As an affiliate, we earn on qualifying purchases.