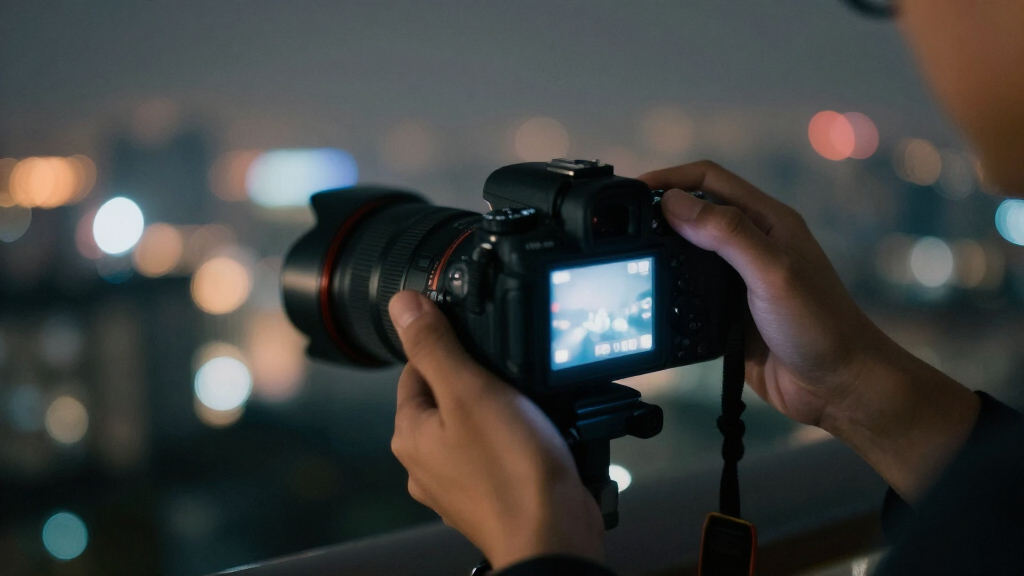

TL;DR
Shooting long exposures without a tripod is genuinely doable today: in-body image stabilization rated at 5–8 stops, solid bracing technique, and improvised supports like beanbags and railings can get you sharp shots at 1/4s to around 1 second. For longer looks, burst-mode frame stacking in post — or your phone’s computational long exposure mode — simulates multi-second blur with zero gear. Past about 2 seconds, expect to shoot bursts and keep only the sharpest frames.
The security guard at the museum entrance pointed at my tripod and shook his head. No tripods allowed. I had two choices: skip the shot, or shoot a half-second exposure with nothing but my own two hands and a stone wall. I got the shot — and it changed how I think about shooting long exposures.
Here’s the truth most tutorials skip: the tripod is no longer the gatekeeper it used to be. Modern stabilization, good bracing, and a little software magic mean you can leave the legs at home for the majority of long exposure work — waterfalls, light trails, moody city scenes at dusk.
In this guide, I’ll walk you through exactly how I do it: the realistic shutter speeds you can handhold, the body positions that buy you extra stops, the household objects that double as camera supports, and the stacking trick that fakes a 10-second exposure from a burst of short ones. You’ll also learn where the honest limits are, because some shots really do still need three legs.
Each stop of stabilization doubles your usable shutter time — plan around 1–2 stops below the CIPA lab rating, which puts a realistic handheld ceiling near 1/4…
Bracing is free performance: tucked elbows, a wall or pillar, controlled breathing, and a 2-second self-timer add 1–3 stops on top of IBIS.
Stabilization corrects your shake, never subject motion — pick static scenes (water, buildings, rocks) for multi-second handheld frames.
Frame stacking turns 10–30 handholdable 1/10s frames into a simulated multi-second long exposure, with cleaner shadows than any single frame.
Some shots still need legs: exposures beyond ~2 seconds, star trails, and 10-stop ND work remain honest tripod territory.
Field Guide · Long Exposure · No Support Required
Shooting Long Exposures Without a Tripod
The tripod is no longer the gatekeeper it used to be. Modern stabilization rated at 5–8 stops, disciplined bracing, and a little software magic put sharp 1/4s to 1-second handheld frames within reach — waterfalls, light trails, and moody city scenes at dusk, no legs attached.
“No tripods allowed,” said the guard. So I shot a half-second exposure against a stone wall — and got the shot.
The moment the rulebook changed~1s
Realistic handheld ceiling, static scenes
10–30
Frames stacked to fake a 10s exposure
5–8 stops
CIPA-rated IBIS on flagship mirrorless bodies
×2
Usable exposure time per stop of stabilization
1–3 stops
Free gains from bracing, breathing & self-timer
1–2 stops
Real-world penalty below the lab rating — plan for it
The Baseline Math
How Slow Can You Actually Handhold?
The classic reciprocal rule says your shutter should be no slower than 1 over your effective focal length. Stabilization rewrites that math — each stop doubles your steady-handed superpower. Plan around the conservative column, not the marketing column.
| Focal Length (Full Frame) | Classic Handheld Limit | Realistic w/ 5–6 Stop Stabilization |
|---|---|---|
| 24mm | 1/25s | 1/2s – 1s |
| 50mm | 1/50s | 1/4s – 1/2s |
| 85mm | 1/85s | 1/8s – 1/4s |
| 200mm | 1/200s | 1/15s – 1/30s |
Field note — a Welsh waterfall at 1/4s on a 35mm lens: 4 of 10 burst frames tack sharp. Past ~1/2s the hit rate falls off a cliff; volume is the only fix.
Data Viz · The Doubling Effect

SVPRO 4K Autofocus USB Camera Module with in-Body Image Stabilization IBIS Camera Anti Shake Camera Board UVC Lightburn Camera,3D Printer USB Plug in Camera for Computer Vision Industrial Camera
4K 3840×2880 Ultra HD video recording for clearer imaging with 1/3.06” IMX258 sensor
As an affiliate, we earn on qualifying purchases.
As an affiliate, we earn on qualifying purchases.
Every Stop Doubles Your Exposure Time
Starting from a classic 1/125s handheld baseline, each stop of compensation stretches the longest sharp shutter speed by a factor of two. A 7-stop rating reaches roughly a full second — real-world results usually land 1–2 stops lower.
Waterfall-silk territory, no legs required. Flagship bodies from OM System, Canon, Panasonic and Nikon now carry CIPA ratings around 7–8 stops — exposures that were unthinkable handheld a decade ago are now routine.
The Critical Distinction

TBag Tripod Bean Bag – Portable Camera & Smartphone Stabilizer – Compact Support for Photo, Video, Flashes, Accessories – Travel Friendly Quick Setup Tripod Alternative Camera Bean Bag | Black
Quick Setup Design: Our portable bean bag tripod alternative sets up in seconds, just place your camera or…
As an affiliate, we earn on qualifying purchases.
As an affiliate, we earn on qualifying purchases.
Stabilization Steadies Your Hands, Not the World
IBIS physically shifts the sensor to counteract camera shake — it does nothing for subject motion. A one-second waterfall works if your body is still; a one-second crowd smears no matter how many stops the spec sheet advertises. Decide before you press the shutter.
Static Subjects
- Flowing water — silk effect at 1/4s–1s, body still
- Buildings & architecture — dusk city scenes, light trails
- Rocks & landscapes — multi-second frames with bracing
Moving Subjects
- People & crowds — shoppers become smears of color
- Pets & wildlife — never still at one second
- Wind-blown leaves — motion IBIS cannot correct
Sometimes the smear is the creative effect. Sometimes it ruins the frame. Pick your subjects accordingly — and leave stabilization on whenever you’re handheld.
Free Performance · Weighs Nothing

K&F CONCEPT 58mm Variable ND2-400 Lens Filter (1-9 Stops) for Camera Lens
【Import Optical Glass】Crafted from premium AGC optical glass with 8 multi-layer coatings, this ND filter reduces reflections and…
As an affiliate, we earn on qualifying purchases.
As an affiliate, we earn on qualifying purchases.
Brace Yourself: 6 Body Tricks That Buy Extra Stops
Hand tremor is random motion across several axes at once. Every point of contact you add between your body and something solid removes one of those axes — turning a wobbly column into a stable platform worth 1–3 extra stops on top of IBIS.
Tuck Your Elbows
Press elbows tight against your chest. Your arms become a brace instead of two pendulums — worth a stop on its own.
+1 stopLean on Something Solid
A wall, doorframe, lamp post, or tree. Shoulder into cool stone kills most lateral body sway.
+1 stopGet Lower
Kneel or sit, elbow resting on your knee. Two legs are a terrible tripod; a kneeling frame with elbow support is a decent one.
Stability baseControl Your Breathing
Exhale halfway, pause, and press during that natural still point — the same pause marksmen use.
Shake window ↓Squeeze, Don’t Jab
Roll your finger like pressing a ripe berry — or better, use the 2-second self-timer or a remote so your finger never moves the camera.
Zero-touchShoot Bursts
Fire 5–10 frames. Shake is random, so the middle frames are often measurably sharper than the first and last.
Hit rate ↑Know Where the Cliff Edge Is
frame stacking software for long exposure
As an affiliate, we earn on qualifying purchases.
As an affiliate, we earn on qualifying purchases.
The Handheld Feasibility Spectrum
The failure curve isn’t gentle — it falls off a cliff. Honest expectations, zone by zone, for a braced shooter with modern stabilization and a static subject.
The Trick That Breaks Every Limit
Stack Frames in Post, Fake the Long Exposure
Instead of one long exposure, shoot a burst of short, sharp, handholdable frames — then let software do what your hands can’t. The result: simulated multi-second blur with cleaner shadows than any single frame.
Shoot the Burst
Fire 10–30 frames at a handholdable ~1/10s, static framing, base ISO.
Input · Sharp framesAuto-Align
Stack as layers and align — alignment algorithms now forgive handheld drift.
Photoshop · Affinity · ScriptsAverage the Stack
Mean or median blending sums the motion across frames into continuous blur.
Motion accumulatesSimulated 10s Exposure
Multi-second water and cloud blur — with averaged noise lower than one long frame.
Output · Zero gearHonest Limits & Smart Detours
Where Hands End — and Software Takes Over
Some Shots Need Legs
- Exposures beyond ~2 seconds — keeper rate collapses
- Star trails & astro — minutes-long, non-negotiable
- 10-stop ND work — deliberate multi-minute blur
- Precision framing — every brace constrains composition
No Tripod? No Problem.
- Phone long-exposure modes — Live Photos, Pixel Motion, Spectre stack in real time
- OM System Live ND — simulates up to ~ND32 (5 stops), no filter
- AI denoise — DxO PureRAW, Topaz, Lightroom make high-ISO handheld frames usable
- Improvised supports — beanbags, railings, backpacks, car roofs
The Chain, End to End
From Bare Hands to Silky Water
Braced Stance
Elbows tucked, shoulder to stone, breath held
+ IBIS 5–8 Stops
Sensor shift cancels the remaining tremor
1/4s – 1s Handheld
Burst of 5–10 frames, middle ones win
Stack If Longer
10–30 frames averaged into multi-second blur
The Shot
Silk water, light trails, dusk cities — no legs
How Slow Can You Actually Handhold a Camera?
Shooting long exposures without a tripod starts with one number: your handheld limit. The classic reciprocal rule says your shutter speed should be no slower than 1 over your effective focal length — 1/50s for a 50mm lens on full frame, 1/200s for a 200mm. Image stabilization is what rewrites that math, adding anywhere from 2 to 7 usable stops on top of the baseline.
Think of each stop as a doubling of your steady-handed superpower. One stop takes 1/125s to 1/60s. Five stops takes that same 1/125s all the way to roughly 1/4s. Modern mirrorless bodies advertise 5–8 stops of compensation under the CIPA testing standard, which is why experienced shooters now routinely handhold exposures that would have been unthinkable a decade ago [1].
One caveat from years of doing this in the field: CIPA ratings come from lab rigs, not from you, cold and tired, balanced on a riverbank at dusk. Real-world results usually run 1–2 stops below the advertised figure, and they shrink further with long lenses and distant subjects. Plan around the conservative column, not the marketing column.
| Focal length (full frame) | Classic handheld limit | Realistic limit with 5–6 stop stabilization |
|---|---|---|
| 24mm | 1/25s | 1/2s – 1s |
| 50mm | 1/50s | 1/4s – 1/2s |
| 85mm | 1/85s | 1/8s – 1/4s |
| 200mm | 1/200s | 1/15s – 1/30s |
Last autumn I shot a waterfall in Wales at 1/4s on a 35mm lens, handheld, and four frames out of a ten-frame burst came back tack sharp. That’s the pattern to internalize: past about 1/2s, your hit rate drops fast, so you shoot bursts and keep the winners. The failure curve isn’t gentle — it falls off a cliff, and the only fix is volume.
Why Image Stabilization Is the Reason Handheld Long Exposures Exist
Image stabilization is the single biggest reason handheld long exposures went from party trick to everyday technique. In-body image stabilization (IBIS) physically shifts your sensor to counteract hand tremor, while lens-based systems (IS, VR, OSS) move an optical element instead. Many recent bodies combine both, and flagship models from OM System, Canon, Panasonic, and Nikon now carry CIPA ratings around 7–8 stops [1].
Here’s what that means in your hands. A static scene that classically demanded 1/125s can stay sharp at somewhere between 1/2s and a full second. That’s waterfall-silk territory. That’s car-light-trail territory at dusk. All without a tripod touching the ground.
Stabilization steadies your hands, not the world. A one-second exposure of a waterfall works handheld if your body is still; a one-second exposure of a walking crowd blurs the people no matter how many stops your IBIS advertises.
This distinction between camera shake and subject motion is one of the most important aspects of the whole topic, and it’s where beginners get burned. I once watched a student try to handhold a 1-second shot of a busy market — every frame sharp on the stalls, every shopper a smear of color. Sometimes that smear is exactly the creative effect you want. Sometimes it ruins the frame. Decide before you press the shutter, and pick your subjects accordingly: rocks, buildings, and flowing water cooperate; people, pets, and wind-blown leaves do not.
Practical tip: leave stabilization on whenever you’re handheld. The old advice about switching IS off applies to tripod-mounted cameras, where the system can hunt against its own corrections. Handheld, it’s doing the heavy lifting for you.
Brace Yourself: 6 Body Tricks That Buy You Extra Stops
Good bracing technique is free, weighs nothing, and reliably adds 1–3 stops on top of whatever your stabilization delivers. The reason it works is mechanical: hand tremor is random motion across several axes at once, and every point of contact you add between your body and something solid removes one of those axes from the equation. The goal is simple — turn your body from a wobbly column into a stable platform by adding contact points and removing muscle tension. Here’s the sequence I teach every workshop student.
- Tuck your elbows tight against your chest. Your arms become a brace instead of two pendulums. This alone is worth a stop.
- Lean on something solid. A wall, a doorframe, a lamp post, a tree. Pressing your shoulder into cool stone kills most of your body’s lateral sway.
- Get lower. Kneel or sit and rest an elbow on your knee. Two legs are a terrible tripod; a kneeling frame with elbow support is a decent one.
- Control your breathing. Exhale halfway, pause, and press the shutter during that natural still point — the same pause marksmen use.
- Squeeze, don’t jab. Roll your finger across the shutter like pressing a ripe berry. Better yet, use the 2-second self-timer or a remote release so your finger never moves the camera at all.
- Shoot bursts. Fire 5–10 frames. Shake is random, so the middle frames of a burst are often measurably sharper than the first and last.
Two tradeoffs are worth knowing before you build the habit. First, every brace that adds stability also constrains your framing — a kneeling position with an elbow on your knee locks you into one height, so settle the composition first and then build the position around it, not the other way round. Second, tension is the hidden enemy: gripping the camera harder feels steadier and is actually worse, because a clenched muscle generates its own high-frequency shake. The marksmanship pause works precisely because it’s a moment of relaxation, not effort. If your forearms start to burn, put the camera down and reset — a tired brace is worse than no brace at all.
I put this to the test on a freezing evening in Prague, shooting the Charles Bridge at 1/3s with my back wedged against a bridge pillar. Six frames, four sharp. Without the pillar, my hit rate at that speed is maybe one in ten. Your environment is full of free stabilization — train yourself to scan for it the moment you raise the camera.
Beanbags, Backpacks, and Railings: Your Improvised Tripod Toolkit
The best tripod substitute is whatever solid object is already standing where you want to shoot. Improvised supports beat handheld technique by a wide margin, because the camera isn’t moving at all — and they matter more than ever, since museums, train stations, cathedrals, and landmarks increasingly restrict or permit-tripod use. A beanbag in a daypack sails through security that would stop a full-size tripod at the door.
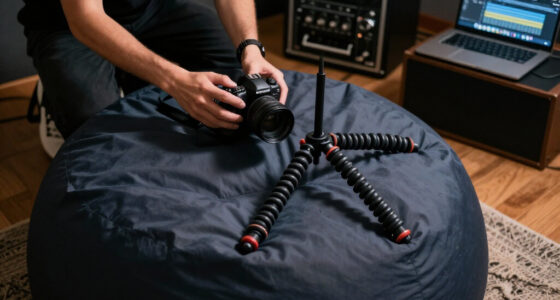
- Beanbag or bag of rice. Mold it onto a railing, windowsill, or bench and nestle the camera in. You can fine-tune framing by squeezing the bag. This is the single most useful item in my bag.
- Your backpack. Set it on the ground or a ledge, punch the top into a dent, and rest the lens in the hollow. Instant ground-level platform.
- A rolled jacket. Same idea, softer support. Great on car roofs and stone walls — and it protects paint and masonry from scratches.
- Railings and fences. Rest the lens barrel directly on the rail, or press the camera body against a vertical post and use the 2-second timer.
- A string tripod. Tie a length of cord from the tripod socket to your foot and pull it taut. It works like an invisible monopod, killing vertical shake for about a stop or two of gain.
What makes these supports so effective isn’t only that they’re solid — it’s that they change the failure mode. Handheld, sharpness is a probability: you shoot ten frames and keep four. On a beanbag or a railing, sharpness becomes close to a certainty, so your attention shifts from volume to timing and composition. Each option carries its own tradeoff, though. A beanbag earns its keep but adds bulk to a daypack. A rolled jacket weighs nothing, yet it compresses under the lens and sags over a long session, so re-check your framing between exposures. Railings transmit every footstep and passing bus as vibration, which is exactly why the 2-second timer matters — it gives the shake you introduced time to die out before the exposure begins. And the string tripod only damps vertical movement, so pair it with tucked elbows or a wall to cover the lateral sway it ignores.
My favorite example: shooting light trails over a city square from a hotel window where tripods were pointless anyway. The camera sat in a rolled sweater on the windowsill, shutter on a 2-second delay, exposures of a full second — every frame sharp, zero gear carried up six floors. Scan the scene before you shoot. The support you need is usually within arm’s reach.
Camera Settings That Stretch Your Shutter Speed
The right settings let you hit long shutter speeds in daylight and survive them at night. Start at base ISO (usually 64–100) and stop down to f/8–f/16; that combination naturally drags a bright-afternoon exposure into the 1/4s–1s range, which is exactly where handheld long exposure lives. No accessories required. The logic behind base ISO is easy to miss: every stop of ISO you add buys back a stop of shutter speed, which is the opposite of what a long exposure is for, and base ISO also gives you the cleanest file with the most highlight headroom — valuable, because sunlit water and bright sky are usually the first things to clip. Stopping down has its own ceiling: past about f/16, diffraction softens the entire frame on most sensors, so treat f/16 as a limit, not a target.
When you want to go slower in full sun, an ND filter is the standard tool. A 3-stop ND takes 1/60s to 1/8s; a 6-stop takes it to about 1s; a 10-stop pushes past 8 seconds, which is firmly back in tripod land. Variable NDs are convenient for travel, but watch for the X-pattern artifact — a dark cross that appears at the extreme end of the range, especially on wide lenses. Fixed NDs don’t have this problem. There’s a practical cost to strong NDs that rarely gets mentioned: a 6- or 10-stop filter turns the viewfinder nearly black and sends autofocus hunting, so compose and lock focus before you mount the glass, not after.
Two smaller settings make a bigger difference than most people expect:
- Electronic shutter. It eliminates mirror slap on DSLRs and shutter shock on mirrorless bodies — a real source of blur right in the 1/15s–1s danger zone where handheld work happens. The catch is rolling shutter: fast-moving subjects can skew, and under LED or fluorescent lighting you may see banding across the frame. That’s a genuine consideration for dusk city work, so shoot a test frame before committing to a sequence.
- 2-second self-timer or remote release. Your finger pressing the shutter moves the camera more than your pulse does. Take the finger out of the equation.
At night, the math flips: you’ll raise ISO to keep shutter speeds handholdable, then lean on AI denoising in post. Current tools — Lightroom’s AI Denoise, DxO PureRAW, Topaz DeNoise — clean up ISO 3200–6400 files to a degree that was impossible five years ago. I’d rather have a sharp ISO 6400 frame than a blurry ISO 800 one. Noise is fixable; shake isn’t. The tradeoffs are time and texture: batch-denoising a hundred frames takes a while, and pushed too hard these tools smooth fine detail into a watercolor look, so dial the strength back until the water still looks like water.
Stack Frames in Post and Fake the Long Exposure
Frame stacking is the technique that quietly breaks every handheld limit: instead of one long exposure, you shoot a burst of short, sharp, handholdable frames and average them together in software. The motion blur accumulates across frames, the noise averages away, and the result looks like a single multi-second exposure. The math is simple — simulated exposure time equals frame count multiplied by shutter speed. Twenty frames at 1/10s equals a 2-second look.
A practical workflow looks like this:
- Brace or rest the camera and lock your composition.
- Shoot a burst of 10–30 frames at a shutter speed you can reliably hold — 1/15s to 1/4s is the sweet spot.
- In Photoshop or Affinity Photo, load the frames as layers, auto-align them, and convert to a mean or median stack.
- Finish with denoising — stacked frames already show cleaner shadows than any single frame could.
Dedicated cameras are starting to build this in. OM System’s Live ND computationally simulates up to about ND32 (5 stops) with no physical filter at all — one of the most interesting developments for this exact way of shooting [2]. Handheld high-resolution sensor-shift modes from the same lineage show how good alignment algorithms have become.
And then there’s your phone. Apple’s Live Photos Long Exposure effect, Pixel’s Motion modes, and apps like Spectre or Slow Shutter Cam stack frames in real time, producing silky water and light trails from a handheld phone. One practical warning from experience: stacking and long live processing drain batteries fast and heat devices up. On a summer shoot, my phone got hot enough to throttle after twenty minutes of stacking — carry a power bank and give the device shade breaks.
Be Honest: When You Really Do Need the Tripod
Everything in this guide works — up to a wall, and the wall sits at roughly 2 seconds. Past that, handheld failure rates climb toward 100% no matter how good your IBIS or how disciplined your breathing. Knowing where the line is will save you a lot of cold, frustrating evenings.
Some shots remain tripod territory, full stop. 30-second cloud-streaking exposures, star trails, and Milky Way work demand minutes of absolute stillness. Precise compositional work — architecture with a tilt-shift, focus-stacked landscapes, pixel-shift high-res files — needs a camera that doesn’t drift a millimeter between frames. And when you’re shooting with a 10-stop ND at noon, the whole point is exposures longer than any human body can hold.
Here’s how I think about the middle ground:
| Situation | Handheld + technique | Tripod required |
|---|---|---|
| Silky waterfall, 1/4s–1s | Yes — brace, burst, done | No |
| Light trails at dusk, 1–2s | Yes, with a solid rest | Helpful but optional |
| Simulated 5–10s blur via stacking | Yes — 20–30 frame burst | No |
| Streaking clouds, 30s+ | No | Yes |
| Astro and star trails | No | Yes |
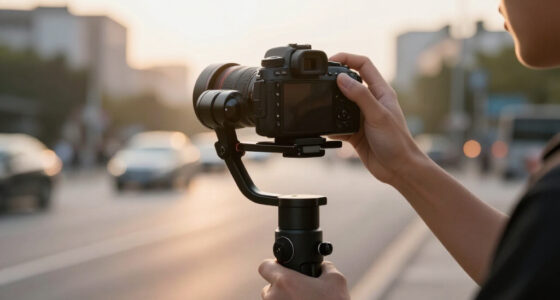
A monopod makes a decent compromise if you want more than handheld but less than a full tripod — it buys roughly 2–3 stops and draws far less attention in restricted venues. Gimbals, despite the hype, are built for video motion; for multi-second stills they’re the wrong tool. Match the support to the shutter speed you actually need, and you’ll never carry more than the shot demands.
Frequently Asked Questions
How slow a shutter speed can I actually handhold?
Start with the reciprocal rule — 1 over your effective focal length, so 1/50s for a 50mm lens — then add your stabilization’s realistic rating. With modern 5–7 stop IBIS, most shooters can reliably hit 1/4s to 1s at standard focal lengths with good bracing [1]. Past about 2 seconds, shoot bursts and expect to keep only a fraction of the frames.
Can I shoot silky waterfalls without a tripod?
Yes — this is the best-case scenario for handheld long exposure, because water is moving but the rocks and banks are not. Rest the camera on a railing or beanbag, shoot at 1/4s–1s with stabilization on, and fire a burst of 5–10 frames. You’ll almost always get several sharp frames to choose from.
Do I need an ND filter, or can software do it?
It depends on the look. A physical ND filter (3, 6, or 10 stops) creates blur in a single frame, which is the classic approach. Software frame averaging simulates the same effect from a burst of short exposures — total simulated time equals frame count times shutter speed — and phones now do this stacking automatically in their long exposure modes [2].
Why are my handheld long exposures still blurry?
First, figure out which blur you have. Camera shake smears the entire frame uniformly; subject motion blurs only the moving parts while static areas stay sharp. If everything is soft, your shutter speed is below your real handheld limit — brace harder, raise ISO, or rest the camera on something solid. If only the subject is soft, no amount of stabilization will help; you need a faster shutter or a stiller subject.
Should image stabilization be on or off for long exposures?
On — always, when you’re shooting handheld. Stabilization is doing the work that makes slow shutter speeds survivable, and some systems even offer a panning mode for deliberate motion shots. The old advice about switching IS off applies only when the camera is locked down on a tripod, where the system can fight its own corrections.
Can my phone really shoot long exposures handheld?
Genuinely, yes. iPhones turn Live Photos into long exposures with a swipe, Pixel’s Motion modes handle water blur and action pans, and apps like Spectre or Slow Shutter Cam stack frames in real time for exposures of several seconds. Just watch your battery and device temperature on long sessions — heavy stacking drains power fast and can overheat the phone in summer sun.
Conclusion
The tripod used to be the price of admission for long exposure photography. It isn’t anymore. Between 7-stop stabilization, a stone wall, a beanbag, and a stack of averaged frames, you can shoot silky water and glowing light trails in places where three legs would never make it past the door.
So here’s your assignment: this week, find one moving subject — a stream, a fountain, evening traffic — and shoot it at 1/4s with your elbows tucked and your breath held. Keep the sharpest frame. Then ask yourself how much of your gear bag you actually needed.