TL;DR
Using a tripod for self-portraits and content creation gives you stable framing, sharper images, hands-free control, and consistent results across photos and video. Keep the center column low, mark your standing position, use eye detection or a focus proxy, and trigger the shot with a remote, app, interval timer, or short self-timer.
A polished self-portrait often begins with something wonderfully ordinary: three locked legs and a strip of tape on the floor. When your camera stays fixed, you can stop chasing the frame and start paying attention to expression, posture, light, and timing. The photograph becomes intentional rather than lucky.
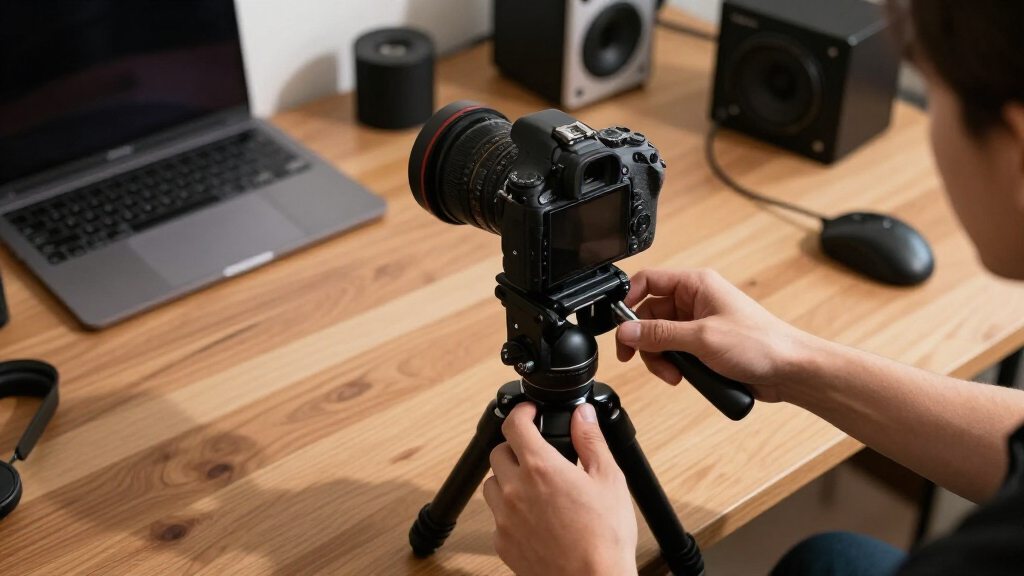
Using a tripod for self-portraits and content creation gives you more than freedom from camera shake. It lets you repeat an angle, demonstrate a process with both hands, record clean video, and make small adjustments without rebuilding the shot after every take. PhotoMocha identifies stability, precise composition, and hands-free operation as the main reasons a tripod improves solo production [1].
I use a tripod as a fixed reference point, much like a musician uses a metronome. Once the beat stays steady, you have room to perform. This guide shows you how to choose a suitable support, frame yourself without guessing, control focus and exposure, record calmer video, work safely on difficult ground, and build a repeatable setup that does not drain your patience.
Mark both the tripod feet and your subject position so framing and focus remain repeatable across multiple takes.
Keep the center column low, extend thicker leg sections first, and shorten the setup whenever wind or vibration appears.
Use eye detection, a focus proxy, or pre-focus at your standing mark, then check the eyes at full magnification.
Start around 1/125 second for still portraits and 1/250 second or faster for visible body movement, then adjust for the light and intended look.
Record a short sample before the main session so you can catch soft focus, clipping, background clutter, or noisy audio early.
Using a Tripod for Self-Portraits and Content Creation
Stable framing changes the job. Instead of chasing the camera, you can concentrate on expression, posture, light and timing. Three locked legs—and a small strip of tape—turn a lucky take into a repeatable creative system.
Keep the center column down for a firmer platform.
Extend the strongest sections before the thin lower legs.
Use eye detection or pre-focus at the standing mark.
Review a short sample before committing to the session.
Choose for the load you actually use
A phone and pocket light ask less of a tripod than a camera, fast portrait lens, monitor and microphone. Test the assembled kit—not just the load figure printed on the box.
Build from the ground up
Spread the legs fully, keep the head over the center and shorten the setup when wind or floor vibration appears. A lower tripod is usually a steadier tripod.
Lock every interface
Check the clamp, plate, head and mount before stepping into frame. A phone clamp should avoid the volume buttons; a camera plate should resist twisting.
Watch live view wobble
Extend the tripod, mount the complete kit and tap the floor nearby. Visible movement reveals vibration resistance more clearly than a headline load rating.
| Support style | Best use | Portability | Main tradeoff |
|---|---|---|---|
| Tabletop tripod | Desk video, food details, seated framing | ✓ Excellent | ~ Needs a stable raised surface |
| Travel tripod | Outdoor portraits and mixed photo/video | ✓ Strong | ~ Thin lower legs may shake |
| Studio tripod | Heavy kits and repeated indoor sessions | ~ Limited | ~ Bulkier and slower to relocate |
| Flexible mini tripod | Low angles and careful solid-object mounting | ✓ Excellent | ~ Less predictable than rigid legs |

Auto Face Tracking Self Stick Tripod for iPhone with 10" Ring Light Hands-Free 360°Adjustable 70.9 Inch Smart Phone Stand with Remote for Content Creator Vlog Video Recording
Hands-Free 360° AI Face Tracking: This tripod for iPhone with light features an advanced 360° auto-tracking system that…
As an affiliate, we earn on qualifying purchases.
As an affiliate, we earn on qualifying purchases.
The tripod freezes the camera—not you
Focus, shutter speed and triggering must work together. Treat these shutter values as practical starting points, then adjust for light, focal length, stabilization and the intended look.
Raise shutter speed as motion increases
After every focus or position change, magnify the preview and inspect the eyes—not merely the overall thumbnail.
Three ways to land focus
Eye detection
Use continuous autofocus and human-eye detection; test a short burst first.
Focus proxy
Place a chair, stand or bag where your face will be while composing.
Pre-focus mark
Focus at the exact standing mark, then avoid drifting forward or back.
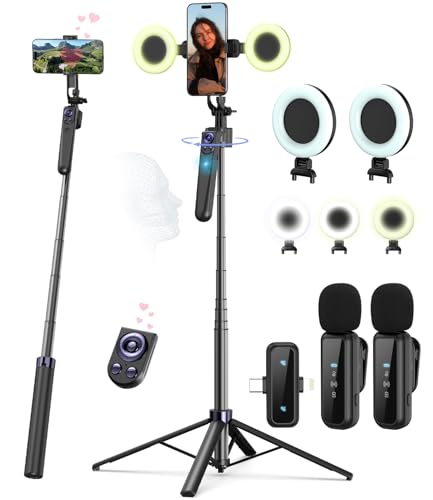
Vlogging Kit for iPhone/Android, 63”Auto Face Tracking Tripod for iPhone with Light, Wireless Microphones, Scrolling Remote Control for TikTok, Content Creator Kit for YouTube Starter
Complete Vlogging Kit: Designed for content creators, this kit includes a face-tracking tripod for iPhone, professional microphone, and…
As an affiliate, we earn on qualifying purchases.
As an affiliate, we earn on qualifying purchases.
Set the frame once. Perform inside it.
Compose around the entire action area, not only your face. Leave room for shoulders, hands, products and natural gestures, then run one slow rehearsal before recording.
Choose format
Horizontal, vertical 4:5 or vertical 9:16—decide before fine framing.
Set eye level
Avoid extreme low or wide angles that distort nearby features.
Place a proxy
Give autofocus a target at the exact eye distance.
Mark positions
Tape the tripod feet and toe line for instant repeatability.
Test and review
Check focus, clipping, clutter and audio before the main take.

K&F Concept 76 inch Camera Tripod with Rotatable Multi-Angle Center Column,Lightweight Travel Outdoor DSLR Tripods with 360 Degree Ball Head Load Capacity 8kg/17.6lbs, Cellphone Clips for Smartphone
Removable Extension Boom Arm: It can move from 0 to 180 degrees, can be rotated 360°horizontally, to realize…
As an affiliate, we earn on qualifying purchases.
As an affiliate, we earn on qualifying purchases.
Trigger without touching the camera
Hands-free control prevents new vibration and gives you time to settle into an expression or action. Choose the method that creates the least friction for the session.
| Method | Live view | Best for | Watch for |
|---|---|---|---|
| Wireless remote | ~ Usually no | Fast, discreet portrait triggering | Hide it naturally in the hand |
| Camera or phone app | ✓ Yes | Framing and settings from position | Connection delay or dropout |
| Short self-timer | ~ Limited | Simple, dependable single frames | One frame may feel posed |
| Interval timer | ~ Limited | Natural gestures and repeated takes | Review and cull more frames |
Auto Face Tracking Self Stick Tripod for iPhone with 10" Ring Light Hands-Free 360°Adjustable 70.9 Inch Smart Phone Stand with Remote for Content Creator Vlog Video Recording
Hands-Free 360° AI Face Tracking: This tripod for iPhone with light features an advanced 360° auto-tracking system that…
As an affiliate, we earn on qualifying purchases.
As an affiliate, we earn on qualifying purchases.
Five rules worth taping to the tripod
Mark both the tripod feet and your subject position.
Keep the center column low and extend thick legs first.
Focus at eye distance and inspect the eyes magnified.
Match shutter speed to subject motion, not camera stability.
Record a short sample before the session gains momentum.
Choose a Tripod That Holds Your Real Setup Steady
Using a tripod for self-portraits and content creation starts with matching the support to the equipment you actually use. A phone and small light need a different stand from a camera, fast portrait lens, microphone, and monitor. Your goal is steady support at working height, not the largest folded specification on a box.
A compact tabletop tripod works well when you film recipes from a kitchen counter or record a seated piece at a desk. A full-height tripod makes more sense when you photograph head-to-toe outfits, movement, or standing demonstrations. If the camera droops after you lock the head, the support is too light, the plate is loose, or the load sits badly off-center.
| Support style | Best use | Main tradeoff |
|---|---|---|
| Tabletop tripod | Desk videos, food details, close framing | Needs a stable raised surface |
| Travel tripod | Outdoor portraits, trips, mixed photo and video | Thin lower leg sections can shake in wind |
| Studio tripod | Indoor sets, heavier cameras, repeated sessions | Bulkier to carry and slower to relocate |
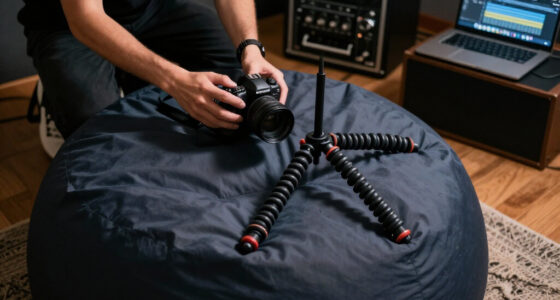
| Flexible mini tripod | Low angles and careful attachment to solid objects | Less predictable than rigid legs |
For example, a lightweight travel tripod may feel firm with a phone in a clamp but tremble when you add a camera, large lens, and side-mounted microphone. Test the complete kit at home: extend the legs, tap the floor nearby, and watch the live-view image. A visible wobble tells you more than a printed load figure, which does not describe vibration resistance.
Check the mount, quick-release plate, head movement, and clamp grip before every solo session. The phone clamp should press the body rather than a volume button, while a camera plate should stay tight without twisting. Your camera or phone maker’s manual remains the final authority for remote pairing, mounting limits, and weather care [2].
Set a Frame You Can Step Into Without Guessing
Using a tripod for self-portraits and content creation becomes much easier when you build the frame around a marked standing position. Set the camera first, place an object where your face will be, and leave visible space for natural movement. This turns framing into a repeatable arrangement rather than a sprint between camera and subject.
I often place a light stand, chair back, or folded jacket at the subject position while composing. It gives the autofocus system a target and shows whether the background appears to grow out of my head. Even a broom with a hat draped over it works when you are shooting alone in a quiet room.
- Choose the final format. Use horizontal framing for a website banner, vertical 4:5 for many social posts, or vertical 9:16 for short-form video.
- Set the camera near eye level. A slightly higher angle can feel gentle; a low angle makes nearby legs, hands, and chins look larger.
- Place a focus proxy. Put a chair, stand, or bag where your eyes will be, then compose around it.
- Mark both positions. Use removable tape indoors or two small natural markers outdoors for the tripod feet and your toes.
- Leave a movement margin. Give your hands and shoulders room so gestures do not scrape the edges of the frame.
Imagine recording a pottery demonstration at a workbench. If you frame only your face, your hands disappear whenever they reach for a tool; if you frame too wide, the clay becomes a brown speck. Compose around the full action area, then perform one slow rehearsal while watching the screen or connected phone.
Lens choice also shapes the room around you. A moderate focal length keeps facial features natural when the camera sits several feet away, while a very wide lens can stretch a hand reaching toward the glass like a reflection in a fun-house mirror. Step the tripod back before relying on a wider setting, when your space allows it.
Get Sharp Results Without Running Back to the Camera
Using a tripod for self-portraits and content creation produces sharp results when focus, shutter speed, and triggering work together. Focus on the exact place where your eyes will be, choose a shutter speed suited to your movement, and fire the camera without touching it. The tripod stops camera movement, but it cannot freeze you.
For a still seated portrait, I commonly begin around 1/125 second and check the eyes at full magnification. For walking, hair movement, or animated hand gestures, 1/250 second or faster gives you more protection from subject blur. These are practical starting points, not fixed laws; available light, stabilization, focal length, and the look you want all matter.
Modern eye detection can follow you well, especially when your face stays clear and reasonably large in the frame. Set continuous autofocus, select human eye detection, and test a short burst before recording the full sequence. If the camera keeps grabbing a bright plant or shelf behind you, switch to a smaller focus area or pre-focus on a stand placed at eye distance.
- Wireless remote: Fast and discreet, though you may need to hide it in your palm.
- Camera or phone app: Gives you live view and setting control, but connections can drop or introduce delay.
- Two- or ten-second timer: Simple and dependable, though one frame rarely captures a natural gesture.
- Interval timer: Records a frame every few seconds, giving you time to settle into real expressions.
A useful portrait sequence might record one photograph every two or three seconds for a minute. Instead of freezing into the same stiff smile, look away, breathe, adjust your sleeve, and return your eyes toward the lens. The quiet rhythm feels like frames from a film, and the expressions between poses often look the most convincing.
Sharp support does not guarantee a sharp person. Raise shutter speed when you move, confirm focus on the eyes, and review a magnified test before shooting dozens of frames.
Make Your Videos Look Calm, Level, and Deliberate
Using a tripod for self-portraits and content creation makes video look polished by holding the horizon, composition, and viewing angle steady from take to take. Lock the camera for direct-to-camera speech, level it before recording, and keep movement deliberate. A quiet frame directs attention to you instead of making the viewer fight the camera.
Suppose you are filming a five-minute tutorial about arranging flowers. A locked wide shot can show your face, hands, and tabletop, while a second close shot records the wet green stems and crisp snip of the shears. If you only have one camera, record the wide explanation first, then move closer and repeat the hand action for detail footage.
Match shutter speed to your recording rate for natural motion. A practical starting point is 1/50 second at 25 frames per second or 1/60 second at 30 frames per second. Faster settings can make moving hands look hard and staccato, while slower settings can smear motion like wet paint across the frame.
Lock exposure and white balance when the light stays constant. Automatic settings can brighten the room when you hold up a dark jacket, then dim it when you swap to a white shirt; automatic white balance may also drift between warm amber and cool blue. A fixed setting keeps separate takes looking like they belong in the same story.
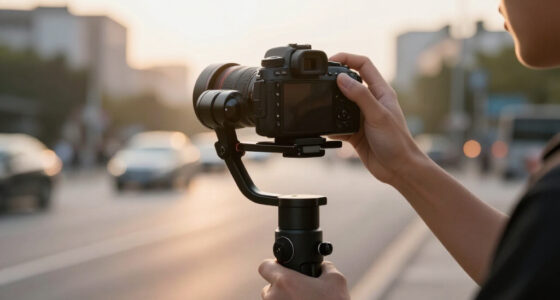
A ball head is quick for still photographs, while a video head gives you smoother, more controlled pans and tilts. Do not add camera movement simply because the head can move. For a seated explanation, a locked frame often feels more confident than a restless pan that follows every lean.
Sound also benefits from a fixed camera position. Once your framing stays put, you can place a microphone close to your mouth without fearing that it will enter the next angle. Record a short test, listen for refrigerator hum, clothing rustle, traffic, or room echo, and then fix the noise before the full take.
Keep the Tripod Upright on Floors, Trails, and Windy Streets
Using a tripod for self-portraits and content creation stays safe when the legs have a wide footprint, every lock is secure, and the camera remains over the center of support. Lower the setup when wind rises, extend thick leg sections before thin ones, and keep people away from the legs. Stability always outranks camera height.
Indoors, polished wood, loose rugs, and narrow walkways create more trouble than dramatic weather. Rubber feet can slide on dust, while one hurried step can catch a leg hidden beneath a table. In a small apartment, I would rather frame slightly wider and keep the stand against a wall than place it in the middle of a busy path.
Outside, spread the legs fully and shorten the center column. On a slope, adjust each leg separately so the center column stays vertical and the head begins close to level. Point one leg downhill when practical, then stand where you cannot accidentally back into the setup while posing.
- In wind: Lower the camera, shorten the legs, remove the neck strap, and shield the setup with your body between frames.
- On sand: Press the feet gently into firm ground and check whether they continue sinking during the session.
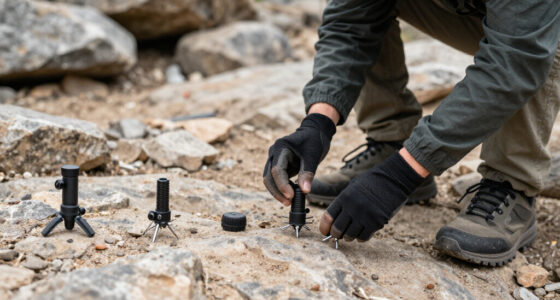
- On rock: Set each foot on a dry, solid patch and test the tripod before mounting the camera.
- Near people: Keep the footprint visible and avoid blocking paths, doors, stairs, or bicycle lanes.
A weight bag can steady a tripod, but a backpack swinging from the center hook can act like a pendulum. In a breeze, the bag bumps the column and sends small shivers through the camera. Let the weight touch the ground or use a stable low sandbag so it adds downward pressure without swinging.
Never leave a mounted camera unattended near water, traffic, ledges, children, pets, or strong wind. If the location feels uncertain, keep one hand on the tripod or choose a safer position.
Build a Repeatable Setup You Will Actually Use
Using a tripod for self-portraits and content creation becomes faster when you save a simple setup and repeat it. Mark the leg positions, record the camera height, save suitable settings, and keep the remote beside the quick-release plate. A small routine removes dozens of tiny decisions from every session.
For a weekly talking-head video, place three small removable tape marks on the floor where the tripod feet belong and one where your chair sits. Note the lens setting, camera height, microphone position, and distance to the background. Next week, the scene returns in minutes rather than slowly drifting through trial and error.
- Mount and level the camera. Check the plate, leg locks, horizon, and format before arranging the room.
- Set the subject mark. Place your chair or toe marker at the distance used for focus.
- Shape the light. Position your window, lamp, reflector, or soft light, then make a test frame.
- Confirm focus and exposure. Magnify the eyes, check bright areas, and test one real movement.
- Record a short sample. Review sharpness, sound, framing, and background distractions before the main take.
- Photograph the setup. A quick reference image makes the next session much faster.
This workflow also protects continuity. If you film part of a tutorial in the morning and finish after lunch, unchanged tape marks keep the framing stable, even after you move the tripod to clear the room. The two clips cut together cleanly because your eyes, chair, and background lines remain in the same places.
Do not let repeatability turn into visual sameness. Once you have the safe version, try one controlled variation: lower the camera for stronger foreground texture, move closer for an intimate crop, or place the subject off-center to leave room for text. The tripod is an anchor, not a cage.
After the session, collapse the stand only after removing the camera or phone. Return the plate, remote, clamp, and cable to the same pouch, then wipe mud or fine sand from the legs before closing them. That two-minute habit prevents a missing plate from ending tomorrow’s shoot before it begins.
Frequently Asked Questions
What tripod height works best for self-portraits?
A tripod that places the lens near your eye level gives you a natural starting angle without forcing you to raise the center column fully. For a seated portrait, lower the legs rather than pointing the camera steeply downward; for a full-body frame, step back and leave room around your feet and hands.
Can I use a phone tripod for a camera?
Use a support only when its head, plate, locks, and rated load suit the complete camera setup. Many phone stands use light plastic joints that can sag or tip under a camera and lens, even when the mounting screw fits. Test stability close to the floor before trusting unfamiliar equipment.
How do I focus a self-portrait when nobody is behind the camera?
Place a chair, light stand, or other object where your eyes will be, then use eye detection, continuous autofocus, or pre-focus at that distance. Mark your toe position so you return to the same plane. Review a magnified test image before starting a long sequence.
Is a remote better than the camera’s self-timer?
A remote or phone app gives you more control and can trigger several frames without repeated trips to the camera. A timer is simpler and avoids connection problems, while an interval timer often produces the most natural portraits because it keeps recording as you move between expressions.
How can I stop a tripod from shaking outdoors?
Lower the camera, shorten the legs, keep the center column down, and remove anything that catches wind, including a loose camera strap. Spread the feet on firm, dry ground and add a low stable weight if needed. Keep one hand near the support whenever wind, people, water, or uneven ground creates risk.
Conclusion
The best tripod setup is the one you can place, trust, and repeat without breaking your creative rhythm. Mark your positions, test focus on the eyes, leave room for real gestures, and review one short sample before committing to a long sequence. Those few habits matter more than adding another complicated accessory.
Start with one simple scene this week: a chair near a window, a steady camera, and a frame recorded every few seconds. Once the legs stop moving, your attention can move where it belongs—to light, expression, movement, and story. The stand stays silent in the corner while you become fully present in the frame.