
TL;DR
Listen free for 30 days with Audible
Thousands of audiobooks and originals — cancel anytime.
Start your free trialAs an affiliate, we earn on qualifying purchases.
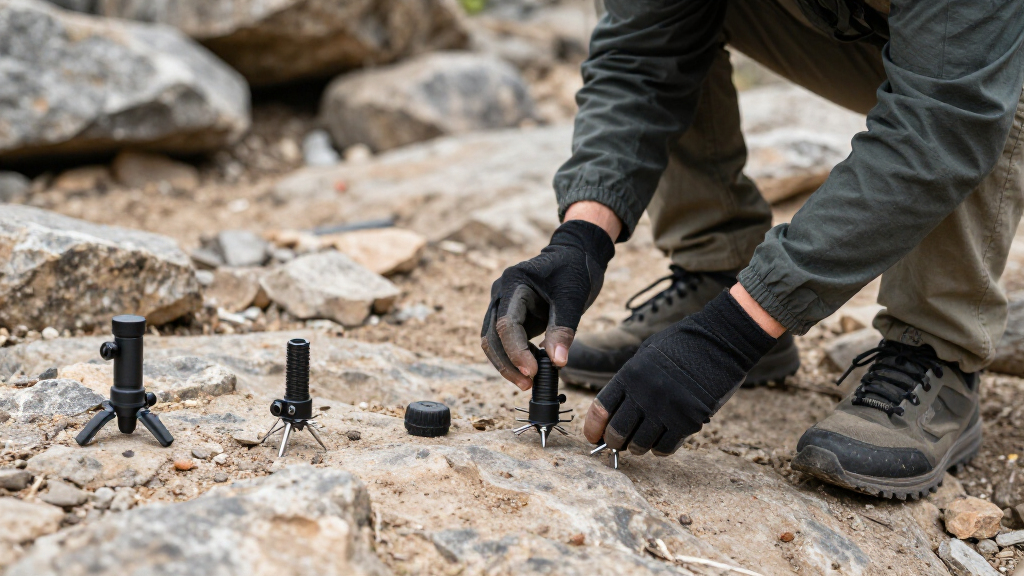
Tripod feet control how securely your support connects with the ground. Use rubber feet on hard, smooth surfaces, spikes on soil and other penetrable ground, and hybrid feet when a shoot crosses several kinds of terrain; careful leg placement and maintenance matter just as much as the foot material.
Your tripod can be rock-solid at the head and still fail at the ground. I have watched a sturdy set of legs creep across wet stone because its metal spikes had nothing to bite into. A quick switch to rubber tripod feet turned that nervous, sliding setup into a dependable support.
The feet look like minor parts, yet they form the only connection between your camera support and the surface below. Their job changes with every location: grip a polished floor, pierce loose soil, settle into sand, or rest on cold rock without skating. Choose poorly and a long exposure can soften, a video pan can wobble, or an unattended camera can fall.
This guide shows you how spikes, rubber feet, and hybrid designs behave on real ground. You will learn how to match them to city streets, forests, beaches, snow, and indoor floors, then improve stability through smart placement and simple care. According to PhotoMocha [1], terrain compatibility has a direct effect on tripod stability, particularly on soft, loose, or uneven surfaces.
Use rubber feet on hard surfaces, where their broad contact patch creates grip and protects flooring.
Use spikes only where they can penetrate soil, grass, compact snow, or gaps in rough ground; smooth stone can make them slide.
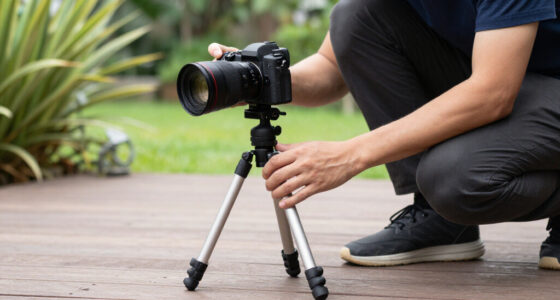
Test every tripod leg with downward pressure and a gentle sideways nudge before mounting the camera.
Use wide pads, baskets, or a compacted platform on sand, mud, and deep snow to slow sinking.
Clean salt, grit, and mud from feet and threads after the shoot, then check that all removable parts remain tight.
Tripod Feet: Spikes, Rubber, and Why Terrain Matters
Your tripod can be rock-solid at the head and still fail at the ground. Feet are the only connection between camera support and terrain—so stability begins with choosing friction, penetration, or load spreading.
A sharper point does not automatically create a steadier tripod.
Choose the foot that can actually hold your ground
Rubber grips through surface contact. Spikes concentrate pressure and penetrate weak layers. Wide supports spread the load when the ground cannot carry a narrow point.
Rubber
Friction / broad contactBest on tile, wood, concrete, pavement and many dry rock surfaces. Slight compression helps the foot conform to tiny surface textures.
Metal spike
Penetration / narrow pointBest where the point can pass through grass, mulch, loose gravel or compact snow and reach a firmer layer underneath.
Hybrid or pad
Adaptation / load spreadHybrid feet switch between rubber and spikes. Wide pads or baskets resist sinking in sand, mud and deep powder snow.
Where each design wins—and how it fails
The foot is useful only when its contact style matches the surface. A spike that cannot penetrate may offer less lateral grip than rubber.
| Foot type | Best surfaces | Main advantage | Common failure | Field verdict |
|---|---|---|---|---|
| Rubber | Tile, wood, concrete, pavement, dry rock | ✓ Broad grip and floor protection | ~ Can ride on loose debris or slime | ✓ Hard-ground default |
| Metal / carbide spike | Soil, grass, compact snow, coarse gravel | ✓ Reaches through weak surface layers | ✗ Skates on smooth stone; marks floors | ✓ Penetrable terrain |
| Hybrid | Mixed urban and outdoor routes | ✓ Switches contact mode quickly | ~ Threads trap grit; collars loosen | ✓ Travel versatility |
| Wide pad / basket | Soft sand, mud, deep snow | ✓ Spreads weight and slows sinking | ~ Bulky and weak on hard ground | ✓ Low-bearing terrain |
✓ strong match ✗ avoid or cap ~ conditional performance
Grip depends on what happens below the foot
Terrain labels are only a starting point. Test whether the upper layer grips, breaks, rolls, sinks or slides before trusting it with a camera.
Contact strategy spectrum
Critical insight: On polished stone, tile or smooth concrete, a narrow metal point cannot bite and may skate sideways. More aggressive hardware is not always more secure.
Read the ground before you deploy the legs
Press one shoe into the surface and twist gently. That small test reveals more than simply deciding whether a location is “indoor” or “outdoor.”
Clean contact first
Use rubberWipe away grit before entering a studio, gallery, church or home. A trapped grain can reduce grip and scratch wood.
Avoid vibration paths
Use rubberChoose solid pavement instead of drain covers or loose slabs that can vibrate when traffic passes.
Reach the firm layer
Use spikesPush through mulch and loose growth until resistance changes. On slopes, seat the downhill leg before loading the head.
Settle between stones
Use spikesRotate each leg gently until the point finds a stable gap. A quiet first position may still rest on a rolling pebble.
Spread the load
Use wide padsCompact a platform, press the legs down, then wait. Continued sinking can tilt the horizon during a long exposure.
Clear loose powder
Basket or spikeUse baskets in deep snow and spikes on rough, firm ice. Make sure every foot reaches a layer able to carry the load.
From ground check to stable frame
A secure setup is a sequence, not a component. Each decision controls the next source of motion.
Test the surface
Press, twist and watch for sliding, rolling or sinking.
Select contact
Choose friction, penetration or load spreading.
Place each leg
Avoid drains, loose stones, slime and unsupported edges.
Load + nudge
Press downward, then test gentle lateral force.
Mount the camera
Only after all three contact points remain still.
Reset the tripod if…
- A foot rotates under a light sideways nudge.
- Gravel crunches or a stone rolls beneath a point.
- One leg continues to sink after several seconds.
- A spike ticks or skips across smooth stone.
Mixed terrain rule
- Judge every contact point independently.
- One secure leg cannot compensate for one uncertain foot.
- Move the entire tripod when a better patch is within reach.
- Point one leg downhill before adding a heavy camera.
Grip is also a maintenance problem
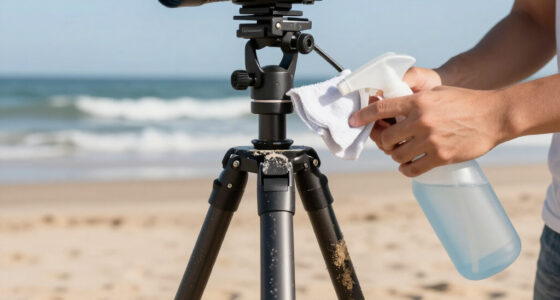
Salt, sand, mud and grit reduce traction, jam threads and loosen removable parts. A two-minute clean protects the next setup.
Remove salt and mud
Use fresh water after beaches, winter roads and tidal locations.
Clear threads and collars
Dislodge sand before retracting or unscrewing adjustable feet.
Prevent corrosion
Dry metal points and threaded sockets before storage.
Check removable parts
Confirm feet, caps and locking collars remain secure and complete.
Hardware helps, but careful placement, individual leg testing and regular cleaning matter just as much as foot material.
Choose the Foot That Can Actually Hold Your Ground
Tripod feet work by creating either friction or penetration, and the right method depends on the surface. Rubber grips hard ground through contact and friction, while spikes enter soil or catch rough gaps. Hybrid feet give you both options when your route moves between hard floors and soft terrain.
Think of the difference like footwear. Smooth leather soles can feel elegant on dry pavement but become lively on wet grass; hiking boots gain their confidence from deep lugs that press into loose earth. Your tripod faces the same problem, except it must hold a camera still through wind, vibration, and long exposures.
Rubber feet usually have a flat, rounded, or textured contact patch. They suit studio floors, wooden decking, pavement, tile, and many rock surfaces because the rubber can compress slightly around tiny surface textures. During an interior shoot on polished wood, rubber also protects the floor from scratches and spreads the load more gently.
Metal or carbide spikes concentrate weight onto narrow points. On woodland soil, gravel, packed snow, or a grassy bank, that pressure helps each foot pass through the loose upper layer and reach firmer material. I often press spikes into damp ground until I feel the resistance change from soft mulch to compact soil; that change tells you the support has found a better anchor.
Hybrid tripod feet place a retractable spike inside a threaded rubber sleeve or let you swap feet completely. They are especially useful during travel, when a morning begins on a hotel floor and ends on a windy hillside. The tradeoff is extra hardware: threads can collect grit, removable parts can disappear, and adjustable collars need an occasional check.
A sharper point does not automatically create a steadier tripod. The foot must interact with the ground in a useful way.
As an affiliate, we earn on qualifying purchases.
See Where Rubber, Spikes, and Hybrid Feet Win
Tripod feet perform best when their contact style matches the terrain: rubber grips solid surfaces, spikes enter penetrable ones, and hybrid systems handle routes with both. The table below gives you a fast field choice, including where each design can fail and what that failure looks like through the viewfinder.
| Foot type | Best surfaces | Main advantage | Common problem |
|---|---|---|---|
| Rubber | Tile, wood, concrete, pavement, dry rock | Broad grip and floor protection | Can sit on top of loose soil or slide on slime |
| Metal or carbide spike | Soil, grass, compact snow, rough ice, coarse gravel | Penetrates weak surface layers | Can skate on smooth stone and damage floors |
| Hybrid | Mixed urban and outdoor routes | Fast adaptation without carrying separate legs | Threads and collars can trap sand or loosen |
| Wide pad or basket | Soft sand, deep snow, mud | Spreads weight to reduce sinking | Bulkier and less useful on hard ground |
A rubber foot on clean concrete often feels planted because its broad patch creates friction across thousands of tiny surface peaks. Put that same foot on a bed of dry pine needles and it grips only the loose material, much like standing on a rug that can slide. The leg may look still while the entire top layer shifts beneath it.
A spike reverses that relationship. It passes through grass, leaf litter, or loose gravel and seeks a firmer layer below. Yet on marble steps, the tiny metal point offers little contact area, so a light sideways push can produce a sharp tick as the leg skips.
Sand and powder snow deserve their own category. A narrow spike can sink several centimetres while you compose, slowly changing the horizon or pulling tension through the tripod legs. A wide pad, snow basket, flat stone, or compacted platform often works better because it spreads the load rather than driving it downward.
tripod spike feet for uneven terrain
As an affiliate, we earn on qualifying purchases.
As an affiliate, we earn on qualifying purchases.
Match Tripod Feet to Six Surfaces in Under a Minute
Tripod feet should be selected by testing the ground, not merely looking at it. Press one shoe into the surface, twist gently, and notice whether the top layer grips, breaks, sinks, or slides. That five-second ground check tells you more than a broad label such as “outdoor” or “indoor.”
- Polished floors: Use clean rubber feet. A grain of sand trapped underneath can act like a ball bearing and scratch wood, so wipe each foot before entering a studio, gallery, church, or home.
- Pavement and concrete: Start with rubber. On a night city shoot, place each foot on solid pavement rather than across a drain cover that can vibrate whenever a vehicle passes.
- Soil and grass: Expose the spikes and push them through the loose upper layer. On a damp hillside, point one leg downhill and seat all three before attaching a heavy camera.
- Gravel: Use spikes, then rotate each leg gently until the point settles between stones. Do not assume the first quiet position is secure; a rounded pebble can roll under load.
- Sand or mud: Add wide pads or build a compact platform. At the beach, press the legs down before framing, then wait several seconds to see whether one side continues sinking.
- Snow and ice: Use baskets on deep snow and spikes on rough, firm ice. Clear away loose powder so the feet meet a layer that can carry the camera’s weight.
I use the same routine beside waterfalls, where the terrain can change within a single stride. One leg may sit on gritty rock, another in moss, and the third in shallow water. In that situation, you can use rubber on all three only if every contact point holds; otherwise move the whole tripod rather than accepting one uncertain foot.
Mixed terrain rewards patience more than fancy hardware. Test each leg separately with a firm downward press, then apply a light sideways nudge near the shoulder of the tripod. If you hear gravel crunch, feel a foot rotate, or see a leg sink, reset it before mounting your camera.
hybrid tripod feet for mixed surfaces
As an affiliate, we earn on qualifying purchases.
As an affiliate, we earn on qualifying purchases.
Stop Small Footing Mistakes From Softening Sharp Photos
Tripod feet affect sharpness whenever they slide, sink, twist, or pass vibration into the legs. These movements can be too small to notice while you stand beside the camera, yet a 10-second exposure records every tremor. Stable-looking support is not always stable support.
One common mistake is spreading the legs across surfaces with different firmness. Imagine two feet on concrete and one on a patch of wet soil. The soil foot can settle slowly after you frame, leaving the horizon tilted and putting uneven force through the tripod shoulder.
Another mistake is hanging a heavy bag from the centre column in gusty weather. Extra weight can help when it rests lightly on the ground, but a swinging bag behaves like a pendulum and sends repeated pulses through the legs. I prefer a bag strap with just enough ground contact to stop the sway, or a low ballast sack that cannot swing freely.
Loose leg angles also matter. If a spike grips strongly but the leg-angle lock has not seated, downward pressure can make the leg snap outward. Before a low-angle landscape shot, listen for the lock and push gently on the tripod platform while keeping your camera strap clear of branches and wind.
- Use the thickest leg sections first; thin lower sections flex more easily.
- Keep the centre column low when wind or unstable ground threatens the shot.
- Turn image stabilization off only when your camera or lens manual recommends it for tripod use; modern systems differ.
- Shield the tripod from wind with your body without touching the legs during the exposure.
After setup, magnify a test frame and check a fine edge, such as distant branches against the sky or lettering on a building. A photograph can look crisp on the rear screen and still show a faint double edge at full size. That small inspection costs less time than repeating an entire blue-hour sequence.
tripod foot cleaning and maintenance kit
As an affiliate, we earn on qualifying purchases.
As an affiliate, we earn on qualifying purchases.
Make Hybrid Feet Useful Without Losing Parts or Time
Tripod feet with retractable or interchangeable tips are most useful when you switch them before the ground becomes a problem. Set the rubber or spike position while the tripod is folded, keep removable pieces in one dedicated pocket, and check every collar after the first few minutes of walking. Preparation makes versatility practical.
Retractable designs usually expose a spike when you screw the rubber sleeve upward. They switch quickly and keep both contact options attached to the tripod, which is valuable in cold weather when small loose parts are awkward to handle. The drawback appears in sand: fine grains enter the thread and create a dry, gritty rasp as you turn the collar.
Interchangeable feet give you more freedom because you can fit spikes, rubber pads, snow baskets, or specialist wide feet. They also create more chances to leave a part beside the car. On assignment, I keep all three removed feet together in a small, bright pouch; a single black rubber foot can vanish instantly among wet leaves.
Before buying replacement feet, check the thread diameter, thread pitch, shoulder shape, and clearance around the lower leg. A foot can screw into place and still be unsuitable if its shoulder bottoms out early or prevents the leg from folding. According to common manufacturer care instructions [2], model compatibility and fitting directions should be checked before replacement.
A dab of ordinary cleaning care is more useful than forcing a stiff thread. Brush away dry grit, rinse removable feet with fresh water when the maker permits it, and let every part dry before reassembly. Avoid lubricants unless the tripod maker calls for one, since oily threads collect dust and can migrate toward leg locks.
Switchable feet solve changing terrain only when the mechanism remains clean, tight, and easy to operate.
Keep Your Tripod Feet Grippy for Years of Field Use
Tripod feet last longer when you remove salt, sand, mud, and moisture soon after the shoot. These materials grind threads, harden rubber, and promote corrosion around exposed metal. A five-minute cleaning routine can prevent a seized spike or missing foot from ruining the next early-morning setup.
After a beach session, I resist the temptation to fold the tripod and forget it in the car. Salt leaves a pale, crusty film that attracts moisture, while sand hides inside collars and screw sockets. Fresh water, a soft brush, and a dry cloth remove most of the trouble before it moves farther up the legs.
Check rubber feet for glossy patches, cracks, flattened edges, or cuts. Fresh rubber usually feels slightly tacky and compliant under a thumbnail; worn rubber can feel hard and smooth, like an old pencil eraser. Replace a damaged set together when possible so all three legs have similar height and grip.
Inspect spikes for bent tips, mushroomed edges, corrosion, and loose mounting threads. A slightly rounded spike may still work in soil, but a bent one can apply sideways force to its socket. Never straighten a hardened metal or carbide point with bare hands; sharp edges can cut skin, and brittle tips can chip.
- After mud: Let thick deposits soften with water, then brush them away instead of grinding them into the threads.
- After saltwater: Rinse permitted parts with fresh water and dry them fully.
- After sand: Remove loose grains with a clean brush before turning threaded collars.
- Before storage: Count all removable feet and keep the tripod dry with its locks relaxed according to its manual.
Give the assembled tripod a final check on a hard floor. Press down gently, listen for clicks, and confirm that every foot stays tight when rotated by hand. This quiet workshop test is far nicer than discovering a loose spike by touch on a dark path before sunrise.
Frequently Asked Questions
Are spikes always better for outdoor photography?
No, spikes are not automatically better outdoors. They work well in soil, grass, coarse gravel, and firm snow because they can penetrate or catch the surface. On pavement, boardwalks, and smooth rock, rubber feet usually provide more contact and grip.
Can tripod spikes damage indoor floors?
Metal spikes can scratch wood, mark vinyl, chip tile, and slide dangerously on polished floors. Retract them or fit rubber covers before entering a home, studio, museum, or event venue. Wipe the rubber clean too, since trapped sand can scratch delicate finishes.
What tripod feet work best on sand?
Wide pads or baskets work better than narrow spikes on soft sand because they spread the tripod’s weight over a larger area. If you have only standard feet, press each leg into compact sand, wait for settling, and test the framing again. Avoid placing a leg where retreating water can wash material away beneath it.
Should I use spikes on ice?
Spikes can grip rough, firm ice when their points catch small pits or cracks. They may skate across smooth glazed ice, especially under sideways pressure. Clear loose snow, keep the tripod low, test every leg, and move to a textured patch if any point slides.
Can I replace rubber tripod feet with spikes?
Many tripods accept screw-in replacement feet, but compatibility varies. Check the thread diameter, pitch, socket depth, and folding clearance listed for your model. A part that starts threading correctly can still damage the socket if its pitch or shoulder does not match.
Conclusion
Match the foot to the ground before you think about the photograph. Rubber needs clean, solid contact; spikes need something they can enter or catch; wide pads need enough area to resist sinking. Once each leg survives a firm press and a gentle sideways nudge, you can give your full attention to light, timing, and composition.
Tripods are essential when the exposure stretches and the landscape refuses to hold still, but their strength ends where the feet meet the earth. Take ten extra seconds to test that connection. Then let the shutter open while the wind moves the grass, the water turns to silver, and your camera stays exactly where you placed it.
Flea & tick season Picks
flea and tick prevention
As an affiliate, we earn on qualifying purchases.