TL;DR
Play games included with Prime
Start a Prime free trial and play with Amazon Luna on your devices.
Start playingAs an affiliate, we earn on qualifying purchases.
Choose a smartphone tripod for locked-off photos and video, and choose a 3-axis gimbal for smooth footage while you walk. Check clamp width, case clearance, portrait rotation, working height, and the universal 1/4″-20 thread before buying; use a screw clamp instead of a magnet whenever a dropped phone is a realistic risk.
A phone balanced against a coffee mug works until a notification makes it buzz, the mug shifts, and your carefully framed family photo becomes a blur. A proper support does more than keep the phone upright. It gives you repeatable framing, cleaner low-light photographs, steadier video, and enough distance to step into the scene yourself.
The confusing part is that smartphone tripods and mounts now cover everything from palm-sized desk stands to eye-level legs, magnetic plates, overhead arms, flexible wraps, and motorized gimbals. Some solve camera shake. Others solve mounting position. A gimbal solves an entirely different problem: smooth movement while you walk.
I approach phone support the same way I approach professional camera support: start with the shot, then choose the simplest hardware that holds it safely. You will learn how to separate useful features from shiny extras, check whether your case fits, and spot the weak joints that cause wobble. You will also leave with a seven-point buying checklist you can use online or in a camera shop.
Use a tripod for locked-off photographs and video; use a 3-axis gimbal when you need smooth footage while walking.
Measure your phone inside its case and check clamp range, button clearance, 90-degree portrait rotation, and accessory balance.
Choose a screw-tightened clamp instead of a magnetic mount near water, traffic, open edges, or other hard-drop locations.
Keep the center column low, spread the legs fully, and use a timer or remote for long exposures and timelapses.
Build around the universal 1/4″-20 thread so you can replace the clamp, head, or legs without discarding the whole setup.
Smartphone Tripods & Mounts
Start with the shot, then choose the simplest hardware that holds it safely. A tripod locks the frame. A gimbal smooths movement. The right mount keeps your cased phone attached through both.
Locked frame, smooth walk, or quick travel?
The most common buying mistake is expecting tripod legs to remove footstep bounce. Decide whether the camera stays put before comparing features.
Tripod
Best for long exposures, group photographs, interviews, timelapses, landscapes and static video.
3-Axis Gimbal
Powered motors counter small rotations during walking tours, follow shots and moving product footage.
Selfie Hybrid
A compact pole with small fold-out feet suits travel clips and quick group shots, but loses rigidity when extended.
Buy for the position you use every week.
The best support is not the one with the longest feature list. It is the one that places the lens where your real shot needs it without wobble or obstruction.
Tabletop / Mini
Video calls, seated tutorials, food details and low angles. Compact and quick, but intentionally short.
Full-Size
Group portraits, landscapes and talking-head video. Usually 50–70 inches and requires a phone adapter.
Flexible Legs
Wraps around poles, branches and rails. Highly packable, though less rigid with a microphone or light attached.
Overhead / Clamp Arm
Ideal for cooking, drawing, repairs and crafts. A solid bench clamp keeps the floor clear and the camera directly above the work.
Suction / Magnetic
Useful on controlled indoor surfaces. Avoid traffic, water, balconies and other locations where one failed connection means a destroyed phone.
| Support | Static shots | Walking video | Eye-level reach | Travel ease | Key limitation |
|---|---|---|---|---|---|
| Mini tripod | ✓ Strong | ✗ No | ✗ Surface needed | ✓ Excellent | Low camera position |
| Full-size tripod | ✓ Best | ✗ No | ✓ Yes | ~ Moderate | Bulk and floor space |
| Flexible legs | ~ Good | ✗ No | ~ With anchor | ✓ Excellent | Joint flex under load |
| 3-axis gimbal | ~ Limited | ✓ Best | ✗ Handheld | ~ Good | Battery and balancing |
| Selfie hybrid | ~ Fair | ~ Handheld only | ~ Partial | ✓ Best | Wobble at full extension |
Measure the case, not the bare handset.
Maximum width is only the beginning. Raised camera surrounds, wallet cases and side buttons can prevent the pads from landing on flat, grippy surfaces.
Spring-loaded clamp
Fast, simple and widely compatible. Confirm that its jaws clear buttons and close around the case.
Screw-tightened clamp
Slower to fit but provides controlled mechanical pressure for heavier accessories and exposed locations.
MagSafe / Qi2 magnetic
Instant one-handed attachment. Holding force varies with case, alignment, adhesive rings, heat and surface texture.
Run this list before checkout.
Compatibility, stability and positioning matter more than bundled extras. These seven checks work online or at a camera-shop counter.
Clamp range
Measure width and thickness with the everyday case fitted.
Case clearance
Check buttons, camera bump and flat contact surfaces.
Portrait rotation
Confirm a true 90-degree vertical position without slipping.
Working height
Judge useful lens height, not the marketing maximum.
Joint rigidity
Inspect the head, leg locks, center column and arm pivots.
Accessory load
Allow for a microphone, light, cable and cold-shoe bracket.
1/4″-20 thread
Choose replaceable clamps, heads and legs over sealed kits.
Typical price bands
Stability beats feature count
From intended shot to dependable support
Choose a Tripod for Still Shots and a Gimbal for Walking Video
Smartphone tripods and gimbals do different jobs: a tripod locks your framing in place, while a powered 3-axis gimbal smooths movement as you walk. Choose a tripod for photographs, interviews, timelapses, and fixed video. Choose a gimbal when the camera must travel through the scene.
| Support | Best use | What it cannot fix | Typical setup |
|---|---|---|---|
| Tripod | Long exposures, group photos, interviews, static video | Footstep bounce during moving shots | Spread legs, level phone, lock head |
| Gimbal | Walking tours, follow shots, moving product footage | A perfectly fixed frame in wind without a stand | Balance phone, power motors, select tracking mode |
| Selfie stick hybrid | Travel clips and quick group shots | Serious rigidity at full extension | Extend pole or open its small feet |
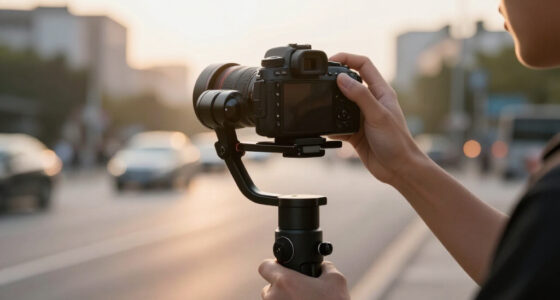
I see the mix-up most often when someone wants smooth footage of a child riding a bicycle. A tall tripod can record the child passing one fixed point, but carrying that tripod alongside the bicycle produces a bouncing, awkward clip. A gimbal counters small rotations with motors, much like a waiter keeping a tray level while walking across a busy room.
The opposite mistake happens during night photography. A gimbal can keep the horizon calm, yet it still moves slightly in your hands during a multi-second exposure. For glowing traffic trails or a blue-hour skyline, you need rigid legs, a low center column, and a timer or remote shutter. In plain language: tripods stop the camera; gimbals soften the walk.
The most common buying mistake: expecting a phone tripod to smooth moving footage. If your feet move during the shot, start your search in the gimbal category.
smartphone tripod for photos and videos
As an affiliate, we earn on qualifying purchases.
As an affiliate, we earn on qualifying purchases.
Match the Support to the Shot You Make Most Often
Smartphone tripods and mounts work best when their shape matches your usual shooting position. A desk stand should be quick and compact; a landscape tripod should reach a useful height without wobbling. Buy for the scene you shoot every week, not the unlikely shot suggested by a crowded feature list.
- Tabletop or mini tripod: Pick this for video calls, seated tutorials, food details, and low-angle photographs. At a café table, short legs keep your phone close enough for clear audio without filling the frame with nostrils and ceiling.
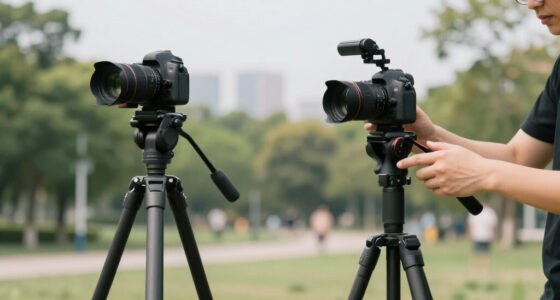
- Full-size tripod: Typical models extend roughly 50–70 inches, which suits eye-level talking-head video, group portraits, and landscapes. You will need a phone adapter, though the standard thread makes that pairing simple.
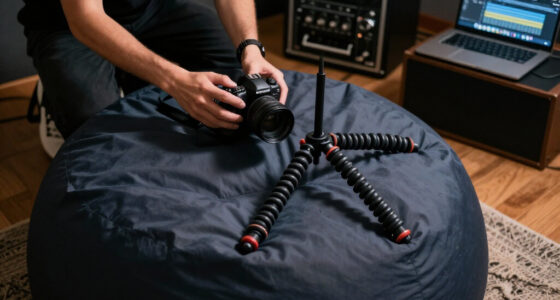
- Flexible-leg tripod: Bendable legs can wrap around a railing, branch, or fence post. They pack easily, but their rubbery joints flex more than rigid tubes, especially when a phone carries a microphone and light.
- Overhead or clamp arm: This is the practical choice for cooking, drawing, repair, and craft demonstrations. A clamp fixed to a solid workbench usually gives you a cleaner straight-down view than three legs crowded around flour, paper, tools, or wet paint.
- Suction or magnetic mount: These suit smooth surfaces and fast placement. Use them for controlled indoor work, not over traffic, water, balconies, or another place where one failed connection could destroy the phone.
Suppose you record sourdough tutorials. A full-size tripod beside the counter may force the camera into a slanted view, while its legs become ankle traps. An overhead arm clamped to the back edge gives your audience a clear view of glossy dough stretching beneath your hands and keeps the floor open.
Now change the job to a family portrait in a meadow. The overhead arm becomes useless, and a miniature tripod places the camera at knee height. A full-size model near eye level produces natural faces and gives you room to frame eight people. The best form factor is not the most versatile claim on the box; it is the support that reaches your real camera position.
3-axis smartphone gimbal stabilizer
As an affiliate, we earn on qualifying purchases.
As an affiliate, we earn on qualifying purchases.
Pick the Mount That Holds Your Cased Phone Safely
Smartphone tripods and mounts are only as safe as the phone connection. Spring clamps offer speed, screw-tightened clamps offer stronger mechanical grip, and magnetic mounts offer instant attachment. Check the phone’s width and case thickness, then choose according to the cost of a possible fall.
| Mount type | Main advantage | Main tradeoff | Best setting |
|---|---|---|---|
| Spring clamp | Fast, simple, widely compatible | Can press buttons or struggle with thick cases | Desk, travel, everyday photography |
| Screw clamp | Controlled, firm grip | Slower to attach and remove | Long exposures, heavy accessories, outdoor use |
| Magnetic mount | One-handed attachment | Holding force varies with case and alignment | Desks, calls, gentle handheld use |
Many spring clamps cover a phone-width range around 55–95 mm, but the printed maximum does not tell the whole story. A thick wallet case, a raised camera surround, or side-mounted buttons can spoil the fit. Measure the phone while it is inside the case, and check whether the clamp pads land on flat, grippy surfaces.
MagSafe arrived with the iPhone 12 generation in 2020, while the open Qi2 standard began expanding magnetic alignment to more devices from 2023 onward. Qi2 25W, also called Qi2.2, was announced in 2025 [2]. A non-MagSafe Android phone can use an adhesive magnetic ring, but adhesive quality, case texture, heat, and placement all affect security.
My rule from working around expensive camera gear is simple: use magnets when speed matters and the landing would be soft. Use a mechanical clamp near water, traffic, crowds, or open edges. A magnetic desk mount above a wooden table feels sensible; the same mount hanging outside a moving car does not.
universal smartphone tripod mount 1/4 inch
As an affiliate, we earn on qualifying purchases.
As an affiliate, we earn on qualifying purchases.
Use This 7-Point Check Before You Commit to a Tripod
A useful buying check covers compatibility, height, stability, orientation, controls, accessories, and portability. Run through these seven points with your phone and case beside you. Five careful minutes can expose a narrow clamp, weak head, or missing portrait position before that flaw ruins a real shoot.
- Measure the cased phone. Record its width, thickness, and the position of its side buttons. If a clamp jaw lands on the power button, the fit will remain irritating even when the width looks correct.
- Confirm 90-degree rotation. A mount may hold a phone securely yet refuse to turn into portrait orientation. Vertical video for Reels, Shorts, and similar platforms needs a clamp or head that rotates without loosening the whole rig.
- Choose a working height. For a standing presenter, place the lens close to eye level. For desk calls, raise it enough to avoid the heavy under-chin angle created by a phone lying beside the keyboard.
- Check the 1/4″-20 UNC connection. This standard thread lets nearly any conventional phone clamp attach to nearly any conventional tripod [1]. It works like a common electrical socket for camera support: one standard joins parts from many systems.
- Inspect the head. A ball head gives photographers fast control over angle and horizon. A fluid pan-and-tilt head gives video shooters slower, smoother movement when following a speaker across a stage.
- Plan for a microphone or light. Look for a cold shoe when you expect to add either accessory. Phones often weigh only about 140–250 g, but a light, microphone, receiver, and cable can shift the balance far away from the center.
- Compare folded size with deployed size. A tripod that reaches eye level but never fits your day bag may stay at home. Check total weight, folded length, leg-lock feel, and whether any removable plate can disappear in grass.
Try a dry run that copies your real use. Mount the cased phone, rotate it vertically, add your microphone, and tap the screen near each corner. If the frame trembles for several seconds, you have found a weak head or narrow stance, even if the load rating sounds generous.
Bluetooth remotes add convenience for group photographs and long exposures, and many trigger the native camera through the phone’s volume-shutter function. Still, a two-second or ten-second timer costs nothing and cannot run out of battery. Treat the remote as a helpful tool, not a reason to accept poor mechanical support.
As an affiliate, we earn on qualifying purchases.
Get Sharper Photos by Making Wobble Your First Priority
For long exposures and timelapses, rigidity matters more than extra features. Use fully spread legs, keep the center column low, lock every joint, and release the shutter without touching the phone. A plain, stiff tripod will produce sharper frames than a feature-packed support that sways after every tap.
Think of the center column as a tall flagpole. Raise it, and a small push at the top becomes a broad arc at the phone. During a four-second city exposure, that tiny movement turns pin-sharp streetlights into soft commas and smears the silver edges of passing cars.
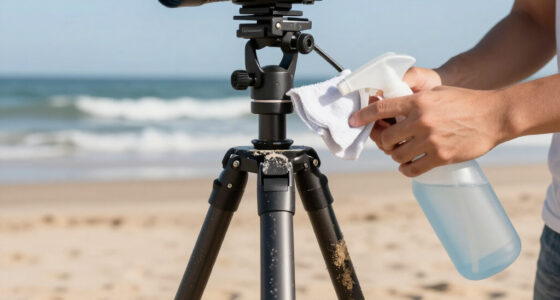
Outdoors, open the thickest leg sections first and leave the thin bottom sections retracted when you can. Spread the legs to their full stops, face one leg toward the wind, and hang a modest bag from the center hook if the design supports it. Keep the bag touching the ground slightly; a freely swinging weight can become a pendulum that adds movement.
- Turn off unnecessary vibration: Silence alerts and avoid handling the phone during the exposure.
- Use a timer or remote: Give the support a moment to settle after you frame the photograph.
- Avoid unstable surfaces: A wooden footbridge can bounce when someone walks behind you, even when the tripod itself feels solid.
- Shield flexible legs from wind: A wrapped railing mount can twist as gusts pull on the phone’s broad, flat body.
I once watched a technically good timelapse fail because the support stood on springy decking beside a busy scenic overlook. Each passing footstep nudged the horizon by a few pixels. The fix was not a smarter camera app; it was moving the legs onto a nearby stone ledge. Challenge yourself to find the weakest physical link before you blame the phone.
Sharpness starts below the camera. If the legs, surface, clamp, or head can move, software cannot restore the fine detail that never reached the frame.
Build a Small Phone Rig That Can Grow With Your Work
The 1/4″-20 thread lets you build a phone rig one useful part at a time. Start with stable legs and a secure clamp, then add a ball head, quick-release plate, cold shoe, light, or microphone only when your work calls for it. This approach keeps weak novelty accessories out of your bag.
An Arca-Swiss-style quick-release plate can help when you switch between a phone and a larger camera, though dimensions and safety stops vary between makers. A cold shoe holds a compact microphone or light without carrying electrical signals. These are mechanical connection systems, not electronic features, which is why they can remain useful through several phone upgrades.
Imagine that you begin with weekly desk videos. A mini tripod and spring clamp may cover every need. Six months later, you add a small microphone, so you replace only the clamp with one that has a cold shoe; when you start filming standing demonstrations, you move that same clamp onto full-height legs.
Integrated case systems from brands such as Peak Design and Moment can make repeated attachment faster, while accessory makers including Joby, Manfrotto, Ulanzi, SmallRig, Benro, DJI, and Insta360 cover different support categories. Brand familiarity does not replace measurement. Check the current case, connector, plate, and phone dimensions, since named systems can change across generations.
- Start with: secure phone clamp, suitable legs, and portrait rotation.
- Add for video: microphone support, cable clearance, and a smooth head.
- Add for fast changes: a compatible quick-release plate or case mount.
- Add for moving shots: a correctly balanced gimbal with enough motor clearance for your phone and case.
USB-C across many recent phones also makes microphones, receivers, lights, and charging arrangements easier to share, but cables can tug on a balanced gimbal or catch a tripod head. Leave a soft loop of cable and test every rotation. A clean rig moves freely; it should not resemble a vine wrapped around its own branches.
Know Which New Features Deserve Space in Your Bag
Buy modern features only when they remove a repeated problem from your shoots. Magnetic attachment saves setup time, AI tracking helps a solo presenter move within the frame, and integrated lights help in close quarters. None of them replaces a secure grip, useful height, or rigid support.
AI subject tracking can be genuinely helpful when you teach fitness, cook, or demonstrate a craft alone. A tracking dock or gimbal can follow your face as you step between a counter and stove. Test the practical limits: fast turns, backlighting, temporary obstructions, and multiple faces can cause hesitation or a jump to the wrong subject.
Built-in LEDs and Bluetooth remotes also sound attractive because they reduce the number of loose pieces. Yet a tiny light placed close to the lens often creates flat faces, bright foreheads, and hard shadows behind glasses. A separate light positioned slightly above and to one side gives your face shape and warmer texture, even if setup takes another minute.
MagSafe and Qi2 accessories make attachment pleasantly quick, while case-and-mount systems can speed up work for frequent creators. The tradeoff is commitment to a connection pattern that may not fit every future case or device. The universal 1/4″-20 mechanical thread remains the steadier long-term foundation because it does not depend on phone electronics.
This primer is based on training data with a fixed knowledge cutoff, not live market data or citations. Verify current models, device compatibility, standards, and safety instructions before publishing or buying. Reference markers here point to [1] PhotoMocha’s supplied tripod research brief and [2] the supplied MagSafe and Qi2 standards chronology, not current retail listings.
Frequently Asked Questions
Will any phone mount fit any tripod?
Most conventional phone mounts fit most conventional tripods because both use the 1/4″-20 UNC thread. Check proprietary mini stands, magnetic systems, and integrated selfie sticks, since some skip the standard socket. When both parts list 1/4″-20 compatibility, they should connect directly or through a simple quick-release plate.
Is MagSafe strong enough for a tripod mount?
MagSafe is suitable for controlled desk use, calls, and gentle shooting when the phone, case, and mount align correctly. Use a mechanical clamp where a fall would send the phone onto concrete, into water, or over an edge. Magnetic strength can change with case thickness, ring placement, heat, and sudden movement.
How tall should a smartphone tripod be?
Choose a tripod that places the lens near eye level for standing presentations and portraits. Full-size models commonly extend about 50–70 inches, while a tabletop model works better for calls and seated demonstrations. Avoid planning around maximum center-column extension because the tallest position is often the least rigid.
Can I keep my phone case on in the clamp?
You can keep the case on when the clamp’s width and jaw depth cover the actual cased dimensions. Measure before buying, and check whether the pads press a side button or rock against a raised camera surround. Thick wallet cases may need a deeper screw-tightened clamp or removal during shooting.
Do I need a Bluetooth remote shutter?
A Bluetooth remote is helpful but optional for group photos, self-portraits, and exposures where touching the phone would cause shake. Many remotes trigger the native camera through the volume-shutter command. Your phone’s built-in timer offers the same no-touch release when speed and distance do not matter.
Conclusion
Buy for your most common shot, then choose the simplest support that places the phone at the right height and holds it without movement. Ignore feature count until you have checked the clamp, case clearance, portrait position, head, and legs. Those plain mechanical details decide whether your footage feels polished or whether every tap sends a shiver through the frame.
Before ordering, stage the shot with your phone in hand and notice where the lens needs to sit. Desk, eye level, railing, overhead, or moving beside you—the answer points toward the right tool. Get that physical position right, and your phone stops feeling like a slippery rectangle propped against a mug. It becomes a camera you can place with confidence.
Fall yard work Picks
leaf blowers
As an affiliate, we earn on qualifying purchases.