
TL;DR

Get audio and creator gear delivered free with Prime
- Fast, free delivery on millions of items
- Prime Video, Amazon Music and more included
- Member-only deals all year
An aspect ratio compares an image’s width with its height, and a print with a different ratio must crop the image, leave borders, or distort it. Match the print to the photo when you can; otherwise, preview the crop at the exact size and keep faces, hands, and text clear of the edges. Use fit or borders to preserve the whole frame, and check the frame opening as well as the printer preview.
A photo can look perfect on your screen and still lose a hand, a hat, or the edge of a building when it comes back from the printer. The culprit is often shape: your image and your chosen paper don’t share the same proportions.
Aspect ratio describes width compared with height. A 3:2 image is 1.5 times as wide as it is tall; a 4:5 image is taller, with the image is taller than it is wide. The ratio describes shape, not sharpness or file size. I check it before printing because a little planning can save a favorite photograph from an awkward crop.
In this guide, you’ll see which common print sizes fit familiar photo shapes, how to preview a crop, when borders make more sense, and what to check before putting a print behind a mat. Think of the frame as a window: choose the right opening, and the photograph gets to tell its story.
A 3:2 photo matches 4 × 6, 8 × 12, and 12 × 18-inch print proportions; 8 × 10 uses a different 4:5 shape.
If the image and paper ratios differ, the printer must crop, leave borders, or distort the image.
Preview the exact size and orientation, then check faces, hands, text, and the visible frame opening near the edges.
Use fit or a mat to preserve the whole image; verify how your printer defines fit and fill.
Resolution affects detail, while aspect ratio affects shape; check both, especially after a substantial crop.
A practical guide to better prints
Print Sizes and Aspect Ratios: Avoiding Awkward Crops
A photo can look perfect on screen and still lose a hand, a hat, or the edge of a building in print. Match the paper to the image when you can; otherwise preview the crop at the exact size and protect the details that matter.
As wide as it is tall
Classic 3:2 print
8 × 10-inch print
Pixels per inch (PPI)
Why prints lose the edges
Aspect ratio describes width compared with height. It tells you about shape, not sharpness or file size.
One scene, one frame
A 3:2 landscape photo has a wide frame. The ratio is the relationship between its width and height.
Paper has a shape too
Compare the print’s proportions with the photo. A familiar size label does not guarantee a close match.
Something has to give
A mismatch means crop to fill, fit with borders, or stretch. Stretching distorts people and objects, so avoid it for ordinary photos.
Match the print size to your photo
These ratios are a starting point. A mat or final trim can cover a little more of the image.
| Print size | Aspect ratio | With a 3:2 photo |
|---|---|---|
| 4 × 6 in | 3:2 | Matches the photo shape |
| 5 × 7 in | 5:7 | Crop or borders needed |
| 8 × 10 in | 4:5 | More noticeable crop or borders |
| 8 × 12 in | 2:3 | Matches in landscape orientation |
| 11 × 14 in | 11:14 | Crop or borders needed |
| 12 × 18 in | 2:3 | Matches in landscape orientation |
Written width × height. Rotate the print for landscape orientation and compare the proportions in that orientation.
Let the crop window protect the story
Automatic framing may center the file while your subject sits off to one side. Inspect all four edges in the actual order preview.
Choose size and orientation
Select the exact print format, such as an 8 × 10-inch portrait, before judging the crop.
Check edge details
Look for faces, hands, signs, text, and anything deliberately placed near the edges.
Read fit and fill
“Fill” commonly crops to cover the paper. “Fit” commonly preserves the frame and leaves blank space. Behavior varies by printer.
Check resolution separately
Aspect ratio controls shape. Resolution affects how much detail the file can print. Focus, compression, paper, printer, and viewing distance also matter.
A useful close-view target, not a guarantee of print quality. Large prints can work at lower PPI when viewed from farther away.
Use a border or mat when every edge matters
Fit the complete image inside the paper, then let a white border or mat make the different shape feel intentional.
A wide 3:2 mountain landscape in an 8 × 10 frame may lose the low sun or a distant peak if cropped to fill. With fit, the full image stays visible and the remaining space becomes a margin. Check the frame’s visible opening too: a mat can hide a strip of the print. For full-bleed printing, the image extends beyond the final edge so trimming does not leave a white sliver. Keep essential content inside a safe area, especially titles and signatures.
- Leave room around important subjects when you know the target format.
- Keep faces, hands, and text away from print and trim edges.
- Preview at the exact size and orientation before submitting.
- Check the mat opening as well as the printer preview.
- Use a border when preserving the complete frame matters.
- Avoid stretching; it changes the proportions of people and objects.
From image shape to finished frame
A quick sequence helps keep the intended composition intact through printing and framing.
Understand why your photo loses the edges
Print sizes and aspect ratios determine whether a photograph fits paper edge to edge, keeps its full frame with borders, or loses some of its edges. Compare the image’s width with its height and then compare that ratio with the print. If the two shapes differ, something has to give.
Imagine a 3:2 landscape photo of a child holding a kite. The 4 × 6-inch print shares its proportions, so it can fill the paper without trimming the kite or the child’s shoes. An 8 × 10-inch print is 4:5, a squarer shape; filling it edge to edge can remove more from the sides, or the top and bottom if you turn the crop.
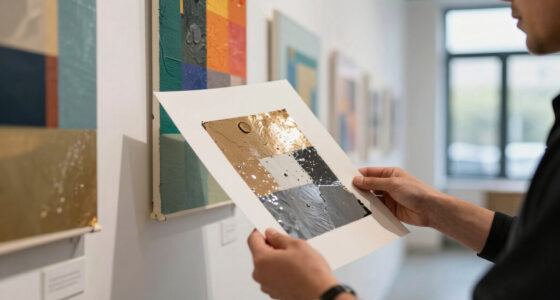
The crop behaves like a window sliding over a scene. The paper decides how wide that window is, and the photo’s edges disappear wherever the window doesn’t reach. A printer may offer fill, which usually crops to cover the paper, or fit, which usually preserves the full photo and leaves blank space. Labels vary, so read the actual preview before you place an order.
Stretching the image to force a fit changes people and objects: a round face can become oval, and a straight-sided building can look pinched. I avoid stretching for ordinary photographs. When the whole frame matters, a border or mat gives the image space to breathe.
The ratio also says nothing about resolution. A perfectly matched crop can still look soft if the file lacks detail, while a high-resolution image can still lose a subject to a mismatched print shape. Shape and pixel count are two different parts of the print decision.
Products Worth Considering
Logitech MX Mechanical Wireless Illuminated Keyboard, Tactile Quiet, Graphite

DJI Osmo Mobile 7P Phone Gimbal with Mic Mini Transmitter, Infinity Black

Amazon Kindle Scribe (64GB) with Premium Pen, Metallic Jade
As an affiliate, we earn on qualifying purchases.
Match common print sizes to your photo’s shape
Print sizes and aspect ratios tell you which paper sizes will preserve most or all of the original frame. Compare the ratios first; a familiar size label alone doesn’t guarantee a close match. For example, 4 × 6 inches has a 3:2 ratio, while 8 × 10 inches has a 4:5 ratio.
A 3:2 landscape photo suits a 4 × 6-inch print, an 8 × 12-inch print, or a 12 × 18-inch print. That gives you several options for the same composition, from a small tabletop print to a larger wall piece. An 8 × 10-inch print is a different shape, so the printer must crop it or leave borders if you want the entire frame visible.
A 5 × 7-inch print has a 5:7 ratio when written as width by height. Rotate it for landscape orientation, and the numbers reverse with the image’s orientation. The practical question stays the same: does the paper’s width-to-height proportion match your file’s? For tall portraits, the crop direction matters just as much as the size.
| Print size | Aspect ratio | What to expect with a 3:2 photo |
|---|---|---|
| 4 × 6 in | 3:2 | Matches the photo shape |
| 5 × 7 in | 5:7 | Needs a crop or borders |
| 8 × 10 in | 4:5 | Needs a more noticeable crop or borders |
| 8 × 12 in | 2:3 | Matches when viewed in landscape orientation |
| 11 × 14 in | 11:14 | Needs a crop or borders |
| 12 × 18 in | 2:3 | Matches when viewed in landscape orientation |
These proportions give you a useful starting point, not a promise about the final visible image. A frame or mat can cover a strip along the edge. I’ve seen a carefully composed portrait feel cramped after framing because the visible opening was smaller than the print itself. Check the crop and the frame opening together, especially when you’ve placed a face near the border.
Preview the crop before you send your photo
Print sizes and aspect ratios are easiest to handle when you test the crop before ordering. Choose the intended size and orientation in an editor or print service, then inspect the full preview. That step shows which parts of the scene will remain in the paper’s window.
Take a landscape portrait with two friends standing close together. If an 8 × 10 crop trims a shoulder or cuts off one person’s hand, move the crop, choose a different size, or add borders. Don’t assume the printer will automatically center the crop on the part you care about; automatic framing may favor the middle of the file while your subject sits off to one side.
- Choose the size and orientation you plan to print, such as an 8 × 10-inch portrait.
- Open the crop preview and check all four edges, not just the center of the image.
- Move the crop window to protect the face, hands, text, or other story-bearing details.
- Check the visible mat opening if the print will go in a frame; the mat can hide more image.
- Confirm fit, fill, and trim behavior on the order screen before submitting the file.
Watch faces, hands, signs, and anything you intentionally placed near an edge. A little extra space around a subject makes it easier to change print sizes later, but it doesn’t guarantee every crop will work. In the studio, I keep a modest margin when I can, especially for portraits that might become gifts in different frames.
Full-bleed printing lets the image run beyond the final paper edge so trimming doesn’t leave a thin white sliver. Printers can cut away a small amount during finishing, so keep important content inside the safe area rather than on the very edge. If a poster has a title or a signature, give it extra breathing room.
Keep the whole composition with borders or a mat
Print sizes and aspect ratios don’t have to match if you’re willing to leave a border. A white border, a colored paper margin, or a mat can preserve the complete image while letting it sit inside a differently shaped frame. That’s often the best choice when every edge belongs to the composition.
Say you’ve photographed a mountain ridge as a wide 3:2 landscape, but your living-room frame is an 8 × 10. Cropping to fill the frame might remove the low sun or a peak at the far edge. If you use fit instead, the full image can sit inside the paper with blank strips at the sides or top and bottom, depending on orientation. A mat can turn those strips into a deliberate border.
The border changes the feeling of the image, too. A clean white margin can make a small photograph feel quiet and gallery-like, while a full-bleed crop feels more immediate, as though the scene continues past the paper. I choose between them based on the subject: a tight street portrait can benefit from edge-to-edge energy, while a landscape with a small figure often needs the full frame to preserve the sense of space.
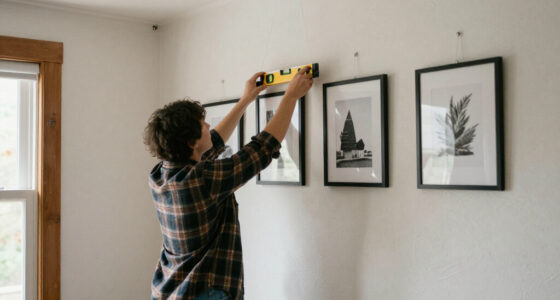
A frame’s outside dimensions don’t tell you exactly how much of the print you’ll see. Its lip and mat opening can cover the edges, and the opening may be slightly smaller than the print. Before ordering, compare the image preview with the frame’s visible opening; this is especially helpful when a face or caption sits near the edge.
Borders also help when one photo needs several print sizes. You can keep the same full composition and allow the margin to change, instead of making a new crop every time. If you want a consistent wall display, matching the border width across prints can make the set feel tidy and intentional.
Keep sharpness separate from crop decisions
Print sizes and aspect ratios control the shape of the picture; resolution controls how much pixel detail the print can show. You can have the right ratio and still print a soft file, or have plenty of pixels and still crop out the moment you wanted. Check both before deciding a photograph is ready for a large print.
A commonly used target for close viewing is about 300 pixels per inch (PPI), though good results depend on the image, printer, paper, and viewing distance [1]. An 8 × 10-inch print at 300 PPI calls for roughly 2400 × 3000 pixels. That is a guide, not a guarantee: sharp focus, low compression, and a clean original still matter.
Large wall prints are often viewed from farther away, so they can look good at lower PPI than a small print held in your hands. If you’re printing a 12 × 18-inch landscape for above a sofa, consider how it will look from across the room, not just at arm’s length. A close inspection on a bright monitor can make normal print softness seem more alarming than it will be on the wall.
Cropping also removes pixels. If you start with a 4000 × 6000-pixel portrait and crop away a large strip from each side, the remaining file has fewer pixels available for the print. For an 8 × 10 crop, check the revised file size and any resolution notice from the printer; don’t rely on the original dimensions alone.
Phone cameras now make it easy to reuse one image in tall, square, and wide formats, but those shapes may differ from the paper you choose. A phone photo can print beautifully at 8 × 10 if the file has enough detail and the crop suits the subject. The preview tells you about composition; the resolution warning tells you about detail. They answer different questions.
Choose a print path that fits the photograph
Print sizes and aspect ratios give you three practical paths: pick a matching size, crop with care, or preserve the whole frame with borders. The right choice depends on what the image needs. For a straightforward 3:2 landscape, 4 × 6, 8 × 12, and 12 × 18-inch prints share its proportions; for a family portrait with hands near the sides, borders may protect details that a tighter crop would cut.
Here’s a real-world scenario: you photograph a dog running through autumn leaves, with its tail near the right edge. You want an 8 × 10 print for a gift. The crop preview shows the tail disappearing when the dog sits in the center. You can shift the crop to favor the dog, select a 3:2 size, or choose fit and add a mat. Each makes a different visual promise.
- Choose a matching ratio when you want an edge-to-edge print with the least cropping.
- Choose fill when covering the whole paper matters more than keeping every edge of the image.
- Choose fit or borders when you need the full composition intact.
- Reframe the photo when the crop can improve the composition without removing essential details.
Ask the printer what its fit and fill settings mean, then verify the preview. Different services may use the same word differently, and print-order tools can default to a crop without making it obvious at first glance. Check the final orientation too; a portrait file placed in a landscape size can lead to a crop you didn’t expect.
If the image includes text, a signature, or a border you added while editing, keep those elements well inside the edge. Bleed and trim can take away a little more than the screen preview suggests. I treat the outer edge like the last inch of a painted canvas: beautiful scenery can go there, but the face and the story stay safely inside.
Frequently Asked Questions
What does aspect ratio mean in a photograph?
Aspect ratio compares an image’s width with its height, such as 3:2 or 4:5. It describes the image’s shape, not its resolution or print quality. A 3:2 image is 1.5 times as wide as it is tall.
Why did my print cut off part of the photo?
Your photo and print probably had different aspect ratios, so the printer cropped the image to fill the paper. A frame lip, mat, or trimming step can hide a little more at the edges. Check the print preview and the frame’s visible opening before ordering.
Which print size matches a 3:2 photo?
A 3:2 photo matches 4 × 6, 8 × 12, and 12 × 18-inch print proportions. An 8 × 10-inch print uses a 4:5 ratio, so it needs a crop or borders to preserve the whole image. Confirm orientation as well as size.
Can I print the whole photo without cropping?
Usually, yes: choose a print with a matching ratio or use fit with borders or a mat. If you want the paper covered edge to edge and its ratio differs from the photo, some crop is usually needed. Avoid stretching, which distorts people and objects.
Should I choose fit or fill when ordering a print?
Choose fit when keeping the full image matters and borders are acceptable; choose fill when you want to cover the paper and can accept cropping. Printer labels and behavior vary, so inspect the preview rather than relying on the setting name alone.
Will a phone photo print well at 8 × 10 inches?
It can, depending on the photo’s pixel dimensions, focus, compression, and how much the 8 × 10 crop removes. Look at the crop preview and check for a resolution warning from the printer. A file with enough pixels can still have an awkward composition if the crop cuts through important details.
Conclusion
Check the shape before you print. Match your photo’s ratio to the paper when edge-to-edge printing matters, or use a preview and borders when the whole composition needs to survive. Keep the important details inside the trim area, and check the mat opening as carefully as the print size.
A good print feels like the moment you remember: the kite still in the sky, the hand still reaching, the last warm band of sunset still glowing at the edge.