TL;DR

Get audio and creator gear delivered free with Prime
- Fast, free delivery on millions of items
- Prime Video, Amazon Music and more included
- Member-only deals all year
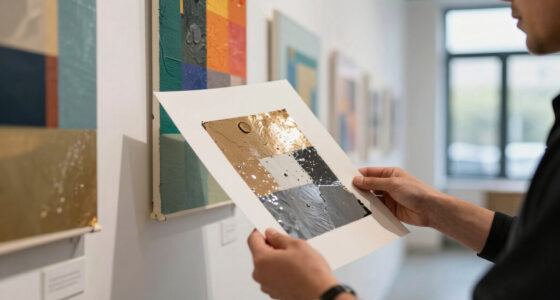
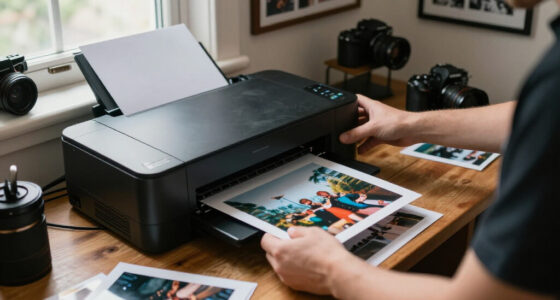
A borderless print carries the image to the paper’s edges, while a bordered print leaves unprinted space around it. Choose full bleed when the photograph benefits from edge-to-edge impact and its details can safely reach the trim; choose a border when you want visual breathing room, easier handling, or space for a signature. Before ordering, check the image dimensions, crop, bleed, and framing plan.
A photograph can feel like a window or like an object you could pick up. Sometimes the only difference is a strip of white paper around the image. A borderless print runs the photograph to the edges; a bordered print leaves a margin. That small choice changes how the image reads on a wall, how you handle it, and what a frame might hide.
When I prepare photographs for printing, I decide where the image should meet its surroundings before I settle on a format. A misty landscape may pull you in more fully without a margin, while a quiet portrait can benefit from the pause a border creates. In this guide, you’ll see how the two options differ, what to watch for during framing and trimming, and a straightforward way to choose for your own print.
Choose borderless when edge-to-edge color supports the image and important details can stay clear of the trim.
Choose a printed border when you want visual breathing room, a handling margin, or a place for presentation details.
A printed border is part of the sheet; a mat is a separate framing element that can cover the photograph if its opening is too small.
Check the sheet size, image size, crop, and bleed because print-service labels can mean different things.
Mock up both the overall sheet and image area on the wall to judge how each option fits your room.
Borderless vs Bordered Prints: An Aesthetic Choice With Practical Sides
A photograph can feel like a window or like an object on paper. Taking the image to the edge creates immersion; leaving a margin gives the eye room to pause. Choose by the composition, the trim, and the way you plan to frame it.
Two ways to meet the edge
Both treatments can suit the same photograph. The choice changes how much of the sheet carries the image and how the work relates to the wall around it.
Borderless
The image reaches the paper or product surface edges. It can feel immersive and contemporary, with more of a fixed-size sheet devoted to the photograph.
Bordered
Paper remains visible around the image. The margin adds separation, gives the eye a pause, and can provide room for handling or presentation details.
Mat ≠ border
A mat sits around the print inside the frame. It is not printed onto the sheet, and a narrow opening may hide the photograph’s edges.
What changes with each choice?
| Consideration | Borderless | Bordered |
|---|---|---|
| Visual effect | ✓ Immersive; edge-to-edge color or detail | ✓ A pause that separates image from room |
| Image area | Image reaches the edges; can appear larger on the same sheet | Image area is smaller than the sheet |
| Handling | ~ Handle carefully around the image | ✓ Margin gives a place to hold or position |
| Frame and mat | ~ Check the mat opening to avoid hiding image | Margin may sit within or be partly covered by a mat |
| Trim risk | ~ Bleed and crop matter at the edges | Keep margin and any marks clear of trim and frame |
A margin changes the visible photograph
On a 12-by-18-inch sheet, a one-inch margin on every side leaves an image area close to 10 by 16 inches. The exact dimensions depend on layout and crop.
Product labels vary. Confirm the finished sheet size, actual image dimensions, crop, and whether bleed is required. “Borderless” may describe a lab photo size or an image covering an entire product face.
Choose the feeling you want at the wall
Choose full bleed for immersion
Try it when edge-to-edge color supports the image: a misty landscape, field of wildflowers, close architectural detail, or bold abstract. Inspect the final-size crop so faces, text, rooflines, and other important details are not crowded by the trim.
Choose a border for breathing room
A visible margin can lend a print a more formal or gallery-like feel and keep dark tones distinct from a dark wall. It can also provide space for a signature, title, edition details, or careful handling. A border alone does not imply a signed or limited print.
Plan the print, mat, and frame together
A mat opening may cover a narrow strip around the photograph. That can be harmless in an open sky, but frustrating if it hides a hand, a branch tip, or a signature.
Inspect the edges
Look for faces, text, and details that need room from the trim.
Preview the crop
Judge it at actual print dimensions, not only on a monitor.
Measure the opening
Compare the mat and frame opening with the image area you want visible.
Mock it up on the wall
Use the overall sheet and image area to assess scale in the room.
A four-point order check
The label tells you less than the layout. Confirm what part of the sheet carries the image and what the frame will show.
Know What You’re Getting Before You Order
A borderless print carries the image to the paper’s edges, while a bordered print has unprinted space around the image. The paper can be the same overall size in both cases, but the bordered version has a smaller printed image area. This distinction sounds simple; product labels can make it less so.
For example, a lab may use “borderless” to mean the photograph fills a standard photo size, even if its printing process slightly enlarges and trims the image. A wall-art listing might use the same word for a canvas or panel whose entire face carries the image. Check the stated finished dimensions and the actual image dimensions, then look for crop information before placing an order.
A printed border belongs to the sheet. A mat is a separate framing element that sits around the print behind the frame. You can frame a borderless print with a mat, but a narrow mat opening may cover the photograph’s edges. If your landscape has a lone tree near the edge, measure the opening against the print before mounting it.
The label tells you less than the layout: check what part of the sheet carries the image and what part the frame will show.
Think of the border as part of the photograph’s presentation, like the space around a painting in a gallery. It doesn’t make the image more or less artistic by itself. Its job is to guide the eye and help the print work in its intended setting.
Products Worth Considering

Amazon Kindle Scribe (64GB) with Premium Pen, Metallic Jade

Amazon Kindle Scribe (32GB) with Premium Pen, Tungsten

Bose QuietComfort Headphones (2nd Gen), Wireless Over-Ear Noise-Cancelling Headphones, Hazelnut Taupe
As an affiliate, we earn on qualifying purchases.
Choose Full Bleed When You Want the Image to Fill the Room
Borderless vs Bordered Prints is a choice about visual emphasis: full bleed lets color and detail reach the surface edge, so the photograph can feel larger and more immersive. It often suits scenes where the edges help carry the composition, such as a field of wildflowers, a close architectural detail, or an abstract image with strong color.
Imagine a seascape with a band of pale sky across the top and dark rocks in the foreground. Extending the image to every edge can make the water feel like it continues beyond the wall. A white margin would give the photograph more separation and formality, but it would also change how that expanse meets the room. Neither choice is wrong; they make different promises to the viewer.
Full bleed can also make the image seem bigger on a sheet of a fixed size because no margin takes up space. If you print an image on a 12-by-18-inch sheet without borders, nearly all that area carries the photograph. With a one-inch margin on every side, the printed area is closer to 10 by 16 inches. The exact result depends on the layout and crop.
Before you select edge-to-edge printing, inspect the photograph’s boundaries. A person’s elbow, a roofline, or a thin tree trunk near the trim can feel cramped if the image runs right to the edge. When I prepare a portrait for full bleed, I look at each edge at actual print size; details that seem comfortably inside the frame on a monitor can feel crowded on paper.
- Try full bleed when the image should visually fill its surface.
- Check the edges for faces, text, and other details that need breathing room.
- Preview the crop at the final print dimensions, not only in the editing window.
Use a Border to Give the Photograph Room to Breathe
A border gives the image a visible margin of paper, creating a pause between the photograph and its surroundings. That space can make an image feel considered and composed, much like a quiet frame around a sentence on a page. It’s especially useful when you want the viewer to notice the print as a physical object, rather than read it as an unbroken image on the wall.
Consider a small black-and-white photograph of a person standing beneath a streetlamp. A generous white border can keep the dark tones from disappearing against a charcoal wall and give your eye a place to rest. The margin may lend the print a more gallery-like or traditional feel. It can also make a modest sheet look deliberately presented instead of simply filling a standard size.
A border has practical sides, too. It gives you a place to hold the sheet while you position it or prepare it for mounting, reducing the need to touch the image. An artist or photographer may also reserve part of the margin for a signature, title, or edition details. Leave those marks clear of the frame, mat, and any possible trim. A border alone does not mean the print is signed, limited, or more valuable.
Margins vary in width, and even margins can change the balance of an image. A half-inch border may offer just enough separation for a compact print, while a wider lower margin can make room for presentation details. If your picture has a strong shape close to one edge, a border can help it feel less crowded without changing the photograph itself.
A border can give your eye somewhere to rest. That breathing room is part of the presentation, not wasted paper.
Match the Print Edge to Your Frame and Mat
Plan the print, mat, and frame as one display, because each changes how much image you see and how the work sits on the wall. A printed border may sit inside the mat opening, outside it, or be partly hidden depending on the measurements. A borderless photograph can also go behind a mat, provided the opening shows the image area you want.
Say you have a 12-by-18-inch photograph and want it to sit inside a wider mat. If the frame opening is cut to show all 12 by 18 inches, you may need to allow for how the print is mounted and held in place. If the opening is smaller, it can cover a narrow strip of the picture around the edges. That may be harmless for a sky or blank wall; it can be frustrating if it hides a hand, a signature, or the end of a branch.
A border can make framing easier because there is unprinted paper to handle and position. But it does not remove the need to check the frame dimensions and mounting method. For a family photograph you plan to change seasonally, a visible paper margin can make it easier to lift and re-mount the sheet. For a permanent display, careful measurement matters more than the label on the print.
Many paper photographs are displayed behind glazing, often with a mat. Canvas wraps may carry the image around their sides instead, and metal or acrylic products have their own edge and mounting choices. These surfaces change the presentation; a white paper margin may not suit a wraparound image. Decide where the work will hang first, then match the print treatment to that display.
| Choice | What you see | Good fit when |
|---|---|---|
| Borderless | Image reaches the sheet or surface edge | You want an immersive, edge-to-edge presentation |
| Printed border | Unprinted paper surrounds the image | You want breathing room, handling space, or room for a mark |
| Mat | Separate window around the print inside the frame | You want visual separation and have checked the opening size |
Protect Important Details from Cropping and Trimming
Full-bleed printing can lose a sliver of the photograph if the image doesn’t account for the printer’s trim. Bleed means the image extends past the intended cut line, giving the printer extra image area to trim away. That extra space helps avoid a thin unprinted edge if the cut shifts slightly, but it also means details too close to the edge may disappear.
The amount of bleed a printer requires depends on its product and process, so follow its specifications rather than guessing. A horizon, ear, or small caption placed right on the trim line can be clipped. Before you send a file, check whether the service will crop it to fit and whether it will enlarge the image to fill the paper. Those small details can change the final composition.
Here’s a simple routine I use when preparing a photograph that must reach the edge:
- Confirm the final sheet size and the image area the printer promises to show.
- Check the crop preview for anything close to the edges, including text and faces.
- Follow the printer’s bleed guidance and keep essential details safely inside the trim area.
- Review the framing plan so a mat or frame doesn’t hide details you intended to keep.
A visible border can make the final edge less visually tense, but it still needs accurate layout and trim details. If a signature appears in the margin, confirm that the finished sheet leaves it uncovered. For an image with a tiny figure at the far edge of a wide scene, a border may give that figure more visual breathing room; if the image itself needs to reach the trim, a careful crop preview can help you decide whether full bleed is worth it.
Make a Clear Choice With One Wall Mockup
Choose the edge treatment by picturing the finished print in its actual space, then checking the image and frame details. The room affects how a border reads: a pale margin can almost disappear against a white wall, while the same paper may stand out against deep blue paint. An edge-to-edge image on a busy wall can feel bold; on a quiet wall, a broad margin can give it a calm, deliberate presence.
Cut a sheet of scrap paper to the print’s full dimensions and tape it to the wall where you expect to hang the photograph. Use a second piece to mark the image area inside it if you’re considering a border. Stand at the usual viewing distance, then move closer. A ten-inch-wide photograph can feel intimate from a chair and unexpectedly small above a sofa; the border changes the visible image area, so both outlines matter.
Think about the photograph’s subject while you look. A full-bleed forest canopy can make a narrow hallway feel wrapped in color. A small portrait with a white border may feel more like a collected object on a reading-room wall. This is an aesthetic choice that changes more than the edge: it affects how the image relates to nearby furniture, light, and the scale of the room.
Use this quick checklist before you order:
- Image: Do the edges need to reach the surface, or would a margin help?
- Room: Will the overall sheet size work where you plan to hang it?
- Frame: Will a mat opening cover any part of the image or border?
- Order details: Are sheet size, image size, crop, and bleed clearly stated?
If you’re unsure, compare two simple mockups before committing: one with the photograph filling the sheet and one with the intended margin. A few minutes with paper and masking tape can reveal whether you want a punch of color or a little space to breathe.
Frequently Asked Questions
Does borderless mean the print has no frame or mat?
No. Borderless describes the image treatment, not the display hardware. You can frame a borderless print or add a mat; check the mat opening so it doesn’t hide image details you want to show.
Does a border make the photograph look smaller?
On a sheet of the same size, a border leaves less room for the printed image. The margin also separates the photograph from the wall or frame, which can make the work feel more deliberate even when the image area is smaller.
Will a borderless print lose part of the image when it’s trimmed?
It can if the file doesn’t account for the printer’s bleed and trim requirements. Check the service’s crop preview and keep important details away from the edges, especially text, faces, and small objects.
Can I put a mat around a borderless print?
Yes. A mat sits around the print inside the frame, and it can give a borderless photograph visual separation. Measure the mat opening and mounting area so the mat doesn’t cover more of the image than you intend.
Should I choose a border if I want to sign my print?
A margin can provide a convenient place for a signature, but follow the photographer’s or publisher’s instructions about placement. Make sure the signature stays clear of the frame, mat, and trim; a border by itself does not mean a print is limited edition.
Which print style works best for photography?
Neither style works best for every photograph. Use full bleed when you want an immersive edge-to-edge image; use a border when you want room around the picture or a more object-like presentation. The composition and display plan should guide you.
Conclusion
Pick the print edge that supports the photograph you made. Let a broad landscape spill to the edges when that helps you feel inside the scene; give a small portrait a border when the extra paper helps it settle into its frame.
Before ordering, verify the image size, crop, bleed, and mat opening. Then imagine the finished photograph on your wall: a field of color at the edge, or a quiet margin where your eye can rest.