
TL;DR

Get audio and creator gear delivered free with Prime
- Fast, free delivery on millions of items
- Prime Video, Amazon Music and more included
- Member-only deals all year
Place the center of a print or complete grouping about 57–60 inches above the floor, then adjust for seated viewers and nearby furniture. Leave 6–10 inches above a sofa or console, use roughly 2–3 inches between most gallery-wall frames, and choose hardware for both the total frame weight and the wall material.
A framed print can be perfectly level and still feel strangely wrong. It may hover above the sofa like a lonely postage stamp, crowd a lamp, or sit so high that you tilt your chin to see the photographer’s careful details. A few inches change the whole room, and your eyes usually spot the mistake before your tape measure does.
After years of delivering photographs and helping clients place finished prints, I have learned that hanging art well is less about rigid rules than visual relationships. The practical approach is to position artwork relative to your eyes, the furniture beneath it, and the wall around it—not simply the ceiling. Measurements give you a reliable starting point, while a final look from the doorway tells you whether the arrangement feels settled.
This guide gives you working numbers for height, spacing, scale, and hardware, along with a method that prevents a wall from becoming a patchwork of abandoned nail holes. You will learn how to treat several prints as one composition, account for hanging wire, and match fasteners to drywall, plaster, masonry, or tile. You will also protect the print itself from sunlight, moisture, scratches, and sudden falls.
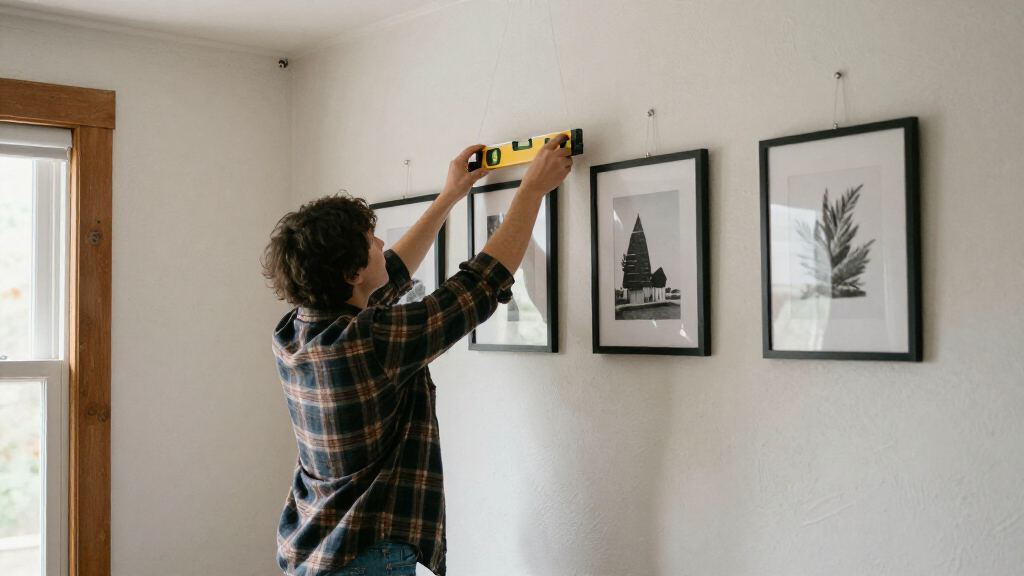
Set the visual center of a single print or complete grouping about 57–60 inches above the finished floor, then adjust for seated viewers and nearby furniture.
Leave roughly 6–10 inches above a sofa, bed, or console, and aim for an artwork width equal to about two-thirds to three-quarters of the furniture width.
Start gallery-wall spacing at 2–3 inches, tightening the gaps for small prints and widening them for large, visually heavy frames.
Calculate the fastener position from the frame’s actual tensioned hanger point; the desired artwork center and the wall-hook height are rarely the same.
Choose every hook, anchor, wire, ring, and screw for both the complete framed weight and the specific wall material, using two attachment points when practical.
Hanging Prints: Heights, Spacing, and Hardware
A framed print can be perfectly level and still feel wrong. Start with reliable measurements, then judge the relationship between the viewer, the furniture, and the complete arrangement—not the ceiling alone.
Anchor the art to human scale.
Measurements create consistency, but context decides the final position. View the work from the doorway, the sofa, and the path people normally take through the room.
Begin at 57–60 inches
Place the center of the visible print or complete grouping near average standing eye level. In seated rooms, children’s spaces, or accessible settings, adjust for the primary viewer.
Build one visual unit
Leave 6–10 inches above a sofa, bed, or console. Center the display on the furniture grouping and aim for a width equal to roughly two-thirds to three-quarters of it.
Resist the ceiling
High ceilings do not require high artwork. Along stairs, follow the incline while maintaining a comfortable sightline. Human scale remains the stronger reference.
The hook is not the artwork’s center.
Measure the frame and pull its wire taut before marking the wall. The true fastener position depends on where the hanging system reaches under tension.
Desired center + half the frame height − distance from frame top to the tensioned hanger = wall fastener height.
Use gaps to turn many frames into one shape.
Start with consistent measurements, then correct optically. Heavy dark frames and broad pale mats can make mathematically equal gaps look uneven.
| Display type | Starting gap | Visual effect |
|---|---|---|
| Small prints | 1.5–2″ | Pulls separate frames into a compact composition |
| Mixed gallery wall | 2–3″ | Creates deliberate rhythm without crowding |
| Diptych or triptych | 2–4″ | Keeps related panels connected but distinct |
| Large frames | 3–6″ | Gives broad mats and heavy frames visual air |
Match the entire load to the wall.
Count the frame, glazing, backing, artwork, wire, and fittings. Use hardware rated above the complete framed weight, and use two attachment points when practical.
Drywall
Use picture hooks for light frames, suitable anchors for medium loads, and studs or properly rated toggle anchors for heavy pieces.
Plaster
Drill an appropriate pilot hole and use compatible anchors. Avoid careless hammering near cracked, weak, or damaged plaster.
Masonry
Use a masonry bit with rated screws or plugs. Mortar may be easier to drill, but its strength varies with age and condition.
Tile
Use tile-rated bits and hardware. Avoid vulnerable edges, confirm the substrate, and check for hidden pipes or wiring first.
| Hanging system | Best use | Level control | Heavy art | Key caution |
|---|---|---|---|---|
| Sawtooth hanger | Small, lightweight frames | ~ | ✗ | Limited adjustment and load capacity |
| Wire with two hooks | Light-to-medium framed prints | ✓ | ~ | Measure the wire while pulled taut |
| D-rings | Stable two-point installation | ✓ | ✓ | Requires accurate paired marks |
| French cleat | Wide or heavy frames | ✓ | ✓ | Secure the cleat to suitable structure |
Five steps prevent abandoned holes.
Plan the complete composition before drilling. A floor layout and paper templates expose scale, spacing, and hanger errors while every decision is still reversible.
Arrange
Build the composition on the floor, beginning with the largest or most important piece.
Photograph
Save the preferred arrangement before moving frames or making small refinements.
Trace
Create paper templates and mark each frame’s actual tensioned hanger position.
Tape
Place templates on the wall and outline the arrangement with painter’s tape.
Verify
Check from the doorway and seating area, then drill only after the grouping feels settled.
Use the 57–60-Inch Starting Point Without Making Your Room Feel Formulaic
Hanging Prints: Heights, Spacing, and Hardware starts with one dependable measurement: place the center of the artwork about 57–60 inches above the finished floor. That range approximates standing eye level and creates a calm visual line across a room, but furniture and the people using the space can justify moving it.
According to PhotoMocha’s placement guidance [1], you measure to the center of the visible artwork or frame, not its upper edge. For a frame that is 24 inches tall, a center height of 58 inches places the top at 70 inches before you account for the hanger. If the hanging wire reaches 4 inches below the top when pulled taut, your wall hook belongs at 66 inches.
That calculation solves a mistake I see often during print deliveries. Someone marks 58 inches for the nail, hangs a tall portrait from loose wire, and discovers that the image center sits closer to 50 inches. The hook is not the artwork’s center; it is only the point where the mounting system meets the wall.
Measure the art first: desired center height plus half the frame height, minus the distance from the frame top to the tensioned hanger, equals the fastener height.
Context can override the starting number. In a reading room where you usually sit low in an armchair, dropping a print by 2–4 inches can make it feel connected to you rather than pinned above you. In a child’s room or an accessible space, use the primary viewer’s comfortable sightline instead of an assumed adult height.
High ceilings tempt people to lift artwork toward the empty air. Resist that pull. A photograph beside a nine-foot bookcase still needs to speak to the person looking at it; hanging it higher merely because the ceiling rises is like raising a dinner plate because the chandelier hangs high. Human scale comes first.
As an affiliate, we earn on qualifying purchases.
Make Artwork Above Furniture Feel Connected, Not Adrift
Hanging Prints: Heights, Spacing, and Hardware works above furniture when the frame sits about 6–10 inches above the furniture and the display spans roughly two-thirds to three-quarters of its width. Center the art on the sofa, bed, or console grouping rather than automatically centering it on the wall.
Imagine an 84-inch sofa on a 14-foot wall. A display between about 56 and 63 inches wide will usually hold its own above that sofa, while a single 20-inch frame can look like a button on a winter coat. You could use one panoramic print, a 60-inch-wide triptych, or a mixed group with a similar outer width.
The gap below the artwork controls whether the two elements feel related. At 6–10 inches, the frame and sofa read as a shared composition; at 20 inches, the print often appears to float. I once helped reposition a family portrait that had been centered between a console and the ceiling, and lowering it by seven inches made the console, lamp, and portrait snap together visually.
Furniture also changes the eye-level guideline. If keeping the arrangement at 58 inches would put its lower edge only two inches above a tall headboard, raise it enough to create breathing room. If a low console leaves a broad empty band, you can lower the grouping slightly, especially when people mainly view it while seated.
- Above a sofa: center the grouping on the seating area, including a chaise only when it reads as part of the main visual mass.
- Above a bed: leave room for pillows and movement, and use secure hardware that cannot shake loose when the wall receives a bump.
- Above a console: account for lamps, flowers, and objects so they frame the print rather than cover it.
- Above off-center furniture: follow the furniture grouping unless the surrounding architecture creates a stronger boundary.
Scale behaves like volume in music: a tiny frame whispers across a wide sofa, while an oversized print can shout down everything nearby. Your aim is not mathematical purity. You want the artwork and furniture to hold a comfortable conversation.
As an affiliate, we earn on qualifying purchases.
Use These Spacing Ranges to Make Several Prints Read as One
Hanging Prints: Heights, Spacing, and Hardware uses 2–3 inches between frames as a practical gallery-wall default. Small prints often look better at 1.5–2 inches, while large frames may need 3–6 inches. Narrow gaps unite the pictures; wider gaps give each image a more independent voice.
| Display type | Useful starting gap | What the spacing does |
|---|---|---|
| Small prints | 1.5–2 inches | Pulls separate frames into one compact composition |
| Mixed gallery wall | 2–3 inches | Creates a deliberate rhythm without crowding the frames |
| Diptych or triptych | 2–4 inches | Keeps related panels connected while preserving separation |
| Large frames | 3–6 inches | Gives broad mats and heavy frames enough visual air |
Treat the complete arrangement as one large shape. If your gallery wall measures 60 inches wide by 40 inches tall, center that rectangle at your chosen eye level rather than placing every individual frame at 58 inches. This is how a loose collection gains the visual backbone of a single large print.
Exact gaps do not always look equal. A thick black frame beside a thin maple frame carries more visual weight, and a wide white mat adds a pale buffer around its image. In one hallway grouping, I increased a measured two-inch gap to two and a half inches beside the darkest frame; from the doorway, the spacing finally looked even.
This adjustment is called optical spacing: you judge the visible balance, not only the ruler reading. It works much like adjusting letter spacing in a word. Two letters can be mathematically equidistant yet still look cramped because their shapes lean toward each other.
For a diptych or triptych, let the image content guide the final gap. A horizon running through three panels usually wants a tight, consistent break, while three separate portraits can tolerate more room. Start within the recommended range, step back to the normal viewing spot, and make changes in half-inch increments.
As an affiliate, we earn on qualifying purchases.
A Five-Step Dry Run Saves Your Wall From Guesswork
A successful gallery layout begins before the first hole. Build the arrangement on the floor, copy each frame with a paper template, and test the complete outline on the wall from several viewing positions. This simple rehearsal reveals scale problems, crooked visual weight, and blocked sightlines while every change remains easy.
- Arrange the frames on the floor. Begin with the largest or most meaningful print, then build outward. Photograph the arrangement so you have a reference when the pieces leave the floor.
- Trace every frame onto paper. Label each template and mark the exact D-ring, wire, cleat, or sawtooth position. Do not assume two frames from the same line have identical hanger placement.
- Tape the templates to the wall. Use painter’s tape and begin with the outer boundary or central anchor. Check that the full composition relates to nearby furniture.
- View it from where you live. Sit on the sofa, enter through the doorway, and walk down the hall. A layout that looks balanced from two feet away may lean badly from across the room.
- Mark and verify the fasteners. Check the level, spacing, hidden services, and wall material before drilling. Measure once more after the templates look right.
I use my phone camera during this stage because a photograph flattens the scene and exposes imbalance quickly. In a nine-frame grid, one template that sits a quarter inch low becomes as obvious as a crooked tooth. For an eclectic wall, the camera also shows when three dark frames have accidentally formed a heavy clump on one side.
A symmetrical grid rewards precise reference lines. Mark one level horizontal line, calculate the full width and height, and place every fastener from those shared coordinates. With mixed frames, consistent gaps and balanced visual weight matter more than forcing every edge into alignment.
Painter’s tape can also outline a single oversized print before you order or frame it. A 48-by-32-inch rectangle above your sofa feels very different on the wall than those numbers sound at a desk. Live with the outline overnight; morning light and an ordinary walk through the room often reveal more than ten minutes of close inspection.
As an affiliate, we earn on qualifying purchases.
Match the Hardware to the Wall and the Weakest Link
Hanging Prints: Heights, Spacing, and Hardware becomes a safety question when you choose fasteners. Base that choice on the combined weight of frame, glazing, backing, and print, plus the wall construction. The system can carry only what its weakest ring, wire, hook, anchor, screw, or wall connection can hold.
| Wall or system | Best use | Watch for |
|---|---|---|
| Drywall picture hook | Small, light frames | Damaged board, poor nail angle, or excess weight |
| Drywall anchor or toggle | Medium or heavier frames when no stud aligns | Correct anchor type, board thickness, and installation |
| Stud fastening | Heavy or valuable work | Accurate stud location and suitable screw length |
| Plaster anchor | Traditional plaster or plasterboard | Cracking, loose keys, hidden lath, and weak areas |
| Masonry screw or plug | Brick, concrete, or sound mortar | Substrate condition and the correct masonry bit |
| Tile-rated fixing | Tiled walls | Cracking near edges and hidden pipes or wiring |
According to manufacturer installation guidance [2], a printed weight rating assumes the fastener is correctly installed in a suitable surface. A hook labeled for a heavy load does not make crumbling plaster strong, and a sturdy wire cannot rescue a tiny screw eye pulling out of soft frame wood. Every component shares the load.
For large or wide work, I favor a properly rated French cleat attached to adequate structural support. The interlocking rails spread force across a broader area and help the frame remain level. A wide landscape print hanging from one central wire behaves like a canoe balanced on a fence post; a cleat gives it a stable dock.
D-rings hung directly from two wall hooks provide a strong, steady setup for many medium frames. Picture wire offers more flexibility, but it needs matching ratings at the wire, rings, and wall hooks. Sawtooth hangers belong on small, light frames, not valuable glazed work.
Before drilling: use a suitable detector to check for studs, electrical wiring, and plumbing. Tile, masonry, damaged plaster, very heavy frames, and irreplaceable prints can justify professional installation.
Adhesive strips can work on clean, smooth, sound surfaces within their stated limits. Humidity, heat, textured walls, wallpaper, weak paint, and incorrect removal all reduce reliability. In a steamy bathroom or above a child’s bed, I would choose a mechanically secured system suited to the wall rather than ask adhesive to carry a glazed frame.
Keep Frames Level While Protecting the Print Behind the Glass
Use two attachment points, firm hanger connections, and small rubber bumpers at the lower corners to keep frames straight and protect the wall. Then protect the photograph from direct sun, persistent moisture, heat, and sharp temperature swings. A secure frame can still hold a badly faded or rippled print.
Two hooks reduce side-to-side rotation and distribute the load more evenly than a single central hook. They are especially useful in busy hallways where footsteps make walls tremble or beside doors that close with a low thud. Rubber bumpers add grip, stop the lower frame edge from scuffing paint, and leave a slim air gap behind the backing.
If a frame keeps tilting, inspect the whole chain. Uneven D-rings, loose wire, a slightly off-center sawtooth hanger, or one hook sitting lower than the other can all cause the problem. I once corrected a stubborn panoramic frame by shortening one side of the wire by less than a quarter inch; the frame settled immediately and stayed level.
Light can cause slower, quieter damage. Direct afternoon sun may bleach rich reds and delicate skin tones until they look washed with chalk. Move valuable work away from the beam, use UV-filtering glazing where exposure remains a concern, and choose acid-free mats and archival backing for prints you want to preserve.
Glass resists scratches and offers crisp clarity, while acrylic glazing weighs less and resists impact. Acrylic makes practical sense for a large frame, a child’s room, or a busy stair landing, though its surface scratches more easily and can attract dust through static. Handle it with a clean microfiber cloth rather than a rough paper towel.
- Every few months: check heavy frames for loose fasteners, stretched wire, opening frame joints, or wall damage.
- After seasonal humidity changes: look for rippling paper, condensation, mildew, or a backing board that has begun to bow.
- In active homes: use security or anti-tip hardware around children, pets, public traffic, or earthquake risk.
- For rotating displays: use picture rails, interchangeable frames, or reusable templates to reduce repeated holes and handling.
Preservation and presentation belong together. The best installation lets you enjoy the photograph without noticing the mechanics, much like a quiet tripod supports a long exposure while disappearing from the finished image. Solid hardware holds the frame; thoughtful placement protects what you framed.
Frequently Asked Questions
How high should I hang a picture?
Place the center of the picture about 57–60 inches above the finished floor. Adjust that height for seated viewing, children, accessible spaces, stairways, or furniture that creates a stronger visual reference.
How do I calculate where the wall hook should go?
Add half the frame height to your chosen center height, then subtract the distance from the frame top to the hanger under normal tension. For a 24-inch frame centered at 58 inches with a hanger 4 inches below the top, place the fastener at 66 inches.
How far apart should gallery-wall frames be?
Use 2–3 inches as a reliable starting gap. Small frames can sit 1.5–2 inches apart, while large frames often need 3–6 inches so their wide mats and heavier edges do not feel crowded.
Should artwork be centered on the wall or the furniture?
When a print hangs above a sofa, bed, or console, center it on the furniture grouping in most rooms. On an empty wall, center it within the visible wall area, accounting for doors, corners, shelving, and the main viewing angle.
Can I hang a heavy frame without finding a stud?
A suitably rated anchor may carry a heavy frame when installed correctly in sound drywall, but stud fastening or a French cleat often provides a stronger choice. Use professional help for very heavy, unusually wide, valuable, or irreplaceable pieces.
Are adhesive strips safe for framed prints?
Adhesive strips can support compatible frames on clean, smooth, sound surfaces within the maker’s weight limits. They become less dependable on textured walls, wallpaper, weak or fresh paint, and in rooms with persistent heat or humidity.
How should I hang prints along a staircase?
Follow the incline of the stairs and keep the arrangement’s visual center near eye level as you move along the route. Paper templates help you test the rising rhythm without drilling a trail of correction holes.
What should I do when a frame keeps tilting?
Switch to two wall hooks, check that the D-rings sit at equal heights, and tighten or recenter the wire. Add small rubber bumpers to the lower corners so the frame grips the wall instead of sliding after every footstep or closing door.
Conclusion
Your best starting move is simple: tape the full arrangement on the wall, set its center near 57–60 inches, and view it from the places where you actually sit and walk. Let furniture and human eye level guide the final height, then use hardware matched to the complete weight and the wall beneath the paint.
A well-hung print should feel settled, safe, and almost inevitable. The frame stays straight, the gaps breathe evenly, and the photograph meets your eyes without asking you to crane your neck. Measure the hidden mechanics carefully, then step back and trust what the room tells you.
Fall Picks
fall essentials
As an affiliate, we earn on qualifying purchases.