
TL;DR
Wind, vibration, and mirror slap soften photographs by moving the camera or lens while the shutter is open, with long lenses, high magnification, and certain slow shutter speeds showing the damage most clearly. Use a stable tripod stance, remove anything that catches the wind, separate your hands from the exposure, and test stabilization, electronic shutter, or mirror lock-up rather than trusting one setting everywhere.
A tripod can stand as still as a fence post while your photograph comes home soft. I have watched a heavy camera settle on solid carbon-fiber legs, pressed the shutter with care, and still found that fine grass looked smeared and distant branches lacked bite. The culprit was movement too small for my eyes to catch but large enough for a high-resolution sensor to record.
This guide helps you separate wind-driven movement, ground vibration, DSLR mirror slap, shutter shock, and subject motion. Those problems can look alike at first glance, yet they need different fixes. A heavier tripod will not freeze swaying leaves, and a remote release will not calm a lens hood that is acting like a sail.
You will learn how to read the blur, set up your support, choose a safer shutter speed, and decide when stabilization or an electronic shutter helps. I will also show you the field checks I use before a landscape, macro, or long-lens exposure. The goal is simple: make sharpness repeatable, not a lucky result discovered later on a large monitor.
Diagnose the blur before changing equipment: uniform directional softness suggests camera movement, while sharp rocks beside blurred leaves point to subject mo…
Keep the tripod low and compact, remove flapping straps, and never let a suspended bag swing beneath the legs.
Use mirror lock-up, live view, electronic first curtain, or an exposure delay when a DSLR’s internal movement overlaps the exposure.
Test tripod-mounted stabilization both on and off because camera and lens systems respond differently to a motionless support.
Make several comparison frames and change one variable at a time, especially when wind, passing traffic, or flexible flooring changes from second to second.
Wind, Vibration, and Mirror Slap
A camera may look perfectly still while a high-resolution sensor records motion too small for your eyes to see. Learn to identify the force, let vibration decay, and choose the fix that matches the blur.
Wind load
Broad hoods, straps, long lenses, and raised columns become levers and sails.
Support vibration
Footfalls, traffic, touch, flexible floors, and loose joints travel into the exposure.
Internal shock
DSLR mirror motion and shutter movement can jolt an otherwise motionless setup.
Diagnose before changing equipment
Camera movement, subject motion, missed focus, and atmospheric shimmer can all look “soft.” The distribution and direction of blur tell you which remedy is worth trying.
| What you see | Likely cause | Camera still? | Useful response |
|---|---|---|---|
| Everything smears in one direction | Camera or tripod movement | ✗ No | Shorten exposure; improve support and wind shielding. |
| Leaves blur while rocks stay crisp | Subject motion | ✓ Yes | Use a faster shutter speed or make motion intentional. |
| A faint doubled edge appears | Mirror, shutter, or oscillation | ~ Brief jolt | Use exposure delay, mirror lock-up, or electronic shutter. |
| One distance is sharp | Focus placement or depth | ✓ Yes | Refocus or adjust aperture and focus distance. |
| Distant detail looks watery | Atmospheric shimmer | ✓ Yes | Shoot earlier, move closer, or wait for calmer air. |

Astromania Anti-Vibration Suppression Pads 3 Pic for Telescope Mount&Tripod
These pads are sold in sets of 3 "one for each tripod leg" and fits under most tripod…
As an affiliate, we earn on qualifying purchases.
As an affiliate, we earn on qualifying purchases.
Stop wind turning the camera into a sail
Wind rarely produces one clean shove. It pulses and releases, leaving a long lens nodding like a fishing rod. Reduce exposed area and wait for the entire system to settle.
Go low and compact
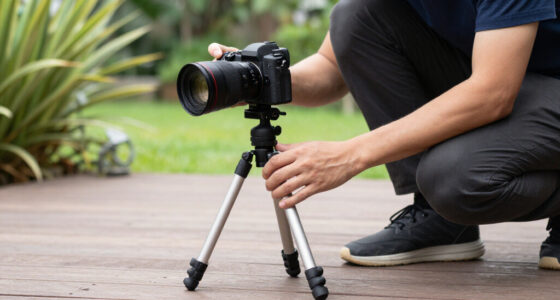
Retract the center column, spread the legs, extend thick sections first, and point a leg toward the wind when it improves resistance.
Remove every sail
Secure the strap and cables. Remove a deep hood when flare is not a risk. Use your body, a wall, or a vehicle door as a windbreak.
Shoot the lull
Watch the scene, expose between gusts, and make several frames. A faster shutter may matter more than added tripod weight when subjects move.
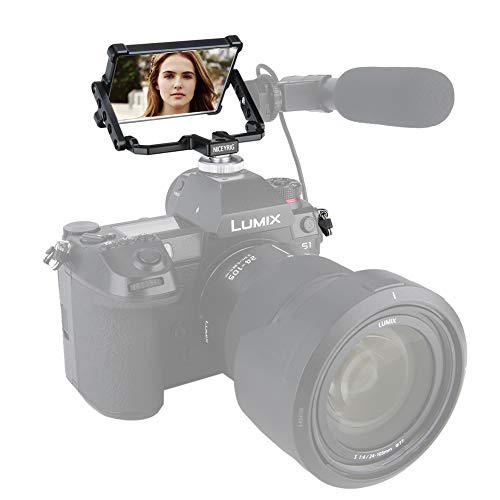
NICEYRIG Vlog Selfie Mirror Camera/Phone TikTok Twitch YouTube Live Cold Shoe Mount 360° Flip Screen Mirror Applicable for iPhone 14/13/12/11/XS SE, Fujifilm, Panasonic, Sony – 377
A PRATICAL SOLUTION FOR VLOG VLOGGING, LIVESTREAM, RECORD YOURSELF, SELFIE SHOTS WITH YOUR PHONE REAR-FACING CAMERA, OR A…
As an affiliate, we earn on qualifying purchases.
As an affiliate, we earn on qualifying purchases.
Let vibration die before light is recorded
Treat the tripod like a tuning fork, not a concrete pillar. Touch, footfalls, loose hardware, and flexible ground start oscillations; compact geometry and time help them decay.
Find firm ground
Avoid springy boardwalks, hollow floors, loose gravel, and shifting soil.
Shorten the structure
Keep the camera near the shoulder and the center column down.
Balance the load
Use a lens collar so a heavy telephoto sits over the head.
Lock every joint
Check plate, collar, clamp, adapters, head, and leg locks.
Release and wait
Use a remote, timer, or delay; keep hands away during exposure.
Weight helps only when it stays still.
A suspended camera bag can become a pendulum. Rest it firmly on the ground and use only gentle downward tension if damping is needed.
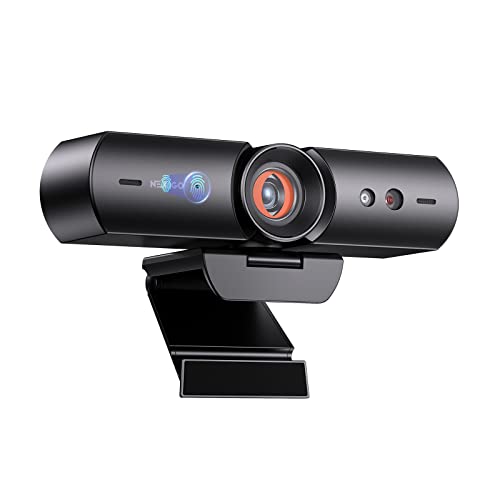
NexiGo HelloCam, 1080P Webcam with Windows Hello, True Privacy, Automatic Electronic Shutter, Computer Camera, Microphone, Facial Enhancement, HD USB Web Cam
【Window Hello Facial Recognition】The webcam is compatible with Windows Hello for Windows 10/11 and enables you to conveniently…
As an affiliate, we earn on qualifying purchases.
As an affiliate, we earn on qualifying purchases.
Move the jolt outside the exposure
Mirror slap is specific to DSLRs, but shutter shock can affect other cameras. The vulnerable range depends on the camera, lens, support, and magnification—so test rather than trust one universal setting.
DSLR test sequence
Keep framing, focus, aperture, and support unchanged. Compare identical subjects at high magnification.
- Standard shutter release
- Two-second timer or exposure delay
- Mirror lock-up or live view
- Electronic first curtain, if available
Stabilization test
Some lens and in-body systems detect tripod use; others may hunt or behave differently on motionless support.
- Make several frames with stabilization on
- Repeat with stabilization off
- Inspect fine stationary edges at equal scale
- Save the winning setup by lens and shutter range
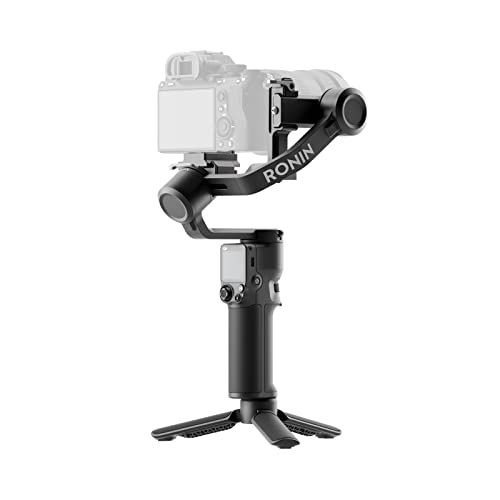
DJI RS 3 Mini, Camera Gimbal Stabilizer, Canon/Sony/Nikon/Fujifilm
795g (1.75lbs) Lightweight and Portable – DJI RS 3 Mini is an ultra-compact gimbal stabilizer for camera convenient…
As an affiliate, we earn on qualifying purchases.
As an affiliate, we earn on qualifying purchases.
From force to reliable fix
Sharpness becomes repeatable when you trace the result backward: inspect the evidence, isolate the source, apply one targeted correction, and verify it with comparison frames.
Do not ask whether the tripod is sturdy. Ask what is still moving.
- Uniform directional softness suggests camera movement; localized blur suggests subject motion.
- Keep the tripod low, compact, fully locked, and planted on firm ground.
- Remove flapping straps and prevent suspended weight from swinging.
- Use delay, mirror lock-up, live view, or electronic shutter when internal jolts overlap exposure.
- Test tripod-mounted stabilization both on and off.
- Make several frames and change only one variable at a time.
Find the Movement Before You Blame the Lens
Wind, Vibration, and Mirror Slap: The Enemies of Sharpness describes three sources of unintended camera movement during an exposure. Wind pushes the equipment, vibration travels through the support, and a DSLR mirror jolts the camera from inside. Identifying which force caused the blur points you toward the right field fix instead of random setting changes.
I define camera-induced blur as softness created because the camera or lens changes direction while light is being recorded. It behaves like handwriting on a moving bus: your pen still works, but the page shifts beneath it. The impact on image detail grows more obvious with long focal lengths, close focusing, dense sensors, and large prints.
Start by inspecting the shape of the softness. Camera movement often gives stationary details a repeated edge or a short directional smear. Subject movement affects only the moving object, while missed focus leaves one distance sharp and another soft. Atmospheric shimmer produces a restless, watery loss of detail across distant subjects, even when the camera stays still.
| What you see | Likely cause | Useful response |
|---|---|---|
| Everything smears in one direction | Camera movement or tripod vibration | Shorten the exposure and improve support |
| Leaves blur but rocks remain crisp | Subject movement | Use a faster shutter speed or accept motion |
| A faint doubled edge appears | Mirror, shutter, or support oscillation | Use a delay, electronic shutter, or mirror lock-up |
| One distance is sharp | Focus placement or depth of field | Refocus or adjust aperture |
| Distant detail looks watery | Heat shimmer | Shoot earlier, move closer, or wait |
On one coastal shoot, the lighthouse remained soft in every frame while nearby rocks looked clean. The tripod was steady, but the 400mm view magnified warm-air shimmer over the water. Swapping heads and tightening clamps changed nothing; returning just after sunrise solved it. That experience saved me from treating every soft photograph as a support failure.
Stop Wind Turning Your Camera Into a Sail
Wind, Vibration, and Mirror Slap: The Enemies of Sharpness becomes a practical wind problem when broad surfaces catch moving air and push the camera away from its resting position. A long lens, deep hood, open camera strap, and raised center column all give the breeze more leverage. Your best defense is a low, compact setup with less exposed area.
Wind rarely delivers one clean shove. It pulses, releases, and returns, making the lens nod after each gust like a fishing rod settling after a cast. According to PhotoMocha’s field guidance, large lenses show wind effects more readily because their size and focal length both magnify movement [1]. A tiny shake that disappears at 24mm can ruin feather detail at 600mm.
- Remove the strap or wrap it tightly around the tripod rather than letting it slap the legs.
- Retract the center column and spread the legs wide, with the thickest sections extended first.
- Turn one tripod leg toward the wind when that stance gives your setup better resistance.
- Remove a large lens hood if flare is not a risk and the hood is catching strong crosswind.
- Use your body, a wall, or an open vehicle door as a windbreak without touching the camera during exposure.
- Shoot during the quiet pause between gusts and make several frames.
A hanging camera bag sounds helpful, but a swinging bag becomes a pendulum. On a mountain ridge, I once clipped a loaded pack beneath the tripod and watched it tug the legs with every gust. Resting the bag firmly on the ground while keeping light downward tension gave me useful damping without the swinging mass.
Weight only helps when it stays still. If a bag, strap, cable, or jacket can flap or swing, it can feed movement back into the tripod.
Wind can also move the subject, so check both foreground and background. During a woodland exposure, the tree trunks may remain razor sharp while fern tips paint soft green arcs across the frame. A faster shutter speed such as 1/250 second may matter more than another kilogram of support when the scene itself refuses to stay put.
Build a Tripod Setup That Lets Vibration Die Out
A stable tripod setup reduces vibration by shortening the path through which movement can flex, bounce, and return to the camera. Keep the camera close to the tripod’s shoulder, use the thick leg sections first, lock every joint, and place each foot on firm ground. Then give the system time to settle before opening the shutter.
Think of the tripod as a tuning fork rather than a concrete pillar. Touching the shutter, adjusting a ball head, or bumping a leg starts a small vibration that fades over time. A longer, thinner, or loosely locked structure rings for longer, while a compact stance damps the motion more quickly.
- Choose firm footing. Avoid springy boardwalks, loose gravel, hollow floors, and soil that shifts under pressure.
- Set the legs before composing. Extend thick sections first and keep the center column down whenever the camera position allows it.
- Balance the load. Use a lens collar for a heavy telephoto so the camera does not hang far behind the head.
- Tighten every connection. Check the plate, collar foot, head clamp, leg locks, and any adapter between them.
- Separate touch from exposure. Use a remote release, self-timer, or shutter delay, then keep your hands away while the photograph is made.
The surface beneath you can defeat excellent equipment. I have photographed inside an old wooden church where footsteps sent a soft tremor through the floorboards. A 10-second timer did nothing when another visitor walked past during the exposure, so I waited for an empty aisle and made the frame between bursts of foot traffic.
Road bridges, balconies, subway platforms, and stadium floors create the same trap. Watch the live-view image at high magnification; vibration often makes a bright edge quiver even when the tripod looks motionless. If the image keeps dancing, move to solid ground, shorten the exposure, or time the shutter between passing vehicles.
Do not press down on the camera as a universal cure. Gentle contact can steady some long lenses in gusty conditions, but your muscles also pulse and drift. I test one untouched frame and one carefully braced frame, then compare them at 100% magnification before trusting either technique.
Keep DSLR Mirror Slap Out of the Exposure
Wind, Vibration, and Mirror Slap: The Enemies of Sharpness matters most inside a DSLR when the mirror flips upward just before the shutter opens. That mechanical movement sends a brief jolt through the body and support. Use mirror lock-up, live view, or an exposure delay so the vibration can fade before recording begins.
Mirror slap is not ordinary hand shake. It is a short internal kick, rather like someone tapping a bell mounted inside the camera. According to PhotoMocha’s technical overview, the resulting vibration can last several milliseconds, long enough to soften high-magnification photographs at vulnerable shutter speeds [2]. Macro work and long telephoto views reveal it readily.
The awkward range often sits between very fast and very long exposures, though the exact range depends on the camera, lens, tripod, and head. At 1/1000 second, the exposure may end before much movement appears. During a 30-second exposure, a tiny initial tremor occupies only a small fraction of the total recording time, though bright pinpoints can still reveal it.
On many DSLRs, mirror lock-up requires two shutter commands: the first raises the mirror, and the second starts the exposure. Wait a second or two between them. Some cameras offer a built-in exposure-delay mode that raises the mirror and opens the shutter after a chosen pause, which is handy when you do not want to carry a cable release.
I encountered the problem while photographing frost crystals at near life-size magnification. Frames made at 1/8 second looked slightly doubled despite a locked tripod and still air. Live view kept the mirror raised before the exposure, and the fine white crystal edges snapped back into place without changing the lens, aperture, or focus.
Mirrorless cameras remove mirror slap because they have no reflex mirror, but they do not make vibration disappear. A mechanical shutter can still start an oscillation, the photographer can still touch the body, and wind can still push the lens. Treat mirrorless design as one removed disturbance, not a universal sharpness guarantee.
Choose Shutter and Stabilization Settings That Work Together
Sharp tripod technique depends on matching shutter mode, shutter speed, and stabilization to the camera and support beneath it. Use a faster speed when wind or subject motion dominates, a delayed or electronic first curtain when internal vibration dominates, and test image stabilization on versus off. No single combination wins in every setup.
Stabilization acts like a tiny helmsman correcting the camera’s drift. Lens-based systems move optical groups, while in-body image stabilization moves the sensor. Both can compensate for small motion in real time, but they cannot freeze a branch whipping through the frame or repair a tripod leg bouncing on a wooden deck.
Older stabilization systems sometimes hunt when a camera sits rigidly on a tripod because they try to correct motion that is not present. Many newer cameras and lenses detect tripod use or offer a dedicated mode. Check your equipment manual, then run a simple field test: make three frames with stabilization on and three off while keeping focus, aperture, and shutter speed identical.
Electronic first-curtain shutter can reduce the movement created when a mechanical first curtain starts the exposure. A fully electronic shutter removes mechanical shutter movement, but fast action or flickering artificial light may produce rolling-shutter distortion or banding. Under LED lighting, inspect the frame for dark stripes before treating silent mode as the automatic choice.
I use exposure choice as an active sharpness tool. During a windy dusk photograph of reeds, the meter suggested 1/6 second at base ISO. Raising the ISO enough to reach 1/125 second added a little noise, yet the upright reeds gained far more usable detail; clean blur is still blur.
Very long lenses need special care because every small angular movement grows across the frame. A lens collar brings the load closer to balance, while a gimbal head allows controlled movement for wildlife. After tracking a bird, pause and let the support settle before firing a static portrait, or use a burst and inspect the middle frames after the first shutter movement has passed.
Run This Sharpness Check Before the Light Disappears
A reliable sharpness check separates focus error, camera vibration, and subject movement while you still have time to reshoot. Magnify a high-contrast detail, compare several frames, and change only one variable at a time. This quick routine turns a vague feeling of softness into a specific diagnosis you can act on.
Begin with something that should be stationary, such as a rock edge, building sign, or catchlight in an animal’s eye. If every fixed detail smears in the same direction, suspect camera movement. If the fixed detail stays crisp while grass, water, feathers, or clothing blurs, your support is probably doing its job and the subject needs a faster shutter.
- Check that the focus point landed where intended, especially with shallow depth of field.
- Compare at least three frames because wind and vibration change from moment to moment.
- Look at the corners and center; a loose plate or uneven support can create inconsistent movement.
- Make one frame with a two-second delay and another with a longer delay or remote release.
- Test a faster shutter speed by raising ISO rather than changing several settings together.
- Try stabilization both ways when the camera is tripod-mounted and your manual leaves room for doubt.
At a city overlook, I once saw doubled window lights in a four-second exposure. Focus was accurate, and the air felt calm. Live view revealed a rhythmical twitch each time buses crossed the concrete deck, so I waited for a gap in traffic; the next frame rendered each window as a clean, bright rectangle.
High-resolution sensors do not create movement, but they expose it with less mercy. Think of resolution as a stronger magnifying glass: it shows both the texture you wanted and the tiny errors you used to overlook. Judge sharpness at the intended output size as well as at 100% view, since a small print can hide motion that a large crop reveals.
Software sharpening can strengthen edge contrast, and newer deblurring tools may improve mild movement. They cannot reliably rebuild fine eyelashes, star points, or bark texture that never landed distinctly on the sensor. Prevention remains the cleanest route, especially in the context of photography where small physical choices have a large impact on image clarity.
Frequently Asked Questions
What shutter speeds are most affected by mirror slap?
Mirror slap often shows most clearly at intermediate slow speeds, where the exposure lasts long enough to record the initial jolt but not long enough to dilute it. The exact range varies, though speeds around 1/2 to 1/30 second deserve testing during macro, telephoto, and high-resolution tripod work.
Should I turn image stabilization off when using a tripod?
Turn stabilization off only when your camera or lens guidance recommends it, or when your own controlled frames show a benefit. Modern systems may detect tripod use, while older ones can hunt and create softness. Make three matched frames on and three matched frames off, then compare a fine stationary detail.
Does a heavier tripod always produce sharper photographs?
A heavier tripod can resist wind and damp small movement, but weight alone does not guarantee sharpness. Loose locks, an extended center column, flexible ground, or a swinging bag can defeat a heavy support. A compact, balanced tripod on firm footing often beats a larger setup used carelessly.
Can mirrorless cameras suffer from shutter vibration?
Yes. Mirrorless cameras avoid DSLR mirror slap, yet a mechanical shutter can still create movement at the start or end of an exposure. Electronic first-curtain or fully electronic shutter can reduce that disturbance, though electronic modes may show banding or rolling-shutter distortion under some lighting and subject conditions.
How can I keep a long lens sharp in strong wind?
Lower the tripod, retract the center column, remove anything that flaps, and use the lens collar to balance the load over the head. Shield the setup with your body without touching it during the exposure, then shoot during pauses between gusts. A faster shutter speed and several short bursts often outperform one carefully timed slow frame.
Can editing software fix blur caused by vibration?
Software can improve mild edge softness, but it cannot reliably recreate fine detail that moved across several sensor positions. Doubled eyelashes, smeared stars, and blurred feather barbs rarely return to natural clarity. Treat deblurring as a rescue attempt, while using support, timing, and shutter settings as your main defense.
Conclusion
The sharpest setup is not always the heaviest one. It is the setup in which you have found the moving part, removed its leverage, and chosen an exposure that fits what remains. Before pressing the shutter, take five seconds to check the strap, legs, surface, shutter mode, and subject; that short pause saves far more time than trying to rescue blurred detail later.
When the wind rises or the floor begins to hum, do not treat softness as bad luck. Watch the live view, wait for the camera to settle, and make one controlled change. The reward is visible in the smallest details: one clean eyelash, a crisp star, or a frost crystal with edges as sharp as broken glass.