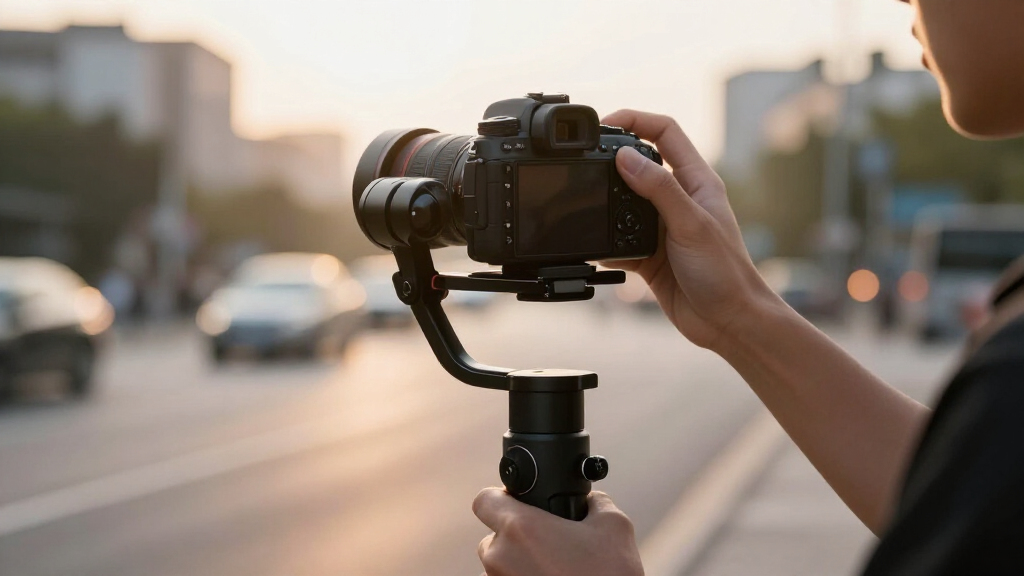
TL;DR
A reliable camera gimbal setup starts with the complete shooting rig mounted and the gimbal powered off. Balance the tilt, roll, and pan axes until the camera holds each position on its own, then power up, calibrate, tune the motors, and test your walking technique.
A gimbal can hide footsteps, but it cannot rescue a camera that keeps trying to fall forward on its plate. The motors may buzz, the horizon may twitch, and your battery may drain while you wonder why an expensive stabilizer produces footage that looks like it was shot from a shopping cart.
The fix starts before you press the power button. You need a complete shooting rig, a sensible mounting position, and a camera that sits calmly across three balanced axes. Once those pieces are right, calibration and motor tuning become quick finishing jobs instead of desperate attempts to correct a mechanical problem.
This guide walks you through the full process I use on working shoots: checking compatibility, mounting the camera, balancing tilt, roll, and pan, tuning motor strength, tracking down jitter, and moving with the rig. You will also learn why a balanced gimbal feels lighter, how small accessories change the result, and when your model’s manual should overrule general advice. The goal is simple: quiet motors, a steady horizon, and footage that feels as though the camera is floating through the scene.
Mount the complete recording rig, including the lens, filter, open screen, cables, and accessories, before balancing.
Balance with the gimbal powered off until the camera holds level and tilted positions without falling.
Tune tilt, roll, and pan mechanically before using calibration or stronger motor settings.
Treat buzzing, heat, and fine vibration as warnings to check balance, motor strength, hardware, and cable clearance.
Record your plate and arm positions with a phone photo so repeated setups begin close to balance.
Camera Gimbal Setup and Balancing Basics
A reliable setup begins with the complete shooting rig mounted and the gimbal powered off. Balance tilt, roll, and pan until the camera holds itself still—then calibrate, tune, and move.
Gravity first. Motors second.
If the camera falls toward the lens or screen, the motors are spending power correcting a mechanical problem.
Quiet, cool, steady.
No buzzing, no fine vibration, no drifting horizon—and no arm fighting the rig.
Photograph your marks.
Record plate and arm positions so the next build starts close to balance.
Match the symptom to the axis.
Each motor resists rotation around one axis. It can correct a turn, but it cannot remove the vertical rise of your arm while walking. Diagnose the movement before touching motor power.
Tilt
The tilt arm controls lens movement toward the ceiling or floor. A nose-heavy camera falls forward; a rear-heavy camera drops toward the screen.
Roll
The roll arm keeps the horizon level. If the camera leans left or right when released, slide the carriage sideways before changing any software setting.
Pan
The pan assembly follows turns around the handle. A level camera can still be pan-heavy and swing sideways when the handle is leaned.
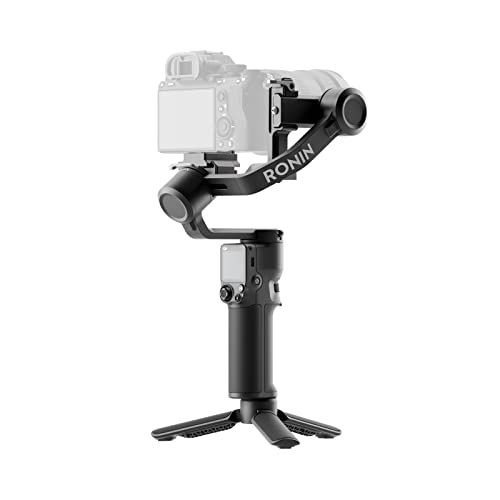
DJI RS 3 Mini, Camera Gimbal Stabilizer, Canon/Sony/Nikon/Fujifilm
795g (1.75lbs) Lightweight and Portable – DJI RS 3 Mini is an ultra-compact gimbal stabilizer for camera convenient…
As an affiliate, we earn on qualifying purchases.
As an affiliate, we earn on qualifying purchases.
Mechanical balance before electronic correction.
Follow one clean sequence. Calibration establishes sensor references; it does not move the camera’s center of gravity or remove leverage from a front-heavy lens.
Build the rig
Lens, battery, card, filter, screen, receiver, and cables.
Mount securely
Align and tighten the quick-release plate with useful travel remaining.
Balance tilt
Set front-back and vertical tilt positions until every angle holds.
Balance roll
Slide sideways until the camera remains level without assistance.
Balance pan
Lean the handle and adjust until the camera stops swinging.
Power and tune
Calibrate, set motor strength, inspect clearance, and walk-test.
Never use active motors to judge mechanical balance.
Powered motors can temporarily hold a bad setup and hide the continuous torque, heat, vibration, and battery drain they are creating.
DJI RS 3 Mini, Camera Gimbal Stabilizer, Canon/Sony/Nikon/Fujifilm
795g (1.75lbs) Lightweight and Portable – DJI RS 3 Mini is an ultra-compact gimbal stabilizer for camera convenient…
As an affiliate, we earn on qualifying purchases.
As an affiliate, we earn on qualifying purchases.
Balance what you will actually shoot.
Small accessories matter when they sit far from an axis. A light filter on the front of a long lens can create more turning force than a heavier object positioned close to the motor.
Distance multiplies the problem.
Payload weight alone does not prove compatibility. Camera dimensions, lens length, arm travel, and motor clearance determine whether the center of gravity can reach the correct position.
Compatibility check: confirm payload guidance, camera fit, lens clearance, plate travel, and the manufacturer’s tested combinations.

FeiyuTech SCORP 3 KIT Gimbal Stabilizer for DSLR and Mirrorless Camera, AI Tracking, Detachable Handle,3-Axis Gimbal for Sony/Canon/Nikon/Fujifilm, Max 3.5KG/7.72lbs, Touch Screen with Carrying Bag
【3.5KG Payload & Extended Axis Arms】Boasting a monstrous 3.5kg (7.72 lbs) payload capacity, the FeiyuTech SCORP 3 is…
As an affiliate, we earn on qualifying purchases.
As an affiliate, we earn on qualifying purchases.
“Looks level” is not enough.
A balanced camera remains still through multiple positions. Use the table to separate a real mechanical pass from a setup the motors will have to rescue.
| Powered-off test | Correct response | Failure signal | Mechanical correction |
|---|---|---|---|
| Camera released level | ✓ Holds still | ✗ Lens or screen falls | Slide the camera front or back on the plate. |
| Lens tilted upward | ✓ Holds the angle | ~ Returns toward level | Adjust the tilt arm’s vertical position. |
| Camera facing forward | ✓ Horizon remains level | ✗ Rolls left or right | Slide the roll carriage sideways. |
| Handle leaned 30–45° | ✓ Pan position remains | ✗ Camera swings around | Move the pan arm until the swing stops. |
| Full movement sweep | ✓ Free and unobstructed | ~ Arm, screen, or cable catches | Reposition the rig or reroute the cable. |
DJI RS 3 Mini, Camera Gimbal Stabilizer, Canon/Sony/Nikon/Fujifilm
795g (1.75lbs) Lightweight and Portable – DJI RS 3 Mini is an ultra-compact gimbal stabilizer for camera convenient…
As an affiliate, we earn on qualifying purchases.
As an affiliate, we earn on qualifying purchases.
Buzzing is feedback, not personality.
Fine vibration, unusual heat, twitching, and rapid battery loss usually indicate excessive motor effort, incorrect tuning, loose hardware, interference, or an obstructed axis.
Motor strength may be too high.
Recheck balance first, then reduce strength gradually. Use the lowest setting that holds the payload confidently.
Look for tension and resonance.
Inspect cable pull, loose plates, touching components, lens stabilization interaction, and motor settings.
Separate balance from calibration.
Confirm roll balance, place the gimbal on a level surface, then run the model’s sensor calibration.
Test with the handle leaned.
A camera can appear level while its pan axis remains unbalanced. Adjust mechanically before increasing pan power.
The gimbal steadies rotation. Your body steadies travel.
Even perfect motors cannot eliminate the vertical movement of your entire arm. Smooth footage comes from combining a balanced mechanism with deliberate footsteps, posture, and turns.
Soften your knees
Absorb the rise and fall of each step instead of transferring it into the handle.
Keep steps short
Controlled foot placement reduces vertical bounce and abrupt acceleration.
Turn with your torso
Rotate smoothly through the body rather than snapping the handle into a new direction.
Start and stop gently
Ease into motion and decelerate early so the camera does not lag or overshoot.
The reliable setup chain
Every stage depends on the one before it. Skipping mechanical balance pushes avoidable work downstream into motors, batteries, and post-production.
Know These Parts and You Will Fix Setup Problems Faster
Camera gimbal setup becomes much easier when you know which parts control each movement. Most handheld models use typically three axes: tilt moves the lens up and down, roll keeps the horizon level, and pan turns the camera left and right. Separate motors control those axes and stabilize camera movement.
Those motors do not remove movement in the same way that software stabilization crops and shifts an image. Instead, each motor applies torque to resist rotation around its axis. That distinction matters because a motor can correct an unwanted turn, but it cannot eliminate the vertical rise of your entire arm as you walk. It also explains why one axis may misbehave while the other two appear normal: each has its own balance point, workload, and adjustment range.
The tilt arm is the one you notice when the lens nods toward the floor. The roll arm corrects a slanted horizon, while the pan assembly sits near the handle and follows your turns. If a camera points level but slowly swings left when the gimbal is off, you are looking at a pan-balance problem rather than weak software stabilization.
Learning to connect a symptom with an axis prevents random adjustments. A forward-dropping lens means gravity is creating torque around the tilt axis, so increasing roll power will not solve it. Likewise, a level camera can still have poor pan balance because pan is tested by leaning the handle, not simply by looking at the horizon. Treating the axes separately makes troubleshooting faster and reduces the risk of masking one mechanical error with aggressive motor settings.
The mounting system matters just as much. A camera plate or quick release holds the rig on the carriage, and a properly tightened plate ensures secure attachment while allowing faster camera changes. On location, I mark a proven plate position with a thin strip of removable tape; that small reference can turn a five-minute rebuild into a one-minute adjustment.
Plate position is more than a convenience because it determines whether the camera’s center of gravity falls inside the adjustment range of the arms. Mount too far forward and the tilt arm may reach its limit before a heavy lens balances; mount too far backward and the eyepiece or screen may strike the rear motor. The practical goal is therefore not merely to make the rig fit, but to preserve enough travel and clearance for the camera to move through the shot.
Understanding gimbal components also means spotting the smaller controls: axis locks, sliding arms, adjustment knobs, USB ports, batteries, and cable clearance points. Imagine adding an HDMI cable that presses against the roll arm. The camera may balance perfectly without the cable, then jerk every time that stiff cord bends and pulls against the motor.
A cable creates a changing force rather than a fixed weight, which makes it especially troublesome. A receiver adds predictable mass that you can balance, while a tight cable behaves like a spring whose pull changes as the camera turns. This is why a rig may pass a stationary balance test but still catch at one angle during operation.
Balance is mechanical. Calibration tells the gimbal where level is, but it cannot stop a badly mounted camera from pulling against gravity.
Payload capacity is only part of compatibility. Your camera may fall below the stated weight limit yet still be too tall, too wide, or too front-heavy for the available adjustment range. Check the maker’s camera compatibility information, physical clearance, and payload guidance before building the rig [1]. A lighter camera with a long lens can be harder to balance than a heavier but compact setup because distance from the axis multiplies the turning force. That leverage is why total weight alone cannot tell you whether a combination will work safely.
Build the Complete Camera Rig Before You Balance Anything
Camera gimbal setup works only when you balance the same camera configuration you plan to record with. Install the lens, battery, memory card, filter, microphone receiver, and any necessary cables first. Even a small change can shift the center of gravity enough to make a previously quiet motor work harder.
The effect depends on both weight and location. A lightweight filter at the front of a long lens can matter more than a heavier accessory positioned close to the tilt motor because the filter has greater leverage. That is why apparently minor front-mounted changes often produce a noticeable nose-drop, while replacing a memory card usually does not.
Start with the gimbal powered off and place it on its mini tripod or another firm, level surface. Lock any axes your model allows you to lock, then attach the plate to the camera with the screw snug and the plate aligned with the lens. A crooked plate can leave you without enough sideways adjustment later.
Working with the power off separates mechanical balance from motor correction. If the motors are active, they can hold a poorly positioned camera long enough to make the setup look correct, hiding the force they must continuously apply. A stable support also keeps the handle orientation consistent, so a movement you observe comes from imbalance rather than from the stand shifting under your hands.
Choose the lens position before balancing a zoom. A 24–70mm lens can change length and weight distribution as you zoom, so I usually balance it near the focal length I expect to use most. For a ceremony filmed mainly at 35mm, balancing at 35mm gives the motors a better starting point than setting the lens at 70mm and immediately pulling it wide.
This choice is a compromise when the focal length will change during a take. Balancing at the most-used position minimizes motor effort for most of the job, while balancing near the middle of the zoom range can distribute the error between both extremes. Neither approach makes an extending zoom perfectly neutral everywhere, so large focal-length changes may still require rebalancing or a lens support designed for the system.
- Remove the lens cap: it adds weight at the farthest point from the tilt motor.
- Flip the screen into shooting position: an open side screen changes roll balance.
- Route cables with slack: tight cables behave like little springs against the axes.
- Set the zoom and focus accessories: moving glass and external motors shift weight.
- Check every clamp: a sliding plate can ruin a take and place the camera at risk.
Suppose you balance a bare mirrorless body with a compact prime, then add a wireless receiver above the viewfinder. The camera may begin leaning toward the receiver, and the roll motor will heat as it fights that pull. Build first, balance second is one of the important aspects of a repeatable setup.
Repeatability is the larger benefit. When the accessory layout, cable route, screen position, and lens setting remain consistent, recorded arm marks become meaningful and automatic motor tuning produces comparable results. If those variables change from one build to the next, troubleshooting turns into guesswork because you cannot tell whether a new vibration came from a setting or from a shifted center of gravity.
Balance All Three Axes So the Camera Holds Itself Still
A correctly balanced gimbal keeps the camera in place when you release it at several angles with the power off. Adjust tilt, roll, and pan one at a time, making small changes until gravity stops pulling the rig away. The camera should feel neutral rather than rigid.
Neutral means the camera has no strong preferred position. It should move freely when you guide it and remain close to where you leave it, rather than snapping back like a weighted toy. A rigid or sticky axis can imitate balance, so confirm that clamps are loosened only where required and that no cable, lock, or overtightened bearing is resisting movement.
- Balance the vertical tilt position. Point the lens upward and loosen the vertical tilt adjustment. If the camera falls backward, lower the camera assembly; if it falls toward the lens, raise it. Tighten the arm when the lens can point upward without dropping. This adjustment aligns the camera’s center of gravity with the height of the tilt axis; without it, the camera may hold level yet return toward that position whenever you angle the lens.
- Balance the front-to-back tilt position. Return the camera to level, loosen the plate or horizontal tilt adjustment, and slide the camera in tiny increments. Move it backward if the lens falls forward, or forward if the screen side drops. This removes the obvious nose-heavy or rear-heavy pull, but it cannot replace the vertical adjustment because the two movements correct different dimensions of the same center of gravity.
- Balance the roll axis. Face the lens forward and watch which side sinks. Slide the roll arm away from the heavy side until the horizon stays level without motor power. Good roll balance reduces the constant force needed to hold the horizon and preserves more motor authority for bumps or quick directional changes.
- Balance the pan axis. Tilt the whole gimbal handle about 30 to 45 degrees while keeping the camera facing forward. If the camera swings sideways, adjust the pan arm until it stops rotating on its own. Leaning the handle lets gravity expose pan imbalance; with the handle perfectly upright, the same error can remain almost invisible.
- Repeat the checks. Move the camera through several tilt angles, level the handle, and lean it again. Tighten every clamp, then confirm that no axis shifted while you worked. Repetition matters because changing one arm or tightening a clamp can move the assembly slightly and reveal an interaction that was not obvious during the first pass.
Use millimeter-sized adjustments. Sliding a plate by the width of a fingernail can change a front-heavy lens from a fast nose-dive to a steady hold. If you reach the end of an arm before finding balance, a longer plate or purpose-made counterweight may help, but added weight must remain within the gimbal’s payload limit.
A counterweight can solve a geometry problem by moving the combined center of gravity into the arm’s range, but it introduces a tradeoff: the motors and operator must now carry more total mass. Use the smallest approved weight that achieves balance, and prefer repositioning the camera or plate when possible. A perfectly balanced rig that exceeds the payload specification is not a safe solution.
Here is a useful test from real shooting conditions: point the lens level, then tilt it roughly 45 degrees upward and release it carefully. If it stays near both positions, the tilt axis is close. If it always returns to one angle, the rig may be bottom-heavy or the vertical tilt position may still be wrong.
Testing multiple angles is essential because a camera can appear balanced at level while its center of gravity sits below the tilt axis. That bottom-heavy arrangement naturally returns to level and may feel reassuring, but the motor must fight the restoring force whenever you tilt. True balance removes that preference, giving the motor similar working conditions throughout its range.
Never force a locked axis or power the gimbal while transport locks remain engaged. Check your model’s lock order and startup position in its official manual [1].
Calibrate and Tune the Motors Without Creating New Jitter
Camera gimbal setup is not finished when the camera holds still mechanically. After balancing, unlock every axis, place the gimbal upright on a firm, level surface, and power it on. Run automatic calibration when your model requests it, then set motor strength for the mounted payload.
Calibration and motor tuning solve different problems. Calibration establishes the electronic reference for level and sensor behavior, while motor tuning controls how forcefully the gimbal holds the balanced camera. Calibrating cannot remove a gravitational pull caused by poor balance, and increasing motor strength cannot correct a sensor that believes a tilted horizon is level.
| Adjustment | What It Changes | Clue You Need It |
|---|---|---|
| Sensor calibration | Teaches the gimbal its level and motion references | The horizon remains tilted after good mechanical balance |
| Motor strength | Controls how firmly each motor holds the camera | Weak response, buzzing, vibration, or hot motors |
| Follow speed | Sets how quickly the camera follows handle movement | Turns feel sluggish or snap too quickly |
| Deadband | Sets how far you move before following begins | Tiny hand movements make the frame wander |
| Smoothing | Softens starts and stops | Pan and tilt movements end abruptly |
These controls involve creative tradeoffs as well as technical correction. Fast follow speed helps keep a moving subject framed but can reveal small wrist movements. A wider deadband makes a locked-off composition calmer but requires a more deliberate turn before the camera responds. More smoothing creates graceful starts and stops, although too much can make the camera lag behind an unpredictable subject.
Motor power that is too low can let the camera sag or lag during a quick turn. Power that is too high can create a fine electrical-looking vibration, often visible in telephoto footage or heard as a faint buzz. Automatic tuning offers a sensible baseline, but watch the camera closely and feel each motor for unusual heat.
The best setting is therefore not the highest value the rig can tolerate. You need enough force to control acceleration and resist disturbances, with some margin for normal movement, but no more than necessary. Mechanical balance widens that usable range because the motors spend less of their capacity holding static weight and can devote more of it to stabilization.
For example, a light camera with a 20mm prime does not need the same motor force as a body carrying a fast standard zoom. If the light setup hums while sitting untouched, reduce motor strength in small steps or rerun the model’s automatic tuning routine. According to manufacturer support instructions, calibration should happen on a stable surface without anyone touching the rig [2].
A stable surface matters because the gimbal treats motion during calibration as sensor information. If the table rocks or you hold the handle, the resulting reference may contain a small error that later appears as drift or a tilted horizon. Allow the routine to finish before lifting the rig, even if the motors appear to have stopped moving.
Finish with a 30-second recording test. Hold still, pan slowly, tilt upward, and walk several steps while monitoring the horizon. Review the clip at normal speed and again at 100 percent magnification; tiny vibrations that hide on a small camera screen often become obvious on a larger display.
Each part of that test isolates a different weakness. The static hold exposes high-frequency vibration and drift, the slow pan reveals rough follow behavior, the tilt checks balance through the working range, and the walk shows how the system responds to real acceleration. Testing all four is more informative than judging the setup from a motionless camera alone.
Stop Buzzing, Drifting, and Shaking Before the Next Take
Jitter usually comes from poor balance, excessive motor strength, loose hardware, or something touching a moving axis. Drift more often points to calibration, a crooked plate, or unwanted follow settings. Diagnose one cause at a time, starting with the physical setup before changing software values.
That order matters because software changes can temporarily hide a mechanical fault and create a second problem. Raising motor power may hold a front-heavy lens level, for example, but the added force can introduce vibration and heat. Returning to a known mechanical baseline keeps cause and effect visible.
- Fine vibration while standing still: check for overly strong motors, a loose plate screw, or a camera strap brushing an arm. A stationary vibration suggests the control system is repeatedly overcorrecting or reacting to movement within the rig.
- Camera drops after startup: confirm the payload, battery charge, axis locks, and motor strength. A sudden drop can mean the motors lack power, but a severe imbalance may be consuming most of their available torque before you move.
- Horizon slowly leans: recheck roll balance, then perform sensor calibration on a level surface. Separating balance from calibration tells you whether gravity or an incorrect electronic reference is producing the lean.
- Pan axis swings during walking: rebalance pan and check whether follow speed is reacting too aggressively. Poor pan balance creates a physical swing, while fast follow settings can turn ordinary handle movement into an intentional-looking pan.
- Movement catches at one angle: inspect cable tension, lens clearance, and the path of each arm. A fault limited to one position usually indicates interference rather than a motor setting that affects the entire range.
Consider a small shotgun microphone mounted above the camera. It clears the roll arm while the lens points forward, but the cable tightens when you tilt upward. The resulting tug may look like a faulty motor, yet a softer cable loop with two centimeters of extra slack can remove the problem immediately.
Too much slack has its own cost: a loose cable can swing, snag, or tap an arm. The aim is a controlled loop that remains relaxed throughout the full movement range without hanging into the mechanism. Move every axis slowly by hand with the power off to confirm the route before trusting it during a take.
Firmware can also affect behavior, especially after a camera or lens combination gains official support. Check release notes before an important job, but do not install an update in the parking lot five minutes before filming. I prefer to update, recalibrate, and test while there is time to roll back settings or consult support instructions [2].
The tradeoff is reliability versus access to fixes and new compatibility. Staying indefinitely on old firmware may leave known problems unresolved, while updating immediately can introduce changed defaults or require a fresh calibration. A controlled test window lets you gain the benefits without making the shoot itself the experiment.
Touch the motors after a brief test. Slight warmth can be normal, but rapid heating, loud grinding, or violent shaking means you should power down immediately and inspect the balance, locks, payload, and mounting hardware. Continuing to run a distressed motor can shorten its life and place the camera at risk.
Heat is useful diagnostic evidence because it reveals sustained effort that may not be visible in the frame. Compare the axes: one motor becoming noticeably hotter than the others often points to an imbalance or obstruction specific to that axis. Do not use temperature alone as a precise limit, however; follow the manufacturer’s warnings and operating guidance for your model.
Use Your Body to Turn Stable Footage Into Smooth Footage
Smooth gimbal footage comes from combining mechanical stabilization with controlled body movement. Keep your elbows relaxed, hold the rig near your center, bend your knees slightly, and take soft heel-to-toe steps. The gimbal corrects rotation, but your body must reduce the vertical rise and fall of walking.
This division of labor explains why a perfectly balanced gimbal can still produce bobbing footage. Its three motors control angles, not the camera’s height or sideways position in space. Bringing the rig closer to your center reduces leverage on your arms, while relaxed joints absorb small vertical shocks before they reach the handle.
Imagine following a couple down a stone path. If you march with straight legs, every footfall lifts the whole camera several centimeters, producing a gentle but obvious bob. Shorter steps and a lowered stance turn that bouncing motion into a quieter glide, especially when the lens is wide.
A lower stance improves isolation but increases physical strain, so it should be sustainable for the length of the take. For a long procession, a modest knee bend and consistent pace may produce better results than an exaggerated walk that leaves your legs shaking halfway through the shot.
- Start recording before moving. Give yourself two seconds of still footage for editing. The pause also lets your grip settle before acceleration begins.
- Accelerate gradually. Let your first three steps build speed instead of lunging forward. Sudden acceleration can push the camera through the deadband and make the follow system snap into motion.
- Turn with your torso. Rotate your whole upper body rather than twisting the handle sharply. A larger, slower body movement gives the gimbal a cleaner directional signal than a quick wrist correction.
- Watch the background. Door frames and lamp posts reveal horizon drift faster than a busy crowd. Strong vertical and horizontal references expose errors that subject-focused viewing can miss.
- Finish and hold. Stop your feet, settle the frame, and keep recording for another two seconds. This creates a usable edit point and prevents the shot from ending with the small rebound that follows a sudden stop.
Lens choice changes what viewers notice. A 16mm or 24mm lens makes small bumps less obvious and suits walking shots through rooms, while a longer lens magnifies tiny shakes and demands slower movement. That does not make telephoto gimbal work impossible; it simply calls for better balance, gentler control settings, and more restrained steps.
A wide lens is forgiving, but it also includes more of the environment and can exaggerate movement near the frame edges. A longer lens offers subject separation and compression at the cost of narrower framing and greater sensitivity to small errors. Choose according to the story and space rather than using width only to conceal weak technique.
Practice a repeatable drill at home. Walk toward a coffee mug, circle it, tilt down to the handle, and retreat without letting the mug leave the center of the frame. Five minutes of this teaches starts, stops, distance, and framing more effectively than waving the gimbal around without a target.
A fixed target provides immediate feedback: if the mug drifts, you can identify whether the mistake happened during your step, turn, or tilt. Repeating the same route also lets you compare follow settings and lenses under similar conditions, turning practice into a useful setup test rather than an impression of smoothness.
Keep Your Setup Ready for Travel, Updates, and Heavier Rigs
A gimbal stays reliable when you clean the joints, inspect the clamps, manage the battery, and store every axis in its transport position. Recheck the balance after travel, a hard bump, or any camera change. Compact folding arms save space, but they still need careful locking before the rig enters a bag.
Transport locks protect the motors and arms from swinging impacts, but they do not guarantee that adjustment clamps remain unchanged. Vibration in a vehicle or pressure inside a packed case can move a scale by a small amount, so previous marks should be treated as a starting point rather than proof of balance.
Dust and fine sand can gather around sliding arms and adjustment tracks. After a windy beach shoot, use a soft brush or hand blower to remove grit before loosening the arms; dragging sand under a clamp can scratch the scale and make adjustments feel rough. Keep liquids away from motors, battery contacts, and charging ports.
Rough adjustment tracks are not merely cosmetic. Friction can make an arm jump past the desired position, while damaged markings reduce the value of recorded setup references. Cleaning before sliding the arm protects both the precision of future balancing and the repeatability of the rig.
Modern gimbals support heavier mirrorless bodies and small cinema cameras, while app control can handle motor tuning, remote movement, calibration, and firmware installation. Those features save time, yet payload capacity does not replace balance. A motor capable of holding a heavy camera still benefits from a rig that is mechanically neutral.
Operating close to the maximum payload also reduces practical headroom. The gimbal may support the static weight but respond less confidently to quick acceleration, long lenses, wind, or an off-center accessory. A lighter, compact build can therefore outperform a heavier configuration even when both fall within the published limit.
Battery care matters on long days. Charge before the job, carry an approved power option when your model supports one, and avoid storing a battery fully depleted. For a day split between interviews and moving shots, I check the battery during lunch rather than waiting for a warning to flash during the final take.
Runtime depends on more than the battery rating. Cold weather, high motor strength, poor balance, and a heavy payload can increase demand, so a duration achieved with a light test camera may not match your working rig. Checking power at planned breaks is more reliable than assuming the advertised maximum will cover the day.
Create a quick phone photo of your working setup. Capture the plate scale, roll-arm mark, lens position, and cable route, then save the image with the camera and lens names. When the same assignment returns a month later, those visual marks offer a fast starting point even though you should still verify each axis.
Record configuration details that affect leverage, not just the camera name. A filter, open screen, receiver position, or zoom setting can explain why the same numerical marks no longer balance. The value of the photo is consistency: it shortens setup while preserving the final powered-off checks that protect the motors.
References: [1] Your gimbal model’s official user manual and compatibility guidance for payload, lock order, mounting, and clearances. [2] The manufacturer’s current support instructions and firmware release notes for calibration, motor tuning, updates, and model-specific behavior.
Frequently Asked Questions
Should I balance a gimbal before or after turning it on?
Balance the gimbal before turning it on, unless your model’s official instructions state otherwise. The camera should hold several positions with the motors off; powering an unbalanced rig can cause shaking, buzzing, or excess heat.
Why does my camera keep falling forward during balancing?
A camera that falls forward is front-heavy. Slide the camera backward on the plate in tiny increments, then test it level and at a 45-degree upward angle; if the tilt arm runs out of travel, check your plate orientation or use an approved longer plate.
Can one balance setting work for every focal length on a zoom lens?
Only if the lens changes very little as it zooms. An extending zoom shifts the center of gravity, so balance near the focal length you will use most or rebalance after a large change. A move from 24mm to 70mm can be enough to make the tilt motor work harder.
Why is my gimbal vibrating even though the camera looks balanced?
Fine vibration often means the motor strength is too high, but loose hardware or a cable touching an arm can create the same symptom. Tighten the plate, clear every axis, run the approved tuning routine, and test after one adjustment at a time.
How often should I calibrate my camera gimbal?
Calibrate after a hard bump, unusual drift, firmware changes, or travel that may have stressed the rig. You do not need to run calibration before every clip when the horizon remains level and the controls behave normally, but always use a stable, level surface when you do.
Can I use a camera that is below the gimbal’s payload limit?
Weight alone does not confirm compatibility. The camera and lens must also fit the available arm travel and physical clearance without striking a motor, and the plate must hold them securely. Check the model’s official compatibility guidance before relying on the rig for a shoot [1].
Conclusion
Your most useful habit is simple: make the camera hold itself still before asking the motors to help. Build the complete rig, balance each axis with the power off, then calibrate and test with the same deliberate care you bring to focus and exposure. A quiet motor and a camera that stays where you leave it tell you more than a glowing status light.
Once the mechanics disappear beneath your hands, work on the human part: soft steps, slow starts, clean stops, and a steady eye on the frame. The next time you follow someone through a doorway, the footage should not call attention to the gimbal. It should simply float forward, smooth and calm, carrying your viewer into the scene.