
TL;DR

Get audio and creator gear delivered free with Prime
- Fast, free delivery on millions of items
- Prime Video, Amazon Music and more included
- Member-only deals all year
To reprint film or prints faithfully, scan negatives and slides at 2400–4000 dpi and prints at 300–600 dpi, save archival masters as TIFF files, and calibrate your monitor so colors match the original. AI-assisted restoration software now removes dust and corrects fading in minutes, making professional-quality reprints achievable at home.
Last winter a client brought me a shoebox of her mother’s negatives from 1968 — curled, dusty, and sitting three decades in a hot attic. The prints made from them in the 70s had gone orange and flat. But the negatives? Still sharp. We scanned them at high resolution, and the 16×20-inch reprint she hung above her fireplace has more detail than any print her mother ever held.
That’s the quiet magic of scanning film and prints for reprinting. The original image often contains far more than the print shows, and a careful scan can set it free — whether you’re preserving original images digitally to prevent further fading, or producing quality reproductions for family albums and wall art.
In this guide, I’ll walk you through everything that actually matters: what equipment to use, what resolution settings deliver printable files, how to keep color honest, and how to restore images that time has beaten up. Thirty years behind the camera and scanner have taught me where the real pitfalls hide — so let’s skip them together.
Scan negatives and slides at 2400–4000 dpi and prints at 300–600 dpi — a 35mm frame at 4000 dpi yields a ~22-megapixel file suitable for a 16×20-inch reprint.
Always prefer the negative over the print when the original film exists: a print is already a second-generation copy and cannot contain more detail than the la…
Save archival masters as 16-bit TIFF files and follow the 3-2-1 backup rule — three copies, two media types, one off-site.
Calibrate your monitor with a hardware calibrator and soft-proof using your print lab’s paper profile before ordering reprints.
Restore in order: global color first, dust and scratches second, physical damage last — and always preserve the uncorrected original scan.
Scanning Film and Prints for Reprinting
Every physical original is dying slowly — negatives shift magenta, prints fade yellow, slide dyes break down decade by decade. A careful scan sets the original image free: a 35mm negative scanned at 4000 dpi holds more detail than any print ever made from it. Here’s how to capture it, calibrate it, and reprint it faithfully.
Why Scan Before You Print — Before It’s Too Late
Think of the negative as an ice sculpture and the scan as a photograph of it. The sculpture melts; the photograph doesn’t. Once the dyes collapse, no scanner on earth can bring back what’s gone.
Freeze the Original
Color negatives shift magenta, chromogenic prints fade yellow, and slide dyes break down decade by decade. A scan stops the clock — the master file never fades, curls, or cracks.
One Master, Endless Reprints
A good scan becomes a master you can reprint at any size, crop, restore, share, or print on canvas — forever. No more hunting down the lab and the negative sleeve for every new print.
These Are People, Not Files
Your grandparents at twenty-five. Your kids as newborns. Every year you wait, the rescue gets harder — one client’s 1968 attic negatives still outperformed every faded 70s print made from them.
Match the Scanner to the Media
The scanner you choose sets the ceiling on every reprint you’ll ever make from the file. A budget flatbed without a proper backlight produces muddy, low-contrast files — treat an afterthought transparency unit as one.
| Scanner Type | Best For | Realistic Quality | Field Pick |
|---|---|---|---|
| Flatbed w/ transparency adapter | Mixed collections: prints + some film | ~ Very good for prints, acceptable for 35mm | Epson Perfection V600 / V850 |
| Dedicated 35mm film scanner | Negatives & slides, especially 35mm | ✓ Excellent — sharp grain, true color | Plustek OpticFilm 8200i, Nikon CoolScan 5000 |
| Dedicated medium-format scanner | 120/220 roll film (Hasselblad-era frames) | ✓ Excellent, larger files | Flatbed V850 + MF holder |
| Drum scan (lab service) | Archive-grade or huge reprints (30×40″) | ★★ The gold standard | Lab service, $25–50 per frame |
A 35mm negative scanned at 4000 dpi yields roughly 22 megapixels — enough for a sharp 16×20-inch reprint. Scan the same frame at 1200 dpi and you get ~2 megapixels: fine for a phone screen, disappointing on paper. One client’s 11×14 from a 1200 dpi scan turned the groom’s face into a watercolor; rescanned at 4000 dpi, you could count the buttons on his tuxedo.
Detail Delivered Per Scan Setting
Relative file detail from a single 35mm frame. Below 2400 dpi, big reprints go soft; far above what the optics truly resolve, you’re mostly scanning dust.
Beware inflated specs: many flatbeds advertise 6400 dpi but can’t optically resolve anywhere near it — like a speedometer reading 180 mph on a car that tops out at 110. Trust true optical resolution: scan a frame at two settings and compare the grain at 100% zoom.
The Numbers That Guarantee Printable Reprints
Resolution is the single most important setting — it decides the largest print you can ever make. A tiny 35mm frame must be multiplied enormously, like blowing up a postage stamp to poster size; a print has already been enlarged, so its information is spread across more square inches.
The archival sweet spot. 4000 dpi puts a 35mm frame in the same resolution class as a modern full-frame camera — sharp grain at 100% zoom, crisp 16×20 reprints.
300 dpi reprints identically at original size. 600 dpi lets you enlarge modestly or crop — a 5×7 scanned at 600 dpi yields enough pixels to crop Grandma’s face into a sharp 4×6 for a memorial board.
Save lossless 16-bit TIFF masters for archiving; reserve JPEG only for sharing. Follow the 3-2-1 rule — three copies, two media types, one kept off-site.
From Shoebox to Fireplace Wall
Color accuracy separates a reprint that makes people gasp from one that makes them squint. Calibrate first, restore in order, and always preserve the uncorrected original scan.
Calibrate
Hardware-calibrate your monitor and load your print lab’s paper profile before you touch a single scan.
Scan
Film at 2400–4000 dpi, prints at 300–600 dpi. Prefer the negative over the print whenever the original film exists.
Soft-Proof
Preview how the file will look on your lab’s exact paper. Squint here saves reprint money later.
Restore
Global color first, dust & scratches second, physical damage last. AI tools now clear dust and fading in minutes.
Reprint
Send the master file to your calibrated lab — 16×20 from a 1968 negative, with more detail than any print her mother ever held.
Five Rules That Actually Matter
Scan film at 2400–4000 dpi, prints at 300–600 dpi. A 35mm frame at 4000 dpi yields a ~22-megapixel file suitable for a 16×20-inch reprint.
Always prefer the negative over the print. A print is already a second-generation copy and cannot contain more detail than the film it came from.
Save archival masters as 16-bit TIFF and follow the 3-2-1 backup rule — three copies, two media types, one off-site.
Calibrate your monitor with hardware and soft-proof using your print lab’s paper profile before ordering reprints.
Restore in order: global color first, dust and scratches second, physical damage last — and always keep the uncorrected original scan.
Why You Should Scan Before You Print (And Before It’s Too Late)
Scanning film and prints matters because every physical original is dying slowly — color negatives shift magenta, chromogenic prints fade yellow, and slide film’s dyes break down decade by decade. Digitizing preserves original images digitally to prevent that slow loss from taking the image with it. A scan is frozen. The negative in your closet is not.
Think of the negative or print as an ice sculpture and the scan as a photograph of it. The sculpture melts; the photograph doesn’t. I’ve watched rolls of 1970s Kodacolor turn the color of weak tea in ten years of basement storage. Once the dyes collapse, no scanner on earth can bring back what’s gone.
The second reason is freedom. A good scan becomes a master file you can reprint at any size, crop, share, restore, or print on canvas — forever. Without one, every new print means hunting down the lab, the negative sleeve, and praying the original survives another trip.
And let’s be honest about the emotional side. These are your grandparents at twenty-five. Your kids as newborns. Digitally to prevent loss is cold phrasing for what is really a rescue mission, and every year you wait, the rescue gets harder.
As an affiliate, we earn on qualifying purchases.
Pick the Right Scanner for Your Negatives, Slides, and Prints
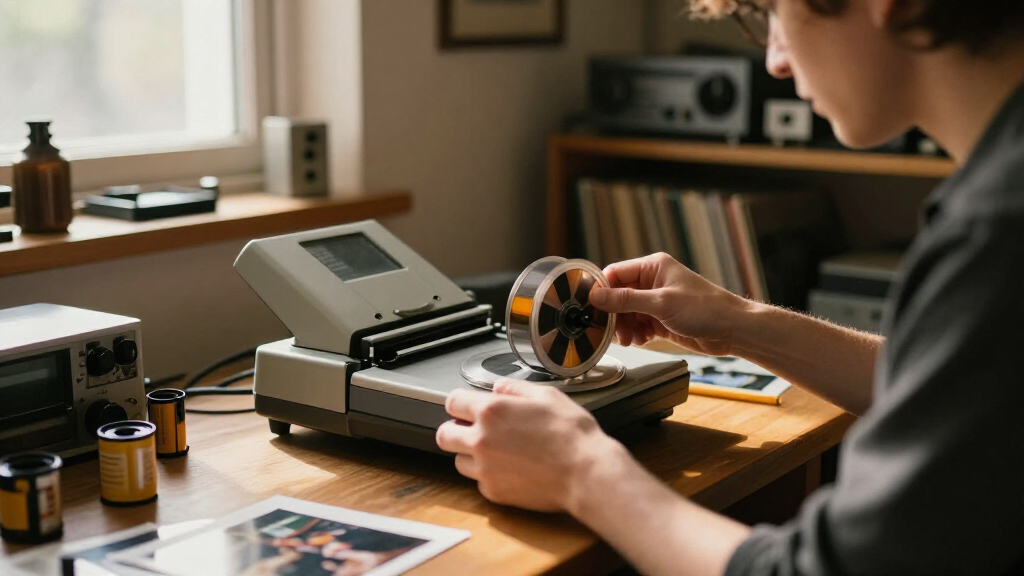
Scanning film and prints starts with matching your media to the right machine — the scanner you choose determines the ceiling on every reprint you’ll ever make from the file. A drum scanner still produces the highest quality, but for the rest of us, the choice comes down to flatbeds versus dedicated film scanners, and the difference is bigger than most beginners expect.
| Scanner Type | Best For | Realistic Quality |
|---|---|---|
| Flatbed with transparency adapter | Mixed collections: prints + some film | Very good for prints, acceptable for 35mm |
| Dedicated 35mm film scanner | Negatives and slides, especially 35mm | Excellent — sharp grain, true color |
| Dedicated medium-format scanner | 120/220 roll film | Excellent, larger files |
| Drum scan (lab service) | Archive-grade or huge reprints | The gold standard |
To make this concrete: the Epson Perfection V600 is the classic flatbed choice for a mixed collection — it’ll scan a shoebox of 4×6 prints beautifully on Tuesday and pull acceptable 35mm scans on Wednesday. For film-first work, something like a Plustek OpticFilm 8200i (35mm only) or a used Nikon CoolScan 5000 delivers grain so crisp you can count it at 100% zoom. If you inherit Grandpa’s 120 roll-film negatives from his Hasselblad days, that same flatbed with a medium-format holder — or a Flatbed V850 — handles the bigger frames. And when a single frame deserves a 30×40 gallery reprint, a lab drum scan at $25–50 beats every home option.
Here’s the honest advice I give everyone: if your collection is mostly prints with a handful of negatives, a quality flatbed covers both jobs in one machine. Scan the prints at high resolution, save the film scanning for the images you truly love. But if you have boxes of 35mm negatives, a dedicated film scanner pays for itself in sharpness alone — flatbeds tend to render 35mm grain slightly soft and mushy.
One caution from experience: a budget flatbed without a proper backlight produces muddy, low-contrast files. If your flatbed’s transparency unit feels like an afterthought, treat it as one.
As an affiliate, we earn on qualifying purchases.
Resolution Settings That Guarantee Printable Reprints
Resolution is the single most important setting when scanning film and prints for reprinting, because it decides the largest print you can ever make. The rule is simple: 2400–4000 dpi for negatives and slides, 300–600 dpi for prints. Below that, big reprints go soft; far above that, you’re mostly scanning dust.
Why the huge gap? A 35mm negative is tiny — about 1 x 1.5 inches. To blow that up to an 8×10 print, the scanner has to multiply the information enormously. Think of it like blowing up a postage stamp to poster size versus photographing a poster at its own size: the stamp needs every scrap of detail it can give. At 4000 dpi, that little 35mm frame becomes a roughly 22-megapixel file, enough for a crisp 16×20 — the same resolution class as a modern full-frame camera. Scan the same negative at 1200 dpi and you’ll get maybe 2 megapixels — fine for a phone screen, disappointing on paper. A concrete example: a client wanted an 11×14 of her parents’ 1975 wedding from a 1200 dpi scan she’d made herself, and the groom’s face came out looking like a watercolor. Rescanned the negative at 4000 dpi, and you could count the buttons on his tuxedo.
Prints are different animals. A print has already been enlarged, so its information is spread across more square inches. Scanning an 8×10 print at 300 dpi gives you a file the same size as the print itself — reprint it at the same size and it looks nearly identical. Go to 600 dpi if you plan to enlarge modestly or crop. Example: a 5×7 family portrait scanned at 600 dpi gives you enough pixels to crop out just Grandma’s face and reprint it as a sharp 4×6 — a trick I use constantly for memorial photo boards.
A word of warning about inflated numbers: many flatbeds advertise 6400 dpi but can’t optically resolve anywhere near it — like a car speedometer that reads 180 mph on a model that tops out at 110. What matters is true optical resolution, not the interpolated figure on the box. When in doubt, scan a film frame at two settings and compare the grain at 100% zoom — grain that looks crisp and defined tells you the scanner is actually delivering.
professional photo scanner for prints
As an affiliate, we earn on qualifying purchases.
As an affiliate, we earn on qualifying purchases.
Get the Color Right: Calibration, Profiles, and Soft-Proofing
Color accuracy is what separates a reprint that makes people gasp from one that makes them squint. The three tools that matter most are a calibrated monitor, the correct scanner color profile, and soft-proofing before you hit print. Skip any one of these and your scans will drift — usually toward the magenta or the muddy green.
I learned this the hard way. Years ago I spent a weekend scanning 200 family slides, color-corrected them all on an uncalibrated laptop screen, and sent them off for prints. Every single one came back with a sickly green cast my screen had hidden from me. Two hours with a monitor calibration tool would have saved forty hours of rework.
- Calibrate your monitor with a hardware calibrator every few weeks — displays shift as they age. (A Datacolor Spyder or Calibrite Display Pro runs about $150–200 and lasts for years.)
- Embed the color profile your scanning software generates (or Adobe RGB / ProPhoto RGB for archival work).
- Enable scanner dust and scratch reduction for prints — but disable it for film you’ll restore manually, since it can smear fine grain.
- Soft-proof the file in your editing software using your print lab’s paper profile before ordering reprints. (Most labs — MPix, Bay Photo, Whitesky — let you download their ICC paper profiles for free.)
- Order a small test print first whenever you’re reprinting something precious. A 4×6 test costs a dollar and can save a $60 large reprint.
Soft-proofing sounds technical but it’s just a preview: your editor simulates how the file will look on that specific paper, and you adjust accordingly. Deep blues that glow on screen often flatten on matte paper — a navy graduation gown that looks rich on your display can print as a dull slate on luster. Better to see that before you pay for the print.
photo restoration software with dust removal
As an affiliate, we earn on qualifying purchases.
As an affiliate, we earn on qualifying purchases.
Restore Faded and Damaged Photos After the Scan
Restoration is where scanning film and prints for reprinting becomes genuinely joyful, because the scan plus modern software can undo damage that once required a retouching artist with brushes and dyes. Today’s AI-assisted tools handle dust removal, scratch repair, and color correction automatically — work that took me hours per image in the 2000s now takes minutes.
Old color prints fade predictably: the cyan dye fails first, leaving everything warm and orange. In any decent editor — Photoshop, Lightroom, or one of the newer AI suites — a Curves adjustment on each channel brings the balance back startlingly fast. Pull the red down, lift the blue, and suddenly 1974 looks like 1974 again instead of a sepia accident.
For physical damage, work in this order: fix global color and exposure first, then remove dust and scratches, then repair tears and missing corners last. Beginners often start with the clone stamp and exhaust themselves before realizing the whole image is two clicks away from looking healthy. Sequence saves sanity.
One thing AI restoration still gets wrong: faces. Automatic tools occasionally smooth skin into plastic or invent detail that wasn’t there. For portraits, do the heavy cleanup automatically, then finish faces by hand with restraint. Your grandmother should look like your grandmother — not like an render of her.
And here’s the golden rule: always keep the uncorrected scan. Save your restoration as a separate edited file. Tools will keep improving, and in ten years you may want to restore that original scan again with better results.
File Formats and Storage That Protect Your Work for Decades
The best scan in the world is worthless if the file corrupts or the format dies, so your storage strategy matters as much as your scanner settings. Save archival masters as TIFF files — lossless, universally supported, and containing every bit of detail you captured. Use JPEG only for sharing, since every JPEG save throws away a little quality. Think of TIFF as the negative and JPEG as a drugstore print: the print is convenient, but you always go back to the negative when you want something better.
My own archive follows what photographers call the 3-2-1 rule: three copies of every file, on two different types of media, with one copy stored off-site. In practice that’s a working drive, a backup drive, and cloud storage. A real example: a fellow photographer lost fifteen years of scanned family archives in a house fire because everything lived on one external drive next to his desk. The cloud copy he never got around to setting up would have saved all of it. A flooded basement or a stolen laptop takes your family history with it if everything lives in one place.
- TIFF (16-bit) for archival masters of anything you’ll reprint — a single 35mm scan at 4000 dpi runs 60–130 MB, which is exactly the point
- JPEG (high quality) for email, social media, and quick sharing — the same frame as a JPEG is a tidy 5–10 MB
- PNG for scanned documents and line art
Two habits separate archives that last from archives that vanish. First, name files meaningfully — 1972-06_beach_neg012.tiff beats IMG_4821.tiff when you’re searching in 2040. Imagine trying to find one specific frame among 4,000 files named SCAN_0001 through SCAN_4000 — I’ve watched clients attempt it, and it isn’t pretty. Second, migrate your collection every five to ten years as storage technology and formats evolve. Anyone who saved their scans to ZIP drives or CDs in 2003 and never copied them forward learned this the hard way. Data doesn’t decay dramatically; it decays quietly, one unreadable file at a time.
And keep the originals. Even after digitizing, proper storage of negatives and prints in cool, dry, acid-free sleeves remains essential — the scan is a copy, not a replacement, and future technology may extract more from that negative than today’s scanners can.
The Mistakes That Ruin Reprints (And How to Dodge Them)
Most disappointing reprints trace back to a handful of avoidable mistakes made at the scanner, not at the printer. Here are the ones I see constantly — and each one is a five-minute fix once you know it.
- Scanning through plastic sleeves. Sleeves add haze and Newton rings (those rainbow blotches). Remove film from sleeves, wear cotton gloves, and hold negatives by the edges.
- Auto-everything settings. Auto exposure clips highlights on dense negatives and crushes shadow detail in slides. Set black and white points manually on the histogram.
- JPEG at the scanner. Compressing at capture locks artifacts into your master forever. Scan to TIFF; export JPEGs later.
- Ignoring the glass. One fingerprint on the scanner bed multiplied across 200 scans is 200 retouching jobs. Clean the glass with a proper anti-static cloth, and use Edge Repair fluid or a masking holder for scratched film.
- Printing from the print instead of the negative. If the negative exists, scan it. Prints for reprinting are a fallback, not a first choice — you can’t scan detail back into a print that the lab never printed.
That last point deserves repeating, because it surprises people: a print is a second-generation copy. Every reprint made from a scanned print is third-generation. Every reprint made from a scanned negative is second-generation and contains detail the print never showed. When the original film survives, it always wins.
Frequently Asked Questions
What resolution should I use to scan negatives for reprinting?
For negatives and slides, scan at 2400–4000 dpi depending on your reprint goals. A 35mm negative at 4000 dpi produces a roughly 22-megapixel file that supports sharp prints up to about 16×20 inches. For archival scanning of images you love, 4000 dpi is the sweet spot — beyond that, most consumer scanners mostly capture grain and dust rather than real detail.
Is it better to scan the negative or the print?
Scan the negative whenever it still exists. A print is a second-generation copy — the lab chose an exposure, cropped, and discarded shadow and highlight detail that remains in the film. A print scan at 300–600 dpi is perfectly fine for reprints at the original size, but if you want to enlarge or restore, the negative holds the real information.
Can I scan old negatives and slides at home, or do I need a lab?
Yes, you can do it at home. A flatbed scanner with a good transparency adapter handles mixed collections of prints and film, while a dedicated film scanner delivers noticeably sharper 35mm scans. Professional scanning services still win for drum-scan quality, damaged film, or very large volumes — but for family archives and quality reprints, home scanning is entirely achievable.
What file format should I use for scanned photos I want to reprint?
Save your archival masters as 16-bit TIFF files. TIFF is lossless, so no detail is discarded no matter how many times you open and edit the file. Create JPEG copies afterward for sharing and web use. Scanning directly to JPEG compresses the file at capture and permanently bakes artifacts into your only master.
How do I fix faded colors in scanned old photos?
Old color prints fade warm and orange because the cyan dye fails first. In your editor, use a Curves adjustment per color channel — reduce red, lift blue — and the balance usually snaps back quickly. Modern AI restoration tools also automate dust removal and color correction in minutes. Just keep the uncorrected original scan, since future software will restore even better.
Do I still need to keep negatives and prints after digitizing?
Yes. A scan is a copy, not a replacement. Store originals in acid-free sleeves in a cool, dry place — heat and humidity are what destroy film dyes and print paper. Future scanning technology may extract more detail than today’s equipment can, so the physical original remains the ultimate backup of your photographic history.
Conclusion
Here’s the whole article in one sentence: scan once, at the highest resolution your originals deserve, in a format that doesn’t throw detail away — and every reprint for the next fifty years becomes a one-click job instead of an archaeology project.
Start small this weekend. Pick the five images you’d rescue from a fire, scan them properly — TIFF, calibrated screen, patient color work — and order one test print. When that print comes back looking better than the faded original ever did, you’ll understand why those of us who scan for a living keep saying the same thing: the best time to digitize your history was twenty years ago. The second-best time is before dinner.
Halloween Picks
halloween
As an affiliate, we earn on qualifying purchases.