TL;DR

Get audio and creator gear delivered free with Prime
- Fast, free delivery on millions of items
- Prime Video, Amazon Music and more included
- Member-only deals all year
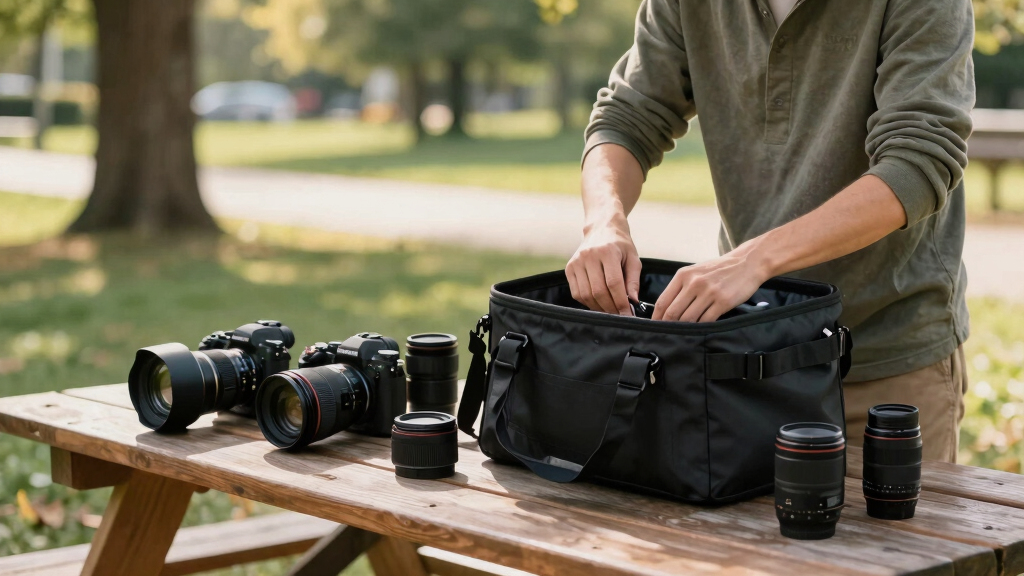
Organizing Your Camera Bag So You Never Miss a Shot means giving every item a fixed home: camera ready, cards split by status, batteries sorted, and weather tools within reach. Pack for the shoot in front of you, balance weight close to your body, and reset the bag after every job.
A shot can disappear in less time than it takes to unzip the wrong pocket.
I learned that the hard way during a windy beach portrait session. The light went silver, the veil lifted, and my clean cloth was buried under a charger, a snack wrapper, and a lens I never used. By the time I found it, the moment had gone quiet.
This guide gives you an overview suitable for a first paid shoot, a family trip, or a long travel day, including key aspects like fast access, padded separation, weight balance, and simple labels. The goal is plain: organizing your camera bag so you never miss a clean, honest moment.
Pack around the moment you most regret missing, then keep that gear in the fastest-access pocket.
Use fixed homes for cards, batteries, cleaning gear, and weather tools so you can find them by touch.
Split fresh and shot memory cards into separate zones to remove guesswork under pressure.
Balance heavy lenses close to your body and cut duplicate gear that only adds fatigue.
Reset the bag after every shoot so the next job starts with charged batteries, empty cards, and clean cloths.
Organizing Your Camera Bag So You Never Miss a Shot
Give every item a fixed home: camera ready, cards split by status, batteries sorted, and weather tools within reach. Pack for the shoot in front of you, balance weight close to your body, and reset the bag after every job.
A two-zone memory card wallet lets you confirm fresh versus shot cards without opening menus or guessing.
A short post-shoot reset starts the next job with charged batteries, empty cards, and clean cloths.
A shot can disappear in less time than it takes to unzip the wrong pocket.
Each card, battery, lens, cloth, and filter returns to the same place every time.
Fresh cards left, shot cards right, locked or flipped backward for instant status checks.
Labels reduce mental load when your brain is already tracking light, timing, and expression.
The gear tied to the moment you most regret missing gets the easiest pocket.
Build the bag around the shot you cannot miss.
You do not pack for every possible image. You pack for the next likely image, then place that gear where your hand naturally lands.
Camera first
Keep the primary body reachable with the first lens mounted, card checked, and cap handled before the moment starts.
Main lens second
The lens most likely to save the frame belongs in the fastest pocket, not the deepest padded slot.
Cloth on top
Rain, fingerprints, sunscreen, dust, and sea spray should meet a clean cloth before they become missed focus or flare.
The best bag is not the one that holds the most gear.
It is the bag that gets the right tool into your hand while the moment still has a pulse. Remove duplicate gear that only adds fatigue.
A 7-step reset you can run before every shoot.
Organizing your camera bag so you never miss a shot works best when the layout becomes muscle memory.
Camera ready
Mount first lens, check card, place body in fastest-access bay.
Second lens
Place it beside your dominant hand, above filters and cables.
Batteries split
Charged label-up, spent label-down or in a separate pouch.
Cards split
Fresh left, shot right, locked or flipped backward.
Clean top
Microfiber, blower, and lens tissue stay in the top layer.
Weather edge
Rain cover, zip bag, and gloves stay on the outside edge.
Shake test
Close, lift, and listen for loose glass, metal, or plastic.
Weight balance target
Use labeled homes so your fingers do not have to search.
Cards, batteries, filters, adapters, and cleaning tools disappear because camera bags become soft black caves. Labels beat memory under pressure.
Needs attention
Spent batteries, used cards, wet caps, and anything that must not go straight back into service.
Fresh tools
Charged batteries, clean cloths, cable release, tiny wrench, and the small tools you trust.
Visible flats
Filters, step-up rings, flat adapters, and accessories you want to identify before opening.
Fresh left
Shot cards go right and locked. The wallet lives in the same pocket for every shoot.
Choose the bag opening that matches how you move.
A backpack protects gear well, but a sling can win on a crowded street. Layout still matters more than clever pockets.
| Access Style | Best For | Fast Retrieval | Watch For | Real Shoot Example |
|---|---|---|---|---|
| Rear-opening backpack | Travel, hiking, long walks | ~ | Slower lens swaps | Set it down before a landscape frame. |
| Side-access backpack | Outdoor portraits, street travel | ✓ | One-sided weight if packed poorly | Swing one strap off and grab a 35mm lens. |
| Sling bag | City walks, events, light kits | ✓ | Shoulder fatigue after hours | Rotate forward at a market without blocking traffic. |
| Shoulder bag | Weddings, press work, fast swaps | ✓ | Less back support | Swap lenses beside a dance floor in under 20 seconds. |
| Roller or insert | Studio jobs, travel bases | ✗ | Stairs and rough ground | Stage gear in a hotel room, then carry only essentials. |
From packed bag to captured moment.
Every part of the system should make one next action easier: reach, confirm, protect, rebalance, and reset.
Ready body
Lens mounted, card checked, fastest bay selected.
Card status
Fresh left, shot right, no guessing under pressure.
Power sorted
Charged and spent batteries never share the same signal.
Weather ready
Rain cover, cloth, blower, and zip bag sit on the outside edge.
Clean frame
The moment stays alive because the tool arrives in time.
Build Your Bag Around the Shot You Cannot Miss
Organizing Your Camera Bag So You Never Miss a Shot starts with deciding which moment matters most, then placing that gear where your hand naturally lands. You do not pack for every possible image; you pack for the next likely image. On a wedding morning, that often means one body, one ready lens, and fresh batteries.
According to PhotoMocha, strong camera bag setups balance access, protection, weight distribution, labels, and regular review [1]. In the field, I turn that into one pre-shoot question: what would hurt to miss? A first kiss, a bird lifting off, and a child blowing birthday candles need different bags.
- Primary body: keep it reachable with the lens mounted and cap handled before the moment starts.
- Main lens: place it in the fastest pocket, not the deepest padded slot.
- Backup power: keep one fresh battery closer than your snack, notebook, or charger.
- Clean cloth: put it where rain, fingerprints, and sea spray meet your front hand.
The best camera bag is not the bag that holds the most gear. It is the bag that gets the right tool into your hand while the moment still has a pulse.
As an affiliate, we earn on qualifying purchases.
A 7-Step Bag Layout You Can Repeat Before Every Shoot
Organizing Your Camera Bag So You Never Miss a Shot works best when your layout becomes muscle memory. You should be able to find a card, battery, or cloth by touch in low light. I use this same 7-step reset before portraits, travel days, and small commercial jobs.
- Place the camera ready: mount your first lens, check the card, and set the camera in the fastest-access bay.
- Put the second lens beside your dominant hand: if you change lenses often, do not bury the lens under filters or cables.
- Split batteries by status: charged batteries face label-up; spent batteries face label-down or go in a separate pouch.
- Use a two-zone card wallet: fresh cards on the left, shot cards on the right, locked or flipped backward.
- Keep cleaning gear in the top layer: one microfiber cloth, a blower, and a small wrapped lens tissue pack cover most field messes.
- Put weather gear on the outside edge: rain cover, zip bag, and thin gloves should come out fast.
- Do a 10-second shake test: close the bag, lift it, and listen for loose metal, glass, or plastic sliding around.
Before a family session, this list takes me about 3 minutes. That tiny ritual has saved more images than any fancy strap or clever gadget. The sound you want is dull and padded, not the sharp click of a filter ring rolling loose.
memory card wallet for photographers
As an affiliate, we earn on qualifying purchases.
As an affiliate, we earn on qualifying purchases.
Give Every Small Thing a Labeled Home
Small items disappear because camera bags become soft black caves. The fix is a set of labeled pouches with jobs you never change. Cards, batteries, filters, adapters, and cleaning cloths should live in fixed places, so your fingers do not have to search while your subject waits.
Research from cognitive psychology shows people usually hold about four chunks of information in working memory [2]. That matters on a noisy sidewalk or in a dark reception hall. Labels beat memory when your brain already tracks exposure, expression, background, timing, and where you parked.
- Red pouch: spent batteries, used cards, or anything that needs attention before reuse.
- Gray pouch: fresh batteries, clean cloths, cable release, and small tools.
- Clear pouch: filters, step-up rings, and flat accessories you want to see fast.
- Card wallet: fresh left, shot right, with the wallet always in the same pocket.
On cold sunrise shoots, gloves turn every pocket into a puzzle. A simple zipper pull and a bold label can save you from dumping half the bag into wet grass. Keep spare lithium batteries covered or in a case, never loose with coins, keys, or metal clips.
camera gear weather protection cover
As an affiliate, we earn on qualifying purchases.
As an affiliate, we earn on qualifying purchases.
Choose the Access Style That Fits Your Shoot
Organizing Your Camera Bag So You Never Miss a Shot depends on access style as much as storage space. A backpack protects gear well, but a sling can beat it on a crowded street. Match the opening, straps, and divider layout to how you move, not how tidy the bag looks at home.
| Access style | Best for | Watch for | Real shoot example |
|---|---|---|---|
| Rear-opening backpack | Travel, hiking, long walks | Slower lens swaps | You set it down on dry ground before a landscape frame. |
| Side-access backpack | Outdoor portraits, street travel | One-sided weight if packed poorly | You swing one strap off and grab a 35mm lens while standing. |
| Sling bag | City walks, events, light kits | Shoulder fatigue after hours | You rotate it forward at a market without blocking foot traffic. |
| Shoulder bag | Fast lens changes, weddings, press work | Less back support | You swap lenses beside a dance floor in under 20 seconds. |
| Roller or insert | Studio jobs, travel bases | Poor stairs and rough ground handling | You stage gear in a hotel room, then carry only what you need. |
Modern modular bags with adjustable dividers, side openings, and dedicated laptop or drone sleeves can help, but layout still wins. A charging port does not help if the charged battery sits under a jacket. I would rather have three honest pockets I trust than ten clever pockets I forget.
camera bag weight distribution straps
As an affiliate, we earn on qualifying purchases.
As an affiliate, we earn on qualifying purchases.
Pack Weather Protection Where the Weather Hits First
Weather protection works only when you can reach it before rain, dust, or sea spray reaches your gear. Keep rain covers, microfiber cloths, silica gel packs, and a small zip bag in the outer layer. If you shoot outdoors, treat weather tools as active gear, not emergency clutter.
At the coast, salt spray feels like a fine cool mist on your face and a gritty film on your front element. I keep one cloth for glass and one cloth for hands, because sunscreen and salt make ugly smears. After the shoot, those cloths leave the bag for washing, not for another round of damage.
- Rain cover: top or side pocket, never under lenses.
- Microfiber cloth: sealed in a clean sleeve so it stays grit-free.
- Silica gel pack: inside the main compartment after damp shoots.
- Zip bag: for wet straps, muddy lens caps, or a soaked phone.
- Blower: for loose dust before you wipe glass.
Do not bury your rain cover beneath the gear it is supposed to protect.
If you use lens cleaning fluid, apply a tiny drop to the cloth, not directly onto the lens. Work gently from the center outward. In dusty places, blow first, wipe second, because one grain of grit can drag a thin scratch across coated glass.
Carry Less by Packing for the Assignment, Not Your Anxiety
A lighter camera bag comes from cutting duplicate possibilities, not from leaving out the tools the shoot truly needs. Start with the assignment, then add backup gear only where failure would stop the work. Weight close to your spine feels calmer than weight hanging far from your body.
A full-frame body with a standard zoom often lands around 1.4 to 1.7 kg before you add another lens, flash, water bottle, or laptop. After 6 hours, that weight turns into slower reactions and sore shoulders. I pack heavy lenses near the center of my back and split smaller items left and right.
- Must shoot: gear needed for the images you promised.
- Likely shoot: one useful alternate lens, flash, or filter based on the location.
- Comfort layer: water, snack, gloves, and medicine, kept separate from glass.
- Leave-behind pile: duplicate chargers, rarely used filters, extra straps, and the lens you bring only from fear.
For a 10-hour travel day, I would rather carry one camera, two lenses, two fresh batteries, and four cards than drag a studio drawer through cobblestone streets. Your bag should make you quicker at hour eight, not proud for the first mile and tired by lunch.
Change the Top Layer for the Shoot in Front of You
Organizing Your Camera Bag So You Never Miss a Shot does not mean rebuilding the whole bag each time. Think of the main compartment like your kitchen cabinets: the plates stay where they are, but the cutting board comes out when you cook. Keep the core map steady, then change the top layer for the job.
Here is what that looks like in real life. The same backpack can feel completely different at 8 a.m. before a ceremony, at noon on a city walk, or at 5 a.m. beside a cold lake. The dividers stay familiar, but the tools sitting closest to your hand change with the moment most likely to vanish.
- Weddings: before the ceremony, the card wallet, two fresh batteries, timeline, flash trigger, and cloth go in the fastest pockets. Picture the couple stepping into confetti outside the church: one card fills, one battery warning flashes, and you still need to keep shooting. The fresh card should be as easy to grab as a door handle, not hidden under a charger.
- Street photography: for a 1-hour city walk, carry one mounted lens, one spare card, a tiny cloth, and no noisy loose accessories. If a cyclist passes through a stripe of window light or a stranger laughs under a cafe awning, your hand goes to the camera, not to a pouch of adapters.
- Wildlife: at a marsh or forest edge, keep long lens support, a spare battery, rain cover, and quiet access on top. Imagine a heron lifting from reeds after 20 silent minutes. A loud zipper, loose tripod plate, or buried teleconverter can end the scene before the shutter fires.
- Landscape travel: before sunrise, filters, tripod plate, headlamp, gloves, and weather gear move to the top layer. When blue hour lasts only minutes, the headlamp should be easier to find than your hotel key, and the filter pouch should open like a recipe card you have used a hundred times.
- Family trips: camera, one small lens, spare card, and a snack pouch stay separate from sticky hands. At a playground or airport gate, the snack can live in the outside pocket and the card wallet can live deeper inside, so helping a child does not turn into exposing your memory cards to crumbs and juice.
After every shoot, I do a 5-minute reset: cards out, batteries charging, cloths washed, sand removed, receipts cleared, and dividers checked. PhotoMocha recommends regular review because your needs shift by season, new gear, and shooting style [1]. Tomorrow’s clean bag starts tonight, while the last shoot is still fresh in your hands.
Frequently Asked Questions
Should I pack my camera with a lens already attached?
Yes, if your bag has enough padded depth and the lens does not strain the mount. For most documentary, travel, and family work, a camera packed with your first-choice lens saves real time. Use a snug divider setup so the body does not twist while you walk.
How many lenses should I carry in my camera bag?
Carry the fewest lenses that cover the shots you promised. For many shoots, two lenses work beautifully: one flexible zoom or normal prime, plus one lens for reach, low light, or a different look. Add more only when the assignment calls for it.
Where should memory cards go in a camera bag?
Memory cards should live in one dedicated card wallet, not loose in pockets. Keep fresh cards on one side and shot cards on the other, then follow the same direction every time. That simple split prevents the sick feeling of formatting the wrong card.
How often should I reorganize my camera bag?
Reset your camera bag after every shoot and rebuild the top layer before each new job. A full seasonal review also helps when weather, travel, or new gear changes your needs. Five quiet minutes at the kitchen table can save you from a frantic search in the field.
How do I keep a camera bag light without leaving out gear I need?
Start with the shoot plan, then remove duplicates that do not solve a real problem. Keep backup items for failures that would stop the job, like batteries, cards, and one alternate lens. Leave behind the gear you pack only because it makes you feel better at home.
Conclusion
Your camera bag should feel like a well-practiced hand movement, not a box of expensive guesses. Give every item a home, keep the fast layer honest, and reset the bag before memory fades.
When the light turns gold, the laugh breaks open, or the bird lifts from the branch, you should hear only one sound: the zipper you meant to open.
Fall Picks
fall essentials
As an affiliate, we earn on qualifying purchases.