
TL;DR

Get audio and creator gear delivered free with Prime
- Fast, free delivery on millions of items
- Prime Video, Amazon Music and more included
- Member-only deals all year
Hiking with camera gear works best when you carry the heaviest items close to your spine, keep one camera reachable without removing your pack, and protect both your gear and the trail. Use a small, intentional kit, weather cover, secure straps, and a simple safety routine so you can shoot well without arriving sore, rushed, or careless.
Hiking with camera gear gets uncomfortable fast when your pack fights your body instead of working with it. I have carried a body, two lenses, water, food, rain shell, and tripod up muddy switchbacks, and the lesson is simple: the photo starts with your carry system, long before the shutter.
You will learn how to balance comfort, access, and safety so you can reach the overlook with steady legs and dry gear. This is real field use, not lab chatter: straps creak, clouds thicken, and the light slides across the ridge whether your bag is ready or not.
Carry heavy lenses high and close to your spine, then let the hip belt take the load before your shoulders complain.
Build a 10-second camera access path with one ready position, one mounted lens, and a tether for rough ground.
Protect the camera in use first with a rain cover, dry bag, cloth, hood, and quick lens-change habits.
Stop walking before composing, keep straps tidy, and follow Leave No Trace guidance around wildlife and fragile ground.
Pack only the lenses that match the hike, because unused glass becomes fatigue by the return mile.
Hiking With Camera Gear: Comfort, Access, and Safety
Carry the heaviest items close to your spine, keep one camera reachable without removing your pack, and protect both your gear and the trail. The photo starts with the carry system long before the shutter.
A camera you can reach in 10 seconds beats an extra lens buried deep.
Fast access reduces missed light, keeps you calmer on rough ground, and lowers the temptation to unpack gear in unsafe places.
Dense lenses ride best near the spine, not swinging at the pack edge.
One mounted lens, one ready position, one repeatable return habit.
Pack cover, dry bag, cloth, and hood protect the gear in use.
Plant both feet before composing, especially near cliffs or water.
Why the Pack Hurts After Mile Three
Comfort starts with weight placement. Your shoulders are not built to carry a dense camera cube all day, so the hip belt, sternum strap, and divider layout become part of the camera system.
Keep heavy glass close
Pack telephoto lenses high and near the back panel. A heavy lens at the outside edge turns every step into a small tug.
Let the belt carry
Tighten the waist belt before the shoulder straps complain. The goal is calm load transfer, not a pack hanging from your neck.
Cut unused glass
Every lens should earn the climb. Unused options become fatigue on the return mile, especially with water, food, layers, and tripod weight.
Choose the Carry Style That Fits the Trail
A chest clip, side-access pack, camera insert, or sling can all work. The right choice depends on trail length, weather, lens size, and how often you shoot.
| Carry option | Works best for | Comfort | Access | Watch for |
|---|---|---|---|---|
| Camera hiking backpack | Longer hikes with layers, water, food, and multiple lenses | ✓ Strong | ~ Moderate | Some designs feel bulky on narrow trails |
| Hiking pack with camera insert | Mixed outdoor days where comfort matters most | ✓ Strong | ~ Pack carefully | Access slows down if the insert is buried |
| Chest clip or holster | Frequent shooting with one mounted lens | ~ Depends | ✓ Fast | The camera needs a tether on rough ground |
| Small sling or hip pouch | Short walks, travel days, and light mirrorless kits | ✗ Uneven | ✓ Fast | Uneven weight can irritate one shoulder |
Build the 10-Second Access Path
Keep one body ready, store backup lenses deeper, and repeat the same return motion every time. Muscle memory beats rummaging when the trail gets narrow.
Choose
Pick one ready position: chest clip, side door, or padded hip pouch.
Preset
Use aperture priority, auto ISO limits, and a safe shutter speed.
Tether
Add a short strap or leash when scrambling or shooting near water.
Shoot
Stop walking, brace your feet, raise the camera, and compose calmly.
Return
Put the camera back the same way before moving again.
Protection Priorities in the Field
Rain protection matters most for the camera in use, not the lens packed three zippers deep. Weather, dust, cold, and hurried lens changes are the real trail test.
Stay Safe When the View Pulls You Forward
The hardest part is not rain or dust. It is the moment when the scene makes you forget your feet. The safest frame starts from stable ground.
The trail routine
- Stop walking before composing.
- Keep straps tidy and tripod legs short near edges.
- Step only onto durable ground.
- Use a longer lens instead of moving closer to wildlife.
Field notes
Trace the Better Hike
The strongest camera carry is a chain, not a single product. Comfort protects energy, access protects timing, and safety protects the place you came to photograph.
Why Your Pack Hurts After Mile Three
Hiking With Camera Gear: Comfort, Access, and Safety starts with weight placement because your shoulders are not built to carry a dense camera cube all day. Think of your pack like a grocery bag: cans ride better close to your body, while a heavy bottle swinging at the outside edge makes every step feel worse. Keep heavy lenses high and close to your spine, shift load onto your hips, and cut the kit until every piece earns the climb.
On a wet ridge hike, I once carried a full-frame body, a 24-70mm, a 70-200mm, a tripod, and two liters of water in a loose daypack. By mile four, the pack slapped my lower back with every step, and my neck felt like a guitar string. Since then, I treat hip belts, sternum straps, and modular dividers as part of the camera system.
For a normal day hike, I aim to keep my full load near 10 to 15 percent of body weight when the trail climbs hard. That is a field guardrail, not a rule carved in stone. If you are using backpacks with padded straps, adjustable harnesses, and a real waist belt, the same gear feels calmer because the load stops swinging.
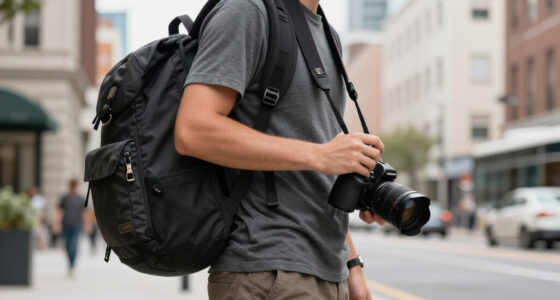
camera hiking backpack with quick access
As an affiliate, we earn on qualifying purchases.
As an affiliate, we earn on qualifying purchases.
Pick the Carry Style That Fits the Trail
Hiking With Camera Gear: Comfort, Access, and Safety gets easier when your carry style matches the terrain, not your wish list. A chest clip, side-access pack, or hiking pack with insert can all work, but the right choice depends on trail length, weather, lens size, and how often you shoot.
| Carry option | Works best for | Watch for |
|---|---|---|
| Camera hiking backpack | Longer hikes with extra layers, water, food, and multiple lenses | Some designs feel bulky on narrow trails |
| Hiking pack with camera insert | Mixed outdoor days where comfort matters more than instant lens swaps | Access can be slower unless you pack with care |
| Chest clip or holster | Frequent shooting with one mounted lens | The camera needs a tether on rough ground |
| Small sling or hip pouch | Short walks, travel days, and light mirrorless kits | Uneven weight can irritate one shoulder |
On a rocky coastline trail, I use a side-access pack because I can keep both feet planted and pull the camera without setting the bag in salt-wet sand. On a short city-to-woods walk, a small sling is enough for a mirrorless body and pancake lens. In a forest, I often prefer a hiking pack with an insert because the route is softer and slower. The important aspects of the choice are balance, reach, and whether the bag stays quiet when you move.
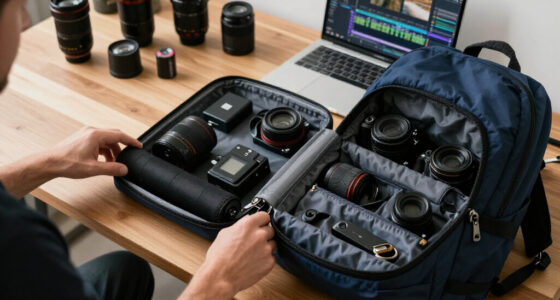
weatherproof camera cover for hiking
As an affiliate, we earn on qualifying purchases.
As an affiliate, we earn on qualifying purchases.
Get the Camera Out Before the Light Disappears
Hiking With Camera Gear: Comfort, Access, and Safety also means your camera should be reachable without unpacking your life on the trail. Keep one body ready, store backup lenses deeper, and build a 10-second access path so a passing cloud, a color shift, or a beam of alpine light does not vanish while you fight a zipper.
- Choose one ready position: chest clip, side door, or padded hip pouch.
- Pre-set exposure: use aperture priority, auto ISO limits, and a safe shutter speed before the view opens.
- Tether the camera: add a short strap or leash when scrambling or shooting near water.
- Return it the same way: muscle memory beats rummaging when the trail gets narrow.
At sunrise, I often walk with a 24-70mm lens mounted and a wider lens buried in the pack. When fog lifts for 30 seconds, I can stop, brace my feet, raise the camera, and shoot before the ridge loses its silver rim. The same habit helps with small moments too, like a hiker crossing a bright gap in the trees or rain beads catching light on a fern. Fast access keeps you stable and calm.
camera strap with quick release for outdoor photography
As an affiliate, we earn on qualifying purchases.
As an affiliate, we earn on qualifying purchases.
Protect Gear From Rain, Dust, and Sudden Weather
Rain protection matters most for the camera in use, not the lens packed three zippers deep. Weather can turn during a long walk; according to the National Weather Service, lightning can strike more than 10 miles from a thunderstorm [2], so sky awareness protects you and your gear.
My trail kit uses layers: a pack rain cover, a small dry bag for batteries and cards, a microfiber cloth in a zip pouch, and a simple lens hood. Picture it like dressing for the hike: the pack cover is the rain jacket, the dry bag is the warm inner layer, and the cloth is the handkerchief you actually need first. A hood keeps drizzle and grit off the front element better than many beginners expect. In wind-blown sand, I change lenses with my back to the gust and my bag open for five seconds or less.
Cold is sneaky too. Batteries fade faster when the air bites, so I keep a spare battery in an inside pocket where body heat helps. After a snowy hike, I let the camera warm slowly in a closed bag, because sudden warm indoor air can leave condensation on glass and electronics.
The harder part is not rain or dust. It is the moment when the view makes you forget your feet.
compact camera kit for hiking trips
As an affiliate, we earn on qualifying purchases.
As an affiliate, we earn on qualifying purchases.
Stay Safe When the View Pulls You Forward
Hiking With Camera Gear: Comfort, Access, and Safety is safest when you stop moving before you start composing. Plant both feet, step off the main path only on durable ground, and keep straps tidy so a dangling tripod or loose lens pouch does not snag rock, brush, or another hiker.
According to the National Park Service Leave No Trace guidance, you protect wild places by staying on durable surfaces, packing out waste, and giving wildlife room [1]. In many U.S. parks, the common distance rule is 25 yards from most wildlife and 100 yards from bears and wolves. A longer lens beats a closer step.
The photo is not the priority when your footing, weather, or trail manners start to slip. Step back, breathe, and make the safe frame from where you are.
I use this rule on cliff overlooks: camera clipped in, one hand free, tripod legs short until I am away from the edge. If the wind pushes my jacket hard enough to flap, I lower the tripod and work from kneeling height. On a crowded waterfall path, I wait for a pullout instead of blocking the trail with tripod legs. You lose a little perspective, but you keep balance, control, and a working camera.
Pack in the Order You Will Shoot
Packing order should follow the way you expect to shoot, because a tidy bag in your living room can become a slow mess on a windy pass. Put the items you need often near your hands, bury the backup gear, and separate wet items from electronics.
- Start with water and layers: place them where they will not crush camera inserts.
- Load heavy lenses close: keep glass near your spine and above the bottom of the pack.
- Mount your main lens: choose the lens you expect to use in the first hour.
- Place batteries and cards in one pocket: use the same pocket every hike.
- Attach the tripod last: cinch it tight so it does not swing like a pendulum.
Before a forest hike, I put a 35mm lens on the camera because the first mile is usually close trunks, wet leaves, and low light. Before a desert overlook, I might mount the normal zoom and keep the telephoto higher in the bag for distant ridgelines. The telephoto sits deeper until the trail opens. This is gear organization with a purpose: less rummaging, fewer missed frames, and less mud on your knees.
The important aspects of a trail pack are not fancy dividers; they are repeatable pockets, dry storage, and a clean route to your camera. I keep a tiny cloth, blower, and card wallet together so my hands go there without thought. When the light changes, your bag should feel familiar.
Choose the Small Kit That Still Tells the Story
A small camera kit is the one that covers the story of the hike without punishing your knees. For many trails, one body, one normal zoom, one light telephoto or wide lens, and a compact support give you range without turning the hike into a haul.
A two-lens kit is suitable for a five-mile loop where you expect wide views and a few detail shots. For example, a 24-70mm can handle trail portraits, overlooks, and camp scenes, while a 70-200mm can pull in a distant ridge or a bird without stepping off the path. A single weather-sealed zoom may be better when rain keeps tapping your hood. If your goal is family memories, a modern phone plus a small camera can beat a heavy bag you resent by lunch.
Tripods are the tradeoff I feel most. A light travel tripod helps with waterfalls, night sky work, and self portraits, but it can snag branches and tire your shoulders. If I will not use shutter speeds slower than 1/30 second, I often leave it and use rocks, railings, or my pack as a brace.
Drones add another layer of responsibility. Check local rules before you pack one; U.S. national parks generally restrict launching, landing, and operating drones without permission [1]. Quiet trails deserve quiet choices, and your camera bag should help you make them.
Run This 60-Second Check Before You Walk
A 60-second trail check catches the small mistakes that turn into sore shoulders, wet gear, or missed photos. Before you leave the car, test the pack fit, confirm one camera access point, check the sky, and secure every strap so nothing swings, rattles, or drags.
- Tighten the hip belt: the pack should sit on your hips before your shoulders carry the load.
- Check camera reach: pull the camera out and put it back while standing still.
- Lock loose straps: stop tripods, pouches, and rain covers from swinging.
- Read the route: note distance, elevation, and daylight, including key aspects like water crossings or exposed ridges.
- Save the map: open your offline route and weather screen before signal fades.
On workshops, I watch beginners learn this fast. One hiker finds a loose tripod strap before it bangs against rock for three miles; another realizes the rain cover is buried under lunch and moves it to the top pocket. The person who tightens a hip belt, pockets a lens cloth, and checks the rain cover usually spends the first hour looking at light, not fighting gear. That calm start pays you back all the way to the trailhead.
Frequently Asked Questions
How much camera gear is too much for a day hike?
Too much gear is the kit that changes your stride, slows your reactions, or makes you skip water and layers. For many day hikes, a camera body, one mounted lens, one backup lens, spare battery, cards, cloth, and rain cover is enough.
Is a hiking backpack better than a camera backpack?
A hiking backpack often carries better over long miles, while a camera backpack usually gives faster padded access. If the trail is steep or long, choose comfort first and add a camera insert; if you shoot every few minutes, a side-access camera pack may fit better.
Should you bring a tripod when hiking with camera gear?
Bring a tripod when you expect slow shutter speeds, night scenes, waterfalls, stitched panoramas, or self portraits. Leave it at home when the route is narrow, windy, or fast-paced and you can shoot handheld at safe shutter speeds.
How do you keep camera gear dry in sudden rain?
Use layers: a pack rain cover, a dry bag for batteries and cards, a lens hood, and a cloth you can reach fast. Keep the camera you are using protected first, because that is the one taking the weather while the rest sits inside the pack.
What is the safest way to carry a camera on rough terrain?
The safest method keeps the camera close to your body, tethered, and stable while leaving your hands available when the trail gets rough. A chest clip or tight side carry works well, but stop walking before you compose and keep one hand free near steep drops or slick rock.
Conclusion
Carry less than you can carry, and arrange it so your body, hands, and attention all work together. The best hiking camera setup is not the biggest one; it is the one that lets you walk steadily, reach the camera quickly, and leave the trail as quiet as you found it.
Before your next hike, load the bag, walk around the block, and fix every rub, swing, and slow zipper at home. The mountain will give you enough surprises; your camera bag should not be one of them.
Columbus Day / Indigenous Peoples' Day Picks
long weekend sales
As an affiliate, we earn on qualifying purchases.