TL;DR

Get audio and creator gear delivered free with Prime
- Fast, free delivery on millions of items
- Prime Video, Amazon Music and more included
- Member-only deals all year
To choose a camera bag that fits how you shoot, start with your most common shooting day, then match the bag style to access speed, comfort, and weather. A sling suits a light street kit, a backpack suits long walks with more lenses, and a roller suits heavy travel work. The right bag should feel like a well-laid-out workbench, not a suitcase full of loose glass.
The wrong camera bag can make a beautiful shoot feel like carrying a box of bricks with zippers. I have watched photographers miss small, quiet moments because their camera was buried under three spare lenses, a charger, and a jacket they never used.
You are not choosing storage. You are choosing speed, comfort, protection, and the tiny rituals that shape how you work when light changes fast. This guide shows you how to choose a camera bag that fits how you actually shoot, from street walks to wedding days to carry-on travel.
Pick the bag for the shoot you do most, not the big assignment you do twice a year.
Keep your everyday kit around 70-80% of the bag capacity so you have working room without loose, shifting gear.
Choose bag style by access speed: shoulder bags open fastest, backpacks carry best, rollers protect heavy kits on smooth ground.
Pack heavy lenses close to your body and test comfort for at least 20 minutes before trusting a bag for long work.
Treat layout as muscle memory: put cards, batteries, and your main lens in the same place every time.
How to Choose a Camera Bag That Fits How You Shoot
The right camera bag is not just storage. It is your moving workbench: fast enough for changing light, balanced enough for long walks, and protective enough when weather gets a vote. Start with your most common shooting day, then match the bag to access speed, comfort, protection, and layout memory.
Full enough to stop dividers collapsing, open enough for lens changes, rain cover, water, and a thin layer.
Shoulder bags open fastest, backpacks carry best, rollers protect heavy kits on smooth ground.
Buy for the shoot you do most, not the giant assignment you do twice a year.
Step 01 / Match the bag to the day
Start With the Shoot You Actually Do
If 80% of your work is one camera body and two lenses, size the bag for that rhythm first. The rare heavy assignment can use an insert, a second case, or a roller.
Keep the camera near your ribs.
A compact shoulder or sling bag helps you react before light leaves a wall, window, or passing face.
Design for dark, fast swaps.
Cards, batteries, and a main lens need fixed homes your hands can find without searching.
Carry weather before another lens.
Weight balance, rain control, water, and a layer often matter more than squeezing in extra glass.
Leave one pocket unclaimed.
A reflector, flash, or towel needs breathing room. A packed-tight bag slows every adjustment.
Protect the dense, fragile core.
Use structured dividers, laptop padding, and battery cases so airport handling does not become chaos.
Make less gear easier to use.
A small kit deserves a small, precise bag. Empty space can let lenses shift and dividers sag.
Step 02 / Compare carry styles
Choose Access Speed or Load Comfort First
Every bag shape makes a bargain. The best choice is the compromise that matches how you move, not the one with the longest feature list.
| Bag style | Best fit | Speed | Comfort | Tradeoff | Real shooting example |
|---|---|---|---|---|---|
| Backpack | Long walks, hiking, travel, multiple lenses | ~ Medium | ✓ High | Slower unless it has side or rear openings | Sunrise hike with tripod, rain shell, and 24-70mm lens. |
| Shoulder bag | Street, documentary, events, quick swaps | ✓ High | ~ Medium | One shoulder tires faster over long days | Reception work with cards, batteries, and 50mm lens at hip level. |
| Sling bag | Light mirrorless kits and short walks | ✓ High | ~ Medium | Limited space and uneven load | Market walk with one body, two primes, and a cleaning kit. |
| Holster | One camera and one mounted lens | ✓ High | ✓ High | Little room for extras | Camera stays ready while spare gear remains at camp. |
| Roller case | Studio, wedding, airport, heavy lighting gear | ✗ Low | ✓ High | Poor on stairs, gravel, and cobblestones | Multiple bodies, flashes, chargers, and backup gear to a venue. |
Step 03 / Packing rehearsal
Run One Real Packing Test Before You Trust the Bag
Close every zipper without forcing the fabric. Change lenses twice while standing. Remove the item you carry from worry but almost never use.
Lay Out the Normal Kit
Body, mounted lens, second lens, batteries, cards, strap, cloth, charger.
Add Weather Basics
Rain cover, microfiber towel, and one dry pouch for batteries or cards.
Pack to 70-80%
Leave working room without creating loose, shifting compartments.
Change Lenses Standing
Real shoots rarely hand you a clean table at the decisive moment.
Walk for 20 Minutes
If it argues with your neck at home, it gets louder outside.
Step 04 / Comfort and capacity
Make the Bag Carry the Weight, Not Your Attention
Dense items packed far from your spine pull hard over time. Keep heavy lenses close to your body, use wide straps, and test stairs before a full-day shoot.
Carry Priority by Shooting Style
Comfort Checklist
- Pack heavy lenses close to the center of your back or near your torso.
- Choose wide straps and a stable sternum or waist strap for long walks.
- Make sure the back panel holds shape when fully loaded.
- Reduce awkward twisting by placing frequent items in easy-reach pockets.
- For 10-12 hour events, plan clean swaps from a nearby case instead of wearing every lens.
Step 05 / Traceability
Turn the Bag Into Muscle Memory
Put your most-used lens, fresh batteries, and empty cards in the same pockets every time. A good layout answers before you have to think.
Ready position, lens mounted, strap clear.
Charged face up, spent upside down.
Full cards left, empty cards right.
Cover, towel, and dry pouch in one reach.
Dense glass close, light extras outside.
No buried camera, no scavenger hunt.
Final filter / Protection before style
Weather, Padding, and Power Rules Matter
Look for structured dividers, water-resistant fabric, a rain cover, and zippers that move cleanly around corners. Keep spare lithium batteries in carry-on baggage with terminals protected from short circuits.
Pick the bag that protects the shot, not the shelf.
A sling suits a light street kit. A backpack suits long walks with more lenses. A roller suits heavy travel work. The wrong bag turns a beautiful shoot into a box of bricks with zippers.
The best camera bag feels like a well-laid-out workbench: every tool has a place, the load sits cleanly, and your hands stop hunting when the light changes fast.
Start With the Shoot You Do Most
How to choose a camera bag that fits how you shoot starts with your real shooting pattern, not your dream kit. If you spend 80% of your time with one camera body and two lenses, buy for that day first. The rare big assignment can use an insert, case, or second bag.
On a city portrait morning, I often carry a body, a 35mm lens, an 85mm lens, batteries, cards, and a small reflector. A hiking backpack would slow me down at every crosswalk. A compact shoulder bag keeps the camera near my ribs, where I can grab it before the light slips off a brick wall.
- Street and travel: prioritize quick side access and a low-profile shape.
- Portraits: leave space for one extra lens, a reflector, and small flash gear.
- Events: plan for fast lens swaps, extra batteries, and cards you can reach in the dark.
- Landscape hikes: favor weight balance, weather cover, and room for water before another lens.
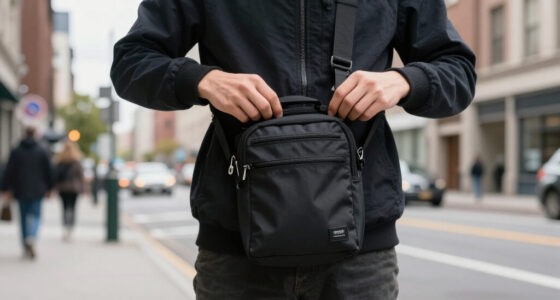
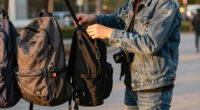
camera sling bag for street photography
As an affiliate, we earn on qualifying purchases.
As an affiliate, we earn on qualifying purchases.
Pick the Bag Style That Matches Your Pace
How to choose a camera bag that fits how you shoot gets easier when you match the bag shape to your pace. Backpacks carry weight well, shoulder bags open fast, slings split the difference, and rollers protect heavy kits when your feet stay on pavement.
| Bag style | Best fit | Tradeoff | Real shooting example |
|---|---|---|---|
| Backpack | Long walks, travel, hiking, multiple lenses | Slower access unless it has side or rear openings | You hike 4 miles at sunrise with a tripod, rain shell, and 24-70mm lens. |
| Shoulder bag | Street, documentary, events, quick lens swaps | One shoulder tires faster | You work a reception and need batteries, cards, and a 50mm lens at hip level. |
| Sling bag | Light mirrorless kits and short walks | Limited space and uneven load | You wander a market with one body, two primes, and a tiny cleaning kit. |
| Holster | One camera and one mounted lens | Little room for extras | You hike with a camera ready while the rest of your gear stays at camp. |
| Roller case | Studio, wedding, airport, heavy lighting gear | Poor on stairs, gravel, and cobblestones | You bring multiple bodies, flashes, chargers, and backup gear to a venue. |
I like backpacks for long days because both shoulders share the load, but they can make you miss fast scenes. A shoulder bag is a little workbench at your hip. After six hours, though, that same workbench starts arguing with your neck.
professional camera backpack for long walks
As an affiliate, we earn on qualifying purchases.
As an affiliate, we earn on qualifying purchases.
Size Your Kit With One Real Packing Test
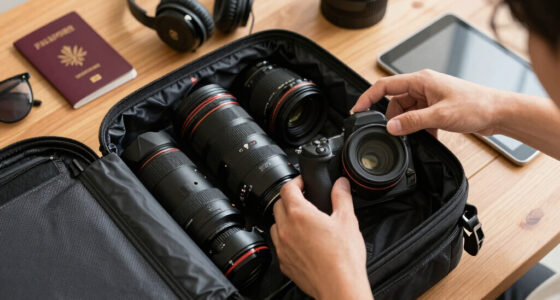
Size your camera bag by packing the kit you use most, then adding only the real extras your day demands. A bag that sits around 70-80% full with your everyday kit gives you working room without letting dividers sag, lenses knock, or cables creep into strange corners.
- Lay out your normal kit: camera body, mounted lens, second lens, batteries, cards, strap, cleaning cloth, and charger if you travel.
- Add weather basics: rain cover, microfiber towel, and one small dry pouch for batteries or cards.
- Pack it once: close every zipper without forcing the fabric or pressing lens caps into each other.
- Change lenses twice: do it standing up, because real shoots rarely hand you a clean table.
- Remove the fantasy item: take out the lens or gadget you carry from worry but almost never use.
Do a 15-minute packing rehearsal at home. If the bag annoys you on the kitchen table, it will annoy you harder on a wet sidewalk.
Before a coastal engagement shoot, I once left a third lens at home and made space for a thin rain shell and microfiber towel. That choice saved the session when salt spray started misting the front element. The unused lens would have been dead weight; the towel kept the images clean.
As an affiliate, we earn on qualifying purchases.
Make Comfort Carry the Weight
Comfort matters because the bag becomes part of your body after the first hour. Choose wide straps, a stable waist or sternum strap, and a back panel that holds shape when loaded. If the bag shifts with every step, your attention leaves the frame and moves to your shoulder.
Ergonomics guidance from CDC and NIOSH favors keeping loads close to your body and reducing awkward twists during repeated lifting [3]. The same idea shows up on set: dense items packed far from your spine pull like a stubborn anchor. Pack heavy lenses near the center of your back, then test stairs before you trust the bag for a full day.
For a wedding, I may carry two bodies, flashes, triggers, batteries, and cards for 10-12 hours. I would rather make two clean bag swaps from a nearby case than wear every possible lens from morning prep to the last dance. Your back is not a shelf.
As an affiliate, we earn on qualifying purchases.
Protect Your Gear Before Weather Gets a Vote
Protection means padding, weather control, and closures that keep working when your hands are cold. Look for structured dividers, water-resistant fabric, a rain cover, and zippers that move cleanly around corners. Soft padding should cradle lenses like a nest, but the outer shell should resist elbows, door frames, and overhead-bin bumps.
According to the Transportation Security Administration, camera equipment can travel in carry-on bags, though officers may ask you to remove larger electronics during screening [1]. According to the Federal Aviation Administration, spare lithium batteries belong in carry-on baggage, with terminals protected from short circuits [2]. Keep batteries in a small case, not loose beside keys.
On rainy football sidelines, I care less about style and more about one-handed zipper pulls and a cover I can throw over the bag in five seconds. A beautiful leather flap can look great in a cafe. In sideways rain, it can behave like a wet napkin with opinions.
Set Up Compartments So Your Hands Stop Hunting
How to choose a camera bag that fits how you shoot also means building a layout your hands can learn. Put your most-used lens, fresh batteries, and empty cards in the same pockets every time. A good layout turns the bag into muscle memory, not a scavenger hunt.
I use a simple left-to-right rule on fast jobs: full cards left, empty cards right, batteries facing up when charged and upside down when spent. At receptions, the room is dark, music is loud, and you do not get a calm minute to wonder which card is clean. The bag should whisper the answer through touch.
- Use bright zipper tabs for pockets you need in low light.
- Keep cleaning gear separate so dust and grit stay away from rear lens caps.
- Label removable pouches for audio, flash, drone, or travel cords.
- Leave one empty slot for the lens you just took off, because real shoots get messy.
Choose Travel Features You Will Use
Choose extra features only when they solve a problem you meet often. Laptop sleeves, tripod straps, charging pass-throughs, hidden pockets, recycled fabrics, and removable inserts can be useful. They can also add weight, bulk, and little dangling bits that catch on chairs, straps, and airline seats.
Modern camera bags lean toward modular inserts, hybrid sling-backpack designs, and lighter recycled fabrics. I like modular layouts when I switch between portraits and family travel, because the insert can move from a daypack to a carry-on. I skip built-in charging ports unless I already carry a power bank every single shoot.
If you edit on location, measure the actual laptop sleeve before trusting the label. A 16-inch laptop, a tablet, and a charger can turn a nimble bag into a stiff filing cabinet. For a Saturday street walk, that tech pocket may be better filled with water and a snack.
Test the Bag Like a Real Shooting Day
Test the bag loaded, moving, and slightly rushed, because that is how you will use it. Walk for 20 minutes, change lenses twice, kneel, climb stairs, and pull the camera out with one hand. If the bag fights you at home, it will shout during a paid shoot.
- Load your real kit, not a neat version made for the store aisle.
- Wear your shooting clothes, including jacket, belt, or harness if you use one.
- Time one camera pull and one lens swap without placing the bag on a table.
- Check pressure points at your neck, lower back, and hips after 20 minutes.
- Remove one item you packed from fear rather than real need.
This is the direct challenge: do not let a bag sell you a fantasy version of yourself. If you shoot one body and one prime lens, honor that lean style. If you carry lighting, snacks, rain gear, and backups for clients, choose the bag that respects real responsibility.
Frequently Asked Questions
What size camera bag do I need?
Choose a bag that fits your normal camera body, main lens, one backup lens, batteries, cards, and a small weather kit with 20-30% free space. If it is packed tight before water or a jacket, it is too small for real use. If half the bag stays empty, you will probably overpack.
Is a backpack or shoulder bag better for photography?
A backpack is better for long walks, travel, hiking, and heavier kits because it spreads weight across both shoulders. A shoulder bag is better when speed matters, such as street work, events, and documentary shooting. If your day mixes both, try a sling or a backpack with true side access.
Does a camera bag need to be waterproof?
A camera bag should at least have water-resistant fabric, covered zippers, and a rain cover if you shoot outside. Fully waterproof bags can feel stiff and slower to use, so match the protection to your weather. For coastal spray, sidelines, or mountain work, stronger weather sealing earns its space.
Can I use a regular backpack with a camera insert?
Yes, a regular backpack with a padded camera insert works well for casual travel, family days, and light kits. The tradeoff is access: many regular packs make you remove the bag before reaching your camera. Use this setup when comfort and disguise matter more than fast lens changes.
Should I buy a bigger bag for future gear?
Buy a little room for growth, not a closet with straps. If you plan to add one lens or a flash, one extra padded slot makes sense. If you buy too large, empty space invites clutter, and clutter slows your hands when the light gets good.
Conclusion
The best camera bag is the one that lets you move, notice, and work without thinking about the bag. Choose for your real shooting day: the kit you carry, the pace you work, the weather you face, and the way your hands reach for gear.
Lay your gear on the table tonight and pack the bag as if tomorrow’s light will not wait. When the zipper opens and every piece is exactly where your fingers expect it, the bag disappears and the photograph gets your full attention.
Fall Picks
fall essentials
As an affiliate, we earn on qualifying purchases.