TL;DR

Get audio and creator gear delivered free with Prime
- Fast, free delivery on millions of items
- Prime Video, Amazon Music and more included
- Member-only deals all year
Choosing a photo printer is less about finding the model with the highest advertised resolution and more about matching dye or pigment ink, print size, paper handling, and maintenance to your real workflow. Buy for the largest size you print regularly, verify support for your favorite paper, and budget for cleaning ink, test sheets, and color management as well as finished prints.
A photo printer can make a beautiful image feel physical—or turn your afternoon into a trail of dark proofs, clogged nozzles, and expensive paper in the recycling bin. I have watched a glowing sunset on my monitor become a flat brown rectangle because the screen was too bright. The printer was innocent; the workflow was the problem.
Choosing a photo printer is less about finding the model with the highest advertised resolution and more about ink technology, paper handling, regular print size, and maintenance. Those inkjet realities for photographers rarely shine on a specification sheet, yet they shape every hour you spend printing. A printer that suits glossy family albums can be a poor fit for textured cotton-rag exhibition work.
This guide shows you how to match a printer to what you photograph and how you work. You will learn where dye and pigment inks differ, why cartridge count can mislead you, what paper specifications hide, and how to estimate the ink you never see on a finished sheet. My goal is simple: help you choose a machine that becomes part of your photographic craft, not a bulky object that gathers dust beside your desk.
Choose dye ink for vivid glossy output and pigment ink for matte, fine-art, monochrome, and stronger display-life expectations.
Buy the smallest printer that handles the largest size you produce several times a year; outsource rare oversized work.
Judge gradients, shadow detail, neutral grays, paper interaction, and surface uniformity instead of comparing headline dpi.
Budget for cleaning cycles, test sheets, failed feeds, maintenance tanks, and borderless overspray—not only ink on finished photographs.
Use a calibrated display, the exact paper profile, one color-management path, and consistent viewing light before blaming the printer.
Choosing a Photo Printer
A great purchase is not the machine with the loudest resolution claim. It is the printer whose ink, format, paper path, maintenance load, and color workflow match the photographs you make repeatedly.
Proofs, albums, portfolios, and regular small prints.
A popular balance of print scale, cost, and studio footprint.
For substantial fine-art output produced consistently.
Enough for a 12 × 8-inch print prepared at 300 ppi.
Choose the print surface before the cartridge count
Dye and pigment inks are not opposing quality grades. They are different tools. The useful question is whether the complete ink-and-paper pairing produces the color, surface, monochrome control, and display life you need.
Glossy color with vivid energy
Dye commonly delivers smooth, saturated output on glossy and semigloss papers, often with lower print costs in compact or refillable systems.
- Strong fit for albums, events, proofs, and glossy photographs
- Often excellent surface uniformity and intense color
- Display life varies greatly with paper, light, and framing
Fine-art depth and resilient output
Pigment usually excels on matte and cotton-rag media, with stronger resistance to moisture and environmental exposure.
- Strong fit for exhibitions, monochrome, and mixed media
- Multiple gray inks can improve neutral tonal transitions
- Inspect glossy samples for bronzing or gloss differential
| What matters | Dye ink | Pigment ink |
|---|---|---|
| Glossy appearance | ✓Often exceptionally smooth and saturated | ~Much improved; some pairings show surface variation |
| Matte and cotton-rag paper | ~Usable on compatible media | ✓Usually the stronger specialist choice |
| Black-and-white control | ~Highly dependent on the ink set | ✓Professional sets often include several grays |
| Environmental resistance | ~Varies with the complete print system | ✓Generally stronger, but never immune |
Buy the size you will actually use
Choose the smallest printer that comfortably handles the largest photograph you produce several times a year. A specialist lab is often the smarter tool for rare oversized work.
Desk-scale output
Well suited to proofs, albums, portfolios, 5 × 7-inch prints, and 8 × 10-inch photographs.
Best when small output dominates.The practical middle
Handles substantial wall prints, 11 × 14-inch images with borders, and suitable 12 × 18-inch media.
Best all-round format for many enthusiasts.Exhibition production
Creates more commanding work but demands considerably more space, ink, paper, and regular use.
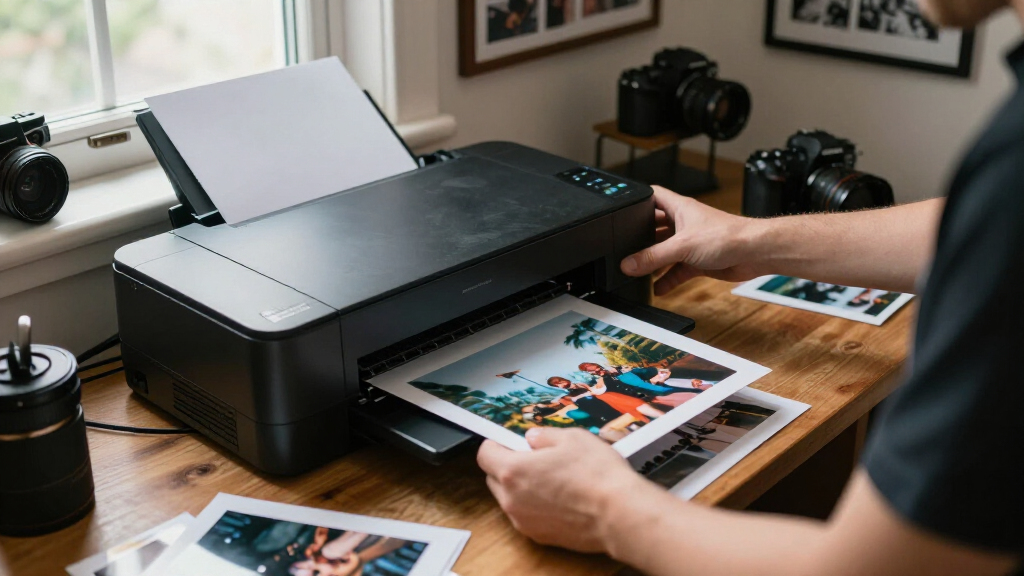
Best when large printing is routine.The closed body is not the working footprint. Allow for the rear fine-art feed, extended output tray, cable clearance, and a flat area where fresh prints can rest safely. A printer that fits the cabinet may not fit the workflow.
Ignore the dpi race. Judge what your eyes can see.
Printer dpi describes microscopic droplet placement. Image ppi describes the pixels available at the final print size. They are related to output, but they are not interchangeable measures.
At 300 ppi, that is approximately 8.6 megapixels. Lower ppi can still look convincing at larger sizes and longer viewing distances.
The specification sheet hides the loading ritual
“Supports fine-art paper” can still mean mandatory margins, one-sheet manual loading, limited thickness, or restricted sizes. Verify the exact medium you plan to use.
Can thick media travel safely?
Look for a straight or near-straight path, then confirm maximum supported thickness and weight.
Is borderless truly available?
Borderless support may depend on paper type and size. Fine-art media can require fixed margins.
Do rolls and custom sizes work?
Check roll feeding, cutting, panorama length, custom-size limits, and reliable handling of small sheets.
Choose the image
Define subject, final size, surface, and intended display conditions.
Calibrate the display
Use sensible brightness so luminous screens do not create dark prints.
Select the paper
Match gloss, texture, white point, and weight to the photograph.
Apply one profile
Use the exact paper profile and only one color-management path.
Evaluate the print
Inspect gradients, shadows, neutral grays, surface, and viewing-light shifts.
Budget for the ink that never reaches a finished photograph
Purchase price is only the entry fee. Cleaning, initialization, test sheets, failed feeds, profile corrections, borderless overspray, and maintenance tanks all belong in the real print budget.
Cleaning cycles: necessary for nozzle health, but capable of consuming meaningful ink.
Testing and correction: proofs reveal brightness, profile, sharpening, and paper problems.
Consumable hardware: maintenance tanks, waste-ink boxes, and printhead policy matter.
Idle time: irregular use can lead to clogged nozzles and repeated recovery routines.
Five realities worth remembering
Match ink to surface: dye favors vivid glossy output; pigment favors matte, fine-art, monochrome, and stronger display-life expectations.
Match format to frequency: outsource sizes you rarely produce instead of permanently buying around them.
Judge the photograph: examine gradients, skin, shadow detail, neutral grays, metamerism, and surface uniformity.
Verify the physical workflow: paper paths, thickness limits, margins, trays, rolls, and open footprint can decide whether printing feels effortless.
Manage color before assigning blame: calibrate the display, use the exact profile, avoid double color management, and evaluate under consistent light.
Dye or Pigment? Match the Ink to the Print You Love
Choosing a photo printer starts with the surface and lifespan you want. Choose dye ink for vivid color and smooth high-gloss prints; choose pigment ink for matte papers, monochrome work, and stronger resistance to moisture and environmental exposure. Neither wins everywhere because ink and paper behave as a pair.
| What you care about | Dye ink | Pigment ink |
|---|---|---|
| Glossy appearance | Often exceptionally smooth and saturated | Much improved, though some combinations show surface variation |
| Matte and cotton-rag paper | Usable on compatible media, with fewer specialist options | Usually the stronger choice for density and longevity |
| Black-and-white control | Depends heavily on the ink set | Specialist systems often include several gray inks |
| Resistance to moisture and pollutants | Varies by the complete ink-paper combination | Generally stronger, though never immune |
| Common use | Albums, proofs, events, glossy color | Exhibitions, fine art, monochrome, mixed media |
I once prepared the same misty woodland photograph on glossy dye output and a matte pigment print. The dye version made the wet leaves glow with jewel-like greens, while the pigment version gave the fog a soft, chalky depth. One was not more correct. Each paper-and-ink pairing told a different story.
Pigment can show bronzing or gloss differential, where dark areas catch the light differently from pale areas. Newer formulations and gloss optimizers have narrowed that gap [1], but you should still inspect a sample under angled light. A print can look silky from the front and patchy when a window reflects across it.
Do not treat the word archival as a magical shield. Light, humidity, pollutants, paper chemistry, framing, and storage all influence print life [1]. A tested pigment-and-paper pair behind suitable glazing has a stronger claim than an unknown ink on bargain paper, even when both packages use impressive permanence language.
best dye inkjet photo printer for glossy prints
As an affiliate, we earn on qualifying purchases.
As an affiliate, we earn on qualifying purchases.
Buy the Print Size You Will Actually Use
Choosing a photo printer by size means buying for your routine maximum print, not one imagined gallery show years away. Letter or A4 handles albums and proofs, 13-inch models suit substantial wall prints, and 17-inch machines serve regular exhibition work. Occasional oversized photographs can go to a lab.
A 13-inch printer often hits a practical middle ground. You can make an 11×14-inch image with a comfortable border, produce a 12×18-inch photograph on suitable media, and still place the machine in a home studio. A 17-inch printer can create more commanding work, but its open trays may reach across far more desk and floor space than the closed dimensions suggest.
I learned this lesson while helping set up a printer in a narrow editing room. The body fit the cabinet perfectly, yet the rear fine-art feed needed clear space behind it and the output tray crossed the walking path. The printer technically fit; the working printer did not.
- Letter or A4: a good match for proofs, portfolios, albums, and regular 5×7 or 8×10-inch output.
- A3+ or 13-inch: a flexible choice for photographers who sell modest wall prints or build exhibition sets at home.
- A2 or 17-inch: useful when larger fine-art prints form a steady part of your paid or personal work.
- Roll support: valuable for panoramas and repeated production, though cutting, borderless printing, and supported media vary.
A larger machine can make small photographs, but that does not make it efficient. Feeding stacks of 4×6-inch sheets into a wide-format printer can feel like using a cinema screen to check passport photos. Choose the smallest format that comfortably handles the largest size you make several times a year.
professional pigment ink photo printer for fine art
As an affiliate, we earn on qualifying purchases.
As an affiliate, we earn on qualifying purchases.
Ignore the DPI Race and Judge What Your Eyes Can See
Choosing a photo printer by advertised dpi is unreliable because printer dpi and image ppi measure different things. Printer dpi describes where tiny droplets can land; image ppi describes the pixels available at the final print size. Judge gradients, skin, shadows, neutral grays, and surface quality instead.
For many photographs, a file prepared at roughly 240–300 ppi at final size gives excellent detail. A 12×8-inch print at 300 ppi needs about 3600×2400 pixels, or 8.6 megapixels. Lower ppi can still look convincing when the print is large and viewed from farther away.
Imagine a portrait with soft window light crossing a cheek. The useful test is not whether one printer claims another thousand dpi; it is whether the skin gradient stays smooth, the eyelashes remain natural, and the dark sweater keeps its woven texture. Excessive sharpening can make pores and hair fizz like brittle wire, even when the printer resolves them perfectly.
Paper and profiles often create a bigger visible change than the difference between two capable modern printers. Glossy paper holds crisp detail and deep color, while textured matte paper gently scatters light and softens microcontrast. The paper is not a passive passenger; it edits the photograph in its own quiet voice.
Also inspect metamerism, the color shift that appears under different lighting. A neutral print beneath daylight can lean green or magenta under a warm household bulb. When black-and-white work matters, compare samples under the light where the print will hang, not only beneath the cool lamp beside a shop counter.
The best quality test is a familiar photograph on your preferred paper, viewed at a normal distance under realistic light. A headline resolution number cannot show you how a face, shadow, or glossy surface will feel.
large format photo printer for photographers
As an affiliate, we earn on qualifying purchases.
As an affiliate, we earn on qualifying purchases.
Choose Paper Handling Before It Becomes a Daily Frustration
The right paper path lets your preferred media feed flat, cleanly, and without scraped corners. Check sheet thickness, weight, loading direction, custom-size support, mandatory margins, and borderless limits before buying. A claim that a printer supports fine-art paper does not promise easy loading or every print size.
Thick cotton rag often needs a straight or near-straight manual path. That path may require open space at the front and rear, one-sheet loading, or a menu setting that widens the head gap. Skip one detail and the printer may leave black smudges across a pale sky or chew a soft deckled edge.
On one exhibition job, I loaded a heavy textured sheet through the ordinary rear tray because it looked close enough to standard paper. The rollers hesitated, the leading edge skewed, and a dark ink mark landed in the white border. That single failed sheet taught a memorable rule: media instructions are part of the printing process, not packaging filler.
- Check the maximum paper thickness and weight, not just the named media categories.
- Verify whether borderless printing works at your chosen size and on your chosen paper type.
- Look for custom-size support if you cut paper from larger sheets or use panoramic formats.
- Confirm reliable feeding for small sheets if you regularly make 4×6 or 5×7-inch prints.
- Check whether roll media needs a separate holder and whether the printer can cut it automatically.
Borderless output also carries a hidden crop. Most printers enlarge the photograph slightly so ink reaches beyond every edge, which can trim fingertips, frame edges, or text close to the boundary. For exhibition work, I usually prefer a deliberate white border; it protects the composition and gives the print room to breathe.
calibrated color management printer setup
As an affiliate, we earn on qualifying purchases.
As an affiliate, we earn on qualifying purchases.
Pick an Ink Set for Tones You Really Photograph
More cartridges help only when their colors or gray levels support the photographs and papers you use. Multiple grays can smooth monochrome gradients, matte and photo black serve different surfaces, and expanded colors can widen selected parts of the gamut. Cartridge count alone never guarantees a better print.
If you photograph weddings, skin tones and pale fabric gradients matter more than an extreme saturated green. A landscape photographer printing moss, alpine flowers, and orange desert rock may gain more from expanded green, orange, red, or violet inks. Your subject matter should guide the ink set, not the drama of a row of cartridge icons.
For black-and-white printing, several gray inks can reduce the need to build every neutral from colored droplets. That usually creates smoother tonal steps and fewer color casts, especially through delicate midtones. Even then, a warm baryta paper and a cool cotton paper will make the same monochrome file feel different.
Black-ink handling deserves a close look. Matte black suits uncoated and fine-art surfaces, while photo black serves glossy and semigloss media. Some older designs shared a channel and flushed ink while switching; many newer specialist printers use dedicated black channels, reducing delays and waste [1].
Gloss or chroma optimizers can help pigment output look more even across glossy media. Think of them as a clear coat that persuades dark and light areas to reflect light with better manners. They do not turn every paper into glass, but they can reduce the patchwork sheen visible at an angle.
Count the Ink You Never See on the Finished Print
Real running cost includes cleaning cycles, initialization, test prints, borderless overspray, maintenance tanks, and failed sheets as well as the ink visible in your photograph. Manufacturer page yields rarely mirror full-coverage photo printing. Calculate cost from your image density, paper choice, size, and printing rhythm.
A bright portrait against a white wall uses less ink than a low-key concert photograph filled with black velvet, smoke, and red stage light. Borderless printing also sprays beyond the sheet, and a cleaning cycle can consume ink without producing anything you can frame. The printer sometimes feeds itself before it feeds your portfolio.
Large cartridges usually reduce the ink cost per milliliter, but they tie up more money and make little sense if you print twice a year. Photo-oriented tank systems can make frequent albums, proofs, school projects, and event output far more economical. Yet a tank is a delivery system, not a quality category; examine its ink type, paper support, profiles, monochrome behavior, and permanence claims separately.
I keep a simple job record with paper used, failed sheets, nozzle checks, and ink changes. During a 20-print portfolio run, two color-correction proofs and one misfeed raised material use by 15 percent before packaging. That was not a controlled lab result, just the honest arithmetic of one real job—and exactly the sort of waste a cartridge-yield figure misses.
Include storage sleeves, backing boards, shipping materials, and workspace when prints become products. If you print only a few times each year, a good laboratory may offer steadier unit costs with no idle-machine upkeep. Home printing earns its place through control, iteration, privacy, and tactile pleasure as much as through savings.
Keep Nozzles Clear Without Pouring Ink into Cleaning Cycles
Inkjet printers stay healthier when you use them regularly, check nozzles before major jobs, and follow the maker’s power guidance. Long idle periods can dry ink in the head, especially in warm, dry rooms. Repeated deep cleans can waste substantial ink without fixing dust, damaged parts, or the wrong diagnosis.
Before an exhibition run, print a nozzle pattern on ordinary compatible paper. Missing lines tell you which channel needs attention before a costly cotton sheet enters the path. A two-minute check is much kinder than discovering faint cyan banding across twelve pale winter skies.
- Run a nozzle check before a deadline or after a long idle period.
- Use the standard cleaning routine once, then inspect another pattern.
- Read the manual before using deep cleaning or ink flushing.
- Keep loose fibers and paper dust away from the feed path.
- Leave the machine connected or powered as directed so scheduled maintenance can run correctly.
I have seen photographers switch a printer off at the wall after every use, hoping to preserve ink. On some designs, repeated cold starts trigger extra preparation routines, while cutting power can interrupt scheduled care [1]. Follow the guidance for your exact machine rather than relying on a universal habit.
Printhead service also changes the ownership story. A user-replaceable head may offer a straightforward recovery path, though the replacement becomes another consumable. A permanent head can deliver superb precision, but a severe blockage may require professional service. Check head policy and maintenance-box replacement before the printer is sitting on your desk.
Build a Color Workflow That Stops Dark, Muddy Prints
Choosing a photo printer cannot fix an unmanaged workflow; reliable output needs a calibrated display, sensible screen brightness, the correct ICC profile, and one active color-management system. The most common dark-print problem is a monitor that glows too brightly. You edit for that light, then the reflective print looks underexposed.
I once received a file whose shadow detail looked beautiful on a bright laptop in a dim room. On paper, a black jacket collapsed into a smooth lump. Lowering the display brightness, checking the histogram, and soft proofing restored the folds without forcing the printer to perform an impossible trick.
An ICC profile describes the behavior of a specific printer, ink, and paper combination. According to International Color Consortium guidance [2], profiles support predictable conversion between device color spaces. In plain language, the profile acts like an interpreter between your file and the materials that place ink on paper.
- Calibrate the monitor and edit under steady room light.
- Select the profile made for the exact printer, ink, and paper.
- Choose whether the application or driver manages color, then avoid double color management.
- Use soft proofing to preview clipped colors, paper tone, and reduced contrast.
- Judge the finished print under consistent viewing light, not beside a bright monitor.
Start with the paper maker’s generic profile; many are very good. A custom profile can help with unsupported third-party papers, repeated commercial work, or a consistent mismatch that correct settings do not solve. It will not automatically make a photograph more attractive, and it cannot recover detail that your edit has crushed.
Here, [1] refers to published manufacturer media, maintenance, and permanence documentation, while [2] refers to International Color Consortium guidance on profile-based color conversion. Specifications establish compatibility, but a familiar test image remains your final reality check.
Use This Buying Checklist Before You Clear Desk Space
The best buying decision comes from writing down what you print, how often you print it, and which paper gives it the right voice. Compare every candidate against that list. A feature matters only when it supports a real photograph, deadline, room, or delivery method in your life.
- Name the largest size you print several times per year.
- Choose your main surfaces: glossy, luster, matte, baryta-style, or cotton rag.
- Decide whether color, black-and-white, or both drive your work.
- Match dye or pigment ink to the intended surface and display life.
- Measure the printer with every tray and feed path open.
- Verify thick-media, borderless, roll, and custom-size restrictions.
- Check profiles, full driver features, current operating-system support, and wired connectivity.
- Investigate maintenance tanks, printhead policy, local supplies, and service.
- Estimate volume honestly, including months when you may not print.
- Compare ownership with outsourcing your rare large or unusual jobs.
Suppose you make two 8×10-inch family portraits each month, one 12×18-inch landscape each season, and a single 24-inch panorama each year. A 13-inch printer handles the recurring work, while a lab handles the panorama. Buying a 24-inch machine for that lone annual print would hand you more storage, maintenance, and ink capacity than your craft needs.
Connectivity belongs on the list, though it should not dominate it. Wi-Fi is pleasant for casual output, while USB or a wired network often feels steadier during production. Confirm that the full driver exposes custom sizes, advanced media settings, and color controls; simplified automatic drivers sometimes hide them.
Owning a printer makes sense when you value immediate proofs, privacy, small runs, consistent portfolio work, and the pleasure of shaping the final object. A laboratory fits infrequent printing, very large formats, tight rooms, and photographers who dislike maintenance. The honest choice is the one that lets you finish more photographs with less friction.
Frequently Asked Questions
Is a tank printer good enough for professional photography?
A tank printer can support professional work when its ink set, consistency, profiles, paper path, durability, and maximum size match the assignment. It may be excellent for proofs, albums, events, and frequent color output, while a cartridge-based pigment system may suit specialist monochrome or cotton-rag work better.
How often should I print to reduce the chance of clogs?
No single interval works for every printer because climate, head design, ink type, and storage conditions differ. Regular small prints or nozzle checks are safer than months of silence; in a dry room, check the machine more often and follow the manufacturer’s maintenance guidance.
Why do my prints look darker than my monitor?
The usual cause is an overly bright display, which leads you to edit the file too dark. Calibrate the monitor, lower its brightness to suit the room, use the correct ICC profile, avoid double color management, and inspect the print beneath steady, suitable viewing light.
Can I use any photo paper in an inkjet printer?
Use paper only when its coating, size, thickness, and loading method suit the printer. Select the matching media setting and ICC profile; laser paper and traditional darkroom paper are not interchangeable with coated inkjet media, even when the sheet dimensions are identical.
Are third-party inks safe for photo printing?
Reputable third-party inks can reduce material costs, but they can change gamut, fading behavior, viscosity, clogging risk, profiling needs, and warranty coverage. If color consistency or print life matters, test one complete ink-and-paper system, create suitable profiles, and avoid casually mixing different formulations.
Conclusion
Choose the printer that fits your repeated habits, not your most ambitious imaginary project. Write down your regular sizes, favorite surfaces, monthly volume, available space, and tolerance for maintenance. Then reject any machine that cannot handle those basics gracefully, even if its specification sheet boasts more colors or a higher advertised resolution.
A well-matched printer changes the way you edit because paper gives you nowhere to hide. You start noticing the blue inside a shadow, the faint texture in a white dress, and the exact warmth of evening skin. Make one careful print this week, hold it beneath steady light, and let the paper tell you what your photograph needs next.
Fall Picks
fall essentials
As an affiliate, we earn on qualifying purchases.