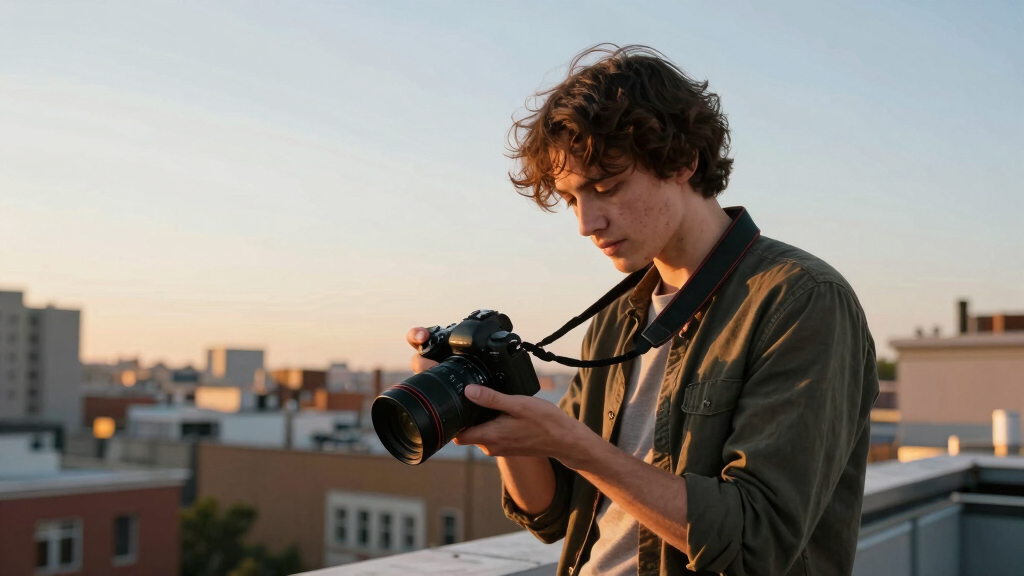

TL;DR

Get audio and creator gear delivered free with Prime
- Fast, free delivery on millions of items
- Prime Video, Amazon Music and more included
- Member-only deals all year
Golden hour photography uses the warm, low-angle sunlight found roughly 20 to 60 minutes after sunrise and before sunset. Arrive early, expose for bright highlights, watch the direction of the light, and build compositions around long shadows, glowing edges, reflections, and warm color rather than simply pointing your camera toward the sun.
Beautiful light can disappear while you are still opening your camera bag. I have watched a flat-looking field turn copper and honey-colored, glow for eight minutes, and then fall into cool shadow. Golden hour gives you gentle contrast and rich color, but it also gives you a moving target.
Golden hour photography refers to capturing images during the short window after sunrise or before sunset, when the sunlight is soft, low, and warm. The useful period often lasts 20 to 60 minutes, not a guaranteed hour, because your latitude, season, weather, hills, and nearby buildings all affect when direct light reaches the scene [1].
You will learn how to predict the light, choose practical settings, protect bright highlights, and use shadows rather than fight them. I will also show you what changes when you photograph portraits, landscapes, city streets, or smartphones. The light is soft, but the clock is unforgiving—and that tension is exactly what makes the experience so rewarding.
Check the sun’s direction and visible horizon, then arrive 30 to 45 minutes early because useful golden light may last only 20 to 60 minutes.
Begin near base ISO, choose aperture for the subject, and raise shutter speed or ISO whenever people, animals, wind, or handheld movement threaten sharpness.
Protect bright sky detail with the histogram and exposure compensation; recovering moderate shadows from RAW is usually easier than repairing clipped highlight…
Move around the subject to choose front light, side light, backlight, or silhouette rather than treating every sunset as a photograph aimed directly at the sun.
Edit warmth with restraint, keeping believable skin and the natural contrast between amber highlights and cooler shadows.
Golden Hour Photography: Making the Most of the Best Light
Warm, low-angle sunlight can turn an ordinary field copper, draw glowing edges around a portrait, and reveal texture through long shadows. But the useful light may last only 20–60 minutes—so preparation matters as much as exposure.
Warmth is useful. Direction is transformative.
Low sunlight travels through more atmosphere, producing warmer color and gentler contrast. Its long shadows reveal form, while rim light separates subjects from the background. Golden light is not the subject—it is the tool that gives the subject shape, texture and mood.
Amber highlights
Warm light enriches skin, stone, grass and glass. Keep edits restrained so highlights remain believable and shadows retain their cooler contrast.
Long shadows
Sideways light catches ridges, faces and architectural details. Compose with those shadows to reveal depth instead of trying to eliminate them.
Glowing edges
Place the sun behind or beside the subject to create luminous outlines. Shield the lens or change position when flare reduces contrast too heavily.
Be ready before the light peaks.
Published sunrise and sunset times are only a starting point. Latitude, season, weather, hills, trees and buildings all determine when direct light actually reaches—or leaves—your composition.
Check direction
Use a sun-position app and note the predicted angle, cloud cover and sunset time.
Read the horizon
Find hills, buildings or trees that may block direct light earlier than expected.
Build two frames
Prepare one view toward the sun and a backup looking across or away from it.
Protect highlights
Watch the histogram, preserve the bright sky and adjust quickly as intensity falls.
Stay for color
Pink, violet and blue tones can remain for another 15–30 productive minutes.
Protect the glow without losing sharpness.
Begin near base ISO, choose aperture for the subject, then set shutter speed for movement. These are launch points rather than laws: a sharp frame at ISO 800 is more useful than a blurred one at ISO 100.
| Subject | ISO | Aperture | Shutter | Priority check |
|---|---|---|---|---|
| Portrait | 100–400 | f/1.8–f/4 | 1/250s or faster | ✓ Sharp eyes and skin highlights |
| Handheld landscape | 100–400 | f/5.6–f/11 | 1/125s or faster | ~ Camera shake and bright sky |
| Tripod landscape | 100 | f/8–f/11 | Variable | ~ Moving leaves, water or people |
| Silhouette | 100 | f/5.6–f/11 | Expose for sky | ✓ Clean, recognizable outline |
| Moving subject | 400–1600 | f/2.8–f/5.6 | 1/500s or faster | ✗ Never sacrifice sharpness for low ISO |
Shoot RAW when possible · Check the histogram · Try Daylight white balance for consistent warmth
Save the highlights first.
The rear screen can appear deceptively bright as the environment darkens. Use the histogram and exposure warnings. Moderate RAW shadows are usually recoverable; a clipped sunlit cloud is not.
When the sky clips, reduce exposure.
Try −⅓ to −⅔ EV, confirm detail on the histogram, and lift the darker subject carefully during RAW processing.
Do more than point toward the sunset.
Walk around the subject and watch how the scene changes. The same patch of light can create warmth, texture, separation or graphic simplicity depending on your camera position.
Warm and accessible
Place the sun behind the camera for even illumination, saturated color and flattering portraits with gentle contrast.
Shape and texture
Let light travel across the subject to reveal cheekbones, stonework, fur, fields and architectural relief.
Glow and separation
Position the subject between camera and sun for luminous edges, translucent foliage and atmospheric flare.
Graphic simplicity
Expose for the bright sky and keep the subject’s outline distinct, recognizable and free from visual overlap.
From forecast to finished frame.
Every strong result connects planning, observation, exposure and editing. If one link fails, the light may still be beautiful—but the photograph becomes less deliberate.
sun position
visible horizon
light direction
highlights
with restraint
The light is soft, but the clock is unforgiving.
Arrive early, prepare a backup composition, respond to changing conditions, and keep shooting after direct sunlight leaves the ground.
Why Golden Hour Makes Ordinary Scenes Look More Dimensional
Golden hour photography works because low sunlight travels through more atmosphere, creating warmer color, softer contrast, and longer shadows than midday light. Those shadows reveal shape and texture, while the broad warm glow makes skin, stone, grass, and glass feel richer without requiring an elaborate lighting setup.
At noon, light falls steeply and can carve dark sockets beneath a portrait subject’s eyes. Near sunset, the same face receives light from the side, producing a gentle cheek highlight and a soft gradient toward shadow. You see shape instead of glare, which is why this light feels polished even before editing.
The effect becomes obvious in a simple landscape. A plowed field may look like flat brown earth at 2 p.m., yet low evening light catches every ridge and draws long blue-gray shadows between the rows. The light paints the field and your memory of it; that is a small example of zeugma at work in the real world.
Warm color alone does not make a strong photograph. A dull composition remains dull under an orange sky, and heavy haze can swallow the clean shadows you expected. Cinematographers helped popularize the term in the early 20th century [1], but the lasting lesson is practical: use the light to reveal form, not merely to add a yellow tint.
Golden light is not a subject. It is a tool that gives your real subject shape, separation, and mood.
golden hour photography camera lens
As an affiliate, we earn on qualifying purchases.
As an affiliate, we earn on qualifying purchases.
A Five-Step Plan That Gets You Shooting Before the Light Peaks
Golden hour photography becomes far more reliable when you plan the sun’s position, your viewpoint, and one backup composition before arriving. A forecast or planning app can predict the timing, but you still need to reach the location early enough to study reflections, blocked horizons, wind, and moving subjects.
- Check sunrise or sunset time. Use a sun-position app or website, then note the predicted direction of the light. Tools such as Sun Surveyor can help, while newer planning apps may also estimate cloud conditions [2].
- Study the visible horizon. A mountain, apartment block, or forest can hide the sun 10 or 20 minutes earlier than the published sunset time.
- Arrive 30 to 45 minutes early. Walk the scene while the light is plain, choose your foreground, and remove small distractions from the frame.
- Prepare two compositions. Pick one view facing the sun and another looking across or away from it, so changing cloud does not end the session.
- Stay after sunset. The sky may hold pink, violet, or blue color for another 15 to 30 minutes, even after direct golden light has left the ground.
I once planned to photograph a river with the setting sun behind a bridge. On arrival, a row of tall poplars blocked the predicted angle, but my backup view faced downstream, where the trees reflected as warm gold streaks. Ten minutes of early scouting saved the session and gave me the stronger frame.
Why arrive so early when the best light comes later? Because choosing a foreground while the color is already burning wastes the rarest minutes. According to PhotoMocha’s timing guidance, the useful window commonly spans about 20 to 60 minutes [1], so preparation buys you more photographs without changing your camera.
smartphone camera filters for golden hour
As an affiliate, we earn on qualifying purchases.
As an affiliate, we earn on qualifying purchases.
Camera Settings That Protect the Glow Without Losing Detail
Golden hour photography usually calls for a low ISO, highlight-aware exposure, and a shutter speed matched to subject movement. Start with ISO 100 or your camera’s base ISO, choose aperture for the depth you want, and adjust shutter speed while checking bright sky areas on the histogram.
| Subject | Useful starting point | What to watch |
|---|---|---|
| Portrait | ISO 100–400, f/1.8–f/4, 1/250 second or faster | Sharp eyes and bright skin highlights |
| Handheld landscape | ISO 100–400, f/5.6–f/11, 1/125 second or faster | Camera shake and clipped sky |
| Tripod landscape | ISO 100, f/8–f/11, variable shutter speed | Moving leaves, water, or people |
| Silhouette | ISO 100, f/5.6–f/11, expose for the sky | A clean, recognizable outline |
These numbers are starting points, not laws. If a cyclist enters your sunset frame, 1/60 second may blur the rider even though the landscape looks perfectly exposed. Raise the ISO and use 1/500 second; a little digital noise hurts less than an unintentionally soft subject.
Your histogram matters because the rear screen can look misleadingly bright in a darkening field. Reduce exposure by one-third or two-thirds of a stop when the sun or a brilliant cloud edge clips, then lift darker areas from a RAW file later. Ask yourself: what good is a clean shadow if the glowing sky has become a blank white patch?
Auto white balance may cool the very warmth you came to photograph. Try Daylight white balance for steady color or RAW capture so you can refine it afterward. I often open my aperture and my attention at the same time, watching both the exposure scale and the subject’s expression.
A polarizing filter can deepen color and cut glare from leaves or water, but it works unevenly near very wide angles and can cost roughly one to two stops of light. Rotate it while looking through the viewfinder, then stop when the reflection or sky looks natural. More polarization is not always more beautiful.
As an affiliate, we earn on qualifying purchases.
Four Ways to Turn Low Sun Into Stronger Compositions
Golden hour photography becomes more expressive when you choose the light’s direction on purpose: use front light for warmth, side light for texture, backlight for glow, or direct sun for silhouettes. Move around your subject instead of waiting for the sun to change, because a few steps can completely reshape the frame.
- Face away from the sun for evenly lit landscapes, warm building fronts, and straightforward color.
- Place the sun to one side to reveal bark, wrinkles, stone, fur, and ripples through small highlights and long shadows.
- Put the sun behind the subject for glowing hair, translucent leaves, mist, dust, and bright rim light.
- Expose for the sky when you want a clean silhouette with bold shape and little interior detail.
Imagine a runner on a gravel path. Front light gives you clear facial detail, side light pulls rough texture from the gravel, and backlight turns flying dust into tiny sparks around the shoes. The person and location stay the same; your position changes the whole emotional temperature.
Long shadows can act as leading lines. Place a tree, bicycle, or person near the edge of the frame and let its shadow stretch toward the center, pulling the eye through the image. Keep checking the corners, because your own shadow can slip into a wide-angle composition when the sun sits behind you.
Reflections offer another layer. Wet pavement, a quiet pond, or an office window can double the warm color and break it into shimmering bands of amber. After a brief rain shower, I often crouch near a shallow street puddle; from knee height, a thin patch of water can hold an entire glowing skyline.
Lens flare can add atmosphere, but uncontrolled flare may flatten contrast and leave pale blobs across a face. Shade the lens with your hand, adjust your position by a few inches, or let the sun peek around a wall. Small movements create large changes when direct light strikes the front element.
camera filters for sunset photography
As an affiliate, we earn on qualifying purchases.
As an affiliate, we earn on qualifying purchases.
Portrait Choices That Keep Skin Warm, Eyes Sharp, and Poses Natural
Golden hour portraits look most natural when you place the sun behind or about 45 degrees beside your subject, expose carefully for the face, and keep the shutter fast enough for small movements. A pale wall or open sky in front can return soft light into the eyes without a flash.
Backlight is my usual starting point because it creates a bright edge around hair and shoulders. I ask the subject to turn until one side of the face catches a faint strip of light, then I expose for the skin rather than the sun. At f/2.8 and 1/500 second, a walking portrait can keep the eyes sharp while the background melts into warm circles.
Do not assume soft sunlight removes every problem. If the sun remains bright and low, a face turned directly toward it may squint, and a backlit face can become several stops darker than the sky. Move into open shade near the warm light, add a white reflector below chest height, or use gentle fill flash that does not overpower the scene.
A real session moves quickly. For a family walking through tall grass, I choose the focus mode that tracks movement, use a short burst for changing expressions, and keep the group on one clear plane when working at a wide aperture. The dry grass whispers around their knees, the rims of their coats glow, and 1/800 second freezes both laughter and loose hair.
Skin should remain believable. Heavy warmth can push fair skin toward orange and deeper skin toward muddy red, especially when auto editing adds saturation. Use a neutral object or gray card for one reference frame, then preserve the golden atmosphere while keeping faces recognizable.
Smartphone and Cloudy-Day Tactics That Save Difficult Shoots
Golden hour photography still works with a smartphone or a cloudy sky when you control exposure, stabilize the camera, and search for reflected warmth. Modern HDR and computational processing can hold detail in bright skies, while clouds soften contrast and sometimes catch orange light along their lower edges [2].
On a phone, tap the main subject and drag the exposure control slightly downward until bright clouds regain color. Use the main camera rather than digital zoom, clean the lens with a soft cloth, and shoot RAW when your device supports it. A greasy fingerprint can turn a neat sunset into a milky flare with smeared streetlights.
HDR helps when a person stands against a bright sky, but movement can create ghosted hands, leaves, or hair. Take one HDR frame and one standard frame, especially when children or pets are running. Brace the phone against a railing or hold it with both hands as the light falls and the shutter speed grows slower.
Full cloud does not automatically produce golden color. Thick gray cover usually creates broad, cool light, while broken cloud near the horizon can scatter warm sunlight across faces and buildings. At a lakeside shoot, a narrow gap under a storm bank once sent a three-minute ribbon of orange light across the reeds; watching the western horizon mattered more than watching the clock.
Cloudy conditions favor close details because soft light reveals subtle color without harsh glare. Look for rain-darkened bark, red brick, wet leaves, or window reflections. The scene may lack dramatic shadows, but you gain smooth tonal detail and forgiving portraits.
When the sun never appears, stop trying to imitate a clear evening. Set a clean white balance, protect pale clouds, and let the quieter palette carry the photograph. A restrained image of silver water and one warm window can feel stronger than an artificial orange wash.
A Fast Field Routine for the Twenty Minutes That Matter Most
Your most productive golden hour routine is simple: lock in one safe photograph, vary the light direction, monitor highlights, and save a few minutes for experimentation. This sequence keeps a changing sky from scattering your attention while leaving room for silhouettes, reflections, flare, or a slower exposure.
- Shoot the safe frame. Capture your planned composition with a balanced exposure before changing lenses or moving the subject.
- Check highlight warnings. Reduce exposure if a large part of the sky flashes as clipped, then make a second frame.
- Change one variable. Move from front light to side light, lower the camera, or add a foreground rather than changing everything at once.
- Watch your shutter speed. Raise ISO when people, animals, flowers, or handheld camera movement begin to blur.
- Finish with a creative frame. Try a silhouette, reflection, sunstar, intentional motion blur, or a carefully controlled flare.
Suppose you have 20 minutes beside a harbor. Spend the first five on the planned boats-and-sky composition, the next five photographing side-lit ropes and peeling paint, then move low for reflections as the lamps appear. Keep the final minutes for a one-second tripod exposure that smooths the water into blue and copper strokes.
This routine also limits unnecessary gear changes. Dust becomes visible when direct sun hits the sensor, and fumbling with three lenses can cost the best expression or cloud pattern. I often carry one versatile lens, a spare battery, a cloth, and—when the subject allows—a tripod and patience.
Review just enough to catch mistakes. Zoom into one frame to confirm focus, inspect the histogram, and return to the scene before the color shifts. The goal is responsive control, not a sunset spent staring at the back of your camera.
Editing Moves That Preserve Real Light Instead of Faking It
A convincing golden hour edit protects natural skin color, highlight detail, and the cool-to-warm balance already present in the scene. Start with exposure and white balance, recover only the highlights that need help, then add modest contrast and color while comparing the result with your unedited frame.
RAW files give you more room to recover a bright sky or lift a shadowed face than compressed JPEG files. In Lightroom, Photoshop, or another RAW editor, lower highlights gradually and raise shadows only until the subject reads clearly. Pulling shadows too far can reveal noise and make backlight look flat.
Warmth needs restraint. Increase color temperature until the scene matches the amber light you remember, then check white clothing, pavement, and skin for an orange cast. If every neutral surface looks like pumpkin-colored paint, you have pushed past warm atmosphere into a color effect.
Local adjustments often beat global ones. A soft mask over the subject can add a third of a stop, while a gradient over the sky can protect cloud detail without darkening the land. On a backlit portrait, I may reduce haze near the sun but leave a little glow around the hair because clean is not the same as lifeless.
For example, a city photograph may contain warm sunlight on brick and cool blue shadow beneath an awning. Keeping both colors creates depth; warming the whole frame removes that contrast. Let the image hold two temperatures, like stepping from a sunlit pavement into a cool doorway.
Finish by checking the photograph at a smaller size. Strong halos, crunchy texture, and oversaturated reds become easier to spot when you stop zooming into individual pixels. Your edit should remind the viewer of low sunlight on their skin, not remind them which slider you moved.
Frequently Asked Questions
When does golden hour happen at my location?
Golden hour begins shortly after sunrise and returns before sunset, but its exact timing changes with your latitude, season, terrain, and weather. Use a sun-planning app for the date and location, then arrive 30 to 45 minutes early because hills, trees, and buildings may block direct light before the published sunset [1].
What camera mode should a beginner use during golden hour?
Aperture Priority mode is a friendly starting point because you choose depth of field while the camera adjusts shutter speed. Set ISO 100 or Auto ISO with a sensible limit, watch that the shutter stays fast enough, and use negative exposure compensation if the bright sky loses detail.
Can I photograph golden hour without a tripod?
You can shoot most golden hour scenes handheld, especially during the brighter part of the window. Keep shutter speed near 1/125 second or faster for still subjects, raise ISO when needed, and use a tripod when you want low ISO, deep focus, smooth water, or blue-hour exposures lasting longer than a fraction of a second.
Why do my golden hour portraits look too dark?
Your camera is probably exposing for the bright sky behind the subject, leaving the face in shadow. Meter from the face, add positive exposure compensation, use a reflector or subtle fill flash, and watch the sky for clipping. A RAW file gives you more room to lift facial shadows afterward.
Can a cloudy day still produce golden hour photographs?
Broken clouds can produce beautiful warm light when sunlight passes beneath them or colors their lower edges. Solid gray cloud usually creates softer, cooler illumination, so focus on wet surfaces, portraits, and subtle texture rather than forcing an orange look. Watch for gaps near the horizon, where a short burst of color may appear.
How do I take better golden hour photos with a smartphone?
Clean the lens, tap your subject to focus, and lower exposure until bright clouds hold color. Use the main camera, HDR, and RAW capture when available, but make a standard frame if moving leaves or people create HDR ghosts. Hold the phone with both hands or brace it against a solid surface as shutter speeds fall.
Conclusion
Plan the position of the light, then stay flexible about the photograph. Arrive early, make one reliable frame, and spend the remaining minutes following what the sun reveals: a glowing edge of hair, rough bark, rain-bright pavement, or a shadow reaching across a field. Golden hour rewards preparation, but it also rewards curiosity.
Your next session does not need a new camera or a distant landscape. Choose a nearby street, park, balcony, or window, check the sunset direction, and arrive 30 minutes before the predicted time. When the ordinary wall beside you turns the color of warm honey, you will be ready instead of reaching for the lens cap.
Fall Picks
fall essentials
As an affiliate, we earn on qualifying purchases.