
TL;DR

Get audio and creator gear delivered free with Prime
- Fast, free delivery on millions of items
- Prime Video, Amazon Music and more included
- Member-only deals all year
Shooting in bad weather gives you soft light, controlled contrast, wet reflections, visible atmosphere, and quieter backgrounds. Expose for the subject, use shutter speed to control weather movement, protect your gear without trusting vague weather-sealing claims, and let one strong color or shape carry the frame.
Bad weather can give you better light than a cloudless blue sky. A thick gray ceiling turns the sky into a giant softbox, rain polishes streets into mirrors, and fog removes background clutter one layer at a time. While other photographers wait indoors, you get softer shadows, deeper color, and scenes that will not look the same tomorrow.
This guide shows you why gray days make great photos and how to use that weather with intent. You will learn which subjects benefit from flat light, how shutter speed changes the appearance of rain and snow, and how to keep moisture away from the vulnerable parts of your camera. You will also see when a gray scene needs a bright accent and when muted color tells the stronger story.
I treat shooting in bad weather as a craft problem, not an endurance contest. You do not need to stand in a downpour for hours or own a camera built like a submarine. You need a workable exposure, a clean front element, a safe place to dry your equipment, and enough patience to notice the red umbrella crossing a silver street.
Set shutter speed around 1/250–1/500 second to show individual rain or snow particles, then move slower for streaks or faster for action.
Use overcast light for portraits, macro work, woodland, and textured surfaces because the broad sky produces smoother tonal changes.
Place rain or snow against a dark background, and use fog to remove clutter and separate near, middle, and distant layers.
Treat weather sealing as limited protection; keep ports closed, avoid lens changes in rain, and warm cold gear gradually inside a closed bag.
Edit for a clear subject and believable atmosphere, using modest local contrast instead of heavy global Dehaze or saturation.
Field Guide 01 / Weather Craft
Shooting in Bad Weather: Why Gray Days Make Great Photos
A thick gray ceiling becomes a giant softbox. Rain turns streets into mirrors. Fog removes clutter one layer at a time. Expose for the subject, control the weather with shutter speed, and let atmosphere do the rest.
The weather is already shaping the light.
Cloud cover spreads sunlight across a vast area, replacing hard-edged shadows with gentle transitions. That makes texture easier to record, bright highlights easier to hold, and subtle color relationships easier to see.
Smoother detail
Faces, flowers, stone and fabric retain texture without the glare, dark eye sockets or sharp midday shadows created by direct sun.
Built-in mirrors
Rain polishes asphalt, windows and pavement. Reflections stretch headlights, signs and clothing into compositional shapes.
Natural separation
Fog and falling weather soften distant detail, reduce clutter and create clear layers without changing the physical scene.
Quiet harmony
Muted surroundings allow one yellow coat, red umbrella or blue doorway to become an unmistakable visual anchor.
More usable range
A camera can often hold both shadow detail and pale highlights without sacrificing either end of the tonal range.
Unrepeatable scenes
Rain, mist and brief openings in cloud constantly redraw the scene. The photograph may not be possible tomorrow.
Subjects that thrive in flat light
- Portraits with soft light in both eyes and controlled skin highlights
- Macro subjects such as mushrooms, moss and rain-beaded petals
- Architecture with brick, concrete and recessed details intact
- Woodland scenes balancing pale trunks against a dark forest floor
Restore shape with negative fill
If overcast light feels too even, place the subject beside a dark wall, beneath an awning or near the edge of a forest. The darker environment absorbs light on one side and adds depth without a flash.
Choose motion first. Let ISO solve the exposure.
Set shutter speed for the appearance of rain, snow or subject motion. Set aperture for depth. Then raise ISO until the exposure works. A sharp ISO 1600 file usually beats a blurred ISO 200 frame.
| Result you want | Starting shutter | Useful aperture | Practical note |
|---|---|---|---|
| Freeze raindrops around a moving person | 1/500–1/1000 sec | f/2.8–f/5.6 | Raise ISO until the face remains sharp. |
| Show fine rain streaks | 1/30–1/125 sec | f/4–f/8 | Place rain against a dark background. |
| Record falling snow as flakes | 1/250–1/500 sec | f/2.8–f/5.6 | Focus on the subject, not nearby flakes. |
| Smooth traffic into wet light trails | 1–10 sec | f/8–f/11 | Use a tripod from a sheltered position. |
| Handhold a quiet street scene | 1/60–1/250 sec | f/4–f/8 | Use stabilization and inspect sharpness. |
React before the weather changes.
A repeatable sequence prevents frantic button pressing when rain thickens, fog lifts or a bright gap opens in the clouds.
Yellow coat. Silver street. One broad puddle.
Focus where the commuter will cross the reflection, set 1/500 second and frame before the stride arrives. Use a short burst near the splash—but remember that timing matters more than holding the shutter down.
Atmosphere is useful. Moisture is not.
Weather sealing is limited protection, not a promise of waterproofing. Keep vulnerable openings closed, clean the front element and give cold equipment time to warm inside a sealed bag.
Creative usefulness by weather effect
A qualitative field index showing how strongly each condition can simplify, energize or deepen a composition.
The shutter—not the forecast—decides how weather appears.
Gear protection hierarchy
Prioritize the small actions that keep moisture away from openings, glass and electronics.
From gray sky to finished frame
Make the visual anchor obvious before adjusting mood, contrast or color.
Add modest structure where it helps the subject instead of applying heavy global Dehaze.
Preserve muted color and atmospheric depth; avoid saturation that breaks the gray-day story.
Why Soft Gray Light Gives You More Detail to Work With
Shooting in bad weather gives you broad, diffused light that wraps around faces, leaves, stone, and fabric instead of carving them into bright highlights and black shadows. The result is smoother skin, richer surface detail, and an exposure your camera can often hold without sacrificing either end of the tonal range.
Direct midday sun behaves like a small, hard lamp. It creates dark eye sockets in portraits, sharp shadows beneath flowers, and white glare on wet leaves. A cloudy sky spreads that same light across thousands of square metres, so the edge between light and shadow becomes wide and gentle rather than crisp.
Imagine photographing a weathered blue door at noon. In sun, its peeling paint may flash pale in one area and sink into shade around the frame; under cloud, you can see the fine cracks, rusty hinges, and faded brush marks together. The gray sky may appear plain, but the door becomes more tactile.
- Portraits: Place your subject near open sky and turn the face until both eyes catch soft light. Watch for a faint green cast beneath dense trees.
- Macro subjects: Photograph mushrooms, moss, or rain-beaded petals without the tiny white glare spots caused by hard sun.
- Architecture: Use even light to record brick, concrete, and painted surfaces without losing recessed details in shadow.
- Woodland scenes: Let the cloud cover control contrast between pale trunks and the dark forest floor.
Soft light is not automatically flattering from every direction. If the entire sky illuminates your subject equally, a face or building can feel flat. Add shape by placing the subject beside a dark wall, beneath an awning, or near the edge of a forest; that negative fill darkens one side and restores depth without a flash.
Gray light does not remove contrast. It lets you decide where contrast belongs.
As an affiliate, we earn on qualifying purchases.
Choose These Settings to Control Rain, Snow, and Low Light
Shooting in bad weather becomes much easier when you set shutter speed for the weather effect first, aperture for the depth you want, and ISO for a usable exposure. A practical starting range is 1/250 to 1/500 second for visible droplets, while slower speeds turn rain and snow into streaks.
There is no single bad-weather setting because the subject still matters. A still building can tolerate 1/30 second with stabilization, but a cyclist splashing through a puddle may need 1/1000 second. If your subject moves, protect the shutter speed before worrying about perfectly clean low-ISO files.
| Result you want | Starting shutter speed | Useful aperture | Practical note |
|---|---|---|---|
| Freeze raindrops around a moving person | 1/500–1/1000 sec | f/2.8–f/5.6 | Raise ISO until the face stays sharp. |
| Show fine rain streaks | 1/30–1/125 sec | f/4–f/8 | A dark background makes streaks easier to see. |
| Record falling snow as flakes | 1/250–1/500 sec | f/2.8–f/5.6 | Focus on the subject, not nearby flakes. |
| Smooth wet traffic into light trails | 1–10 sec | f/8–f/11 | Use a tripod from a sheltered position. |
| Handhold a quiet street scene | 1/60–1/250 sec | f/4–f/8 | Use stabilization and check at full magnification. |
Aperture priority works well when the weather stays steady and your subjects barely move. Set a minimum shutter speed if your camera offers that option, then use Auto ISO to absorb small changes in brightness. In gusty rain or fast street action, manual exposure with Auto ISO gives you firmer control over both motion and depth.
Gray scenes often trick a meter into making pale subjects too dark. Fresh snow is the classic example: the meter tries to render all that white closer to middle gray. Start with +1 exposure compensation, inspect the histogram and highlight warning, then adjust without clipping textured snow or bright raincoats.
High ISO is rarely the disaster beginners fear. A sharp photograph at ISO 1600 usually beats a blurred frame at ISO 200, especially with current noise-reduction tools. The real danger is lifting a severely underexposed file later, which can reveal blotchy shadows and weak color.
As an affiliate, we earn on qualifying purchases.
Use a Five-Step Field Routine Before the Weather Changes
A repeatable field routine helps you react before rain thickens, fog lifts, or a bright gap opens in the clouds. Start by protecting the camera, choose one clear subject, set the shutter for visible weather, check the brightest detail, and shoot a short sequence. These five steps prevent frantic button pressing.
- Prepare under shelter. Fit the lens, memory card, and charged battery before stepping into rain. Every open compartment gives moisture another path inside.
- Choose the visual anchor. Find a person, tree, doorway, boat, or bright object that can hold the frame together when the background is soft and gray.
- Set weather motion. Pick a fast shutter to freeze droplets or a slow one to draw streaks. Make that decision before fine-tuning ISO.
- Check the bright edge. Review snow, pale clouds, reflective signs, and wet metal for lost highlight detail. Use the histogram as a warning tool, not as a beauty score.
- Shoot the changing moment. Capture several carefully timed frames as feet hit puddles, wind lifts a coat, or headlights sweep across wet pavement.
Suppose you see a commuter in a yellow coat approaching a broad puddle. Focus on the spot where the person will cross the reflection, set 1/500 second, and frame before the stride enters. A short burst near the splash gives you options, but timing still matters more than holding the shutter for ten seconds.
Pause after the first useful frame and check the lens, not just the rear screen. One drop near the centre can turn every streetlight into a milky smear. Carry a clean microfibre cloth in an inner pocket and use the lens hood; the hood blocks slanting rain as effectively as it blocks stray light.
This routine also helps with phones. Wipe the small lens carefully, tap the main subject to set focus and exposure, then lower the exposure slightly if bright windows or snow are losing detail. Press the volume button or use a timer when wet fingers make the touchscreen unreliable.
lens cleaning kit for outdoor photography
As an affiliate, we earn on qualifying purchases.
As an affiliate, we earn on qualifying purchases.
Turn Fog, Puddles, Snow, and Wind Into Composition Tools
Shooting in bad weather works best when you treat rain, fog, snow, and wind as parts of the composition rather than problems sitting in front of it. Fog separates distance into pale layers, puddles duplicate light, snow reveals movement, and wind adds gesture. Each condition gives you a different visual tool.
According to the World Meteorological Organization, fog consists of tiny water droplets suspended near the ground and is generally associated with visibility below 1 kilometre [1]. In a photograph, that lost visibility creates aerial separation: a nearby tree stays dark while each distant ridge becomes lighter and less detailed. What disappears can be as useful as what remains.
Try a familiar park in fog. Instead of squeezing every tree into the frame, place one dark trunk near the edge and let two faint rows recede behind it. The mist becomes a curtain of depth, hiding benches, signs, and parked cars that would compete on a clear afternoon.
Rain offers a different gift. Wet asphalt reflects shop signs, brake lights, windows, and umbrellas, often turning an ordinary road into a ribbon of red, amber, and blue. Kneel near a shallow puddle, keep your camera safely above splash height, and frame the reflection before the object; a broken reflection can feel more lively than a perfectly symmetrical one.
Snow shows both shape and movement. Use a dark coat, brick wall, or stand of fir trees behind falling flakes, because white flakes vanish against a pale sky. At 1/500 second, they hang as dots; around 1/30 second, they become diagonal strokes that reveal the wind.
Wind itself is invisible, so photograph its fingerprints. A bent reed bed, a snapping flag, or hair sweeping across a face tells the story. If branches keep moving but the stone building behind them stays still, try a tripod exposure near one second; the solid architecture anchors the frame while the leaves brush soft marks across it.
Do not photograph weather as decoration. Use it to hide, reveal, repeat, or move something inside the frame.
As an affiliate, we earn on qualifying purchases.
Keep Your Camera Dry Without Missing the Photograph
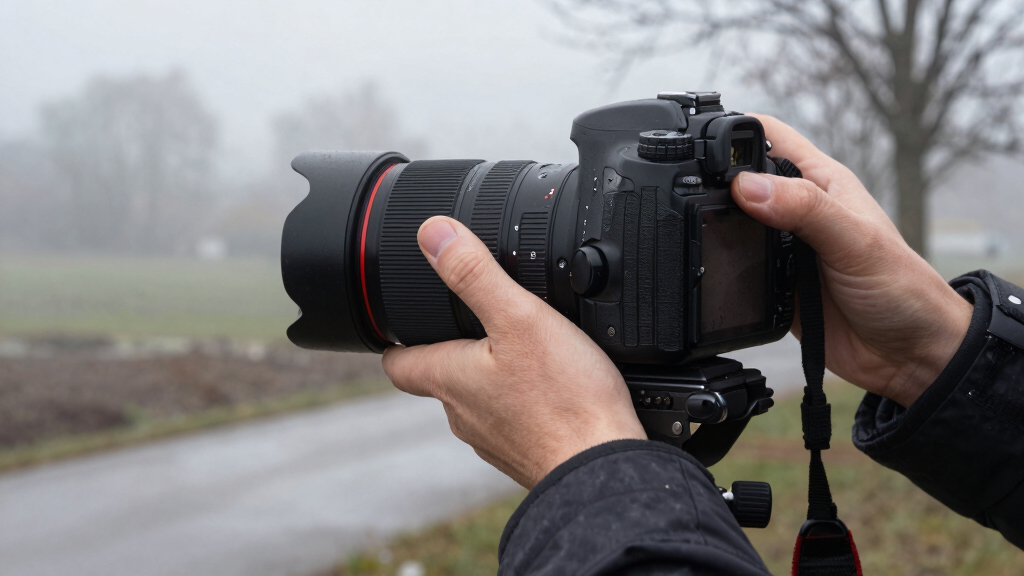
Protecting camera gear in bad weather means keeping water away from openings, wiping exposed surfaces, and slowing down when you return indoors. A rain sleeve, lens hood, dry cloth, and sealed bag handle most ordinary showers. The words weather resistant never mean that a camera can be treated as waterproof.
The IEC 60529 standard defines the familiar IP rating system for protection against dust and water [2]. Many cameras and lenses advertise sealing without publishing an IP rating, so you cannot compare those claims as if they describe one shared test. Check the maker’s manual for your exact camera-and-lens combination.
A weather-sealed body with an unsealed lens, open port door, or loose battery cover still has a weak point. I keep the lens mounted, point the camera slightly downward while walking, and use a hood even with a clear filter. I also avoid changing lenses in blowing rain, where one hurried swap can place droplets on the rear element or sensor chamber.
- Carry two dry cloths: one for the camera body and one reserved for optical glass.
- Keep spare batteries and cards in a resealable inner pouch, not a damp outer pocket.
- Use a simple rain cover with enough room for your hands, but do not block the lens or camera vents.
- Move away from lightning, fast water, unstable cliffs, and falling branches. No photograph deserves a gamble with those hazards.
The return indoors needs care because a cold camera can collect condensation in warm, humid air. Before entering, place it in a closed camera bag or sealed plastic bag and let it warm gradually for one to two hours. Any moisture then forms mainly on the outside of the bag rather than across colder internal surfaces.
After the camera reaches room temperature, unpack it in a dry space and inspect the lens mount, battery compartment, straps, and cloth case. Let damp accessories air-dry separately. Never aim a hair dryer or strong heater at the camera; concentrated heat can damage adhesives, seals, coatings, and plastic parts.
Edit Gray-Day Files Without Draining Away Their Mood
Gray-day editing should strengthen the subject without forcing the scene to pretend it was sunny. Start with exposure and white balance, restore a controlled black point, then guide attention with local adjustments. The best edit preserves soft atmosphere while giving the viewer one clear place to look.
Auto white balance often pushes an overcast file toward neutral gray, even when the scene carried a cool blue cast or warm streetlight glow. Set white balance by memory and intent, not by chasing technically neutral pavement. A rainy evening may feel right near 4,500 K, while a portrait under heavy cloud may need a warmer value for natural skin.
Be gentle with Dehaze and Clarity. Adding a little local contrast to a wet stone wall can reveal texture, but applying the same amount across fog can turn smooth mist into dirty bands. Start around 5 to 10 points, inspect distant gradients at 100 percent, and stop before the atmosphere becomes brittle.
For a city example, imagine a blue-gray street with one red umbrella. Lower global saturation slightly, then use a mask to lift the umbrella by about one-third of a stop and add modest color saturation. The frame stays quiet, yet the eye lands immediately where you want it.
Noise reduction also needs restraint. Luminance noise can resemble fine grain, while heavy smoothing turns rain, hair, grass, and fabric into waxy patches. Apply enough reduction to calm the darkest areas, preserve edge detail, and add output sharpening only after you know whether the photograph will appear on a phone screen or as a print.
The scientific references behind two practical points are straightforward. [1] The World Meteorological Organization’s International Cloud Atlas describes fog and its effect on visibility; that definition explains why mist naturally simplifies distant layers. [2] IEC 60529 defines IP protection codes; it also explains why an explicit rating tells you more than a broad sealing claim.
Editing should reveal the photograph the weather gave you. If the final frame looks like a different day, you have probably pushed past its strongest quality.
Frequently Asked Questions
Can I shoot in rain if my camera is not weather sealed?
Yes, during light rain, if you use a fitted cover or plastic rain sleeve, keep the lens pointed slightly downward, and avoid opening any compartment. Work near an awning, doorway, or vehicle so you can retreat quickly, and stop if water starts collecting around buttons, mounts, or port doors.
Why do my overcast photos look dull and underexposed?
Your meter may darken a frame filled with pale sky, snow, or mist because it tries to pull bright tones toward middle gray. Add roughly +0.3 to +1 stop of exposure compensation, then check the histogram and highlight warning so textured whites remain intact.
What shutter speed makes rain visible in a photograph?
Start near 1/250 to 1/500 second for recognizable drops and use 1/1000 second when fast movement also needs to freeze. For visible rain streaks, try 1/30 to 1/125 second and place the rain against a dark wall, coat, tree line, or night background.
Should I use a tripod on gray days?
Use a tripod when you want long reflections, moving branches, light trails, or maximum depth at a low ISO. For street photography and portraits, handholding usually gives you more freedom; raise ISO and protect a shutter speed that keeps the subject sharp.
How do I stop raindrops from ruining the front of my lens?
Fit a deep lens hood, angle the camera away from driving rain between frames, and check the front element often. Blot water with a clean cloth before wiping, because grinding grit across wet glass can mark a filter or coating; keep a second cloth dry for the final polish.
Is fog safe for autofocus, or should I focus manually?
Autofocus works when you give it a clear edge with local contrast, such as a dark trunk, face, sign, or roofline. If the camera hunts through blank mist, use single-point autofocus on the subject or switch to manual focus and magnify the live view before shooting.
Conclusion
Your next gray forecast is a shooting plan, not a cancellation notice. Pack a hood, cover, dry cloth, and spare battery, then choose one nearby subject you already know: a market street, a stand of trees, a footbridge, or a quiet portrait location. Work the soft light, wait for one gesture or flash of color, and let the weather simplify everything else.
The habit to remember is simple: make the weather part of the photograph. Freeze the drops, stretch the reflections, layer the fog, or let wind draw through the frame. When everyone else sees a dull silver afternoon, you can come home with wet pavement glowing like glass and a photograph that could only exist on that exact day.
Halloween Picks
halloween
As an affiliate, we earn on qualifying purchases.