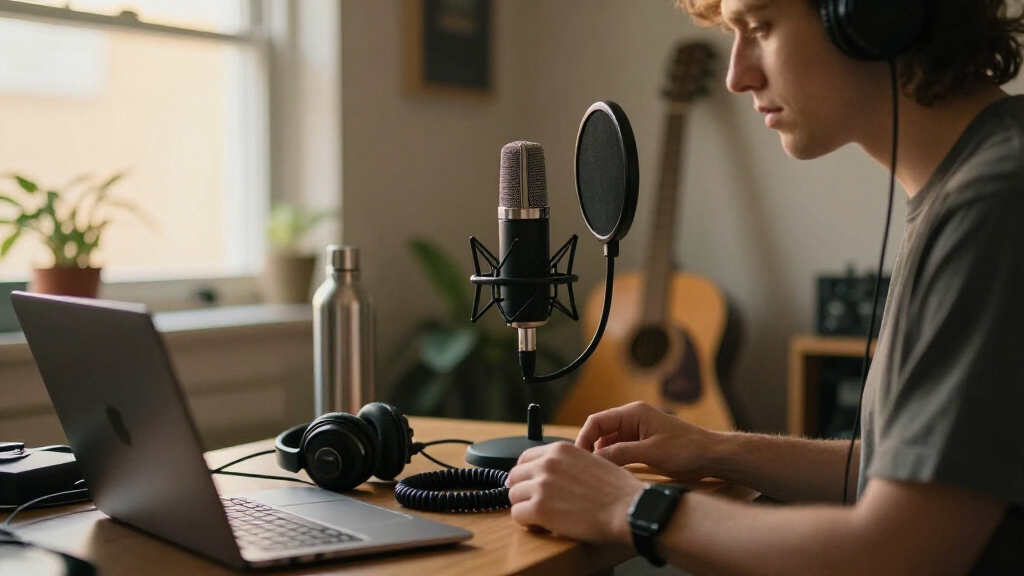
TL;DR

Get audio and creator gear delivered free with Prime
- Fast, free delivery on millions of items
- Prime Video, Amazon Music and more included
- Member-only deals all year
Portable condenser microphones are small recording mics built to capture detailed sound without a permanent studio setup. Choose by recording situation first, then check pickup pattern, device compatibility, power, monitoring, and the complete kit you will carry; a mic close to its source with suitable wind protection often beats a more expensive mic used in a noisy spot.
A microphone can fit in your jacket pocket and still record the rustle of your coat louder than your voice. Portable condenser microphones make detailed recording possible away from a permanent studio, but their sensitivity rewards careful placement and punishes sloppy setup.
I’ve learned that the useful question isn’t simply, “Which mic sounds best?” It’s, “Which mic can you connect, power, position, and monitor where you’ll actually record?” A phone interview, a desk voiceover, and birdsong beside a windy trail call for different tools.
This guide explains how the main types work, what to check before buying, and how to avoid common recording problems. You’ll also get a practical setup sequence, realistic examples, and key facts and trade-offs that matter more than a long feature list.
Match the mic type to the device and recording job: USB for many desk setups, mobile mics for phones, and recorder or XLR options for field rigs.
Check the complete signal chain, including app support, connector, preamp, and power; many XLR condensers use 48-volt phantom power.
Use cardioid pickup to favor a nearby front-facing source and omni pickup when you want sound from around the mic.
For outdoor work, keep the microphone close, secure it against handling noise, and use wind protection suited to the conditions.
Treat 24-bit, 48 kHz as a practical general-purpose setting when supported, and monitor with headphones to catch problems early.
What portable condenser microphones capture—and what they also hear
A portable condenser microphone is a compact mic with a sensitive diaphragm and electrical circuit, built to record detailed sound without a fixed studio installation. Many are compact microphones designed to capture detailed sound while being easy to carry, but they also pick up more of the room, wind, and handling than you might expect.
That sensitivity is useful when you’re recording a soft acoustic guitar, spoken voice, or distant ambient sound. Compared with many dynamic microphones, condensers often respond readily to quiet details and higher frequencies. Think of one as a fine brush: it can catch delicate texture, but it also reveals every smudge on the canvas.
For example, if you record a quiet voiceover beside a humming refrigerator, the mic won’t know the hum is unwanted. It will capture both. Move closer to the speaker, turn off the appliance if possible, and choose a quieter room before reaching for software fixes.
According to the supplied research notes, sensitivity is both a strength and a trade-off: placement and the recording environment matter as much as the microphone. [1] Condensers aren’t automatically better than dynamics, either. A dynamic mic can be a sensible pick for a loud room or stage, while a condenser can reveal subtle detail in a controlled space.
portable condenser microphone for smartphones
As an affiliate, we earn on qualifying purchases.
As an affiliate, we earn on qualifying purchases.
Choose the microphone type that fits your recording day
Portable condenser microphones come in several forms, and the right one depends on what you need to plug into and record. USB models suit a laptop desk, phone mics suit mobile work, recorder mics suit location capture, compact XLR models suit flexible rigs, and lavaliers keep a mic near a moving speaker.
These formats differ not just in connector but in how much of the recording system they ask you to carry and manage. A USB mic combines the microphone and digital connection in one device, which reduces setup steps for a laptop voiceover. The trade-off is that you depend on the computer or mobile device recognizing it, and you may have fewer placement options than with a separate mic and recorder. A phone mic can make a quick street interview easy, but connector and app support vary, so a physically compatible adapter may still fail to provide the right audio input or power.
A handheld recorder with built-in microphones keeps the mic, preamps, controls, and storage together. That self-contained design is handy for field sound, but adds batteries and another device to operate; you also need to set levels and manage files. Compact XLR microphones take more pieces—a cable, recorder or interface, and sometimes phantom power—but let you swap components as your work changes. A lavalier keeps the mic close to a moving speaker, reducing the effect of room distance, though clothing friction and wireless compatibility become new concerns.
| Type | Good fit | Check before recording |
|---|---|---|
| USB microphone | Laptop voiceovers, podcasts, calls | Device support and headphone monitoring |
| Phone microphone | Mobile interviews and clips | Connector, app support, and power |
| Recorder microphone | Field sound and events | Storage, input controls, and batteries |
| Compact XLR mic | Flexible recorder or interface rigs | Preamp and phantom power needs |
| Lavalier | Presentations and video interviews | Clothing noise and transmitter compatibility |
Picture a two-person interview in a busy café. A tiny mic clipped close to each speaker may give you clearer dialogue than a mic placed in the middle of the table, even if the table mic has more features. Closer placement makes the voices stronger relative to the surrounding chatter; the cost is that you may need two mics or a more involved setup. If simplicity matters more, one recorder can capture the whole scene, but the dialogue may be harder to separate from café noise afterward.
Wireless systems can simplify a video kit by pairing a clip-on transmitter with a receiver. Some models offer onboard recording, automatic level controls, or safety tracks, but these features vary. They can protect against a dropped connection or unexpected loud peaks, but they don’t remove clothing noise or guarantee clean dialogue. Check current specifications rather than assuming every small wireless kit has them. [2]
As an affiliate, we earn on qualifying purchases. As an affiliate, we earn on qualifying purchases.USB condenser microphone for recording
Check connections and power before you buy
Portable condenser microphones only work smoothly when the whole signal chain fits together: the mic, cable or adapter, power source, recording device, and app must all support one another. A plug that physically fits does not prove that your phone or recorder can accept the microphone’s signal. If one link is incompatible, you may get silence, a weak signal, or a recording made through the device’s built-in mic instead.
USB microphones usually draw power from a computer or compatible mobile device. That makes them convenient, but a phone may not supply enough power or support the mic’s audio format without an appropriate adapter or interface. Some phone microphones draw power from the phone; others may need an adapter, interface, or separate battery. Many compact XLR condensers need 48-volt phantom power from a compatible recorder, mixer, or interface. Phantom power is supplied through the XLR connection, so it avoids adding a separate battery to the mic, but it means the recorder must support it. Battery-powered models are another option for setups without phantom power, at the cost of carrying and checking batteries.
Imagine arriving for an outdoor interview with an XLR mic, only to find your small recorder can’t supply phantom power. The microphone may be perfectly fine, but your setup is incomplete. I check the device manual and test the full connection at home before packing for a shoot; that also confirms the app is recording from the intended input and lets me catch noisy adapters before they matter.
Use this quick sequence before recording:
- Confirm the connector. Check whether the mic uses USB, USB-C, Lightning, XLR, or a wireless receiver.
- Confirm the power. Look for USB power, battery operation, or phantom power requirements.
- Check device and app support. Make sure your recording device can select the mic as its input.
- Run a test recording. Listen back with headphones to catch silence, distortion, or adapter problems.
That five-minute test can save a whole interview. If you plan to use 48-volt power, check every connected piece of equipment and follow its instructions before switching it on. Knowing which device supplies power and when it is enabled helps prevent surprises when connecting or disconnecting gear. [3]
As an affiliate, we earn on qualifying purchases. As an affiliate, we earn on qualifying purchases.XLR portable condenser microphone kit
Choose a pickup pattern that suits the room or outdoors
The pickup pattern determines which directions a microphone hears most strongly. A cardioid pattern favors sound in front of the mic, while an omnidirectional pattern captures sound from all around it; choose based on your subject and surroundings, not on the name alone. The pattern affects the balance between your intended source and everything else, but it doesn’t make unwanted sound disappear.
For a solo voiceover at a desk, cardioid placement can help prioritize your voice over sounds behind the microphone. Sit close, aim the front of the mic toward your mouth, and keep the keyboard or computer fan from sitting directly in its pickup area. This works because the voice becomes stronger relative to room noise as the mic moves closer. In a two-person conversation around a small table, an omni mic can capture both voices more evenly, but it will also collect more room noise. If the room is lively, separate close mics may provide clearer dialogue, though they add setup and mixing work.
Outdoors, wind becomes a sound source of its own. A thin foam cover can help with light air movement, while stronger wind often calls for a more substantial furry cover. Wind protection reduces the bursts of air hitting the capsule; it won’t remove distant traffic or other ambient sounds. Keep the mic secured on a stand or grip; a loose cable rubbing against a jacket can make scratchy thumps that sound like someone crumpling paper beside the listener’s ear.
As a photographer, I think about microphones much like lenses: where you point them and how far you stand from the subject changes the result. A directional pattern doesn’t magically erase a noisy street, and an omni mic isn’t wrong just because it hears a lot. If you’re capturing a fountain or a group of people, that wide pickup may be exactly the sound you want. The useful choice is the pattern that preserves the sound you came for without making unwanted sound dominate. [4]
As an affiliate, we earn on qualifying purchases. As an affiliate, we earn on qualifying purchases.wind protection for condenser microphones
Build a portable kit that stays light and ready
A portable microphone kit is only convenient if you can carry, power, position, and protect the entire setup. Count the microphone, cables, batteries, wind cover, headphones, mount, and case; the full kit—not the mic’s bare dimensions—decides whether you’ll bring it along. Each extra piece may improve reliability or sound, but also adds weight, setup time, and another item that can be forgotten or fail.
For a phone interview, your kit might be a compact mic, the correct phone adapter, a clip, wired headphones, and a small case. Keeping it minimal makes spontaneous recording easier, but test that particular combination because a weak link in the adapter or app can undermine the whole setup. For a trail recording, add suitable wind protection and a way to secure the mic against handling noise. That extra bulk is worthwhile if it prevents wind or grip noise from ruining a take. For a laptop podcast, a stand and headphone output may matter more than a tiny body you can slip into a pocket: stable positioning and monitoring make repeatable recordings easier.
Useful accessories solve specific problems. A shock mount can reduce bumps traveling through a stand, but it adds bulk and cannot fix noise from a cable rubbing against clothing. A windscreen can soften gusts, though stronger wind may require a more substantial cover. Closed-back headphones help you hear interference while recording; they are useful only if you can monitor the actual mic signal. A spare cable can rescue a shoot when a connector fails, and replaceable cables may make a microphone easier to maintain over time.
- For outdoor recording: pack a sturdy wind cover, secure mount, spare battery, and headphones.
- For video interviews: add a clothing clip or lavalier mount and check for fabric rustle.
- For desk recording: prioritize a stable stand, pop protection, and a monitoring option.
Consider a one-hour walk to record birds: a tiny mic with no wind cover may be less useful than a slightly larger recorder with a furry cover and fresh batteries. The larger kit takes more effort to carry, but offers protection and power that can make the recording usable. Durability and storage matter, too. A padded case keeps the mic from collecting grit at the bottom of your camera bag, where it competes with loose lens caps and crumbs. The best kit is not the one with every accessory; it’s the smallest set of pieces that reliably handles the conditions you expect.
Set levels and monitor before the moment passes
Good recording levels leave room for sudden loud sounds while keeping the voice clear above background hiss. Set your input so normal speech sits comfortably below the recorder’s maximum, then listen through headphones; a meter alone won’t reveal wind rumble, cable crackle, or a nearby siren. If levels are too high, loud moments can clip and become harshly distorted. If they’re too low, raising them later may also make the recorder’s background noise more noticeable.
For spoken word and general recording, 24-bit at 48 kHz is a practical starting point when your device supports it. Higher sample rates and larger files aren’t automatic improvements for every project. They can be useful for particular workflows, but they consume more storage and may complicate handling without fixing a noisy room or distant microphone. Your microphone placement and clean signal usually matter more than chasing bigger numbers.
Suppose you’re filming a short interview outside and the guest laughs more loudly than they speak. If you set the input too high for their usual voice, that laugh can clip into harsh distortion. Leave headroom, make a test recording, and lower the gain if the loudest expected moment pushes too close to the top. The trade-off is that quieter speech may sit lower in the recording, so get the mic close enough to capture it clearly rather than solving every level problem with gain.
Some recorders offer a safety track or limiter; these can help manage sudden peaks, but don’t treat them as a substitute for listening. A safety track can preserve a quieter version of the signal, while a limiter reduces peaks within its limits; neither can repair severe clipping or remove wind and handling noise. If you have a headphone output, use it. Ten seconds of monitoring can reveal a loose adapter or clothing rustle before you’ve recorded the answer you can’t repeat. [5]
Frequently Asked Questions
Do all condenser microphones need batteries?
No. Some use 48-volt phantom power, USB power, or power from a phone or recorder; others run on batteries. Check the specific model and the device supplying it before you leave for a recording.
Can I plug a condenser microphone directly into my phone?
Sometimes, but the microphone must support your phone’s connector and audio input requirements. You may need a compatible adapter, interface, recording app setting, or external power source. Make a short test recording and listen back before relying on the setup.
Are portable condenser microphones good for outdoor recording?
They can capture clear outdoor sound, but wind and background noise need attention. Use suitable wind protection, keep the mic close to the source, secure the cable, and monitor through headphones when you can.
Is a condenser microphone better than a dynamic microphone?
Neither type is best for every situation. Condensers are often chosen for sensitivity and detail, while dynamic microphones can be useful in loud environments. Your source, room, mic placement, and recording device all affect the result.
What pickup pattern should I choose for interviews?
A cardioid pattern can favor a speaker in front of the mic, while an omnidirectional pattern can capture several people or more of the surrounding ambience. For a busy room, a close microphone aimed at each speaker often gives you clearer dialogue than one mic placed far away.
What accessories should I pack with a portable microphone?
Start with the correct cable or adapter, headphones, a stable mount or clip, and a protective case. For outdoor recording, add wind protection and spare power. A spare cable is a small addition that can save an interview when a connector fails.
Conclusion
Choose a portable condenser microphone by starting with the sound you need and the place you’ll record it. Then verify the connection and power, bring the right wind or handling protection, and test the complete kit before the real moment arrives.
The best portable setup is the one you can carry, connect, and trust when the room goes quiet—or the wind picks up.
Columbus Day / Indigenous Peoples' Day Picks
long weekend sales
As an affiliate, we earn on qualifying purchases.