
TL;DR

Get audio and creator gear delivered free with Prime
- Fast, free delivery on millions of items
- Prime Video, Amazon Music and more included
- Member-only deals all year
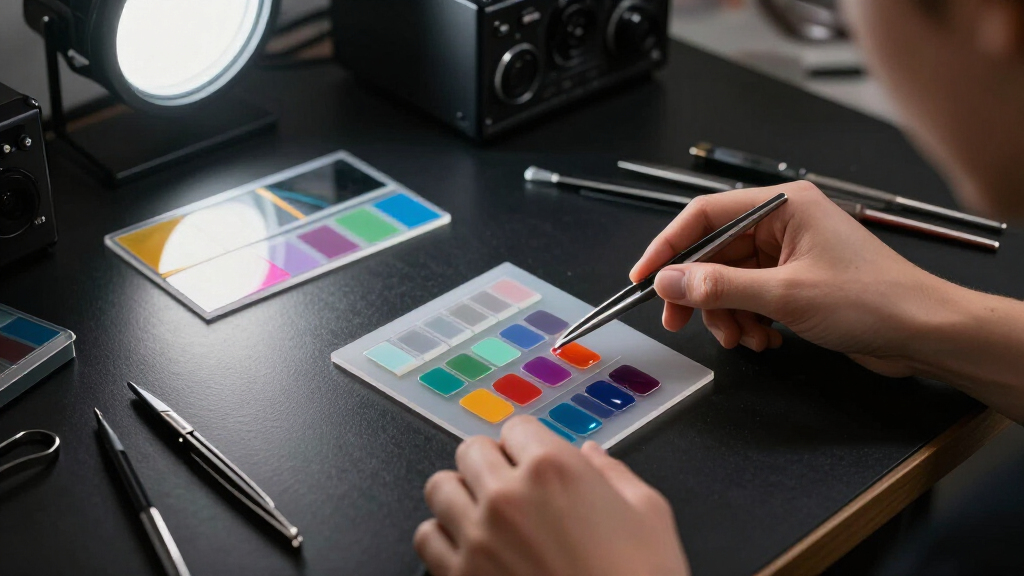
Lighting gels are heat-resistant filters that change the color or color temperature of emitted light. Use CTO, CTB, and green correction to match sources; use creative colors for mood, separation, and background control; then judge every choice through your actual camera because exposure, spectrum, and white balance change the result.
A plain gray wall can turn electric blue with one small sheet of gel, while a pale orange filter can rescue a face caught between a window and a tungsten lamp. The material looks simple, but it changes what your camera records before the light ever reaches the sensor. That gives you more control on set and fewer strange skin tones later.
I use gels for two jobs: matching lights that disagree and adding color with a clear purpose. The first job keeps whites neutral and faces believable. The second can make a rim light glow like sunset, push a background toward deep violet, or suggest the cold spill of a neon sign just outside the frame.
You will learn how CTO, CTB, plusgreen, and minusgreen work, why camera white balance cannot repair every mixed-light problem, and how saturated filters affect exposure. You will also see a repeatable testing process, practical safety rules, and examples drawn from the way photographers actually build a set. The goal is simple: choose color deliberately, test it through your camera, and avoid turning correction into a guessing game.
Choose one dominant color temperature, set a fixed camera white balance for it, and gel every competing source toward that target.
Use fractional CTO or CTB when full conversion looks heavy; a quarter-strength correction often preserves believable warmth while reducing color conflict.
Treat kelvin and green-magenta balance as separate controls because two lights with matching kelvin values can still render skin differently.
Protect saturated color from neutral spill and overexposure, both of which can turn a rich gel effect pale.
Use only lighting-rated material, leave ventilation space around hot fixtures, and replace any gel that bubbles, fades, warps, or scorches.
Gels: Adding Color and Correcting It
A gel changes the light before it reaches the sensor. Use correction filters to make competing sources agree, creative colors to shape mood and separation, and the actual camera image to judge every decision.
One material. Two very different intentions.
A thin, heat-resistant filter can rescue mismatched skin tones or turn a gray wall electric blue. Decide whether the goal is consistency or visible color before choosing the sheet.
Add a deliberate hue
Use saturated or subtle color to establish mood, separate layers, suggest an off-screen environment, or transform an ordinary background.
Make sources agree
Shift daylight, tungsten, fluorescent, flash, and LED fixtures toward one target so whites remain neutral and faces reproduce believably.
Choose the gel that moves color in the right direction.
CTO and CTB control the blue-to-amber axis. Plusgreen and minusgreen work on the separate green-to-magenta axis. Start broad, then refine.
Warm cool light
Moves a daylight-balanced source near 5600 K toward tungsten near 3200 K. Useful for matching flash to warm practical lamps.
Cool warm light
Moves a tungsten-balanced source near 3200 K toward daylight. Expect meaningful output loss with full conversion.
Warm with yellow
Adds a straw-like character that can feel less red than CTO—useful for warm highlights and sunlit effects.
Add green bias
Helps a clean source resemble green-biased fluorescent or LED fixtures when those sources must remain in the scene.
Remove green cast
Counteracts excess green from fluorescent and LED sources. Apply in small increments after temperature matching.
Reduce brightness
Cuts output without intentionally shifting hue. Diffusion, by contrast, spreads and softens light rather than correcting color.
Match the visible problem—not merely the fixture label.
Full conversion is only one option. Half, quarter, and eighth strengths let you reduce conflict while preserving believable warmth or coolness.
| Visible problem | First move | Best gel | Strength strategy | Camera check |
|---|---|---|---|---|
| Flash looks blue beside lamps | ✓Warm flash | CTO | Start at ¼; increase if needed | Face + white fabric |
| Tungsten looks orange by a window | ✓Cool lamp | CTB | Full conversion costs output | Highlights + shadow side |
| LED makes skin look sickly | ~Check both axes | Minusgreen | Use fractional correction | Face + gray card |
| Clean flash must match fluorescent | ~Add source bias | Plusgreen | Match, then white-balance | Neutrals across the frame |
| Mixed light corrected only in camera | ✗One WB cannot unify it | Gel one source | Choose a dominant target first | Lock white balance |
Match mixed lighting in five steps.
Choose one destination before touching the filters. This order prevents a temperature correction, tint correction, and camera setting from quietly fighting each other.
Choose the dominant light
Preserve the source you cannot move or the visual character you want to keep.
Fix camera white balance
Use the target kelvin value or a measured custom balance—not auto WB.
Gel competing sources
Apply CTO, CTB, or fractional correction toward the chosen target.
Correct green or magenta
Add plusgreen or minusgreen only after the broad temperature match.
Test the full image chain
Review the camera, lens, exposure, monitor, and recording format together.
Camera white balance interprets light; a gel changes the light itself. White balance can neutralize one dominant source, but it cannot make daylight on one cheek and tungsten on the other become the same illumination.
A rich color survives only if the source and exposure support it.
Saturated filters reject much of a lamp’s output. Neutral spill, overexposure, and incomplete LED spectra can all weaken or distort the intended color.
Illustrative relative output after filtration
Exact transmission varies by product and source; deeper saturation generally means less usable output.
Compensate by moving the source closer, raising power, opening the aperture, or reducing competing neutral spill—while watching highlight clipping.
Kelvin does not describe the whole color
Two fixtures marked 4500 K may sit at the same blue–amber point yet differ along the green–magenta axis. LED peaks or gaps can also change how skin, fabric, and paint render.
Every decision travels through the full image path.
Heat changes both the gel and the risk.
Use only lighting-rated material. A filter that bubbles, fades, warps, or scorches is no longer predictable and should be replaced.
Five rules to carry onto every set.
Correction stops being a guessing game when every source has a role, every adjustment has a direction, and every choice is tested through the camera.
Choose one dominant temperature, fix the camera white balance, and gel competing sources toward it.
Try fractional CTO or CTB before full conversion; subtle warmth often looks more believable.
Treat kelvin and green–magenta balance as separate controls, especially with LEDs.
Protect saturated color from neutral spill and overexposure, which can make it look pale.
Use lighting-rated material, allow ventilation, and replace damaged or heat-stressed gels.
How Two Gel Families Give You Control Over Color
Gels: Adding Color and Correcting It becomes much easier when you divide the material into two families. Creative gels add a visible hue for mood or separation, while correction gels make sources agree. One changes the character of a scene; the other removes distracting color conflict before you press the shutter.
Lighting gels are thin, heat-resistant sheets placed in front of a light source to change its color or color temperature. A red filter can turn a bare wall into a glowing ember, while a quarter CTO can give a cool flash a gentle late-afternoon warmth. Same physical idea. Different visual purpose.
On a portrait set, I might keep the key light neutral and place a blue gel on a rear light. That blue edge traces the subject’s jacket like moonlight along wet pavement, yet the face remains natural. If I instead notice that an overhead fixture makes one cheek green, I reach for minusgreen correction, not a creative color.
- Creative color gels: Add reds, blues, greens, magentas, ambers, or other intentional hues.
- Color-correction gels: Shift daylight, tungsten, fluorescent, and LED sources toward a shared appearance.
- Neutral-density gel: Cuts brightness without deliberately changing color.
- Diffusion material: Spreads and softens light, though it is a modifier rather than a color gel.
Why not choose every gel by looking at it under room light? Because a gel filters the spectrum behind it. The same magenta sheet can look rich on one flash and muddy on a budget LED. According to PhotoMocha [1], physical swatch tests with the intended fixture and camera are more dependable than selecting color from a computer screen.
As an affiliate, we earn on qualifying purchases.
Which Correction Gel Fixes the Color You Can See?
Gels: Adding Color and Correcting It calls for matching the filter to the direction of the color problem. CTO warms cool light, CTB cools warm light, and green correction works on a separate green-to-magenta axis. Identify the unwanted cast first, then use the lightest strength that produces a clean result.
| Gel | What it does | Useful example |
|---|---|---|
| CTO | Moves daylight-balanced light near 5600 K toward tungsten near 3200 K | Matching a flash to warm household lamps |
| CTB | Moves tungsten-balanced light near 3200 K toward daylight | Matching a tungsten lamp to window light |
| CTS | Adds a yellower, straw-like warmth | Creating warm skin highlights without the redder feel of CTO |
| Plusgreen | Adds green to resemble a green-biased source | Matching a flash to older fluorescent fixtures |
| Minusgreen | Counteracts excess green | Cleaning up a green cast from an LED or fluorescent lamp |
| Neutral density | Reduces output without deliberately shifting hue | Balancing a bright window without changing its color |
Full conversion is not always the best-looking answer. CTO and CTB commonly come in full, half, quarter, and eighth strengths, which let you nudge rather than shove the color. During an indoor portrait at dusk, a quarter CTO on flash can preserve the room’s amber glow while keeping the subject from looking blue and detached.
Here is the trap: a lamp labeled 4500 K can still lean green, while another 4500 K fixture can lean magenta. Kelvin only describes the blue-to-amber direction. According to PhotoMocha [2], equal kelvin readings do not promise equal color rendering, especially when LEDs contain sharp spectral peaks or gaps.
Correct the color you can measure and see, not merely the number printed on the fixture.
When the cast feels close but faces still look sickly, add or subtract green in small steps. I tape a quarter minusgreen over the problem fixture, shoot a gray card beside a face, and compare both on the intended monitor. That quick frame tells me more than staring at the gel itself.
As an affiliate, we earn on qualifying purchases.
How to Match Mixed Lighting in Five Repeatable Steps
Gels: Adding Color and Correcting It works reliably when you choose one target color before touching the filters. Decide whether daylight, tungsten, or another source will lead the scene, set the camera for that target, and gel the remaining sources to match. This sequence prevents one correction from quietly undoing another.
- Choose the dominant light. Pick the source you cannot move or the look you want to preserve.
- Set a fixed white balance. Use the target kelvin value or a measured custom balance rather than automatic white balance.
- Gel the other sources. Apply CTO, CTB, or fractional correction until their blue-amber character agrees.
- Correct green or magenta. Add plusgreen or minusgreen only after the broad temperature match.
- Test the full image chain. Check the actual camera, lens, exposure, monitor, and recording format.
Imagine photographing a chef beside a large kitchen window at noon. Daylight gives one side of the face a clean, cool tone, while a tungsten practical makes the other side orange. Setting the camera to daylight fixes the window side but exaggerates the lamp; setting it to tungsten reverses the problem. White balance can interpret one dominant source, but it cannot make two different sources become the same light.
The cleaner fix is to gel the smaller or more controllable source. Place CTB on the tungsten fixture if it has enough output, then set the camera near daylight. If covering the window with CTO is more practical, you can work near tungsten instead, though a large window demands far more material and absorbs light.
I always include a face, gray card, white fabric, and something strongly colored in the test frame. A gray card can look neutral while red clothing goes dull because the source lacks parts of the spectrum. Click, inspect, adjust, and shoot again. That small loop is faster than trying to scrub different color casts from every patch of skin during editing.
As an affiliate, we earn on qualifying purchases.
How to Make Creative Gel Color Look Rich Instead of Washed Out
Creative gels look richest when the gelled light is separated from neutral light and kept below clipping. Control spill, darken the receiving surface, and expose for visible color rather than raw brightness. A saturated gel absorbs a large part of the lamp’s output, yet overexposing that filtered light can make its color look pale.
For a simple portrait, start with a neutral key on the face and place a blue-gelled light behind the subject. Aim it across the shoulders instead of straight toward the lens. The result gives you a crisp blue rim, while the clean key protects believable skin. Color and neutrality work side by side, each making the other feel stronger.
Adding color and texture to a plain background can be just as effective. A magenta gel fired across wrinkled silver fabric creates bright pink ridges and dark plum valleys. Move the light close and the falloff becomes dramatic; pull it back and the wash grows flatter. The fabric almost seems to crackle, snap, as its highlights catch the beam.
- Use complementary colors, such as blue and orange, to separate foreground from background.
- Keep a neutral key light when accurate skin tone matters more than a fully colored scene.
- Flag spill so one hue does not contaminate every surface.
- Lower ambient exposure when a weak gel effect competes with room light.
- Test the gel on the actual paint, fabric, or skin it will illuminate.
Why does a deep red gel sometimes look pink? The filtered area is probably too bright, catching neutral spill, or landing on a surface that reflects little red. Automatic white balance may also fight the effect. Switch to fixed white balance, reduce the gelled light by a fraction, and watch the color gather density like ink soaking into paper.
You can also combine correction with a creative gel. If an LED starts slightly green, remove that bias before adding blue, or the finished shade may drift toward cyan. Stacking filters costs output and raises heat, so use one tested combination only when the visual gain justifies it.
As an affiliate, we earn on qualifying purchases.
Why a Gel Cannot Rescue Every Problem Light
Gels: Adding Color and Correcting It cannot replace wavelengths a lamp never produced. A gel can subtract or rebalance existing light, but it cannot manufacture missing reds, greens, or blues. If faces stay gray, waxy, or patchy after broad correction, the source spectrum may be the real problem.
Think of a gel like a sieve. It can hold back part of what flows through, but it cannot add an ingredient that was never in the bowl. A broad-spectrum tungsten lamp often responds predictably to blue correction, while an LED with sharp gaps may shift in a less pleasing way. Both fixtures can display the same kelvin value and still paint a red sweater differently.
Several measurements help you investigate. CRI offers a familiar general color-rendering score, but it can hide weaknesses that matter on camera. TLCI evaluates light with television-camera response in mind, while SSI compares spectral similarity between sources and can help when matching fixtures [2]. No single number replaces a camera test.
I once see this most clearly with mixed practical lamps in interior photography: the walls balance reasonably well, yet one wooden cabinet turns muddy and a person’s lips lose warmth. A little minusgreen may improve the overall frame, but repeated correction soon eats output without restoring the missing color. At that point, replacing or switching off the weak lamp gives a cleaner result.
A gel edits the light that exists. It does not rebuild a broken spectrum.
Programmable RGB, RGBW, RGBWW, and multi-emitter LEDs give you fast electronic color control, but their matching readouts can still produce different camera results. Physical gels remain useful on fixed-white fixtures, practical bulbs, windows, and venue lights. The reliable approach pairs spectral information with a real test frame and a calibrated display.
How to Handle, Label, and Reuse Gels Without Costly Surprises
Use only lighting-rated gel material, mount it in the proper holder, and leave ventilation space around hot fixtures. Traditional gels resist heat, but they are not fireproof. Tungsten and discharge lamps can bleach, warp, bubble, or melt a filter, while powerful LEDs can still create damaging heat near the emitter or lens.
Never substitute ordinary cellophane or colored household plastic. Those materials may soften, discolor, or release fumes when heated. On a hot lamp, a sheet that seemed harmless can curl with a quiet crinkle, touch the lens, and become a genuine fire risk. Follow the fixture maker’s accessory and spacing limits.
- Mount each gel in the fixture’s frame or approved holder.
- Keep the material away from bulbs, hot lenses, and blocked vents.
- Inspect for bubbling, brittleness, fading, and scorch marks before every reuse.
- Place the gel farther from the hottest beam area when the fixture permits it.
- Stop using any filter that smells unusual, deforms, or shows heat damage.
Organization protects your visual continuity as well as your gear. Similar color names from different manufacturers are not guaranteed to match, so label each cut with its maker, catalog number, and strength. Store pieces flat or loosely rolled, away from sunlight and radiators. I keep correction sheets separate from creative colors so a quarter CTO never disappears into a stack of pale ambers.
Record successful combinations in your lighting notes. For example, write that the interview setup used a specific half CTO on the rear fixture, quarter minusgreen on the key, and a fixed 4300 K camera balance. When the subject returns three weeks later, those details give you a repeatable starting point instead of a morning spent comparing nearly identical scraps.
Stacking two gels is possible, but each layer reduces output and traps more heat. If you use one combination repeatedly, find a single filter with comparable transmission when available. Careful cataloging also reduces waste: reuse clean cuts, trim only what the holder needs, and choose electronic color control when it produces the same result.
Frequently Asked Questions
Can ordinary colored plastic replace a photography gel?
No, household plastic is not a safe substitute for a lighting-rated gel. It can discolor, melt, touch hot components, or release unpleasant fumes. Use material rated for your fixture and keep it inside the proper frame with adequate ventilation space.
Should you gel the light or change camera white balance?
Use camera white balance when one type of light dominates the scene. Use physical correction gels when two or more sources illuminate different parts of the subject. White balance changes the camera’s interpretation, while a gel changes the illumination before it reaches the scene.
Do lighting gels reduce brightness?
Yes, every gel absorbs some light, and dense creative colors can absorb a large amount. Check the manufacturer’s transmission data, then confirm with a meter or test frame. You may need to move the fixture closer, raise its output, open the aperture, or reduce competing ambient light.
Why does the same gel look different on two fixtures?
A gel filters whatever spectrum the fixture already produces, so different light engines create different results. Optics, dimming, exposure, surrounding surfaces, camera response, and white balance add more variation. Test the gel on both fixtures through your intended camera instead of trusting a screen preview or color name.
Do programmable LED fixtures make physical gels obsolete?
No, physical gels still solve jobs LEDs cannot always handle conveniently. They work on fixed-white fixtures, practical lamps, windows, and older venue equipment, and they provide familiar repeatable palettes. Programmable LEDs offer speed and saved settings, but matching digital coordinates do not guarantee matching camera color across different fixtures.
Conclusion
Fix the light before asking the camera to interpret it. Choose a target white balance, make competing sources agree with the lightest practical correction, and reserve bold color for places where it supports the frame. Then judge the result through the intended camera because your sensor, exposure, surfaces, and display all shape the final hue.
Start with one neutral key, one gelled accent, and a few careful test frames. Watch what happens to skin, white fabric, and the darkest colored object in the scene. When the light clicks into place, you will see it immediately: clean faces, deliberate shadows, and color that feels built into the photograph rather than painted over it.
Halloween Picks
halloween
As an affiliate, we earn on qualifying purchases.