TL;DR

Get audio and creator gear delivered free with Prime
- Fast, free delivery on millions of items
- Prime Video, Amazon Music and more included
- Member-only deals all year
Rembrandt, butterfly, and loop are three of the five classic portrait lighting patterns, and each one is defined by where the key light sits relative to your subject — not by your gear. Butterfly puts the light high and centered, loop moves it 30–45° off axis, and Rembrandt pushes it far enough that the nose shadow connects to the cheek shadow, leaving a small lit triangle under the eye. You can shoot all three with one light and a window.
Your phone has been faking these lighting setups since 2017. Apple’s Portrait Lighting mode — launched with the iPhone 8 Plus and X — simulates studio patterns in software, and most people swipe past them without knowing they’re looking at classic lighting patterns that portrait photographers have used for a century.
Here’s the good news: you don’t need a studio, a strobe, or even a second light to use the real thing. Rembrandt, butterfly, and loop lighting are three of the five classic portrait lighting setups, and each one comes down to a single decision — where you place your key light relative to the face.
I’ve shot headshots and portraits for years with everything from a bare speedlight to a north-facing window. In this guide, I’ll show you exactly how to build each pattern, which faces each one flatters, and the small shadow cues that tell you — before you ever press the shutter — whether you’ve nailed it.
Lighting patterns come from key-light position — angle and height relative to the face — not from the light or modifier you own. A window and a softbox can pro…
Read three shadows to identify any pattern: butterfly sits under the nose, loop angles toward the mouth without touching the cheek shadow, and Rembrandt connec…
Loop is the safest default — 30–45° off axis flatters nearly every face, which is why headshot professionals and AI headshot generators favor it.
Rembrandt’s triangle should be no wider than the eye and no longer than the nose; bigger means you’ve drifted back to loop.
Pattern, short/broad direction, and lighting ratio are three independent controls — you can mix any pattern with slimming light and any mood from 2:1 to 8:1.
Portrait Lighting · Field Guide 01
Rembrandt, Butterfly, Loop: Classic Lighting Patterns Explained
Three of the five classic portrait patterns — and each is defined by where the key light sits relative to the face, not by your gear. A window, a $40 LED panel, or a dorm-room desk lamp can produce all three. The pattern is geometry; the gear only changes how soft the shadow edges look.
3/5
Classic patterns covered here
45°
Butterfly key-light drop angle
30–45°
Loop off-axis sweet spot
45–90°
Rembrandt key-light swing
1
Light needed for all three
The Continuum
A Pattern Is a Position, Not a Purchase
Think of the key light as the sun and the face as a landscape. Move the sun and the shadows redraw themselves — same hills, different map. Loop → Rembrandt → Split is one continuous slide of the same light.
Key-light angle off the camera axis →
A softbox rolled six inches too far can flip a friendly headshot into a moody editorial frame — without the subject moving a muscle.
The Three Patterns
Same Light, Three Maps of the Face
Each pattern comes down to a single decision: horizontal angle and height of the key light. Here are the exact build specs.
Pattern 01 · Glamour
Butterfly
aka Paramount — 1930s–40s Hollywood
Sculpts shadows under cheekbones and chin — the Marlene Dietrich look. Nose shadow sits just below the nose, never touching the lip. Add a reflector under the chin and it becomes clamshell. Watch for “raccoon eyes” on deep-set eyes.
Pattern 02 · The Default
Loop
The corporate headshot standard
The safest pattern in portraiture — which is why headshot pros and AI headshot generators favor it. The loop shadow angles toward the corner of the mouth but must not touch the cheek shadow; that contact line is the border with Rembrandt.
Pattern 03 · Dramatic
Rembrandt
Named for the painter’s window light
The nose shadow reaches across and merges with the cheek shadow, leaving one small lit triangle — the last lit window in a house at dusk. Bigger than the eye means you’ve drifted back to Loop. Moody, sculptural, editorial.
Diagnosis Grid
Read Three Shadows, Never Guess Again
The nose shadow is your compass. Find it on any headshot — LinkedIn, a movie poster, a book jacket — and the pattern names itself.
| Pattern | Nose Shadow | Nose ↔ Cheek Shadow | Lit Triangle | Best For | One-Light Setup |
|---|---|---|---|---|---|
| Butterfly | Straight down under noseButterfly-shaped, off the lip | ✗ Never touchSymmetric cheek shadows | ✗ None | Beauty, fashion, symmetrical faces | ✓ Window or softbox, high & centered |
| Loop | Angles toward mouth cornerSmall “loop” cast sideways | ~ Close, but a gap remainsThe defining boundary | ✗ None | Corporate headshots, nearly everyone | ✓ Window 30–45° to the side |
| Rembrandt | Reaches fully acrossExtended by height + angle | ✓ ConnectedShadows merge into one | ✓ Under far eye≤ eye wide · ≤ nose long | Fine-art, editorial, moody portraits | ✓ Window far to the side, high |
Shoot Workflow
From Bare Room to Nailed Pattern
Four checkpoints, one light. No meter, no monitor — your eyes read the shadows.
Place the Key
Set one light — window, LED, desk lamp — and choose your angle: front & high, 30–45°, or 45–90° off axis.
Trace the Nose Shadow
Straight down = Butterfly. Toward the mouth = Loop. Merged with the cheek shadow = Rembrandt.
Verify the Triangle
For Rembrandt: triangle no wider than the eye, no longer than the nose. Bigger means slide the light back toward Loop.
Check the Catchlights
All three need eye sparkle at 10 or 2 o’clock. Dark glass means the light is too high — drop it a hand’s width.
Independent Controls
Pattern Sets Shape — Ratio Sets Mood
Pattern, short/broad direction, and lighting ratio are three separate dials. Mix any pattern with any mood from 2:1 to 8:1.
Field Checkpoints
Before You Press the Shutter
Checkpoint α
The Compass
Ignore the smile, the suit, the background. Find the nose shadow and trace where it points — it names the pattern in two seconds.
Checkpoint β
The Border
The exact Loop/Rembrandt boundary is contact: nose shadow meets cheek shadow. Six inches of light movement crosses it.
Checkpoint γ
The Sparkle
No catchlight means the light sits too high or behind the brow line. Lower it a hand’s width and the eyes come back to life.
A Lighting Pattern Is a Position, Not a Purchase
A lighting pattern is the shape and placement of light and shadow on your subject’s face, and it’s determined primarily by the position of the key light — its horizontal angle and its height — not by the light or modifier you used. A $40 LED panel, a softbox, and a living-room window can all produce the identical pattern. The pattern is geometry. The gear only changes how soft or hard the shadow edges look.
This is the most freeing idea in portrait lighting, and it’s where most beginners get unstuck. You stop shopping and start looking.
A student once told me she couldn’t attempt Rembrandt lighting until she could afford a ‘real’ strobe. I unplugged the desk lamp in her dorm room, clamped it to a bookshelf high and to her roommate’s left, and there it was — nose shadow merged into cheek shadow, triangle glowing under the far eye. Total cost of the ‘studio’: zero dollars. The lamp didn’t know it wasn’t a Profoto.
Think of the key light as the sun and your subject’s face as a landscape. Move the sun, and the shadows redraw themselves — same hills, different map. A softbox just gives you an overcast sun; a bare bulb gives you noon in the desert.
Last spring I shot a author portrait in a hallway using one bi-color LED panel on a cheap stand. We walked through all three patterns in about four minutes, just by moving that one light around her face. She never changed expression. The portraits look like three different days.
So when you see a portrait you love, don’t ask what light they used. Ask where they put it. That question will take you further than any gear list ever will.
portable softbox for portrait photography
As an affiliate, we earn on qualifying purchases.
As an affiliate, we earn on qualifying purchases.
Learn to Read Three Shadows and You’ll Never Guess Again
Every classic portrait lighting pattern is identified by reading three shadows on the face: the nose shadow, the cheek shadow on the far side, and — when it appears — the small triangle of light under the shadow-side eye. Once you can spot these three shapes, you can diagnose any portrait in about two seconds and fix your own setup without a meter or a monitor.
Want proof? Open your LinkedIn feed and pick the first headshot you see. Ignore the smile, the suit, the blurred office background — just find the nose shadow and trace where it points. I do this constantly: scrolling movie posters in a theater lobby, glancing at novel covers in a bookstore, sitting across from a friend at dinner. Every face becomes a quick riddle, and the answer is always written in the same three shapes.
The nose shadow is your compass. Under the nose pointing straight down? You’re in butterfly territory — that’s the look in those old Marlene Dietrich publicity stills. Angling off toward the corner of the mouth? That’s loop, which is what you’ll find on nearly every corporate team page. Reaching all the way across to merge with the cheek shadow? Rembrandt — the moody pattern staring out from half the author photos on a bookshelf.
The cheek shadow falls on the side of the face turned away from the light. As you swing the key light wider, it grows — and the gap between it and the nose shadow narrows until they touch. That moment of contact is the exact border between loop and Rembrandt. I watched that border get crossed mid-shoot when an assistant rolled a softbox six inches too far to the left: the portrait flipped from friendly headshot to moody editorial frame without the subject moving a muscle.
The triangle is Rembrandt’s signature: a patch of light on the shadow-side cheek, roughly no wider than the eye and no longer than the nose. Bigger than that, and you’ve drifted back toward loop. Picture it as the last lit window in a house at dusk — small, bright, surrounded by dark. If the whole side of the house is still glowing, the sun hasn’t dropped far enough.
One more checkpoint: catchlights. All three patterns should put a sparkle in the eyes, usually at the 10 o’clock or 2 o’clock position, mirroring where your key light sits. No catchlight almost always means your light is too high or too far behind the subject’s brow line. I once shot a groom whose eyes read as dark glass in every frame; dropping the light a hand’s width brought the sparkle back instantly, and nothing else in the setup had to change.
As an affiliate, we earn on qualifying purchases.
Butterfly Lighting: The Hollywood Glamour Setup
Butterfly lighting is a classic portrait lighting setup where the key light sits directly in front of the face, raised above eye level and angled down about 45°, producing a small butterfly-shaped shadow directly under the nose. It also carves soft shadows under the cheekbones and chin, which is why beauty and fashion photographers reach for it constantly.
You’ll also hear it called Paramount lighting, because the studio’s photographers popularized it for 1930s and 40s Hollywood glamour portraits. Look at old publicity stills of Marlene Dietrich — sculpted cheekbones, symmetrical shadows, everything polished. That’s butterfly.
Set it up like this:
- Place your key light on the camera axis, directly in front of your subject.
- Raise it so it points down at roughly 45° — the nose shadow should sit just below the nose, not touch the lip.
- Check the catchlights: they should sit high in the eyes, near 12 o’clock.
- Add a reflector or second light under the chin if shadows under the eyes feel heavy — that pairing is called clamshell lighting.
Butterfly flatters symmetrical faces and defined cheekbones. I use it for beauty work and for anyone whose features balance evenly left to right.
The honest warning: on subjects with deep-set eyes, a high key light throws the sockets into shadow and you get raccoon eyes. I’ve ruined an otherwise lovely frame this way. The fix is simple — lower the light a few inches or slide a white reflector onto the subject’s lap to bounce fill upward.
adjustable LED key light for portraits
As an affiliate, we earn on qualifying purchases.
As an affiliate, we earn on qualifying purchases.
Loop Lighting: The Forgiving Pattern Pros Default To
Loop lighting places the key light about 30–45° off the camera axis and slightly above eye level, creating a small loop-shaped nose shadow that angles down toward the corner of the mouth — without ever touching the cheek shadow. It is the most widely used pattern in professional portraiture because it flatters the majority of face shapes and forgives small positioning errors.
If butterfly is the red carpet, loop is the everyday workhorse. When you book a corporate headshot session, this is almost certainly what the photographer sets up first. It models the face with gentle shadow — enough to give it depth, not enough to scare a nervous CEO.
The boundary rule matters here: the loop shadow from the nose must stay separated from the cheek shadow by a visible lane of lit skin. The moment they merge, you’ve crossed into Rembrandt. When I’m shooting fast, that gap is the one thing my eyes check on every frame.
Starting recipe: light at 30–45° to the subject’s left or right, feathered down from just above eye level. On a shoot last fall, I photographed eleven staff members back to back with one loop setup and a single light. Round faces, angular faces, glasses — it worked on all of them with only minor height tweaks. That versatility is why remote headshot services and even AI headshot generators aim for a loop look: it photographs kindly across almost every face type.
If you’re learning these are three patterns worth mastering, start here. Loop teaches you to read nose shadows without punishing every small mistake.
As an affiliate, we earn on qualifying purchases.
Rembrandt Lighting: One Small Triangle, All the Drama
Rembrandt lighting pushes the key light further around the face — roughly 45–90° off axis and high — until the nose shadow stretches across and connects with the cheek shadow, leaving one small illuminated triangle under the eye on the shadow side. It’s the most dramatic of the three patterns: moody, sculptural, and a favorite in fine-art, editorial, and masculine portraiture.
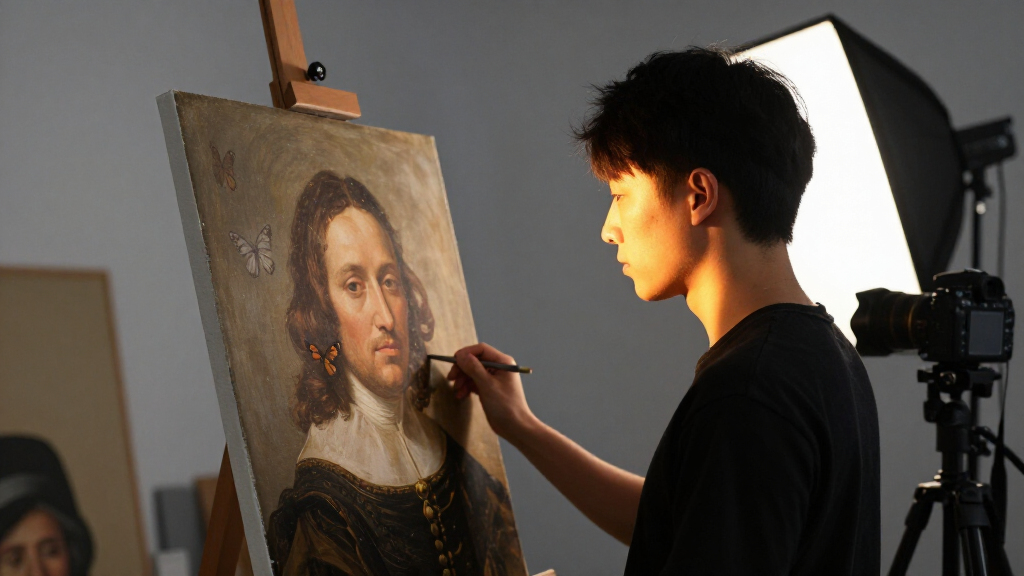
The name comes from Rembrandt van Rijn, whose self-portraits show this exact window-light effect over and over. He didn’t invent it as a technique — painters were chasing window light long before him — but his canvases made the look so recognizable that photographers borrowed his name.
Here’s the plain-language version of the whole setup: keep moving your light sideways until the nose shadow touches the cheek shadow, then stop.
Watch the triangle’s size. Aim for no wider than the eye, no longer than the nose. Let it grow bigger and you’ve slid back toward loop; let the light wrap too far behind and you’re into split lighting, where half the face goes dark entirely. Loop, Rembrandt, and split are a continuum — small movements of the light, or a slight turn of your subject’s head, slide you along it.
A candid caveat from experience: Rembrandt is less forgiving than the other two. On a face without much cheek structure, the triangle can sit oddly and the heavy shadow reads as muddy rather than dramatic. I shot a Rembrandt-style portrait of a musician in his garage — bare bulb, high and wide — and it gave him cheekbones he doesn’t have in real life. His rounder-faced bandmate needed the light pulled back toward loop before the shadows stopped swallowing his features. Choose this pattern when your subject’s bone structure can hold the shadow.
Butterfly vs. Loop vs. Rembrandt: Pick Your Pattern in Ten Seconds
The fastest way to choose between these three classic lighting patterns is to match the pattern’s shadow behavior to your subject’s face and the mood you want. Butterfly sculpts, loop flatters almost everyone, and Rembrandt dramatizes. This table gathers the core subject matter — light position, shadow signature, and best use — side by side.
| Butterfly | Loop | Rembrandt | |
|---|---|---|---|
| Key light position | Centered, ~45° above, angled down | 30–45° off axis, slightly above eye level | 45–90° off axis, high |
| Shadow signature | Butterfly shape under nose; shadows under cheekbones | Loop-shaped nose shadow, clear gap before cheek shadow | Nose shadow joins cheek shadow; lit triangle under far eye |
| Flatters | Symmetrical faces, strong cheekbones | Nearly every face shape | Defined bone structure; faces that hold deep shadow |
| Mood | Glamorous, polished | Natural, approachable | Dramatic, moody |
| Common mistake | Light too high → raccoon eyes | Shadow merges into cheek → accidental Rembrandt | Triangle too large → drifted back to loop |
| Typical use | Beauty, fashion | Corporate headshots, general portraits | Editorial, fine art, character portraits |
Print this mentally and tape it to your light stand. On a real shoot, I glance at the subject, pick a starting column, and then let the shadows on their actual face fine-tune the decision. Faces are more honest than diagrams.
Short Light, Broad Light, and Ratios: The Dials That Change Everything
Once you can set a pattern, two refinements control how it actually feels: short versus broad lighting and your lighting ratio. Both work independently of the pattern itself, which means a loop setup can look slimming or widening, soft or dramatic, depending on how you turn these dials.
Short lighting means the key light hits the side of the face turned away from the camera, so the broader, camera-facing side falls into shadow. It’s slimming, and it’s my default for almost every headshot. Broad lighting does the opposite — it lights the side of the face turned toward the camera, which visually widens the face. Useful for very narrow faces; unflattering nearly everywhere else. The swap is effortless: ask your subject to turn their shoulders slightly, or walk yourself to the other side of the light.
Lighting ratio — the brightness difference between the lit and shadow sides — sets the mood. 2:1 to 3:1 reads friendly and corporate. 4:1 adds quiet depth. 8:1 is full drama. And here’s the nuance people miss: ratio and pattern are separate controls. Rembrandt with heavy fill looks surprisingly soft; loop with no fill at all can look downright brooding.
You don’t need a light meter to build these ratios. Fill follows distance: a white reflector two feet from the face lifts the shadows toward a friendly 2:1; pull it back to five or six feet and the fill fades toward 4:1; take it out of the room entirely and the walls decide for you — which is why a small dark room gives you drama for free, and a white-walled hallway fights your moodiest setups.
Real-world example: I shot a series of founder portraits with the same loop position all afternoon. For the marketing VP, I added a white reflector close in — about 2:1, open and warm. For the novelist, I pulled all fill and let the ratio fall near 8:1. Same pattern, same light, two completely different emotional registers. That’s the power of these two dials.
One Light, One Window: Your First Session With All Three Patterns
You can shoot every pattern in this article with a single light — a window counts — plus, optionally, a white wall or a $5 foam board as a reflector. Budget is not the barrier; attention to shadow placement is.
With a window, your subject’s position relative to the glass does the same job as moving a light stand. Facing the window squarely with the sill at chest height and light falling downward? That’s your butterfly. Have them turn about 30–45° away from the glass and the nose shadow swings into a loop. Keep turning until the nose shadow meets the cheek shadow — window Rembrandt, with you shooting from the shadow side. North-facing windows are the classic choice because the light stays soft and steady all day.
Here’s the practice exercise I give every photographer I mentor:
- Set up one light — LED panel, speedlight through an umbrella, or a window — and seat one patient subject.
- Start centered and high. Confirm the butterfly shadow under the nose. Take the frame.
- Move the light 30–45° to one side. Check for the loop shadow with a clear gap before the cheek shadow. Take the frame.
- Keep moving the light wider until the shadows connect and the triangle appears under the far eye. Take the frame.
- Repeat the whole walk with the subject’s shoulders turned for short lighting, then again with a reflector adding fill.
Fifteen frames, one light, under an hour. When you compare them side by side, the three-shadow language stops being theory — you’ll see the gap close into the triangle frame by frame. Modern continuous LED panels make this even easier to learn, because you watch the pattern reshape itself live as you move, instead of test-firing a strobe and guessing.
Frequently Asked Questions
What’s the actual difference between loop and Rembrandt lighting?
It comes down to one detail: whether the nose shadow touches the cheek shadow. In loop lighting, a clear lane of lit skin separates them. In Rembrandt, they’ve merged, and a small triangle of light survives under the shadow-side eye. Move your key light wider and loop becomes Rembrandt at the exact moment of contact.
Which lighting pattern is best for my subject’s face shape?
Loop lighting flatters the widest range of faces, so start there. Butterfly suits symmetrical faces with defined cheekbones. Rembrandt works best on bone structure that can hold deep shadow — on very round faces it can look muddy, so pull the light back toward loop if the shadows swallow the features.
Can I create these patterns with just one light?
Yes — all three patterns need only a single key light. A reflector or white wall can add fill, but it’s optional. Pattern comes from light position, not light count, so one LED panel, one speedlight, or one window is genuinely enough.
How do I get Rembrandt lighting with a window?
Seat your subject at roughly 45–90° to the window and shoot from the shadow side of their face. Turn their shoulders or your camera position until the nose shadow connects with the cheek shadow and a small lit triangle appears under the far eye. A north-facing window gives you the softest, most stable version.
Why does my butterfly lighting give my subject dark eye sockets?
Your light is too high, or your subject has deep-set eyes. Lower the key light a few inches so the down-angle softens, or place a white reflector on the subject’s lap to bounce fill up into the sockets. That reflector-plus-key pairing is the basis of clamshell lighting.
What lighting ratio should I use for portraits?
For approachable corporate work, stay around 2:1 to 3:1 by adding fill near the camera. For depth and drama, pull the fill and let the ratio climb to 4:1 or even 8:1. Ratio controls mood independently of pattern — Rembrandt at 2:1 looks soft, and loop at 8:1 looks dramatic.
Did Rembrandt actually invent Rembrandt lighting?
No. The pattern is named after Rembrandt van Rijn because his paintings — especially his self-portraits — show the characteristic triangle of light so consistently. He was using ordinary window light, and painters worked that way long before him. Photographers later attached his name to the look.
Conclusion
Stop shopping for lights and start moving the one you have. Watch the nose shadow: centered and high is butterfly, off to the side with a gap is loop, and connected with that small triangle is Rembrandt. That one habit — reading shadows before pressing the shutter — is worth more than any modifier on the market.
Tonight, grab whoever’s sitting at your kitchen table and one lamp. Walk the light around their face and watch the shadows redraw the map in real time. Fifteen minutes from now, you’ll own three patterns that took painters centuries to name.
Halloween Picks
halloween
As an affiliate, we earn on qualifying purchases.