
TL;DR

Get audio and creator gear delivered free with Prime
- Fast, free delivery on millions of items
- Prime Video, Amazon Music and more included
- Member-only deals all year
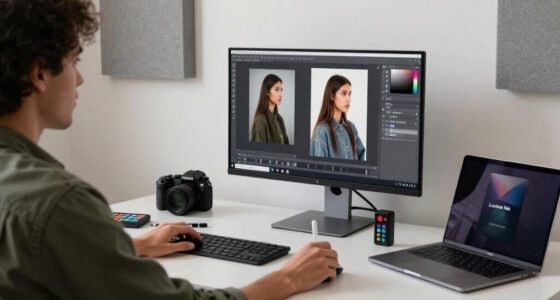
Frequency separation is a retouching technique that divides an image’s skin detail into separate layers: broad color and tone sit on one layer, while pores, fine hairs, and sharp texture sit on another. Use it for targeted repairs, keep facial boundaries intact, and rely on restrained dodge and burn when the real problem is uneven brightness rather than color or texture.
Perfectly smooth skin usually looks less professional, not more. Remove every pore, shadow, and tiny crease, and a living face starts to resemble a wax figure under a shop light. The goal of good retouching is believable skin, where temporary distractions fade but the person remains unmistakably themselves.
Frequency separation gives you unusually precise control because it lets you work on broad color separately from fine texture. You can soften a red patch without wiping away pores, or repair a broken patch of texture without painting over the skin tone beneath it. That sounds almost magical, yet the method can produce halos, gray smears, and repeated pores when you push it too far.
I use frequency separation as a small, sharp tool, not a full-face beauty filter. In a real portrait session, I might use it around a temporary cheek flush, a makeup edge, or one rough patch beneath an eye, then switch to dodge and burn for the smaller shadows that shape the face. You will learn how to build a neutral separation, choose a sensible radius, repair each layer, and recognize the exact moment when polish starts erasing character.
Choose the separation radius by watching pores disappear from the low-frequency layer while the nose, lips, eyelids, and jaw remain clearly shaped.
Confirm that the combined frequency layers match the untouched image before editing; any initial contrast or color shift signals a faulty setup.
Repair broad color on the low-frequency information, repair local texture on the high-frequency information, and use dodge and burn for small brightness proble…
Sample texture from nearby skin with matching pore size, direction, lighting, and focus to avoid repeated patterns.
Review at 100%, zoomed out, and final output size, then reduce the group opacity if smoothness attracts more attention than expression.
Portrait Retouching Field Guide
Frequency Separation: Skin Retouching Without the Plastic Look
Separate broad color from fine texture, repair only what is distracting, and preserve the pores, shadows, creases, and permanent features that make a face feel alive.
01 / Understand the split
One portrait, two kinds of information
Frequency separation divides detail by size rather than by facial area. It lets you soften a red patch without erasing pores, or repair broken texture without painting over the color beneath it.
Color, tone and broad form
This layer carries gradual transitions and larger shapes. Work here when the distraction is chromatic or tonal rather than textural.
- Broad skin color and luminosity
- Cheek, forehead and under-eye transitions
- Soft highlights and large shadows
- Temporary redness or uneven makeup tone
Pores, hairs and crisp edges
This layer carries small, sharp detail. Work here only when local texture is damaged, distracting, or inconsistent.
- Pores, fine hairs and tiny wrinkles
- Flaky makeup and broken texture
- Sharp eyelashes and facial edges
- Local detail and micro-contrast
02 / Choose the dividing point
The blur radius is a visual decision—not a recipe
Resolution, crop, focus, lens rendering, and subject distance all affect where texture ends and facial form begins. Inspect at 100% and increase the radius gradually.
The radius test
Stop when pores and tiny hairs disappear from the low-frequency layer while the nose, lips, eyelids, jaw, and cheek volume remain clearly shaped.
Pores remain Working zone
Texture clears Too large
Form dissolves
03 / A natural workflow
Seven steps that keep pores and expression
Move from global corrections toward local repairs. Every step should solve a named problem instead of making the whole face uniformly smooth.
Build the foundation
Correct white balance, exposure, lens issues, and overall contrast.
Clean distractions
Heal temporary blemishes, sensor dust, and isolated flyaway hairs.
Create the low layer
Blur until pores vanish while facial form remains intact.
Build the high layer
Use a bit-depth-appropriate calculation and verify neutrality.
Repair color
Use small, soft moves that follow the contours of the face.
Repair texture
Sample nearby skin with matching pores, light, focus, and direction.
Lower the volume
Review every scale and reduce group opacity when polish dominates.
04 / Select the right tool
Color, texture, and brightness need different treatments
Frequency separation is strongest when color and texture must be addressed independently. Dodge and burn is usually the better choice for small brightness irregularities that shape the face.
| Visible problem | Information type | Best first tool | Why it works | Common risk |
|---|---|---|---|---|
| Temporary cheek redness | Broad color | ✓ Low frequency | Softens color while retaining normal pores. | Crossing the nose, lip, or jaw boundary. |
| Flaky makeup on the chin | Local texture | ✓ High frequency | Repairs surface detail without dragging skin tone. | Repeated pores or mismatched sharpness. |
| Small under-eye shadow | Luminosity | ~ Dodge and burn | Balances brightness while preserving depth and shape. | Flattening natural facial structure. |
| Permanent mole or scar | Identity feature | ✗ Preserve by default | Keeps the subject recognizable and authentic. | Removing character without permission. |
| Wrong overall skin color | Global color | ✗ Raw correction | Fixes the source rather than patching the face area by area. | Creating a quilt of inconsistent hues. |
Preserve the person
- Pores and fine hairs
- Small lines and creases
- Natural highlights
- Irregular color transitions
- Freckles and familiar moles
- Texture variation across the face
Watch for over-retouching
- Waxy uniform surfaces
- Gray or muddy smears
- Halos near facial edges
- Repeated cloning patterns
- Missing dimensional shadows
- Polish louder than expression
05 / Final quality control
Review from pixels to final output
A repair can look convincing at one magnification and artificial at another. The final check should test detail, facial integrity, and real-world presentation.
What Frequency Separation Actually Lets You Fix
Frequency separation: skin retouching without the plastic look is a method for correcting broad color and fine texture independently while preserving the subject’s natural features. The low-frequency layer holds color, brightness, and broad shading; the high-frequency layer holds pores, hairs, wrinkles, and crisp edges.
Put another way, frequency separation is a retouching technique that divides an image’s skin detail into separate layers. The split acts like separating the dye from the weave of a patterned fabric: you can mend the color or the threads without automatically disturbing both. When the layers recombine, they should reproduce the original photograph with no jump in contrast or color [1].
Suppose your subject has a warm red patch beside the nose, but the pores in that area look completely normal. You can soften the color on the low-frequency layer while leaving local skin texture untouched. If a flaky makeup spot catches the light on the chin, you can repair that texture on the high-frequency layer without dragging a mismatched peach tone across the face.
This distinction tells you what frequency separation is not. It is not another name for skin smoothing, and it does not identify the cheek, forehead, or nose as separate objects. It separates detail by size, much like a sieve sorts coarse grains from fine ones, so a sharp eyelash and a sharp pore may both appear on the high-frequency layer.
The technique should solve a specific problem. If you cannot name whether that problem belongs to color, texture, or brightness, pause before touching either layer.
professional skin retouching tools
As an affiliate, we earn on qualifying purchases.
As an affiliate, we earn on qualifying purchases.
The Blur Radius Test That Protects Real Skin
The right separation radius removes pore-level detail from the blurred layer while keeping the recognizable shape of the face intact. There is no universal pixel number: resolution, crop, focus, lens rendering, and subject distance all change where fine texture ends and broad form begins.
At 100% magnification, raise the blur radius slowly while watching a detailed area such as the cheek beside the nose. Stop when individual pores and tiny hairs disappear, but the nose edge, under-eye shape, lip boundary, and cheek volume still read clearly. A close beauty crop may need a larger numerical radius than a loose head-and-shoulders portrait, even when both came from the same camera.
Here is a practical example. On a tightly framed 45-megapixel portrait, you may still see pores at a radius that already wipes them away in a smaller web crop. Copying a tutorial’s 8-pixel recipe would be like wearing someone else’s glasses: the number works for their file, not automatically for yours.
- Radius too small: visible pores remain in the low-frequency layer, making color edits muddy or uneven.
- Radius too large: facial edges and medium-sized shadows move into the texture layer, inviting halos and false contours.
- Radius about right: pores disappear from the low layer, while facial form and clean boundaries remain easy to read.
After building both layers, toggle the group against the untouched image. You should see no initial visual difference. A contrast shift, strange color, or overly sharp result often means the high-frequency calculation does not match the document’s 8-bit or 16-bit setup, since those files use different Apply Image values.
frequency separation Photoshop kit
As an affiliate, we earn on qualifying purchases.
As an affiliate, we earn on qualifying purchases.
A 7-Step Workflow That Keeps Pores and Expression
A natural frequency separation workflow starts with a clean raw conversion, separates the image neutrally, and applies small repairs only where color and texture need independent treatment. Work from broad corrections toward fine ones, and finish by checking the photograph at 100%, normal viewing size, and final output size.
- Finish the raw foundation. Correct white balance, exposure, lens issues, and overall contrast before skin work. If a forehead looks too orange because the white balance is wrong, repairing that color patch by patch wastes time and often leaves a quilt of slightly different hues.
- Clean obvious distractions. Heal temporary spots, sensor dust, and isolated flyaway hairs before creating the separation. On a corporate portrait, I would remove a fresh shaving nick but leave a familiar mole unless the subject requested otherwise.
- Create a neutral low layer. Duplicate or group your working layers, then use Gaussian Blur or the software’s equivalent until fine pores vanish. Keep the nose, lips, eyelids, jaw, and hairline readable rather than melting them into soft bands.
- Build the matching high layer. Use Apply Image or an equivalent calculation suited to the file’s bit depth, then set the texture layer to Linear Light when that construction calls for it. Toggle the group to confirm that the untouched appearance returns before you edit.
- Repair color with small, soft moves. Use feathered selections, a low-opacity brush, a Mixer Brush, or masked Curves on the low-frequency information. Follow the face’s contours; do not pull cheek color across a nostril or sweep forehead color through the eyebrow.
- Repair texture from nearby skin. Use short Healing Brush or Clone Stamp strokes on the high-frequency layer. Sample close to the problem so pore size, direction, sharpness, and lighting agree with the surrounding area.
- Lower the volume and review. Toggle the group, reduce its opacity, and inspect the full face. A retouch that feels restrained at 70% group opacity often looks more convincing than the same work at full strength.
Imagine you are editing a bridal portrait with a small patch of uneven foundation beside the mouth. The low layer can blend the color, while two or three careful high-layer strokes can repair the makeup texture. You fix the patch and preserve the smile; one tool carries both the correction and your restraint.
As an affiliate, we earn on qualifying purchases.
Five Warning Signs Your Retouch Is Turning Waxy
Frequency separation: skin retouching without the plastic look succeeds when the viewer notices the expression before the editing. Waxy results appear when you remove normal variation, cross facial boundaries, copy mismatched texture, or judge every pore at extreme magnification instead of evaluating the whole face at its intended size.
- The cheeks become one flat color. Real skin carries warm and cool patches, tiny shadows, and shifting highlights. If a cheek resembles wet clay under even light, restore some tonal variation or reduce the low-layer correction.
- Bright or dark halos outline features. These often appear beside the nose, lips, jaw, or hairline when blurred color crosses a hard edge. Use a smaller feathered selection and keep every stroke inside the natural boundary.
- Pore patterns repeat like wallpaper. Large cloned patches produce recognizable dots, lines, or curls. Sample frequently, rotate through nearby sources, and use strokes only a little larger than the damaged area.
- The face looks finished but the neck does not. A glassy face beside a textured neck, ear, or hand breaks the illusion immediately. Match the degree of polish across all visible skin without giving every area identical texture.
- The subject looks younger but less like themselves. Under-eye folds, smile lines, freckles, scars, and moles can carry identity. Remove temporary distractions with intent, and discuss permanent features when the brief leaves room for doubt.
I often perform a simple expression check after a beauty edit: I fit the image to the screen and look first at the eyes. If my attention slides straight to smoothness, glowing edges, or a spotless forehead, the edit has become the subject. Pulling back the group opacity by even 15% to 30% can return the photograph to human territory.
If your first impression is smooth skin rather than the person’s expression, the retouch is probably too strong.
As an affiliate, we earn on qualifying purchases.
Choose the Right Tool Before You Touch the Face
Frequency separation: skin retouching without the plastic look works best for problems that require color and texture to be repaired independently. Use dodge and burn for brightness, healing for isolated distractions, cloning for exact edge replacement, and AI tools for a cautious first pass that you inspect by eye.
| Technique | Best use | Main risk |
|---|---|---|
| Frequency separation | Uneven color beneath good texture, or damaged texture above good color | Waxy skin, halos, and smeared boundaries |
| Dodge and burn | Small bright or dark patches and careful shaping of facial form | Changed volume or patchy brushwork when pushed too hard |
| Healing | Pimples, dust, tiny flakes, and isolated stray hairs | Soft texture or color contamination |
| Cloning | Precise replacement near edges or in difficult texture | Repeated patterns and mismatched sharpness |
| Global smoothing | Rare, restrained softening across a broad area | Lost pores, expression, and identity |
| AI-assisted cleanup | Fast masks, feature detection, and rough first-pass cleanup | Generic texture, artifacts, and altered features |
Consider a dark crescent beneath an eye. Part of it may be color, part may be a natural fold, and part may be a small shadow from the lighting. Frequency separation can reduce discoloration, but gentle dodge and burn usually handles the shadow more naturally because it changes brightness while keeping texture and shape connected.
The strongest retouch often uses several tools in quiet succession. You might heal one blemish, soften a red patch through the low-frequency information, repair three flaky pixels on the high layer, then dodge a narrow shadow. Each move stays small, like sanding a wooden edge with fine paper instead of a power grinder.
Current professional practice increasingly favors selective frequency separation, visible pores, and nondestructive layer structures [2]. That does not make the method outdated. It places the method where it belongs: inside a broader toolkit guided by the photograph, the brief, and the subject.
Three Viewing Checks That Reveal Hidden Mistakes
You catch different retouching problems at different viewing sizes: inspect at 100% for texture artifacts, zoom out for facial form, and check the final output size for practical impact. A face can look clean pore by pore yet appear strangely flat when it shrinks to the size of a magazine page.
At 100% magnification, scan for repeated cloning, broken pores, sharp seams, gray patches, and halos around high-contrast edges. Move across the frame instead of polishing one cheek for twenty minutes. When you stare at one patch too long, your eye adapts, and increasingly heavy edits begin to look normal.
Next, fit the full portrait to your screen. Check whether the forehead still curves, the cheekbones retain shape, and the under-eye area still connects naturally to the nose and temple. In a headshot I might accept a tiny pore irregularity that remains visible at 100% because it vanishes in the delivered image, while an over-smoothed cheek remains obvious from across the room.
Finish with the actual output. A large beauty print reveals copied texture that a phone post may hide, while heavy micro-retouching adds little to a small social image. A bright monitor can also disguise weak shadows that become muddy in print, so make a proof when the photograph will live on paper.
- At 100%: inspect texture, seams, halos, and cloning patterns.
- Zoomed out: judge expression, facial volume, and consistency across the neck, ears, and hands.
- At output size: decide whether each correction improves what the audience will really see.
Toggle your correction group every few minutes and watch the full face, not just the edited patch. The before-and-after view should feel like a distraction quietly left the room, not like someone replaced the lighting, skin, and personality.
Keep Identity Intact When Automation Speeds Up the Work
Automation can speed up masks and basic cleanup, but you still decide which features belong to the person and which distractions belong only to the day of the shoot. Use AI-generated selections as editable starting points, inspect reconstructed texture closely, and keep permanent features under deliberate human control.
Modern editing software can locate skin, eyes, lips, blemishes, and the subject in seconds. That helps when you need a clean mask around a face or a quick pass over dozens of portraits. Yet an automated tool may interpret freckles as blemishes, soften a scar, or manufacture uniform pores that look like sand sprinkled across the cheek.
Imagine delivering an actor’s headshot after removing a small scar that casting directors use to recognize them. The file may look polished, but the edit has crossed from cleanup into changing identity. For documentary portraits, family photographs, and personal branding, I keep scars, moles, lines, and skin conditions unless the subject or agreed brief asks for a specific change.
Output and genre also guide restraint. A beauty campaign may call for close, careful polish, while a musician’s backstage portrait may gain strength from visible lines, sweat, and rough texture. The same face can support different treatments, but the light direction, anatomy, and local pore structure must remain coherent in every version.
Fast selection is not finished judgment. Automation can save minutes, but it cannot decide what makes a face recognizable or what the subject wants preserved.
Keep your edits nondestructive with masks, adjustment layers, grouped corrections, and adjustable opacity. When a client asks for more natural skin, you can soften the treatment without rebuilding the file. That flexibility protects both your craft and the subject’s identity.
Frequently Asked Questions
Is frequency separation the same as smoothing skin?
No. Frequency separation separates broad color from fine texture; smoothing is only one possible edit after that separation. You can use the method to repair redness while preserving every pore, which is very different from blurring an entire face.
What blur radius should I use for frequency separation?
No fixed radius works for every photograph. At 100%, increase the blur until pores and tiny hairs disappear from the low-frequency information while the nose, lips, eyes, and overall facial shape remain clear. A high-resolution close-up commonly needs a different number from a cropped web portrait.
Why does my frequency separation look waxy?
Waxy skin usually comes from excessive low-layer smoothing, missing texture, or both. Restore some natural color variation, check that facial shadows still shape the face, and try lowering the correction group to 70% or 80% opacity. Small dodge-and-burn corrections may handle the remaining uneven brightness more naturally.
Should I remove blemishes before creating the layers?
Basic cleanup often works well before separation because it removes isolated pimples, dust, and stray hairs without complicating the layer structure. You can then reserve frequency separation for problems that truly need color and texture handled independently. Keep permanent marks unless the subject or brief asks for a change.
Why does the high-frequency layer look gray?
A gray high-frequency layer is normal in many common setups. Fine texture appears as lighter and darker detail around neutral gray, then a blending mode such as Linear Light recombines it with the low-frequency information. If the complete group changes the untouched image before editing, recheck the calculation and bit-depth settings.
Is frequency separation better than dodge and burn?
Neither method wins every job. Frequency separation handles independent color and texture repairs efficiently, while dodge and burn usually gives finer control over small brightness changes and facial shape. A believable portrait often uses both in restrained amounts.
Can I use frequency separation for acne or under-eye circles?
Yes, but split the problem into parts. Repair rough or broken texture on the high-frequency information, reduce redness or discoloration on the low-frequency information, and use dodge and burn for small shadows. Keep natural under-eye folds because erasing them can flatten expression and change the face.
Conclusion
Use frequency separation only when you can name the problem it solves. Redness beneath healthy pores belongs on the low-frequency information; damaged surface detail belongs on the high-frequency information; a small brightness dip often belongs to dodge and burn. That simple diagnosis keeps your strokes local and your result believable.
Your best final check is not whether every pore looks tidy at 100%. Ask whether the person still looks like themselves when the image fills the screen, sits on a phone, or rests in your hand as a print. Leave the freckles, the soft crease, and the tiny uneven patches that make skin feel alive. Let the retouch whisper while the expression speaks.
Fall Picks
fall essentials
As an affiliate, we earn on qualifying purchases.