
TL;DR

Get audio and creator gear delivered free with Prime
- Fast, free delivery on millions of items
- Prime Video, Amazon Music and more included
- Member-only deals all year
Dodge and burn is a selective photo-editing technique used to control brightness in specific areas of an image: dodging lightens, while burning darkens. Work from broad tonal shaping to small corrections, use editable masks and low-flow brushes, and stop when the photograph feels better lit without looking visibly retouched.
The most powerful retouch in a finished photograph may be the one you never notice. A face catches the light a little more cleanly, a pale corner stops pulling your eye, and a ridge of clouds gains shape. Nothing screams editing. The photograph simply feels clearer, deeper, and more intentional.
That quiet control comes from dodge and burn, a technique born beneath the dim amber glow of the darkroom. Printers once moved card shapes, wire-mounted tools, and even their hands beneath an enlarger to control how much light reached the paper. Those moving shadows created lighter and darker areas, much like a soft brush moving across a digital mask today [1].
I use dodge and burn because a global exposure slider cannot tell the difference between your subject and a bright distraction behind it. Local tonal work can. You will learn how the technique guides attention, which digital methods suit different jobs, and how to build edits in small, reversible steps. You will also see why restraint matters more than software, whether you are shaping a portrait, opening a dark doorway in an architectural frame, or adding weight to rain clouds above a field.
Build dodge and burn edits from global shaping to local form and then micro corrections; large tonal structure should guide the small work.
Use a soft brush at roughly 2% to 5% flow as a practical starting point, then build the effect through several weak passes.
Choose editable Curves layers, RAW masks, or a separate neutral-gray layer so you can reshape or reduce the effect later.
Inspect the photograph at fit-to-screen, 100%, and final output size; microscopic smoothness can look artificial at normal viewing distance.
Treat AI masks as starting selections, then refine their edges and decide where the light should lead the viewer.
Dodge and Burn: The Oldest Trick Still Worth Learning
Dodging selectively lightens. Burning selectively darkens. Together they guide attention, restore tonal hierarchy, and shape depth without making a photograph look visibly retouched.
The names describe what happened beneath the enlarger.
Printers moved cards, wire-mounted shapes, and their hands through the enlarger beam. Constant motion softened boundaries and prevented obvious outlines—a principle that still governs believable digital masks.
Dodge to reveal
Blocking some enlarger light reduced the paper’s exposure. The selected area printed lighter, allowing a face, ridge, or foreground detail to emerge.
Digital equivalent: brighten through a maskBurn to contain
Giving one area extra exposure made it print darker. Bright corners, pale skies, and weak shadows gained weight without changing the entire image.
Digital equivalent: darken through a maskAnsel Adams is closely associated with extensive local exposure control. His negatives held the information; deliberate printing choices shaped clouds, foreground weight, and separation in the finished photograph.
An exposure slider sees pixels. Dodge and burn sees priorities.
Global exposure moves every face, shadow, highlight, and distraction together. Local tonal work changes visual emphasis precisely where the photograph needs it.
Guide the eye
Lift the subject or lower a competing highlight so the viewer reaches the story first.
Shape dimension
Brighten illuminated planes and deepen shadow planes to make forms feel more three-dimensional.
Even luminosity
Soften blotchy transitions and under-eye shadows while preserving pores and natural texture.
Clarify layers
Separate a bright ridge from a dark mountain or distinguish overlapping subjects in a crowd.
Strengthen surfaces
Shape cloud ridges, fabric folds, glass highlights, and architectural lines without shifting color.
Hold the frame
Quiet bright edges and open important shadows to reinforce the intended visual pathway.
The three-scale editing hierarchy
Let the scale of the correction choose the tool.
Broad masks suit environmental shaping. Curves provide precise, reversible control. Neutral gray supports direct painting. The strongest workflow is the one you can still refine tomorrow.
| Method | Best use | Editability | Main strength | Watch for |
|---|---|---|---|---|
| Local RAW mask | Faces, skies, buildings, broad light | ✓High | Exposure and range controls remain adjustable | ~Mechanical edges around hair or branches |
| Two Curves layers | Portraits and precise tonal shaping | ✓High | Separate dodge and burn strength, curves, and masks | ~Requires clean layer organization |
| 50% gray layer | General brush-based work | ✓Good | Compact, visible, and separate from base pixels | ~Overlay mode can become punchy quickly |
| Dedicated tools | Fast corrections on a working layer | ✗Limited | Direct and intuitive brush behavior | ✗Pixel changes may be difficult to revise |
| Luminosity masks | Landscapes and architecture | ✓High | Targets highlights, midtones, or shadows | ~Selections still need visual refinement |
Reliable portrait setup
Create one bright Curves layer and one dark Curves layer. Hide both with black masks, then reveal each effect using a soft white brush.
Useful landscape setup
Use a RAW or luminosity range for broad sky and terrain shaping, then refine branch, ridge, and horizon edges by hand.
Ten steps. Every stroke remains accountable.
Make large decisions before small ones. Work with weak passes, follow existing illumination, and repeatedly return to normal viewing size.
Set the base
Correct exposure and white balance before local work.
Define intent
Decide where the viewer should look first and next.
Choose layers
Create separate, editable dodge and burn controls.
Shape globally
Balance broad regions and quiet distracting edges.
Build local form
Follow faces, clothing, clouds, and architecture.
Lower the flow
Use weak overlapping passes instead of one heavy stroke.
Refine masks
Inspect hair, fingers, horizons, and complex edges.
Make micro fixes
Even small tonal transitions without removing texture.
Review at scale
Check fit-to-screen, 100%, and final output size.
Reduce and stop
Lower opacity if the retouch announces itself.
Low-flow brush starting range
Flow is not a target strength. It controls how slowly the effect accumulates. Several weak passes create smoother transitions and make mistakes easier to reverse.
Three-view quality check
Microscopic smoothness may look artificial at normal viewing distance. Judge the photograph where people will actually see it.
Every tonal decision should connect to the story.
AI masks can accelerate selection, but they cannot decide where the light should lead. Treat them as editable starting points and keep artistic intent at the center of the chain.
Intent
Name the subject and the desired viewing path.
Mask
Select the region without assuming the edge is correct.
Light
Dodge or burn in the direction of existing illumination.
Review
Compare several magnifications and toggle the edit.
Restraint
Reduce anything that looks like a visible technique.
The best retouch feels like light that belonged there all along.
A face reads more cleanly, a pale corner becomes quiet, and a ridge of clouds gains shape. Nothing screams editing. The photograph simply feels clearer, deeper, and more intentional.
What Dodge and Burn Gives You That Exposure Sliders Cannot
Dodge and burn is a selective editing technique used to control brightness in specific areas of an image. Dodging makes chosen areas lighter, while burning makes them darker. Unlike a global exposure adjustment, it lets you change visual emphasis without pushing every highlight, face, shadow, and background object in the same direction.
Imagine a window-lit portrait in a small café. Your subject’s eyes sit slightly in shadow, but a white cup near the edge glows like a tiny lamp. Raising exposure brightens the eyes, yet it also makes the cup louder. A gentle dodge over the eyes and a restrained burn over the cup creates a clear visual hierarchy while preserving the room’s warm, dusky mood.
Your eye tends to move toward brighter areas and stronger local contrast. You can use that habit deliberately: lift the face, deepen the folds of a jacket, or lower the brightness of a patch of pavement that competes with the subject. The effect works like stage lighting, where a narrow pool of light tells you where the story lives.
- Portraits: soften an under-eye shadow while leaving pores and fine lines intact.
- Landscapes: separate a sunlit ridge from the darker mountain behind it.
- Products: brighten a curved highlight to make a glass bottle feel round.
- Architecture: darken a bright doorway that pulls attention away from the building’s lines.
Dodge and burn can correct uneven luminosity, but it can also shape mood. I might darken the edges of a documentary frame by a fraction of a stop, not to create an obvious vignette, but to hold your attention near two people talking beneath a streetlight. The best result feels like light that belonged there all along.
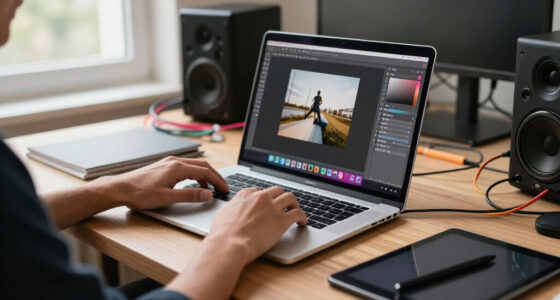
photo editing dodge and burn brushes
As an affiliate, we earn on qualifying purchases.
As an affiliate, we earn on qualifying purchases.
Why a Darkroom Hand Trick Still Shapes Digital Photographs
Dodge and burn still works because the principle never depended on film, paper, or software. It depends on controlling where light appears in the final photograph. Digital masks replaced moving pieces of card, but the craft remains the same: lighten with purpose, darken with purpose, and soften the boundaries.
Under a traditional enlarger, dodging meant blocking some light before it reached the photographic paper, which produced a lighter area. Burning meant giving one part of the paper extra exposure, making it darker [1]. Printers kept their tools moving because a stationary card could leave a hard, obvious outline—like a coin-shaped stain floating on the print.
That history gives you a useful modern rule: movement and feathering create believable gradients. If you paint one heavy digital stroke beside a cheekbone, the result resembles makeup applied with a ruler. Several weak, overlapping strokes follow the face more naturally, like sunlight fading across a curved wall.
Ansel Adams is closely associated with extensive local exposure control in finished darkroom prints [2]. The negative supplied the recorded information, but careful printing shaped how the scene read on paper. A famous landscape did not simply fall out of the enlarger fully formed; the print required choices about clouds, foreground weight, and the separation of pale and dark forms.
The darkroom lesson is simple: local adjustments should follow the subject’s shape, fade gently, and serve the photograph rather than advertise the retouch.
I learned the value of that rule while editing a backlit musician on a dim stage. A hard circular dodge made his face look pasted onto the frame. When I replaced it with broader, softer strokes that followed the existing light, the face emerged without losing the smoky black atmosphere around it.
editable curves adjustment layer for photo editing
As an affiliate, we earn on qualifying purchases.
As an affiliate, we earn on qualifying purchases.
Choose the Right Method Without Letting the Software Lead
Dodge and burn works through several digital methods, and the right one depends on the scale of your edit. Local RAW masks suit broad shaping, Curves layers give you precise and reversible control, and a neutral-gray layer offers a compact painting workflow. Your visual decision matters more than the tool.
| Method | Best use | Main strength | Watch for |
|---|---|---|---|
| Local RAW mask | Faces, skies, buildings, broad light | Fully editable exposure and range controls | Masks can look mechanical near complex edges |
| Two Curves layers | Portraits and precise tonal shaping | Separate, adjustable dodge and burn controls | Requires organized masks and layers |
| 50% gray layer | General brush-based work | Simple, visible, and kept off the base pixels | Overlay mode can become punchy quickly |
| Dedicated tools | Fast corrections on a working layer | Direct and intuitive | Pixel changes can be hard to revise |
| Luminosity masks | Landscapes and architecture | Targets highlights, midtones, or shadows | Selections still need visual refinement |
For a portrait, I usually favor two Curves adjustment layers: one bright curve and one dark curve, each hidden behind a black mask. I paint white on the relevant mask with a soft brush to reveal the effect. If the work feels heavy later, I can lower layer opacity or reshape the curve without touching the original pixels.
For a landscape with pale clouds behind dark branches, a luminosity range can keep a burn mostly inside the bright sky. For a quick environmental portrait, a subject mask in a RAW editor may be enough to lift the person by roughly one-third of a stop. The mask saves time, but I still inspect hair, fingers, and coat edges where automatic selections often need brushing.
Do not confuse dodge and burn with frequency separation. Dodge and burn changes local luminosity. Frequency separation divides fine texture from broader color and tone, which can help certain portrait workflows but can also produce waxy skin when pushed too far. If your goal is to calm a dark patch while preserving pores, careful tonal brushwork often gives you the cleaner answer.
As an affiliate, we earn on qualifying purchases.
A 10-Step Workflow That Keeps Every Stroke Under Control
- Set exposure and white balance before local work.
- Name the subject and identify two or three distractions.
- Start at a normal viewing size.
- Shape the frame with broad masks.
- Refine major forms with a smaller soft brush.
- Use low flow, often 2% to 5%, and build slowly.
- Zoom in only for small corrections.
- Toggle your adjustment layers off and on.
- Check both color and temporary monochrome views.
- Lower layer opacity if the edit announces itself.
This sequence keeps dodge and burn coherent by moving from the whole photograph toward the smallest details. Basic corrections establish a stable starting point, broad shaping sets the visual path, and close work cleans up selected irregularities. That order stops you from polishing pores while the main subject still gets lost in the frame.
Suppose you are editing a bridal portrait beside a bright hotel window. Begin by balancing overall exposure and color, then darken the empty window edge with a wide mask. Next, dodge the bride’s face and hands with strokes that follow the window light. Only after those large choices work should you soften a small under-eye shadow or a dark crease in the dress.
A soft brush at 2% to 5% flow gives you room to change your mind while you work. Five light passes usually blend better than one strong pass, just as thin watercolor washes build more gracefully than a single puddle of pigment. Brush size should match the form: broad for a shoulder, smaller for a cheek, and tiny only for a spot-sized tonal change.
I also add a temporary black-and-white view above my working layers. Color can hide luminosity problems; a red cheek may look dark even when its brightness is close to the surrounding skin. The monochrome view reveals the uneven patch, while the color view tells you whether your adjustment has shifted saturation.
Check the frame at fit-to-screen, 100%, and final output size. A correction that looks beautifully smooth at 200% can turn a face into polished metal when you step back. Your audience sees the photograph, not the retouching session.
soft photo editing brushes for subtle retouching
As an affiliate, we earn on qualifying purchases.
As an affiliate, we earn on qualifying purchases.
Work at Three Scales for Light That Feels Coherent
Dodge and burn becomes easier when you divide the job into global, local, and micro scales. Global work balances the frame, local work defines major subjects and forms, and micro work corrects small tonal irregularities. Moving through those scales in order gives the photograph one believable lighting structure.
Global shaping tells the eye where to enter
Global shaping affects large areas without behaving like a single exposure slider. You might darken the outer quarter of a street photograph while gently lifting the pool of light around a vendor. In one rainy-night frame, I lowered a bright shop sign near the border so the viewer’s eye stayed with the vendor’s silver umbrella and wet, amber-lit pavement.
Local shaping gives subjects volume
Local work follows major forms such as a face, jacket, mountain, cloud, or building. Lightening an already illuminated cheek plane and darkening the natural shadow beneath the jaw can add depth, but the changes must agree with the original light direction. If the sun comes from camera left, a bright stroke along the right edge of a nose can make the face feel strangely assembled.
Micro work fixes bumps without erasing texture
Micro dodge and burn targets small brightness differences in skin, fabric, metal, or painted surfaces. In a beauty portrait, you might lift a pinhead-sized dark patch beside a pore cluster and lower a tiny bright patch nearby. You are smoothing luminosity, not skin texture, so the pores remain crisp instead of dissolving into plastic blur.
The scale should match the destination. A small web image rarely needs an hour of micro work, while a close beauty crop for a large print may reveal every uneven patch. Spend your time where the viewer can see the result, and let natural texture stay natural.
Avoid the Five Mistakes That Make Retouching Look Fake
Dodge and burn looks fake when the adjustment becomes stronger, sharper, or more detailed than the photograph can support. The usual causes are high-flow strokes, hard brush edges, halos, invented light, and endless work at extreme magnification. You can prevent all five through weaker passes and frequent full-frame checks.
- Metallic skin: repeated bright and dark sculpting exaggerates every facial plane.
- Patchy tone: a small brush and high flow create islands of mismatched brightness.
- Halos: broad masks spill across hair, roofs, trees, and horizon lines.
- Flattened form: removing every shadow erases the subject’s natural shape.
- Color shifts: strong luminosity changes alter perceived saturation and hue.
I once pushed a portrait too far while concentrating on the face at 200%. The cheek looked smooth close up, yet at normal size it shone like brushed chrome and the jaw appeared carved. Dropping both Curves layers to about 60% opacity brought back the person I had photographed.
Halos often appear when you brighten a mountain but let the brush cross into the sky. They resemble a pale ribbon pasted along the ridge. Use a smaller brush near the boundary, combine the mask with a luminance or object range, and inspect the edge against both light and dark backgrounds.
Strong adjustments can also change how color feels. A heavily dodged red jacket may appear more saturated, while a deep burn can make blue fabric look muddy. Setting tonal adjustment layers to Luminosity blend mode can reduce unwanted color movement, though your eyes still make the final call.
Dodge and burn refines good lighting; it does not replace it. A flat, badly placed key light cannot always be rebuilt into convincing side light without creating contradictions across the face, hair, clothing, and background.
When you toggle the work off, the edited version should read more clearly. When you toggle it on, you should not see a collection of brushstrokes. If the first thing you notice is the retouch, reduce it before adding anything else.
Use AI Masks for Speed, Then Make the Lighting Decisions Yourself
Dodge and burn is faster with AI-assisted masks, but automation does not decide how the light should feel. Modern editors can identify people, skies, backgrounds, clothing, facial features, and objects in seconds. Those selections give you a useful starting boundary; your judgment supplies the emphasis, shape, and restraint.
Consider a cyclist photographed against pale evening clouds. A subject mask can isolate the rider, and a sky mask can contain a gentle burn behind the helmet. Yet the software may miss gaps between spokes, include bright road spray, or create a hard line around the jacket. A few brush additions and subtractions turn a convenient selection into a believable adjustment.
Mask intersections give you even tighter control. You can select a person, intersect that mask with a shadow range, and dodge only the darker tones on the face and coat. That approach avoids lifting already bright highlights, which can otherwise make skin look slick and fabric lose its weave.
Object-aware selections help with architecture, foliage, and products, but intricate edges still deserve inspection. On a photograph of a dark bottle against a bright set, an automatic object mask may clip the translucent glass rim. Painting that rim back into the mask preserves the narrow silver highlight that makes the bottle feel solid and smooth.
A pressure-sensitive tablet can make long sessions more fluid because pen pressure can control flow or opacity. A mouse still works, especially for broad adjustments, and good brush settings matter more than hardware. Start with what you have.
Automation makes selection faster; it does not replace intentional lighting decisions. Software can find the face, but it cannot know whether the photograph should feel quiet and overcast or crisp and theatrical. That is why this old technique is still worth learning: the final choice remains yours.
Frequently Asked Questions
What is the difference between dodging and burning?
Dodging lightens selected areas, while burning darkens them. You can dodge a face to draw attention or burn a bright corner to make it recede. Both actions change local brightness rather than the exposure of the entire photograph.
Should I dodge and burn before or after color grading?
Complete basic exposure, white balance, and contrast work before detailed dodge and burn. You can apply the final color grade afterward, then make one more tonal check because color changes how bright areas appear. A deep blue grade, for example, can make clean shadows feel heavier.
What brush settings should a beginner use?
Begin with a soft-edged brush and about 2% to 5% flow. Match brush size to the form you are shaping: large for a shoulder or cloud, smaller for a cheek, and tiny only for close corrections. Build several light strokes instead of placing one heavy mark.
Is dodge and burn only useful for portraits?
No. Dodge and burn works in landscape, product, architecture, fashion, documentary, and fine-art photography. You might darken clouds above a hill, brighten the edge of a glass, or lower a glaring doorway. The common goal is controlled local brightness.
How do I know when the edit is finished?
The edit is finished when the subject reads clearly, distractions feel quieter, and the tonal work does not call attention to itself. Toggle the adjustment off and on at normal viewing size. You should see a meaningful improvement without seeing obvious halos, patches, or sculpted-looking skin.
Conclusion
Learn to see the light before you paint it. Start with one photograph, identify its main subject, and make only three changes: brighten one area that deserves attention, darken one distraction, and shape one natural shadow. Keep every stroke soft, weak, and editable, then step back until you can no longer see the method—only a clearer path through the frame.
Dodge and burn has survived the move from enlargers to pixels because the photographer’s real job has not changed. You still decide what the viewer notices, what recedes, and how the scene breathes. When the work is right, the brush disappears and the light tells the story.
Columbus Day / Indigenous Peoples' Day Picks
long weekend sales
As an affiliate, we earn on qualifying purchases.