TL;DR

Get audio and creator gear delivered free with Prime
- Fast, free delivery on millions of items
- Prime Video, Amazon Music and more included
- Member-only deals all year
Protecting camera gear in rain, dust, and cold means blocking moisture and grit before they reach your camera, slowing temperature changes, and drying gear patiently after the shoot. Use a rain cover, sealed bag, lens hood, clear filter, warm spare batteries, and a simple clean-dry-store routine every time conditions get rough.
The first time rain crept under my camera strap, I heard one tiny tap on the hot shoe and felt my stomach drop. The sky had gone steel gray, the street smelled like wet asphalt, and my lens cloth was already damp. That day taught me that weather protection starts before the first drop lands.
This guide gives you a practical field routine for protecting camera gear in ugly weather: rain, blowing dust, beach sand, freezing mornings, and the damp warmth that follows. Think of it like dressing yourself for bad weather: a rain jacket, warm pockets, dry socks, and somewhere clean to put the muddy layers afterward. Your camera needs the same kind of ordinary, repeatable care.
I am writing this from the working photographer’s side of the bag. No fake torture tests. Just real shooting habits, hard lessons, and the small choices that keep cameras alive when the weather turns mean.
Use layered protection: rain cover, lens hood, sealed bag pocket, dry cloths, and warm spare batteries.
Weather-sealed gear is water-resistant, not waterproof; covers and careful handling still matter.
Blow dust off before wiping glass, because one sandy cloth can scratch a lens or filter.
Prevent condensation by sealing cold gear before you bring it into warm indoor air.
Clean and dry straps, caps, covers, ports, and bag compartments after the shoot, not days later.
Protecting Camera Gear in Rain, Dust, and Cold
TL;DR: Block moisture and grit before they reach your camera, slow temperature changes, keep batteries warm, and dry gear patiently after the shoot. Weather sealing helps, but field habits do the heavy lifting.
“Treat weather sealing like a seatbelt, not a force field.”
Fit protection before the first hard drops or dust gusts arrive.
One warm spare battery often beats three cold spares.
Rain cover, hood, filter, dry cloths, sealed bag pocket.
Ports, card doors, lens mount, wet hands during changes.
Blow grit away before any cloth touches glass.
Seal cold gear before entering warm indoor air.
Bad-weather gear should be reachable in 30 seconds.
Preparation feels boring until salt mist, gritty wind, or freezing rain starts making decisions for you. Keep the kit small, repeatable, and always in the same bag pocket.
Folding Rain Cover
Choose one you can fit while standing in wind. The best cover is the one you can deploy before the weather gets ugly.
Hood + Clear Filter
A hood blocks side spray and fingers. A clear filter earns its place when grit, salt, or blowing sand is in the air.
Two Cloth System
Keep one microfiber for glass and a rougher cloth for the body. Store both dry, separate, and sealed.
Blower First
Fine particles can scratch filters and jam controls. Air comes before wiping, especially at beaches and trailheads.
Resealable Bags
Use them for damp straps, wet covers, silica gel packs, and gradual temperature transitions after cold shoots.
Inside-pocket Battery
Lithium-ion performance drops in cold conditions. Rotate warm spares from an inner pocket instead of freezing them all.
Weather-resistant does not mean waterproof.
Sealed bodies and lenses buy time in drizzle, mist, cold air, and dust. They do not excuse open doors, wet lens swaps, salt spray, or long downpours without a cover.
| Protection Type | Rain | Dust / Sand | Cold | Where It Falls Short |
|---|---|---|---|---|
| Weather-sealed body | ✓Light rain and mist | ~Fine dust resistance | ✓Cold air handling | Open ports, wet doors, long exposure to water |
| Weather-sealed lens | ✓Spray at rings | ~Dust near controls | ✓Stable handling | Mount gaps, zoom movement, salt residue |
| Rain sleeve | ✓Fast cover | ~Basic shield | ~Snow barrier | Wind-driven water, awkward controls, wet hands |
| Hard waterproof case | ✓Transport storms | ✓Sealed storage | ~Insulation only | Slow access when the shot is happening |
| Bare camera | ✗High risk | ✗High risk | ~Battery drain | Relies on luck and fast cleanup |
The wet-weather routine is a chain, not a single product.
Rain usually damages gear through patience, one seam at a time. Reduce how long every opening, control, and strap has to fight moisture.
Cover Early
If clouds look low and bruised, fit the rain cover before heavy drops begin.
Point Down
Walk, wait, and change position with the lens angled slightly away from falling water.
Shield Glass
Use the hood to keep drops off the front element and reduce frantic wiping.
Dry Before Doors
Wipe the exterior before opening card slots, battery doors, ports, or the lens mount.
Pack Wet Apart
Keep damp covers and straps out of clean bag compartments until they can fully dry.
What usually hurts gear first?
Most field failures begin with small handling mistakes: wiping grit, opening wet doors, letting condensation form, or storing damp gear until corrosion and fungus have time to work.
Temperature Change Scale
Cold gear entering warm indoor air is where fogging becomes a real threat. Seal the camera in a bag first, let it warm gradually, then unpack once surfaces have stabilized.
Clean and dry the boring parts too.
Post-shoot care prevents small exposure from becoming corrosion, fungus, sticky controls, or scratched glass. The strap, caps, ports, and bag compartments count.
Power down, dry outside, then open.
Switch the camera off. Dry the exterior first. Remove battery and card only after water is cleared from doors and seams. Let gear rest in moving room-temperature air. Skip hair dryers and heaters.
Air before cloth, patience before pressure.
Use a blower before wiping. Clean caps, hood grooves, filter threads, straps, and zipper areas. A single sandy cloth can turn cleanup into lens damage.
From bad weather to safe storage.
The practical goal is not invincible gear. It is a repeatable chain that blocks exposure, limits handling mistakes, and gives moisture nowhere useful to hide.
Cover camera and hood the lens.
Close bag and blower first.
Rotate warm batteries.
Seal before warm rooms.
Dry straps, ports, caps.
Air out, desiccant, inspect.
Build a Weather Kit Before the Sky Turns Mean
Protecting camera gear in rain, dust, and cold starts with a small kit you can reach in 30 seconds, not a drawer full of accessories back home. Your goal is simple: block water, slow dust, cushion impact, and keep batteries warm before the weather gets a vote.
My basic bad-weather pouch lives in the same pocket of my camera bag on every job. It holds a folding rain cover, microfiber cloths in a zip bag, a few silica gel packs, nitrile gloves, a blower, and one clear protective filter for the lens I use most.
- Rain cover: Choose one you can fit while standing in wind, not one that needs a quiet table and saintly patience.
- Lens hood: It blocks side spray, stray light, and clumsy fingerprints better than many beginners expect.
- Clear or UV filter: Use it when grit or salt spray is flying; remove it when flare or image quality becomes a problem.
- Dry cloths: Keep one cloth for lens glass and one rougher cloth for the camera body.
- Resealable bags: Use them for damp straps, wet covers, and slow temperature changes after cold shoots.
Picture a coastal sunrise with salt mist blowing sideways. Without the pouch, you are digging through a dark bag while the front element gets speckled. With it, you pull a cover, keep the hood on, wipe the filter, and keep shooting while everyone else is bargaining with wet sleeves. Preparation feels boring until the wind throws sand at your face.
As an affiliate, we earn on qualifying purchases.
Know What Weather Sealing Can and Cannot Save
Weather sealing means a camera or lens has barriers that resist moisture and dust; it does not mean the gear is fully waterproof. Water-resistant gear buys you time in drizzle, spray, and dusty air, while waterproof housing is built for real immersion or heavy, sustained water exposure.
| Protection Type | What It Helps With | Where It Falls Short |
|---|---|---|
| Weather-sealed body | Light rain, mist, cold air, fine dust | Open ports, lens swaps, long downpours |
| Weather-sealed lens | Spray, dust at control rings, damp handling | Unsealed mount gaps, zoom movement, salt water |
| Rain sleeve | Fast cover during showers or snow | Wind-driven water, awkward controls, wet hands |
| Hard waterproof case | Transport through boats, mud, or storms | Slow access when the shot is happening |
I treat weather sealing like a seatbelt, not a force field. It helps when a wedding couple runs through rain or when dust hangs over a gravel road, but I still cover the camera and keep the mount pointed down during lens changes.
For example, a sealed body and sealed zoom may handle ten minutes of mist at a football sideline, but that same setup can struggle if you open the card door with droplets sitting around the rubber flap. The weak point is often the human moment: changing batteries with wet gloves, swapping lenses in wind, or laying the camera on a damp jacket.
According to CIPA-style battery and camera testing, manufacturers often measure camera performance under controlled conditions, not the messy mix of wind, salt, mud, and hurried handling you meet outside [2]. That gap matters. Field habits still carry the day.
As an affiliate, we earn on qualifying purchases.
Keep Rain Out Without Missing the Shot
Protecting camera gear in rain, dust, and cold during wet weather means creating layers: cover the camera, shield the lens front, keep water away from openings, and dry the outside before you pack up. Rain usually damages gear through patience, not drama. It sneaks in one seam at a time.
- Fit the rain cover before heavy rain starts. If clouds look bruised and low, cover early.
- Point the lens slightly downward when you are waiting, walking, or changing position.
- Use the lens hood to keep drops off the front element and reduce frantic wiping.
- Wipe the camera body before opening doors for cards, batteries, or cables.
- Pack wet covers separately so they do not soak the inside of your bag.
On street assignments, I often work with the camera under my jacket until the frame appears. Then it comes out, shoots for 10 seconds, and goes back under cover. Not elegant. Very effective.
At an outdoor ceremony, the same habit might mean keeping the camera under a rain sleeve while guests walk in, lifting it only for the kiss, then wiping the body before changing batteries under a tent. In rain, you are not trying to make the camera invisible to weather. You are trying to reduce how long each opening and control has to fight it.
Do not open the battery door, card slot, or lens mount while water sits on the camera. Dry the outside first, even if the moment feels urgent.
If your camera gets wet, switch it off, remove the battery and card only after drying the exterior, and let the gear rest in moving room-temperature air. Skip hair dryers and heaters. Fast heat can push moisture deeper and stress seals.
As an affiliate, we earn on qualifying purchases.
Stop Dust and Sand Before They Grind Into Everything
Dust protection is about reducing contact, reducing movement, and cleaning in the right order. Fine grit can scratch filters, jam buttons, and work into zoom barrels, especially at beaches, deserts, construction sites, rodeos, and windy trailheads where the air feels dry and gritty on your teeth.
At the beach, I use one mounted lens and avoid swapping glass unless I can step into a car, building, or sheltered corner. If I must change lenses, I turn my back to the wind, point the camera mount down, and make the swap in one calm motion.
- Use a blower before cloth. Wiping first can drag grit across glass.
- Keep zippers closed. An open bag on sand becomes a dust tray in minutes.
- Use a clear filter in harsh grit. A scratched filter is painful; scratched lens coating is worse.
- Carry one damp cloth for the body. Keep it away from the glass cloth.
- Clean tripod leg locks after sand. They collect grit with impressive enthusiasm.
Imagine photographing kids running through dunes. Every lens change is like opening a sandwich at the beach: even if you are careful, the sand is looking for a way in. In that situation, a single versatile zoom can be safer than chasing perfect focal lengths with exposed mounts and dusty fingers.
The order matters: blow, brush, then wipe. I have watched new photographers polish a sandy lens with a dry shirt, and the sound tells the whole story: that faint, awful scrape of grit doing permanent work.
As an affiliate, we earn on qualifying purchases.
Beat Cold Weather Battery Drain the Practical Way
Protecting camera gear in rain, dust, and cold includes protecting power, because cold batteries fail long before most camera bodies do. Lithium-ion batteries deliver less usable power as temperature drops, so your best move is to keep spares warm and rotate them before they seem dead [1].
I keep one battery in the camera, one in an inside coat pocket, and any extras deeper in the bag. On winter dawn shoots, the pocket battery feels almost alive compared with the stiff, cold one that has been sitting near the zipper.
- Start with fully charged batteries before you leave the house.
- Keep spares close to your body, not in an outside bag pocket.
- Rotate cold batteries into a warm pocket; many recover some charge after warming.
- Turn off power-hungry extras like constant Wi-Fi, long image review, and bright rear screens.
- Use gloves that let you work controls so you do not drop gear with numb fingers.
On a ski-slope shoot, for instance, a battery that shows one blinking bar in the camera may come back to two or three bars after twenty minutes inside your jacket. Treat cold batteries like tired hands by warming them before deciding they are finished.
Cold also makes straps stiff, rubber grips slick, and small buttons feel tiny. I set key controls before stepping into freezing wind, because bare fingers at -10°C lose their charm quickly.
Avoid Fog When You Come Back Inside
Condensation forms when cold gear meets warm, humid air and water collects on colder surfaces. The danger is not just fog on the front element; moisture can settle inside ports, viewfinders, lens barrels, and switches if the temperature change happens too fast.
After a snowy portrait session, I put the camera and lenses into a sealed plastic bag before entering the warm house. The moisture gathers on the outside of the bag while the gear warms slowly inside. It looks almost too simple, but it works.
- Bag cold gear before going indoors. Seal in the cold, dry air outside.
- Leave the bag closed for 60-120 minutes, depending on how cold the gear is.
- Remove batteries and cards only after the exterior warms if the camera was exposed to heavy moisture.
- Use fresh silica gel in storage, not mystery packets that have lived in the bag for years.
The same thing happens when eyeglasses fog after you walk from a frozen sidewalk into a warm cafe. Your camera is just a more expensive pair of cold surfaces, with more cracks and buttons where moisture can hide.
If fog appears inside a lens or viewfinder, stop shooting and let the gear dry slowly. Do not chase it with hot air. Warm patience beats hot panic almost every time.
Pack Your Camera Bag So Bad Weather Has Fewer Chances
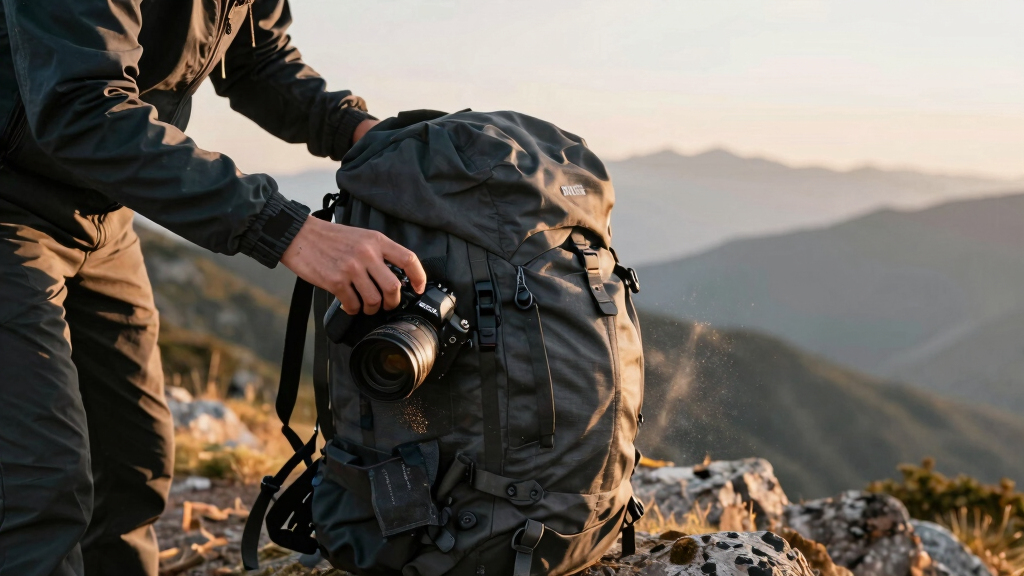
A good camera bag protects gear by creating dry zones, dirty zones, and fast access to the items you need under pressure. The bag matters, but the layout matters more. A waterproof shell helps little if a wet rain cover drips onto your open lens pouch.
I pack from the outside inward. The top or side pocket gets rain gear. The main compartment holds cameras and lenses. A separate pouch carries damp cloths, used covers, and anything salty or muddy until I can clean it properly.
| Bag Area | Best Use | Field Example |
|---|---|---|
| Fast-access pocket | Rain cover, blower, dry cloth | You cover the camera before a storm cell hits the overlook. |
| Main padded section | Camera bodies and lenses | Gear stays upright and separated during a rough trail walk. |
| Sealed pouch | Wet straps, used cloths, sandy filters | Salt spray stays away from clean lens caps. |
| Inside pocket | Batteries and cards | Cards stay dry when the outer fabric gets soaked. |
Think of the bag like a small field kitchen: clean tools stay clean, wet things get their own corner, and the item you need in a hurry should not be buried under everything else. If a rain cover has to pass over your open sensor-cleaning pouch every time you grab it, the layout is working against you.
This is one of the important aspects of camera travel that beginners often learn late: your bag is not just storage. It is a working system, and in foul weather that system should be simple enough to use with cold hands and a fogged pair of glasses.
Clean and Dry Gear After the Shoot, Not Next Week
Post-shoot care prevents small exposure from turning into corrosion, fungus, sticky controls, or scratched glass. Clean the outside first, dry slowly, separate wet items, and inspect the gear again the next day under good light.
- Remove loose dust with a blower before touching glass or screens.
- Wipe the body with a barely damp cloth if it met salt, mud, or dirty rain.
- Dry lens hoods, caps, straps, and rain covers separately before they return to the bag.
- Leave compartments open overnight in a dry room with airflow.
- Check mounts, ports, and filter threads the next morning for hidden moisture or grit.
Salt water deserves extra respect. After a windy pier shoot, I wipe the exterior with a cloth lightly dampened with fresh water, then dry it with a clean towel. Salt crystals look harmless, but they cling like tiny glass teeth.
A simple example: if your strap is wet, your lens cap is sandy, and your rain sleeve is dripping, do not toss all three back into the main compartment with the camera. Put them on a towel, open the bag, and let each piece dry separately. Tomorrow’s clean gear starts with tonight’s boring table spread.
This routine is a comprehensive, overview suitable for a blog article, yes, but it is also the quiet part of real work. The photograph may happen in a flash; the care that keeps your kit reliable happens afterward, at the kitchen table, under a warm lamp.
When to Stop Shooting and Protect the Camera First
You should stop shooting when water reaches openings, dust makes lens changes risky, controls start sticking, or cold affects your hands enough to make dropping gear likely. No frame is worth a ruined mount, a soaked card slot, or a fall caused by numb fingers.
I have packed up during dramatic light because rain was blowing sideways into the lens mount area. It hurt for about five minutes. Then I remembered that a working camera tomorrow beats a heroic repair bill today.
- Stop in heavy sideways rain if you cannot keep openings dry.
- Stop during blowing sand if you need to change lenses in the open.
- Stop when condensation forms inside gear, not just on the surface.
- Stop when your grip becomes unsafe from cold, wet gloves, or fatigue.
A useful test is the dry-door test: before opening any battery door, card slot, or lens mount, ask whether you could touch that area with a dry tissue and keep the tissue dry. If not, stop and protect the camera first. That one pause can save the part of the camera you cannot easily clean later.
The tradeoff is simple: better protection can slow you down, while less protection keeps you nimble but exposed. Your job is to choose the smallest setup that lets you make the picture and get home with every dial, card, and lens still behaving.
Frequently Asked Questions
Can I use a plastic bag to protect my camera in rain?
Yes, a clean plastic bag can work as emergency rain protection if you cut or tear a small opening for the lens and secure it with a hood or elastic band. It is clumsy in wind and poor for regular use, but it can save a camera during a surprise shower.
Should I keep a clear filter on my lens in bad weather?
A clear filter helps when sand, salt spray, mud, or rain may hit the front element. I remove it when flare becomes a problem or when shooting into bright lights, but in rough conditions I would rather clean a filter than grind grit into lens coating.
What should I do if my camera gets soaked?
Turn it off, dry the outside gently, then remove the battery and memory card once water is no longer sitting near the doors. Let the camera dry in room-temperature airflow and avoid heaters, ovens, hair dryers, or direct sun.
How long should camera gear warm up after shooting in the cold?
Give cold gear 60-120 minutes inside a sealed bag before opening it in a warm room. Larger lenses and metal-bodied cameras need more time because they hold cold longer than small plastic accessories.
Is a weatherproof camera bag enough for heavy rain?
A weatherproof bag helps during transport, but it does not protect the camera while you shoot. Use the bag’s rain cover, keep wet items isolated, and add a camera rain sleeve when the camera leaves the bag.
Conclusion
Protecting camera gear is mostly habit: cover early, swap lenses rarely, warm batteries, slow down temperature changes, and clean the kit before the damage has time to settle in. You do not need to fear weather. You need a plan you can follow when your hands are cold and the light is beautiful.
The best protection is the one you actually use. Pack the small pouch, keep it in the same pocket, and let the rain hit the cover instead of your camera.
Fall Picks
fall essentials
As an affiliate, we earn on qualifying purchases.






![Mike Love Rejoins The Beach Boys On Stage Amid Health Issues [Updated]](https://photomocha.com/wp-content/uploads/2026/10/mike-love-rejoins-the-beach-boys-on-stage-amid-health-issues-updated-featured-260x140.jpg)