
TL;DR
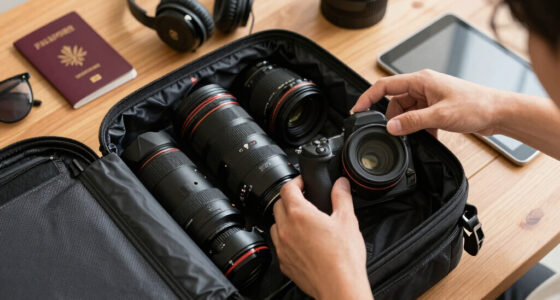
A camera cube is a padded, removable organizer that turns a backpack, tote, messenger bag, or duffel into a flexible camera carrier. Choose one that fits your actual shooting kit and sits firmly inside the outer bag, then arrange the dividers so gear cannot collide, shift, or carry the weight of other equipment.
Your favorite backpack may already carry better than most camera bags. Add a well-fitted camera cube, and that familiar bag can hold a camera, two lenses, batteries, and a small flash without advertising expensive gear to everyone on the train. The idea feels almost too simple: keep the bag, add the protection.
I like camera cubes because they separate two jobs that manufacturers often bind together. Your outer bag handles comfort, weather, and capacity, while the insert handles padding and organization. That split gives you more freedom, whether you carry a quiet canvas backpack through a city or tuck your equipment into a duffel for a weekend assignment.
You still need to choose and pack the cube with care. Soft padding cannot stop a heavy water bottle from crushing a lens hood, and a loose insert can slide around like a bar of soap in a bathtub. This guide shows you how to select the right size, arrange the adjustable dividers, match the cube to different bags, and recognize where its protection ends.
Measure the bag opening as well as its interior, and leave about 10 to 20 millimetres of clearance around the loaded cube.
Pack the heaviest gear near the centre and close to your back, with a separate padded compartment for every hard object.
Tilt the closed cube gently before a shoot; any knock, rattle, or shift means the dividers need adjustment.
Treat water-resistant fabric as protection from brief drizzle, not heavy rain, immersion, or prolonged contact with a wet surface.
Keep the internal layout consistent across bags so you can reach the camera, fresh batteries, and memory cards without searching.
Camera Cubes: Turning Any Bag Into a Camera Bag
Keep the bag you already trust. Add a padded, removable organizer that separates your camera, lenses and accessories—without advertising expensive gear on the train, street or trail.
More than loose padding
A folded sweater can soften a landing, but it cannot reliably stop equipment from colliding. A fitted cube creates a small, structured transport system inside an ordinary bag.
Padded walls
A rectangular shell softens ordinary bumps and keeps cushioning where it belongs instead of allowing it to slide away.
Adjustable dividers
Hook-and-loop partitions give every hard object its own space, preventing a metal lens barrel from rubbing against a screen.
Secure closure
Zips, pockets and elastic loops keep batteries, cards, plates and cables away from keys, grit and fragile controls.
Bag-to-bag transfer
Move the same packed layout from a city backpack to a duffel without rebuilding your organization before every trip.
Low-profile carry
A familiar canvas backpack or tote attracts less attention than a bag whose shape and branding announce camera equipment.
Everyday protection
A cube is not a hard case. It organizes and cushions gear, but the outer bag still governs weather resistance and crush protection.
Fit the kit you actually shoot
Measure your arranged equipment at its widest, tallest and deepest points. Compare those figures with the cube’s internal dimensions—and confirm the loaded cube can pass through the bag opening.
| Cube size | Typical working kit | Outer bag need | Watch for |
|---|---|---|---|
| ✓ Compact | Mirrorless body, attached zoom, one prime | Daypack, tote or messenger | Grip and viewfinder height |
| ✓ Medium | One body, 2–3 lenses, batteries, small flash | Full backpack or carry-on | Top opening and lid pressure |
| ~ Large | Multiple bodies or long lenses | Broad-opening backpack or duffel | Base support and total weight |
Pack the cube in five steps
A consistent layout improves protection and speed. Place weight centrally, support attached lenses and orient the main camera so it can be lifted by the grip.
Lay out one working kit
Camera, lenses, cards, batteries and cloth only. Keep unrelated objects outside.
Place weight first
Set the heaviest gear near the centre and close to your back.
Build snug spaces
Padding should touch like a firm handshake—not squeeze like a clamp.
Secure small objects
Put plates, adapters and batteries in zipped pockets or elastic loops.
Run the tilt test
Close, support and gently tilt the cube. Adjust any item that shifts.
Knock, rattle or shift? Stop and move the dividers. A loose insert can slide around inside an oversized bag, transferring momentum directly to the gear it was meant to protect.
Two layers, two jobs
The outer bag manages comfort, weather, carrying capacity and stability. The insert manages organization, separation and minor-impact cushioning.
Protection depends on the complete system
Relative importance for everyday carry. The cube is strong at separation; the bag must contribute stability, structure and weather coverage.
Cushioned is not indestructible
Soft padding is designed for daily knocks and abrasion. It cannot guarantee protection from crushing loads, major drops, immersion or prolonged exposure to rain.
Order and ordinary bumps
- Prevents cameras and lenses rubbing together
- Softens routine impacts from setting a bag down
- Keeps small accessories contained and repeatable
- Makes equipment easy to transfer between bags
Crushing, leverage and water
- A heavy bottle can still crush a lens hood
- A long lens can strain the camera mount during a drop
- Water-resistant fabric is not waterproof
- A sliding cube can amplify internal collisions
Every link protects the next
Rules worth remembering
The best cube is not the largest or most padded. It is the one that fits your real kit, stays stable inside your preferred bag and supports the way you reach for equipment.
Measure the opening and interior. Leave roughly 10–20 millimetres around the loaded cube.
Centre the heaviest equipment. In a backpack, keep it close to the panel touching your back.
Give every hard object a padded home. Support large attached lenses so the mount carries no transport load.
Tilt-test before every shoot. Any movement means the dividers or outer-bag fit need adjustment.
Keep the layout consistent. Separate fresh and depleted batteries, and make the camera reachable by its grip.
What a Camera Cube Gives You That Padding Alone Cannot
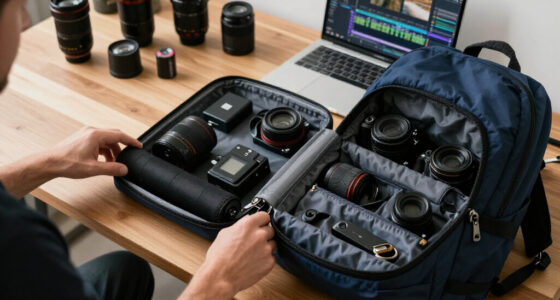
Camera Cubes: Turning Any Bag Into a Camera Bag describes a simple modular system: a removable padded box sits inside an ordinary bag and gives each piece of equipment its own compartment. Unlike a folded sweater or loose foam sheet, the cube adds structured walls, adjustable dividers, and a closure that keeps small accessories together.
Most designs use a rectangular shell made from nylon, polyester, or another durable fabric. Inside, hook-and-loop dividers create spaces for a body, lenses, flash, batteries, and cables. According to PhotoMocha camera-bag guidance [1], this mix of padding, adjustable compartments, and portability explains why cubes work across mirrorless and DSLR systems.
The difference becomes obvious when you set the bag down quickly. A scarf may cushion the bottom, but it can slide away and leave a lens knocking against the camera grip. A properly arranged cube acts more like individual seats on a small bus: every passenger has a place, and nobody tumbles down the aisle when the driver brakes.
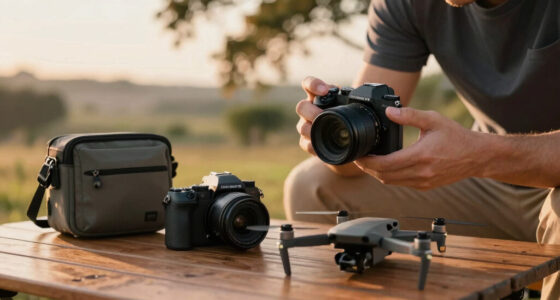
For example, a compact cube can hold a mirrorless body with a small zoom attached, plus a prime lens standing beside it. A divider between those items prevents the metal lens barrel from rubbing against the camera screen. A zipped pocket can hold two spare batteries and several memory cards, keeping them away from keys, crumbs, and the mysterious grit that collects at the bottom of a daily backpack.
A camera cube does not make a weak bag indestructible. It creates order, separation, and everyday impact protection inside a bag you already trust.
As an affiliate, we earn on qualifying purchases.
Choose the Right Size Without Packing Your Whole Studio
The right camera cube holds the equipment you use on a normal shoot with little wasted space and no pressure on controls, screens, or lens mounts. Measure both your gear and the inside of your bag, then leave roughly 10 to 20 millimetres of clearance so the loaded cube can pass through the opening.
Start with your real kit, not the equipment you may own someday. If you usually photograph family trips with one mirrorless body, a standard zoom, and a small prime, size the cube around those three items. Buying space for four extra lenses creates a larger, heavier block that may encourage you to carry gear you never remove.
I use a simple test: arrange the equipment on a table in the same orientation it will have inside the cube. Measure the group at its widest, tallest, and deepest points, including the attached lens cap and viewfinder. Then compare those figures with the cube’s internal dimensions, not just its outside measurements.
- Compact cubes suit a small mirrorless body, one attached lens, and one additional lens.
- Medium cubes often suit a body, two or three lenses, batteries, and a compact flash.
- Large cubes can carry multiple bodies or long lenses, but they need a bag with a broad opening and a firm base.
Watch the height. A cube can fit the floor of a backpack yet still press the zipper against a camera’s mode dial. That pressure is easy to miss until you open the bag and find the settings changed. Leave enough room to slide one flat hand over the packed equipment without forcing the lid closed.
Also measure the bag’s opening. A tote may have generous internal volume but a narrow zip at the top, rather like trying to move a sofa through a small doorway. Your measurements should cover the route into the bag, not only the room waiting inside.
padded camera insert for backpacks
As an affiliate, we earn on qualifying purchases.
As an affiliate, we earn on qualifying purchases.
Pack the Cube in Five Steps for Faster, Safer Access
Camera Cubes: Turning Any Bag Into a Camera Bag works only when the internal layout matches the way you shoot. Place the heaviest equipment near the centre and close to your back, give every hard object its own compartment, and orient your main camera so you can lift it by the grip rather than the lens.
- Lay out one working kit. Put the camera, lenses, batteries, cards, and cleaning cloth on a table. Leave unrelated items outside the cube so they cannot steal padded space.
- Place the heaviest item first. Set the camera body or largest lens near the middle. In a backpack, position that weight toward the panel touching your back so the load does not pull you backward.
- Build snug compartments. Move each divider until the gear stays upright without being squeezed. The padding should touch lightly, much like a firm handshake rather than a clamp.
- Separate small hard objects. Put batteries, adapters, and mounting plates in zipped pockets or elastic loops. A loose metal plate can scratch a screen during a ten-minute walk.
- Run a movement check. Close the cube, support it with both hands, and tilt it gently from side to side. If you hear a knock or feel something shift, adjust the dividers before loading the outer bag.
Imagine covering a small indoor event. You enter a dim room with the camera packed grip-up and the standard zoom already mounted. One zip, one lift, and you are ready before the moment disappears. If the body sits lens-down beneath two accessories, the same task becomes a noisy excavation while people wait.
Keep lens weight off the camera mount whenever the attached lens is large. Support the lens with a divider or remove it for transport. A light prime can usually remain attached, but a long telephoto creates leverage at the mount when the bag drops onto a chair.
Finish by assigning a repeatable home to every item. Put fresh batteries in one pocket and depleted ones in another, or turn used batteries so their contacts face the opposite direction. That small habit saves you from testing three dead batteries while the last warm light fades behind the skyline.

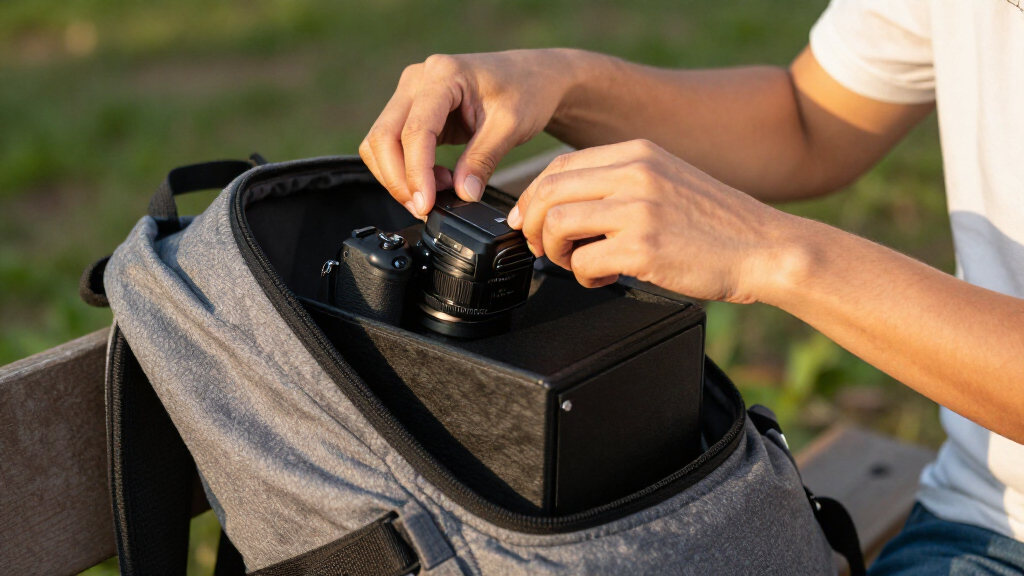
TACTICAL_GEEK TCM9 Backpack Insert Camera Organizer, Flexible Modular Storage for Photography Gear with Magnetic Flap, Foldable Hook Panel for Backpack Accessories Storage(Grey)
- Modular Storage for Photography Gear: Lightweight, compression-resistant panels for protection
- Foldable for Compact Storage: Collapsible design for easy space-saving
- Magnetic Flap for Quick Access: One-handed access with added protection
As an affiliate, we earn on qualifying purchases.
As an affiliate, we earn on qualifying purchases.
Match the Cube to Your Bag Before the First Long Walk
A camera cube can work inside a backpack, tote, messenger bag, or duffel, but each pairing changes access, weight balance, and protection. Backpacks usually carry best over distance, totes give quick top access, messenger bags favor small kits, and duffels provide room at the cost of more movement around the insert.
| Outer bag | Best use | Main strength | Watch for |
|---|---|---|---|
| Backpack | Travel, hiking, daily carry | Balanced two-strap support | Deep bags may bury the cube |
| Tote | Short city walks, events | Fast top access | Limited closure and base support |
| Messenger bag | Street photography, light kits | Access without removing the bag | One-shoulder fatigue |
| Duffel | Car travel, larger equipment sets | Broad opening and high capacity | The cube may slide or tip |
A backpack is usually the easiest match because its tall walls surround the cube and its shoulder straps distribute weight. Place a medium cube horizontally near the bottom, then use a folded jacket above it. If the backpack is much larger, fill the side gap with soft clothing so the insert cannot drift with every step.
A tote feels wonderfully quick on a portrait session. You can set it beside a chair, open the top, and change lenses without placing the whole bag on the floor. The tradeoff is structure: a soft tote may sag around the cube, so choose one with a flat base and a closure that covers the equipment.
Messenger bags work best with a restrained kit. A camera and two small lenses feel manageable; a large body and three heavy zooms can pull one shoulder down after an hour. The cube should fill most of the bag’s width so it cannot rotate as you walk.
Inside a duffel, treat the cube as a protected island surrounded by softer cargo. Keep shoes in a separate bag, place toiletries where leaks cannot reach the camera, and avoid stacking heavy objects over the cube. The best pairing feels stable and boring: no sliding, tipping, or surprise pressure when you lift the bag.
As an affiliate, we earn on qualifying purchases.
Know Exactly What the Padding Will—and Will Not—Stop
Camera Cubes: Turning Any Bag Into a Camera Bag gives you protection from scratches, minor knocks, and ordinary handling, but it does not create a rigid equipment case. The cube’s performance still depends on foam coverage, zipper design, weather resistance, and the strength of the outer bag around it.
Think of the padding as a seat belt, not a steel cage. It can soften the short bump when you set a backpack on a wooden floor. It cannot promise survival if baggage handlers throw a soft duffel beneath a hard suitcase or if someone sits on the bag.
Water protection also varies. Many newer cubes use water-resistant fabrics and coated zippers, reflecting broader material trends identified in recent camera-carry guidance [2]. Water-resistant means the fabric can shed brief drizzle or a small splash; it does not mean you can leave the cube in heavy rain or place it on a soaked pavement.
For a rainy street shoot, keep the cube inside a zipped backpack with its own rain cover. Store a small dry cloth near the top, and wipe moisture from the camera before returning it to the enclosed space. Warm, damp equipment sealed inside padding can leave the cube smelling musty and may encourage moisture to linger around metal contacts.
Do not rely on a camera cube as checked-luggage protection. A soft insert cannot control crushing forces, rough conveyor drops, or the weight of other cases.
Small details matter too. Divider gaps can let a narrow lens slip downward, while an exposed zipper pull can rub against a camera screen. Pack the cube, carry it around the room for five minutes, then inspect every contact point. A faint rub mark today can become a worn finish after months of commuting.
Make One Cube Work for Travel, Street Shoots, and Daily Life
A single camera cube becomes far more useful when you treat it as a transferable shooting kit rather than permanent storage. Keep the core layout consistent, move the complete insert between suitable bags, and change only one or two dividers when a job calls for different equipment. Familiarity makes access faster.
For air or rail travel, place the cube inside the bag that stays with you. Keep the camera body, lenses, batteries, and memory cards together, while allowing easy access to anything you may need to remove. Check the carrier’s current baggage limits before leaving, since bag dimensions and battery rules can differ.
On a city walk, you can move the same cube into a plain backpack that blends with coats, lunch bags, and laptops. That discretion is useful near busy stations where a bag covered with photography logos may draw attention. Pair a compact cube with one camera and one extra lens, and the rest of the backpack remains open for water, a light layer, and snacks.
Daily life is where modular carry earns its place. Suppose you commute with a laptop during the week and photograph a family gathering on Saturday. Lift the cube from your closet, place it in the backpack, and test that it cannot press against the laptop. After the shoot, remove the entire unit instead of searching through six pockets for cards and batteries.
- Use a grab handle to transfer the cube while keeping it level.
- Keep a small inventory card under the lid so missing equipment stands out.
- Choose a bright interior when possible; black lens caps disappear against black lining.
- Air the cube after wet or dusty work before closing it for storage.
Consistency matters more than squeezing in one extra lens. When your camera always sits grip-up and your spare card always occupies the same pocket, your hands learn the layout like a pianist learns a keyboard. You spend less time rummaging and more time watching the light.
Keep the Cube Clean Without Damaging Its Padding
Clean a camera cube with gentle suction, a soft brush, and a damp cloth, then let it dry fully while open. Avoid soaking the foam unless the manufacturer explicitly allows washing, because trapped moisture, strong detergent, and high heat can weaken adhesives or leave residue near your equipment.
Start by removing every divider and opening all pockets. Turn the empty cube upside down and shake it gently outdoors, then use a clean brush to loosen sand from seams and hook-and-loop strips. Fine grit behaves like sandpaper in slow motion, especially when it sits between a lens barrel and a divider.
For an ordinary mark, wipe the fabric with lukewarm water on a pale microfiber cloth. If needed, add one small drop of mild dish soap to the cloth rather than pouring soap into the cube. Test a hidden corner first, since coatings, dyes, and laminated fabrics react differently.
A beach session offers a good example. Even if you never put the bag on the sand, wind can carry salt and grit into the zipper track. Brush the cube outside, wipe the zipper teeth, and let the open insert dry overnight in moving air away from a radiator or strong sun.
Check the cube during cleaning rather than waiting for a failure in the field. Look for flattened foam, torn divider tabs, loose stitching, or a zipper that catches at one point. A divider that no longer grips the wall should be replaced or repositioned before it allows a heavy lens to lean into another piece of equipment.
Frequently Asked Questions
Can a camera cube fit inside any backpack?
A camera cube fits most backpacks only when its outside dimensions and loaded shape pass through the opening. Measure the narrowest part of the zipper opening as well as the bag’s internal width, depth, and height. A cube that technically fits but bulges against the zipper is too large for safe, easy access.
Should the camera face up or down inside the cube?
For quick access, place the camera grip-up so you can lift the body securely without pulling on the lens. If a large lens remains attached, support its barrel with a divider so its weight does not hang from the mount. Avoid resting the camera’s screen or controls against a hard accessory.
Is a camera cube safe for air travel?
A camera cube works well inside a carry-on bag because it keeps small equipment organized and padded. It is a poor substitute for a rigid case in checked baggage, where crushing and hard drops can occur. Keep cameras, lenses, memory cards, and permitted spare batteries with you, and check the carrier’s current baggage and battery rules.
Can I leave my camera stored in the cube at home?
You can use a clean, dry cube for short-term storage, but open it after damp, cold, or dusty shoots. Remove wet cloths, inspect the equipment, and let both the cube and camera reach a dry, stable condition before closing them. For longer storage, manage humidity and follow the camera maker’s storage guidance.
How much empty space should remain inside a camera cube?
Leave enough space for the padding to touch the equipment lightly without pressing buttons or forcing the lid upward. The gear should not move when you perform a gentle tilt test, yet you should still remove each item without tugging. Large empty gaps invite movement, while an overfilled cube transfers pressure directly into the gear.
Conclusion
The smartest way to use a camera cube is to pack for the photographs you actually make. Choose a snug insert, support the heavy gear, stop hard objects from touching, and place the cube inside a bag that carries comfortably without letting it slide. That simple system gives you flexibility without pretending soft padding can defeat every impact.
Before your next shoot, place your usual camera and two most-used lenses on a table. Measure them, map their positions, and test the loaded cube with a gentle tilt. When everything stays quiet and your hand finds the camera grip at once, the bag disappears from your thoughts—and the light gets your full attention.