
TL;DR

Get audio and creator gear delivered free with Prime
- Fast, free delivery on millions of items
- Prime Video, Amazon Music and more included
- Member-only deals all year
Long exposure photography uses a slow shutter speed, usually from a fraction of a second to several minutes, to record motion as blur, flowing texture, or light trails. Start with a tripod, ISO 100, manual focus, and a 2- to 10-second exposure, then adjust the shutter speed according to the movement and available light.
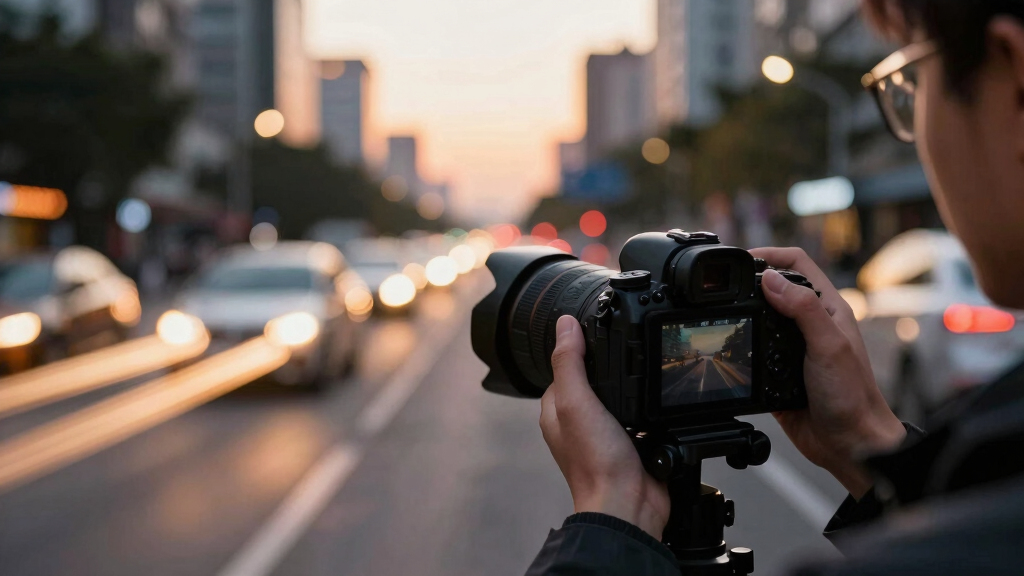
A camera can record an entire stretch of time inside one frame. With a 10-second exposure, ordinary traffic becomes glowing ribbons, choppy water turns to silver mist, and a moving crowd fades into a quiet blur. It feels like a small piece of magic, but the technique rests on a few settings you can learn in one evening.
This guide shows you how to choose a subject, steady your camera, focus in dim light, and balance shutter speed, aperture, and ISO. You will also learn when an ND filter helps, what common mistakes look like, and how to fix them while you are still standing beside the tripod.
I approach long exposures as a craft exercise, not a gear contest. A basic camera, a stable support, and a road with moving headlights can teach you more than a bag full of accessories used without a plan. Begin with one moving element, keep the rest of the scene still, and let time become the brush inside your camera.
Start at ISO 100, f/8, and a 2-second shutter speed, then change only one setting after reviewing each frame.
Use a tripod or solid surface, a two-second timer, and manual focus so deliberate subject movement remains separate from camera shake.
Try 1/2 to 2 seconds for textured water, 10 to 30 seconds for vehicle trails, and longer exposures for stretched clouds or star paths.
Add an ND filter when daylight prevents you from reaching the slow shutter speed needed for the effect.
Judge an exposure by the shape and feeling of its movement, not by how many seconds the shutter stayed open.
Long Exposure Photography for Beginners
A camera can record an entire stretch of time inside one frame. Slow the shutter and traffic becomes glowing ribbons, choppy water turns to silver mist, and moving crowds dissolve around sharp, stationary architecture.
Movement becomes the brush inside your camera.
A long exposure is any exposure long enough for motion to become visible. The correct duration is determined by the subject—not by an arbitrary number of seconds.
Texture to silk
Use roughly ½ to 2 seconds to retain flowing detail. Extend the exposure when you want water to become softer and more atmospheric.
Lines of light
Try 10 to 30 seconds. Several vehicles can cross the frame while buildings, signs, and bridges remain sharply defined.
Stretched atmosphere
Longer exposures turn broken clouds into directional streaks. A fixed building or tree gives that movement visual structure.
People become traces
A slow shutter can soften busy pedestrians or make them nearly disappear, leaving a quiet architectural scene behind.
Stars draw paths
Exposure times from minutes to hours reveal celestial movement. Dark skies reduce light pollution and preserve contrast.
Test the kitchen tap
Compare 1/100 second with ½ second. One freezes droplets; the other transforms the stream into a smooth glass cord.
Build the frame first. Then change one control at a time.
Beginning from the same baseline makes every adjustment easier to understand and every mistake easier to identify.
Stabilize & compose
Mount the camera and include a sharp anchor such as a rock, railing, tree, or building.
Set ISO 100
Protect bright highlights and keep digital noise under control.
Choose f/8
Start with useful depth of field and balanced optical performance.
Focus manually
Magnify a bright edge, focus carefully, then prevent the lens from searching again.
Try 2 seconds
Review motion, fixed-object sharpness, highlights, and the histogram before adjusting.
Match shutter duration to the movement you want.
The bars show relative exposure length, not rigid rules. Speed, distance, light level, focal length, and creative intent all change the final result.
You need control—not a bag full of accessories.
A basic camera, stable support, and timer can teach the entire technique. Add specialist equipment only when a real shooting problem asks for it.
| Tool | What it solves | Beginner priority | Practical alternative |
|---|---|---|---|
| Camera or smartphone | Provides manual, shutter-priority, or computational long-exposure control. | ✓ Essential | Any device with exposure control or a built-in long-exposure mode. |
| Stable tripod | Separates intentional subject movement from unwanted camera movement. | ✓ High | Beanbag, folded jacket, wall, railing, or another solid surface. |
| Timer or remote | Allows vibration from pressing the shutter to settle before exposure. | ✓ High | Use the camera’s two-second self-timer. |
| ND filter | Reduces incoming daylight so slower shutter speeds do not overexpose. | ~ Situational | Shoot at blue hour, night, or in deep shade. |
| Image stabilization | Helps handheld work, but may cause drift when the camera is locked down. | ~ Check manual | Disable it on a tripod if your camera recommends doing so. |
| Expensive accessories | Add convenience but do not replace planning, stability, or deliberate settings. | ✗ Not required | Practice with one moving subject and one fixed anchor. |
Every strong long exposure connects intention to review.
Follow the visual logic from subject choice to the finished feeling. The number of seconds matters only when it supports that chain.
Common mistakes have visible, fixable causes.
Everything looks soft
Check tripod movement, wind, center-column height, timer use, and whether the surface beneath you is vibrating.
The camera keeps hunting
Focus on a bright edge, magnify the view, then switch to manual focus. Recheck after zooming or moving the tripod.
Highlights are blown out
Shorten the exposure, close the aperture, lower ISO, wait for dimmer light, or add an ND filter during daylight.
Motion looks broken
Lengthen the shutter time so moving water, headlights, or clouds travel farther through the frame.
The image is noisy
Use ISO 100, shoot RAW, avoid severe underexposure, and apply measured noise reduction during processing.
Thirty seconds is not enough
Use Bulb mode with a locking remote or compatible camera control for exposures measured in minutes.
Night safety belongs in the setup.
Carry a light, tell someone your location, stay clear of traffic, and watch for slippery banks, unstable rocks, tides, and steep drops.
Judge movement, not the stopwatch.
The best exposure is the one that gives motion the right shape and feeling while the stationary parts remain deliberate and sharp.
See What a Slow Shutter Adds to an Ordinary Scene
Long exposure photography is a technique that records a scene for long enough to show movement changing over time. It involves using slow shutter speeds to capture movement over several moments, resulting in images with flowing water, blurred people, star paths, or bright vehicle trails instead of frozen action.[1]
A practical definition is simple: a long exposure is any exposure long enough for movement to become visible in the finished frame. That could mean 1/4 second for a cyclist passing close to you, 5 seconds for waves sliding around rocks, or several minutes for clouds drifting over a building. The subject decides what counts as long.
Think of the shutter as a bucket collecting light. A fast exposure catches a few drops; a slow one catches a steady stream. The camera also collects every change that happens while that bucket is open, which explains why moving headlights stretch like molten red wire while a concrete bridge stays clean and sharp.
The technique creates a kind of organized chaos. You control the framing and settings, but moving water, traffic, clouds, and people draw their own marks. I often compose around a fixed object, such as a dark rock in a waterfall or a lamppost beside a busy road, because that sharp anchor gives the flowing movement something solid to push against.
Long exposure photography does not merely photograph a moving subject. It photographs the path that subject takes through time.
For your first test, photograph a kitchen tap running into a sink at 1/100 second and again at 1/2 second. The first frame shows droplets; the second turns the stream into a smooth glass cord. That small experiment reveals the central creative choice: deciding whether motion should look crisp, streaked, silky, or nearly invisible.
As an affiliate, we earn on qualifying purchases.
Build a Stable Kit Without Buying Everything at Once
Your first long-exposure kit needs only a camera with manual controls, a stable support, and a way to release the shutter without shaking it. A DSLR, mirrorless camera, or capable smartphone can work. Add an ND filter only when daylight is too bright for the exposure time you want.[1]
The tripod does more than hold the camera upright. It separates the movement you want from the movement you do not want. During a 15-second city exposure, cars should streak through the frame, but windows, road signs, and buildings must remain as still as painted scenery.
- Camera or smartphone: Use manual exposure, shutter-priority mode, or a built-in long-exposure feature.
- Tripod: Extend the thick upper leg sections before the thin lower ones, and avoid raising the center column in wind.
- Two-second timer or remote: Either option lets vibration from your finger fade before the exposure begins.
- Neutral density filter: This dark glass reduces incoming light so you can use slower shutter speeds during the day.
- Small flashlight: Use it to check controls and find your way safely without draining your phone.
A beanbag, folded jacket, or stone wall can replace a tripod when you are starting. Place the camera securely, frame the scene, and use the timer. I have made perfectly usable night exposures from a camera resting on a bridge parapet, though a proper tripod gives you far better control over height and composition.
Smartphones have made the technique more approachable. Some phones combine several short frames to imitate a longer exposure, while others offer direct manual control through built-in modes or apps.[2] Computational processing can reduce noise and align minor hand movement, but a firm support still produces cleaner edges and more repeatable results.
Keep night safety part of your setup. Stay clear of roads, slippery banks, incoming tides, and unstable rocks; carry a light and tell someone where you are shooting in a remote area. No photograph is worth stepping backward into cold black water while watching the screen instead of your feet.
ND filter for long exposure photography
As an affiliate, we earn on qualifying purchases.
As an affiliate, we earn on qualifying purchases.
Set Your Camera in Five Calm, Repeatable Moves
Long exposure photography becomes easier when you begin with a repeatable baseline: mount the camera, select ISO 100, choose a middle aperture, focus carefully, and test a short exposure. Change one control after reviewing the frame. This method keeps mistakes visible instead of burying them under several simultaneous adjustments.
- Compose on the tripod. Include a sharp, unmoving anchor such as a rock, railing, tree, or building.
- Set ISO 100. A low ISO protects highlight detail and usually keeps digital noise under control.
- Choose f/8 as a starting aperture. This often provides useful depth of field without forcing the lens to its smallest opening.
- Focus, then switch to manual focus. Magnify a bright edge on the rear screen and stop the camera from searching again.
- Try 2 seconds and review. Check the histogram, bright highlights, sharp fixed objects, and the shape of the movement.
Suppose you are photographing a fountain at blue hour. At ISO 100, f/8, and 2 seconds, the water may form pale ribbons while the stone basin stays crisp. If the ribbons look too broken, move to 4 seconds and close the aperture or reduce the light with an ND filter to keep the brightness under control.
Manual focus matters because autofocus can hunt in low light, sliding back and forth with a faint mechanical whisper. Focus on an illuminated window, street sign, or bright edge near your subject, then switch the lens to manual focus. Check the focus again if you zoom, move the tripod, or accidentally touch the focus ring.
Many cameras limit timed shutter settings to 30 seconds. Bulb mode keeps the shutter open for longer exposures, usually through a locking remote, cable release, or camera app. Several-minute exposures can produce smoother clouds and longer star trails, but they also increase the chance of blown highlights, battery drain, sensor heat, and interruptions from passing lights.
Use the histogram as a map, not a scorecard. A night photograph will naturally contain deep shadows, while streetlamps may create small bright peaks. Watch for a large pile-up against the right edge, which signals lost highlight detail, and inspect important fixed objects at high magnification for camera shake.
As an affiliate, we earn on qualifying purchases.
Choose a Starting Shutter Speed That Matches the Motion
Long exposure photography has no single correct shutter speed because water, traffic, clouds, and people move at different rates. Use 1/2 to 2 seconds for visible texture, 5 to 15 seconds for smoother motion, and 10 to 30 seconds for continuous traffic trails. Treat these ranges as starting points, not rigid rules.[1]
| Subject | Starting shutter speed | Likely appearance | Practical example |
|---|---|---|---|
| Waterfall | 1/2 to 2 seconds | Soft water with some texture | A woodland cascade after light rain |
| Ocean waves | 2 to 10 seconds | Misty water around sharp rocks | Blue-hour waves moving between boulders |
| Vehicle lights | 10 to 30 seconds | Long, connected red and white trails | Traffic passing beneath a pedestrian bridge |
| Walking people | 1 to 5 seconds | Ghostlike figures or partial disappearance | Commuters crossing a station hall |
| Moving clouds | 30 seconds to several minutes | Stretched bands across the sky | Fast clouds behind a fixed tower |
| Stars | Several seconds to several minutes | Points at shorter times, trails at longer times | A dark rural sky away from city glow |
Speed and distance change the result. A nearby bus crossing the frame covers more visual space than a distant car, so it creates a longer streak during the same exposure. Fast water rushing past your boots can turn silky at 1/2 second, while a slow lake may need 30 seconds before its surface looks smooth.
For traffic, I usually wait until several vehicles approach, then open the shutter before the first car enters the composition. A 15-second exposure can connect separate headlights into one bright line, like someone pulled glowing thread through the street. Sparse traffic may need several attempts because an empty road records no trails, regardless of exposure length.
Nighttime and low-light conditions make slow exposures easier because less light reaches the sensor.[1] In bright daylight, even ISO 100 and f/11 may produce a shutter speed that is too fast for smooth water. An ND filter solves that problem by cutting light without forcing you to use a tiny aperture that can soften fine detail.
One stop means a doubling or halving of light. If your correct exposure is 1 second and you add a 3-stop ND filter, an equivalent exposure becomes 8 seconds: 1, 2, 4, then 8. This small piece of arithmetic turns filter choice into a predictable craft decision.
remote shutter release for cameras
As an affiliate, we earn on qualifying purchases.
As an affiliate, we earn on qualifying purchases.
Fix Soft, Bright, or Noisy Frames Before You Pack Up
Most failed long exposures come from camera movement, missed focus, excess light, or an ISO setting that is higher than necessary. Diagnose the visible symptom before changing anything. Sharp buildings with blurred water indicate success; blurred buildings and blurred water point to tripod movement, vibration, or incorrect focus.
If every fixed object looks soft in the same direction, inspect the tripod first. Wind can tug a camera strap like a small sail, wooden floors can vibrate under footsteps, and a raised center column can wobble. Shorten the legs, remove or secure the strap, and use the two-second timer before repeating the frame.
If the photograph looks almost white, you have collected too much light. Shorten the exposure, lower the ISO, close the aperture, or use a stronger ND filter. During a daytime waterfall shoot, changing from 8 seconds to 2 seconds removes two stops of light while preserving plenty of visible flow.
If autofocus refuses to settle, aim at a bright edge near the desired focus distance. Focus once, switch to manual focus, and leave the ring alone. A piece of removable tape can stop a loose focus ring from creeping during a sequence, especially when the camera points steeply upward for stars.
Noise often appears as colored grit in dark skies and shadowy walls. Use ISO 100 or 200 when the scene allows, shoot RAW, and avoid brightening a severely underexposed file by several stops later. Long-exposure noise reduction can subtract hot pixels through a second dark frame, but it may make the camera unavailable for as long as the original exposure.
Check for light leaks and stray beams during multi-minute exposures. A headlamp sweeping across the lens can leave a pale flare, while light entering an optical viewfinder may affect some DSLR exposures. Shade the lens from side light, cover the viewfinder when your camera manual recommends it, and inspect the frame for unexpected streaks before making ten more copies of the same mistake.
Change one variable, make another frame, and compare. Randomly turning three dials turns a simple exposure problem into a guessing game.
Turn One Evening Walk Into a Complete Practice Session
A productive first session needs one safe location, three shutter speeds, and a subject with steady movement. A fountain beside an illuminated building works beautifully because it offers flowing water, fixed architectural detail, and enough light for focusing. You can learn the technique in 30 focused minutes without chasing several locations.
Arrive during blue hour, when the sky holds a cool cobalt glow and streetlights have begun to warm the pavement. Frame the fountain with a doorway or stone edge as a sharp anchor. Start at ISO 100, f/8, and 1 second, then make exposures at 2, 4, and 8 seconds while keeping the overall brightness consistent.
- Make a sharp reference frame at a faster shutter speed so you know what the scene looks like without deliberate blur.
- Photograph the same composition at 1, 2, 4, and 8 seconds.
- Review the water shape and check the building at high magnification after every frame.
- Change your composition once, placing the fixed anchor on the opposite side of the frame.
- Choose your favorite exposure by the character of the movement, not by which frame used the longest time.
This exercise teaches an easy-to-miss lesson: longer is not always better. At 1 second, water may retain lively strands and weight; at 8 seconds, it may become a blank white patch. The best frame often sits between literal detail and dreamlike blur, a bittersweet balance between fact and feeling.
Once you feel comfortable, repeat the exercise with traffic. Stand on a broad pavement or protected bridge, keep well away from moving vehicles, and expose for 10, 20, and 30 seconds. Notice how the number and speed of cars matter as much as the camera settings.
Do not judge the session by the number of finished photographs. Your real result is a set of visual notes showing what each shutter speed does. Save the files side by side and record the settings; those comparisons become a personal field guide you can use beside the next waterfall, harbor, or rainy street.
Polish the Mood Without Making the Photograph Look Plastic
Long-exposure editing should protect the scene’s natural light and texture while correcting color, contrast, and noise. Begin with the RAW file, recover bright highlights gently, set a believable white balance, and apply modest noise reduction. The movement should hold attention; the processing should not shout over it.
City lights often create mixed color: amber lamps, blue signs, green reflections, and red brake trails can all share one frame. Choose a white balance that makes neutral surfaces believable, then let some color contrast remain. Removing every color cast can drain the electric atmosphere from a wet street at night.
Open the shadows carefully. Lifting dark areas too far reveals mottled noise and can turn a night scene into a flat gray afternoon. I prefer to keep some areas genuinely dark while guiding attention toward the light trails, reflective pavement, or pale flow of water.
- Highlights: Reduce them until lamps retain shape, but accept that tiny light sources may remain pure white.
- Contrast: Add enough separation to keep misty water from blending into surrounding stone.
- Noise reduction: Use a light hand so brick, leaves, and stars do not melt into waxy patches.
- Sharpening: Apply it to fixed detail rather than trying to sharpen deliberate motion blur.
- Spot cleanup: Remove obvious sensor dust, especially from smooth skies and pale water.
Computational photography and AI-based processing can align frames, reduce noise, and improve low-light clarity on newer devices.[2] Those tools are helpful when you shoot handheld or with a phone, but they can create halos, smeared leaves, or broken light trails when movement changes between frames. Inspect edges at 100 percent before accepting the automated result.
Imagine a harbor exposure with blue water, orange lamps, and boats rocking during a 20-second exposure. The boats will never become tack-sharp because they moved, and aggressive sharpening only builds crunchy outlines around them. Let the boats remain soft; their gentle blur tells the viewer that the water was breathing beneath the camera.
Frequently Asked Questions
Can I take long exposure photographs without an ND filter?
Yes. You can make long exposures without an ND filter at night, during blue hour, inside dim buildings, or anywhere the available light is low. Start with ISO 100, a small-to-middle aperture, and a 2- to 10-second exposure.
Bright daylight is harder because the sensor receives too much light before movement becomes smooth. In that situation, an ND filter lets you lengthen the shutter speed without producing a washed-out frame.
What shutter speed should a beginner try first?
Start with 2 seconds for flowing water or walking people and 10 to 15 seconds for evening traffic. These times show obvious movement while remaining short enough for quick adjustments.
Make one frame on either side of your starting point. Comparing 1, 2, and 4 seconds reveals more than searching for a universal best shutter speed.
Why is my whole long exposure photograph blurry?
If fixed objects are blurry, the camera moved or the focus missed. Tighten the tripod, lower the center column, secure the strap, switch off any setting your camera manual says is unsuitable for tripod use, and trigger the exposure with a two-second timer.
Magnify a bright fixed edge, focus carefully, and switch to manual focus. If buildings look sharp while water or people look blurred, the technique is working as intended.
Can I shoot long exposures with a smartphone?
Yes. Many smartphones offer a built-in night or long-exposure mode, and some apps provide manual shutter control. Other phones combine several short frames through computational photography to create a similar result.[2]
Place the phone on a tripod or firm surface and use a timer. Even strong stabilization benefits from a steady starting position, especially when the scene contains fine lights or straight architectural edges.
How do I focus when the scene is very dark?
Find a bright edge near the subject, such as a streetlamp, lit window, moonlit ridge, or distant sign. Use autofocus or a magnified live view to lock focus, then switch to manual focus so the lens does not hunt when you press the shutter.
If nothing is bright enough, briefly illuminate a nearby subject with a flashlight while focusing, then turn the light off before the exposure. Recheck focus whenever you move the tripod or change the focal length.
How can I reduce noise in a long exposure?
Use a low ISO, expose the RAW file brightly enough without clipping key highlights, and avoid lifting very dark shadows heavily during editing. Several-minute exposures may show more hot pixels or color noise as the sensor warms.
Your camera’s long-exposure noise reduction can make a second dark frame and subtract some fixed-pattern noise. It also doubles the waiting time, so a five-minute exposure may keep the camera busy for roughly another five minutes.
Conclusion
Your next step is simple: take one camera to a safe location with moving water or traffic and photograph the same composition at three different shutter speeds. Keep the ISO low, steady the camera, focus once, and compare how each exposure draws time. That direct comparison will teach you more than memorizing a supposedly perfect setting.
Remember that the shutter is not only a gate controlling brightness. In long exposure photography, it becomes a paintbrush made of time. Give it a steady frame, let the scene move, and watch an ordinary evening leave glowing marks across your photograph.
Fall Picks
fall essentials
As an affiliate, we earn on qualifying purchases.