TL;DR

Get audio and creator gear delivered free with Prime
- Fast, free delivery on millions of items
- Prime Video, Amazon Music and more included
- Member-only deals all year
Panoramic prints work best when you plan the physical display before taking the first frame. Shoot vertical RAW frames with 25–40% overlap, lock exposure, focus, and white balance, then choose a projection, resolution, paper, and frame that suit the scene and its viewing distance.
A wide photograph can hold an entire coastline, yet one crooked horizon or duplicated wave can stop your eye cold. The difference between a merely long file and a convincing panoramic print lies in controlled perspective, consistent capture, and a composition that carries your gaze from one end to the other.
You will learn how to choose between cropping and stitching, capture frames that merge cleanly, calculate print size, select paper, and avoid expensive presentation mistakes. I approach every panorama from the wall backward because a file meant for a 60-inch display demands different choices from one destined for a small album spread.
I have watched beautiful wide scenes lose their power through thin foregrounds, stretched corners, glossy reflections, and frames chosen too late. You can avoid those problems with a few deliberate habits, including 25–40% frame overlap, locked camera settings, a sensible focal length, and a full-scale proof strip before the final print. The camera records the pieces, but your planning makes them feel like one place.
Plan the wall size, aspect ratio, paper width, and framing method before choosing a capture technique.
Shoot horizontal panoramas as vertical RAW frames with 25–40% overlap and locked exposure, focus, white balance, aperture, ISO, and focal length.
Divide pixel width by intended ppi to estimate print width, then adjust that choice for subject detail and viewing distance.
Inspect every stitch for doubled movement, broken lines, soft frames, color bands, edge stretching, and projection errors.
Print a final-scale test strip before ordering or producing a large panorama.
Panoramic Prints: Shooting and Printing Wide
A convincing panorama is planned from the wall backward. Define the physical display, capture consistent vertical RAW frames, select a believable projection, and proof the image at final scale before committing to paper and framing.
Let the final print decide the capture
A 24-inch frame, a 60-inch hallway piece, and a multi-panel installation demand different files. Choose the wall size, aspect ratio, paper width, and framing method before deciding how many exposures to make.
Single-frame crop
Excellent for movement and modest output. Cropping is simple and stitch-free, but every removed strip sacrifices printable detail.
Vertical-frame stitch
Portrait-orientation RAW frames preserve sky and foreground, improve resolution, and leave room for projection corrections.
Panoramic mode
Useful when speed matters, although automated capture can limit RAW flexibility, projection control, and final file quality.
Multi-row stitch
Combines several rows for extremely large prints. It rewards precise leveling, disciplined overlap, and a panoramic head.
Five habits for clean stitches
Every source frame must behave like part of one exposure. Work steadily across the scene, keep the camera level, and capture more material than the composition appears to need.
Level the support
Confirm that the camera will not climb or dip as it rotates across the scene.
Lock exposure
Meter the brightest important area, then fix shutter speed, aperture, and ISO.
Fix color and focus
Set white balance, focus once, and switch the lens to manual focus.
Overlap generously
Use 25–40% overlap, with more coverage across low-detail or moving areas.
Shoot beyond the crop
Add an extra frame at both ends and leave spare height for straightening.
Choose a believable projection
Stitching software must flatten a curved field of view into a rectangle. Inspect the automatic result: every projection makes a different compromise between straight lines, edge scale, and overall geometry.
| Projection | Best use | Straight lines | Edge behavior | Watch for |
|---|---|---|---|---|
| Rectilinear | Architecture and moderately wide scenes | ✓ Preserved | ~ Stretches | Broad-looking subjects near extreme edges |
| Cylindrical | Long landscapes and horizontal sweeps | ~ Mixed | ✓ Calmer | Curved horizontal lines away from center |
| Spherical | Multi-row, extreme-angle, and 360° work | ~ Curved | ✓ Broad coverage | Unnatural geometry in a flat presentation |
Calculate size, then judge the experience
Pixel density is a planning tool, not the only quality test. Fine texture and close viewing favor higher ppi; graphic scenes and distant viewing can tolerate less.
One 12K file, three output choices
Relative width shown below. Final suitability depends on subject detail and viewing distance.
Quiet and forgiving
Reduces glare and supports soft skies, restrained color, and bright rooms.
Balanced versatility
Adds contrast and color depth without the strongest glossy reflections.
Maximum visual punch
Delivers deep blacks and saturation, but reflections can interrupt a wide image.
The panorama quality chain
Every decision passes consequences forward. A strong print is the result of an unbroken chain from physical intent to final presentation.
Make the Final Print Decide How You Shoot
Panoramic prints succeed when their planned dimensions guide the capture method, frame orientation, resolution, and composition. Decide whether the photograph will become a 24-inch framed print, a long hallway piece, or a multi-panel installation before you choose between cropping one frame and stitching twenty.
Panoramic photography is less about making an unusually long image than controlling perspective and detail across a wide field of view. A single-frame crop works quickly and avoids stitching errors, but every strip removed from the top and bottom also removes pixels that could have carried fine grass, stone, or cloud texture into the print.
For example, imagine photographing a quiet lake at dawn with a 45-megapixel camera. A narrow crop may produce enough resolution for a modest print, while six overlapping vertical frames can create a file wide enough to show individual reeds across a much larger wall piece. The stitched version takes more work, but it gives the printer far more genuine detail.
I usually rotate the camera vertically for a horizontal stitched panorama. Portrait-orientation frames preserve more sky and foreground, leave room for straightening, and reduce the need for a severe crop after projection changes. That extra height has saved several of my compositions when stitching software trimmed irregular corners more aggressively than expected.
The choice depends on movement as well. A single frame may beat a high-resolution stitch when waves are crashing, crowds are flowing, or sunlight is racing across a valley. The next challenge is making multiple frames behave like one exposure rather than a row of loosely related photographs.
As an affiliate, we earn on qualifying purchases.
Get Clean Stitches With Five Field Habits
Panoramic prints stitch cleanly when every source frame shares the same exposure, color, focus, focal length, and camera position. Use 25–40% overlap, work methodically across the scene, and capture more space around your intended edges than the finished composition appears to need.
- Level the support: straighten the tripod and check that the camera will not climb or dip as it rotates.
- Set exposure manually: meter the brightest important area and keep aperture, shutter speed, and ISO fixed.
- Fix color and focus: choose a set white balance, focus once, and switch the lens to manual focus.
- Overlap each frame: use about 25–40%, increasing it over fog, water, blank sky, or repeating windows.
- Shoot beyond the crop: add a full frame at both ends and leave spare space above and below.
On a windy cliff, for example, I might photograph seven planned frames but take nine. The extra frames give me cleaner choices if one contains a vibrating tripod, a bird cut in half, or grass bent into a different shape. I also shoot the sequence briskly so the light does not paint visible bright and dark bands across the final sky.
A moderate focal length often makes this process easier than an ultra-wide lens. A 35mm to 85mm view on a full-frame camera usually brings calmer edges, more even detail, and natural-looking spatial relationships. Several frames from a 50mm lens can cover a broad scene without pulling the corners like warm taffy.
Foreground objects change the rules. A tripod socket rotates beneath the camera body, but nearby fence posts may shift against distant mountains as you turn. A panoramic head rotates around the lens entrance pupil, reducing that parallax and making it especially useful inside rooms, between buildings, or beside close rocks.
Field warning: more pixels cannot rescue a soft frame, shifting focus, or a foreground object that jumps between exposures.
As an affiliate, we earn on qualifying purchases.
Choose a Projection That Keeps the Scene Believable
Panoramic prints look believable when the projection matches the scene’s width, geometry, and intended presentation. Use rectilinear projection for straight architectural lines, cylindrical projection for broad horizontal landscapes, and spherical projection for extreme multi-row or 360-degree coverage.
Why can a straight horizon suddenly bow like a drawn bow? Stitching software must flatten a curved field of view into a rectangle, and each projection negotiates that problem differently. The projection quietly tugs at lines, corners, and scale, so an automatic choice deserves inspection rather than blind acceptance.
| Projection | Works well for | Watch for |
|---|---|---|
| Rectilinear | Architecture and moderately wide scenes where straight lines must remain straight | Strong stretching near the edges of very wide views |
| Cylindrical | Broad landscapes and long horizontal sweeps | Curved horizontal lines away from the center |
| Spherical | Multi-row, extreme-angle, and 360-degree work | Curved geometry when displayed as a flat print |
Consider a row of seaside cottages photographed from across the harbor. Rectilinear projection may keep every wall upright but stretch the buildings at both ends until they look oddly broad. Cylindrical projection can preserve a more natural sense of scale, though the waterfront may need careful correction to keep its curve from feeling accidental.
After merging, I inspect the file at high magnification and then fit it to the screen. Up close, I look for broken railings, repeated people, doubled branches, soft frames, color bands, and gaps. From farther back, I judge whether the composition still has a clear entry point, visual rhythm, and somewhere for the eye to settle.
Automatic blending often handles rock, soil, and distant clouds beautifully, but water and movement can confuse it. Layer masks let you select one clean version of a wave, car, or walking figure. The software can build the stage; you still have to check whether every actor ended up with the right number of limbs.
As an affiliate, we earn on qualifying purchases.
Know Exactly How Large Your File Can Print
Panoramic prints can be sized by dividing pixel width by the intended pixels per inch, then judging the result against subject detail and viewing distance. A 12,000-pixel-wide file produces a 50-inch print at 240 ppi or a 40-inch print at 300 ppi before resampling [1].
That calculation gives you a sound starting point, not an iron gate. According to PhotoMocha’s print-preparation guidance [2], 240–300 ppi suits close-viewed fine-art prints, while large wall displays can look excellent at 150–240 ppi because viewers naturally step back. A detailed woodland rewards more resolution than a soft, misty seascape.
| File width | At 300 ppi | At 240 ppi | At 180 ppi |
|---|---|---|---|
| 8,000 pixels | 26.7 inches | 33.3 inches | 44.4 inches |
| 12,000 pixels | 40 inches | 50 inches | 66.7 inches |
| 18,000 pixels | 60 inches | 75 inches | 100 inches |
Suppose your 12,000-pixel file will hang above a sofa and viewers will usually stand six feet away. Printing at 50 inches and 240 ppi gives you strong detail without enlargement. Stretching it to 70 inches drops the native resolution to about 171 ppi, which may still work if focus is clean, noise is low, and the scene does not depend on tiny texture.
Modern enlargement tools can smooth jagged edges and make a moderately undersized file look more polished. They cannot recreate real pine needles, brick grain, or lettering that the camera never resolved. Clean capture beats synthetic detail, especially when a viewer can walk close enough to examine the paper.
Aspect ratio also affects usable size. A 3:1 crop may fit a standard panoramic frame, while an unusual 4.7:1 composition may demand custom glazing, mounting, and shipping. The strongest crop should lead, but knowing the physical limits early can spare you a beautiful file that becomes awkward to display.
As an affiliate, we earn on qualifying purchases.
Match the Paper and Frame to the Room
Panoramic prints feel finished when the paper surface, mounting method, frame, and room lighting support the subject rather than fight it. Choose lustre or baryta-style paper for crisp detail and rich blacks, matte paper for quiet texture, and reflective surfaces only where glare can be controlled.
What good is a glowing mountain sunset if the print mostly reflects the window opposite it? Screens shine light toward you, while paper depends on light bouncing from its surface. Prints commonly appear darker and less punchy than an unadjusted display, and a long reflective print can catch several lamps at once.
I once prepared a wide, low-key forest image that looked deep and luminous on screen. On a textured matte proof, the black tree trunks softened into charcoal and the smallest wet leaves lost their sparkle. A baryta-style surface restored the deep black separation and fine detail, though it also required more careful placement to control reflections.
- Glossy and lustre: strong detail, contrast, and color, with visible reflections under direct light.
- Baryta-style paper: rich blacks and a traditional photographic feel suited to exhibition work.
- Matte fine-art paper: soft texture and low glare, with gentler blacks and saturation.
- Canvas: lightweight at large sizes, though its weave can hide fine detail.
- Metal or acrylic: bold apparent contrast and a modern finish, with glare and handling demands.
Presentation affects the crop too. Custom frames, glazing, mounting boards, and shipping may cost more than the print, particularly when one side becomes very long. A diptych or triptych can simplify transport, but keep faces, trees, doorways, and strong horizon features away from the panel gaps.
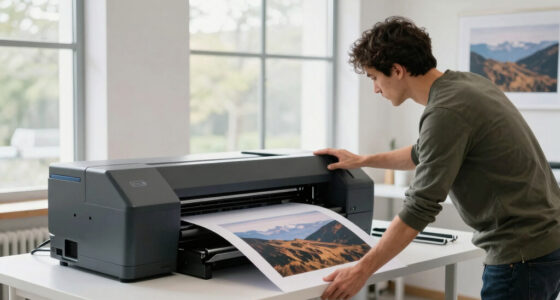
Before final sizing, check the printer’s roll or sheet width, required margins, printable length, borderless support, and file limits. A roll-fed printer may accept flexible lengths while holding one fixed width. The room, printer, and frame all place boundaries around the image, and those boundaries belong in the creative plan.
Use One Proof to Prevent a Very Large Mistake
Panoramic prints should be proofed at their final reproduction scale before you commit to the full sheet. Print a small full-image proof for overall color, then make a narrow 100% crop containing shadows, highlights, fine detail, and a difficult blend to judge sharpness and tone.
A dependable workflow starts with a calibrated and profiled monitor, followed by the printer or lab’s ICC profile and a soft proof. The profile previews how a specific ink-and-paper combination handles saturated color and dark tones. It will not reproduce the room’s lighting perfectly, but it can reveal clipped blues, muddy shadows, and colors the paper cannot hold.
For a 60-inch city panorama, I might print a 10-inch-wide section containing streetlights, brickwork, a dark doorway, and pale evening sky. That strip quickly shows whether output sharpening makes window frames brittle, whether shadow detail survives, and whether the sky carries an unwanted color cast. One small piece of paper can prevent wasting an entire long sheet.
- Apply capture sharpening to correct the camera and lens response.
- Add selective sharpening where texture or a visual anchor needs emphasis.
- Resize the finished file for the exact print dimensions.
- Apply output sharpening for the chosen paper and viewing distance.
- Inspect a full-scale test strip under lighting similar to the display room.
Matte paper usually accepts gentler output sharpening because its fibers spread detail more softly. Glossy and baryta-style papers reveal crisp edges, along with every sharpening halo and stitching flaw. Ask the lab whether it adds sharpening automatically; two sharpening passes can make distant branches buzz with pale outlines.
Archival life also belongs to the complete system, not a single label. Ink, paper, coatings, glazing, humidity, pollutants, and direct light all play a part. Keep the finished work away from strong sun, and let the proof tell you what the glowing monitor cannot.
Control Movement Without Hiding Invented Pixels
Panoramic prints containing moving water, people, traffic, clouds, or foliage need fast capture, extra source frames, and careful masking. When software creates or replaces image content, keep documentary accuracy separate from artistic repair and disclose invented material whenever clients, competitions, or editorial use demand honesty.
Imagine a runner crossing your frame sequence. She appears in frame three, moves during frame four, and leaves a shoe in frame five; the merge may duplicate her or build a body from mismatched moments. Shooting a second clean frame of that area gives you real material for a simple mask.
Long exposures present a different problem. Silk-smooth waves can blend well when each exposure lasts the same length, yet clouds may change shape and dusk may darken between frames. Work quickly, keep timing consistent, and capture backup exposures where the motion looks most unpredictable.
Computational stitching now handles alignment, exposure blending, and irregular boundaries with impressive speed. Content-aware and generative tools can also fill transparent corners left by rotation, but those pixels describe something the lens never saw. For decorative work, a small extension of blank sky may be acceptable; for news, conservation records, property documentation, or judged competitions, it may break the assignment’s rules.
Smartphone, drone, pixel-shift, and automated panoramic modes make wide capture more accessible, though convenience changes the tradeoffs. Phones may struggle with edge detail, drones remain subject to local aviation and privacy rules, and pixel shift works best when the scene stays still. A carefully made manual stitch still offers RAW flexibility, controlled overlap, and a clear record of what entered the final image.
Keep the edit honest: blending captured frames repairs the photograph; generating a missing cliff, cloud, or building changes what the photograph claims to show.
Frequently Asked Questions
How much should panorama frames overlap?
Use 25–40% overlap as a dependable starting range. Increase it over blank skies, fog, water, repeating windows, or moving foliage because stitching software has fewer distinct details to match.
Should I use a tripod for panoramic photography?
A tripod is not mandatory when you have bright light and distant subjects, but a leveled tripod makes framing and overlap more consistent. Use a panoramic head when close foreground objects reveal parallax, such as chairs inside a room or rocks beside the lens.
Should panorama source frames be vertical or horizontal?
For a horizontal stitch, vertical source frames usually preserve more height and produce better final resolution. They also leave extra room for projection correction, straightening, and cropping, which often remove more of the edges than expected.
Is 300 ppi required for a panoramic print?
No. 300 ppi is a strong target for prints examined closely, but a large wall panorama may look excellent at 150–240 ppi when viewed from several feet away. Judge the file by focus, noise, subject detail, print size, and expected viewing distance.
Which lens works best for stitched panoramas?
A normal or short-telephoto lens often stitches more naturally than an ultra-wide lens because it produces calmer edges and more even detail. A 50mm lens across several frames can create a wide view without the stretched corners of one very wide exposure.
Why did the stitch duplicate a person or wave?
The subject moved between exposures, so the software found conflicting versions in overlapping frames. Shoot the sequence faster, capture extra clean frames, and use manual layer masks to choose one complete version of the moving object.
Should I print a large panorama at home or use a lab?
Home printing gives you fast proofing and direct control when your printer supports the required paper width and length. A specialist lab makes sense for unusually long work, wide rolls, professional mounting, acrylic or metal presentation, and frames beyond your available equipment.
Conclusion
Your most useful habit is simple: design the physical print before pressing the shutter. When final width, viewing distance, paper, frame, and room lighting guide the capture, you can choose the right overlap, focal length, resolution, projection, and crop with confidence rather than trying to repair a weak file at the end.
Start with one manageable scene, perhaps a shoreline, skyline, or quiet row of trees, and shoot it as a careful set of vertical frames. Make a small proof, inspect a strip at full scale, and adjust what the paper reveals. When the finished panorama stretches across the wall without a visible seam, your viewer will stop thinking about technique and simply travel through the scene.
Halloween Picks
halloween
As an affiliate, we earn on qualifying purchases.