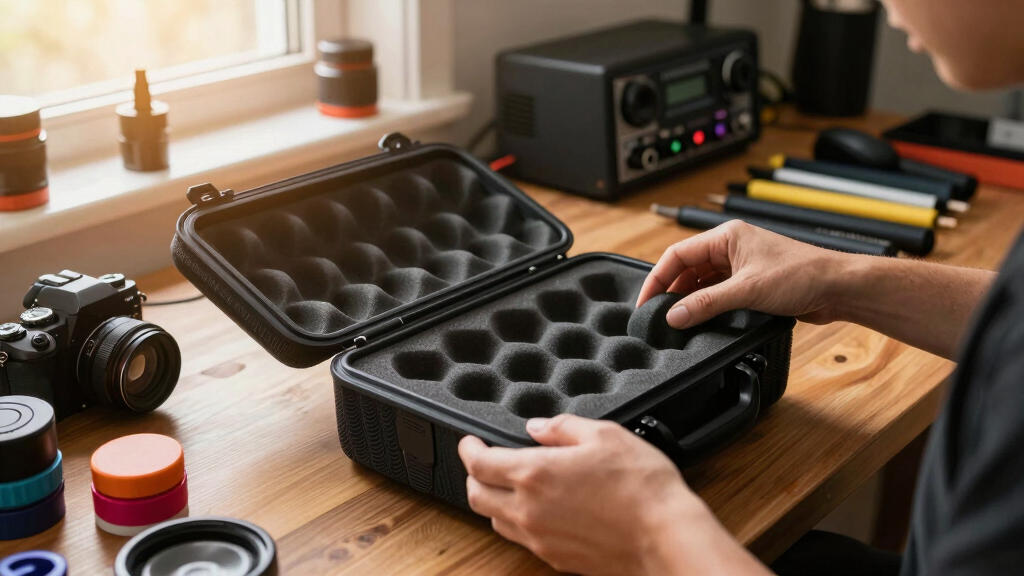

The Pelican 1301 Foam Set earns my Best Overall position because its four-piece construction and one-inch die-cut grid offer the strongest balance of layout control, protection, and manageable setup. For photographers who change equipment more often, the NANUK Multi-Layer Cubed Foam Insert is the more adaptable choice. The Pelican 1060 set takes the compact slot for a small camera, action camera, or limited accessory kit.

Get audio and creator gear delivered free with Prime
- Fast, free delivery on millions of items
- Prime Video, Amazon Music and more included
- Member-only deals all year
The main tradeoff is that every insert here is tied to a particular case family or model. A well-designed foam layout cannot compensate for the wrong exterior dimensions, so case compatibility comes before ranking. After fit, the meaningful differences are the number of foam layers, the size of the removable cubes, the depth available for lenses, and how well the layout tolerates future gear changes.
I rank these inserts by how effectively they solve a photographic packing problem, not by presenting five similar foam blocks as interchangeable products. My top pick suits a balanced kit, NANUK favors more involved custom layouts, the Pelican 1060 insert serves minimal carry, the Pelican 1200 set gives beginners a straightforward starting point, and the Pelican 1450 set accommodates larger camera collections.
Complete the kit


Key Takeaways
- The Pelican 1301 Foam Set ranks first for its four-piece design, approachable one-inch grid, and balanced support for mixed camera gear.
- The NANUK insert offers the most layout flexibility, but shaping several layers takes more planning and loose cubes may need additional support.
- The Pelican 1060 foam is the best compact choice, though its limited interior space makes it unsuitable for a full interchangeable-lens kit.
- The Pelican 1200 set has the easiest learning curve for a first pick-and-pluck layout, while the 1450 set better suits larger bodies and multiple lenses.
- Model compatibility is the deciding filter: none of these inserts should be purchased before matching the exact Pelican or NANUK case.
| Pelican 1301 Foam Set (4-Piece) |  | Best Overall | Number of pieces: 4 | Material: Foam | Cut type: Die-cut grid | VIEW LATEST PRICE | See Our Full Breakdown |
| NANUK Multi-Layer Cubed Foam Insert |  | Best for Frequent Reconfiguration | Material: Polyurethane foam | Construction: Multi-layer | Cut pattern: Cubed | VIEW LATEST PRICE | See Our Full Breakdown |
| Pelican Foam Set for Micro-Case 1060 |  | Best Compact | Insert type: Protective foam set | Compatibility: Pelican 1060 Micro-Case | Listed weight: 0.04 kilograms | VIEW LATEST PRICE | See Our Full Breakdown |
| Pelican 1200 Foam Set (3-Piece) |  | Best for Beginners | Number of pieces: 3 | Material: Foam | Customization: Pick-and-pluck | VIEW LATEST PRICE | See Our Full Breakdown |
| Pelican 1450 Foam Set (Gray) |  | Best for Larger Camera Kits | Material: Foam | Compatibility: Pelican 1450 case | Customization: Pick N Pluck | VIEW LATEST PRICE | See Our Full Breakdown |
| foam inserts for camera case | Compatibility | Material | Customization |
|---|---|---|---|
| Pelican 1301 Foam Set | Pelican 1301 case | Foam | — |
| NANUK Multi-Layer Cubed Foam I | Matching NANUK cases | Polyurethane foam | Hand-shaped removable cubes |
| Pelican Foam Set for Micro-Cas | Pelican 1060 Micro-Case | — | — |
| Pelican 1200 Foam Set | Pelican 1200 case | Foam | Pick-and-pluck |
| Pelican 1450 Foam Set | Pelican 1450 case | Foam | Pick N Pluck |
More Details on Our Top Picks
Pelican 1301 Foam Set (4-Piece)
The Pelican 1301 Foam Set takes my first position because it combines a four-piece structure with a simple one-inch die-cut grid. That combination gives a photographer room to separate a camera body, lens, batteries, and a small flash while controlling cavity depth more effectively than a single thick slab. It is a practical middle ground between the compact Pelican 1060 set and the more involved NANUK multi-layer option.
Its one-inch removable squares make layout work approachable, particularly when the kit contains boxy items such as chargers or battery cases. Compared with the Pelican 1450 foam, the 1301 set makes more sense for a moderate kit that does not need the capacity of a larger case. The four pieces also provide better vertical organization than buyers may expect from a basic replacement set.
The grid is not perfectly suited to every camera shape. Rounded grips, lens barrels, and protruding viewfinders may leave a stepped cavity, and getting a close fit can require trimming. The insert is also restricted to the Pelican 1301, so its first-place position does not make it a universal sheet-foam solution. I would also avoid leaving very thin foam walls between heavy lenses, since the convenience of the grid does not remove the need for strong internal dividers.
Pros:- Four-piece arrangement supports useful depth control
- One-inch die-cut grid is approachable for DIY layouts
- Provides separate protection for mixed camera accessories
- Installs without specialized cutting equipment
Cons:- Fits only the Pelican 1301 case
- Rounded equipment may need extra trimming
- Poor planning can leave weak walls between cavities
Best for: Pelican 1301 owners carrying a balanced camera kit with a body, lens, power accessories, and small peripherals
Not ideal for: Photographers using another case model or anyone who wants smooth, precisely cut circular cavities
- Number of pieces:4
- Material:Foam
- Cut type:Die-cut grid
- Grid size:1-inch squares
- Compatibility:Pelican 1301 case
- Customization method:Manual pick-and-pluck removal
- Installation:DIY drop-in set
Our verdict“My top pick for Pelican 1301 owners balances easy customization with enough layered support for a varied camera kit.”
NANUK Multi-Layer Cubed Foam Insert
The NANUK Multi-Layer Cubed Foam Insert is my choice for photographers who need more control over cavity shape and depth. Its polyurethane construction and stacked cubed layers allow separate adjustments around bodies, lenses, tools, and sensitive electronics. Compared with the Pelican 1301 set, NANUK places more emphasis on a layered layout, which is useful when equipment varies sharply in height.
This design makes the most sense for a mixed production kit rather than a single camera. A buyer could assign shallower spaces to batteries and media while preserving deeper cavities for lenses or a compact body. That vertical flexibility is its clearest advantage over the simpler Pelican 1200 set. It also helps limit equipment movement when each opening is shaped with firm foam contact on multiple sides.
Greater flexibility brings a slower setup. Planning several layers takes patience, and cubes may shift if too much surrounding foam is removed or if heavy equipment repeatedly pulls at an unsupported wall. It is also made for compatible NANUK cases, not as a universal insert for the Pelican models in this lineup. I rank it below the 1301 set because the setup is less forgiving, even though its layout potential is broader.
Pros:- Multiple layers allow refined cavity-depth control
- Cubed polyurethane foam accommodates varied equipment shapes
- Provides impact and vibration cushioning
- Can organize cameras, lenses, tools, and small electronics together
Cons:- Precise shaping can take more time than a basic grid
- Loose or thin cube walls may shift under repeated handling
- Compatibility is limited to the intended NANUK case
Best for: NANUK case owners organizing camera equipment of several heights or revising a mixed media kit
Not ideal for: Buyers wanting the quickest possible setup or a foam insert for a Pelican case
- Material:Polyurethane foam
- Construction:Multi-layer
- Cut pattern:Cubed
- Compatibility:Matching NANUK cases
- Customization:Hand-shaped removable cubes
- Protection focus:Impact and vibration cushioning
- Tool requirement:No specialized tools required
Our verdict“I recommend the NANUK insert when layered customization matters more than a fast, beginner-friendly setup.”
Pelican Foam Set for Micro-Case 1060
The Pelican Foam Set for Micro-Case 1060 fills a narrower role than the first two products: it is intended for small, carefully limited camera loads. At a listed weight of only 0.04 kilograms, the insert adds little to a compact carry setup. It suits an action camera, a small fixed-lens camera, wireless microphone components, memory cards, or batteries better than a full interchangeable-lens system.
Compared with the Pelican 1450 set, the 1060 insert sacrifices expansion room for less bulk and easier portability. That can be the right decision when a photographer wants one protected device rather than a traveling equipment library. Its model-specific fit also removes the guesswork associated with cutting a generic sheet to the Micro-Case interior.
The limitation is straightforward: small dimensions cap layout flexibility. Buyers who expect to add a second lens or larger body may outgrow it quickly, and the foam does not offer an added organizational system beyond its protective compartments. I place it third because it performs a focused task well, but the Pelican 1301 and NANUK inserts serve a wider range of camera configurations.
Pros:- Compact format is suited to minimal camera loads
- Model-specific fit avoids cutting generic foam to size
- Very low listed weight adds little carrying burden
- Provides a padded interior for small valuable devices
Cons:- Only fits the Pelican 1060 Micro-Case
- Limited room for interchangeable-lens equipment
- Offers little flexibility for future kit growth
Best for: Pelican 1060 Micro-Case owners protecting an action camera, compact camera, audio device, or small accessory bundle
Not ideal for: DSLR and mirrorless users carrying multiple lenses, flashes, or plans for near-term kit expansion
- Insert type:Protective foam set
- Compatibility:Pelican 1060 Micro-Case
- Listed weight:0.04 kilograms
- Listed size:One Size
- Listed color:Grey
- Listed compartments:2
- Primary use:Compact equipment protection
Our verdict“This is my compact pick for protecting one small imaging device and a few accessories without moving to a larger case.”
Pelican 1200 Foam Set (3-Piece)
I place the Pelican 1200 Foam Set in the beginner role because its three-piece pick-and-pluck design keeps the first layout relatively manageable. A new buyer can map a compact camera kit, remove sections gradually, and retain the remaining foam as a padded border. It is less complex than the NANUK multi-layer insert, which rewards more detailed depth planning.
The listed dimensions of 5.2 by 10.1 by 11 inches describe a relatively compact format suited to a body with a small lens, batteries, and a limited set of accessories. Against the smaller Pelican 1060 option, it provides more useful arrangement room while staying below the scale of the Pelican 1450 set. That middle size can help a first-time case owner avoid paying for and carrying unused interior volume.
There is no closure mechanism because this is an insert, not a standalone case; the Pelican 1200 supplies the exterior closure and shell. The larger concern is compatibility, since the foam has little value outside that exact case. Its basic grid also produces stepped edges around curved lenses. I rank it fourth because it is easy to understand, but the 1301 set offers another layer and the NANUK option supports more sophisticated layouts.
Pros:- Three-piece arrangement is easy for a beginner to understand
- Pick-and-pluck design requires no specialized cutting setup
- Compact dimensions suit a modest camera load
- Foam helps separate equipment inside the Pelican 1200
Cons:- Compatible only with the Pelican 1200
- Grid edges do not closely follow every curved item
- Limited capacity compared with the Pelican 1450 set
Best for: First-time foam-layout buyers who already own a Pelican 1200 and carry a modest camera setup
Not ideal for: Owners of other cases or photographers who need intricate circular cuts and frequent layout changes
- Number of pieces:3
- Material:Foam
- Customization:Pick-and-pluck
- Compatibility:Pelican 1200 case
- Dimensions:5.2 x 10.1 x 11 inches
- Color:Grey
- Pattern:Solid
- Closure:None; insert uses the case closure
Our verdict“I favor this set for Pelican 1200 owners who want a simple first custom layout without the complexity of extensively layered foam.”
Pelican 1450 Foam Set (Gray)
The Pelican 1450 Foam Set is the lineup choice for a photographer carrying more equipment in one case. Its Pick N Pluck layout and one-inch die-cut sections can be arranged around a larger body, several lenses, a flash, and support accessories, subject to the interior limits of the Pelican 1450. Compared with the 1060 and 1200 inserts, its appeal is room for a broader working kit.
That added capacity also permits wider foam barriers between heavier items. A larger insert does not automatically protect equipment better, but it gives the layout designer more freedom to avoid placing lenses too close together. The one-inch grid follows the same approachable DIY idea as the Pelican 1301 set, making this a more accessible choice than cutting solid foam from scratch.
I rank it fifth because its size is an advantage only for the right buyer. A larger case adds carrying bulk, and repeated removal of equipment may wear exposed cube edges over time. Like every model-specific Pelican option here, it cannot solve a fit problem in another case. Choose it over the 1301 when capacity takes priority; choose the 1301 when a more moderate kit and four-piece layout better match the load.
Pros:- Roomier layout supports a broader camera kit
- One-inch die-cut grid simplifies DIY cavity creation
- Extra space allows stronger foam walls between heavy items
- Gray foam makes dark equipment outlines easy to see during planning
Cons:- Fits only the Pelican 1450 case
- Larger case format is excessive for minimal loads
- Exposed plucked edges may wear with frequent handling
Best for: Pelican 1450 owners carrying a larger camera body, several lenses, a flash, and supporting accessories
Not ideal for: Minimalist photographers, commuters avoiding bulky cases, or owners of any case other than the Pelican 1450
- Material:Foam
- Compatibility:Pelican 1450 case
- Customization:Pick N Pluck
- Cut pattern:Die-cut squares
- Grid size:1 inch
- Color:Gray
- Installation:DIY drop-in replacement
Our verdict“I recommend the 1450 foam when carrying capacity and generous spacing matter more than compact portability.”
How We Picked
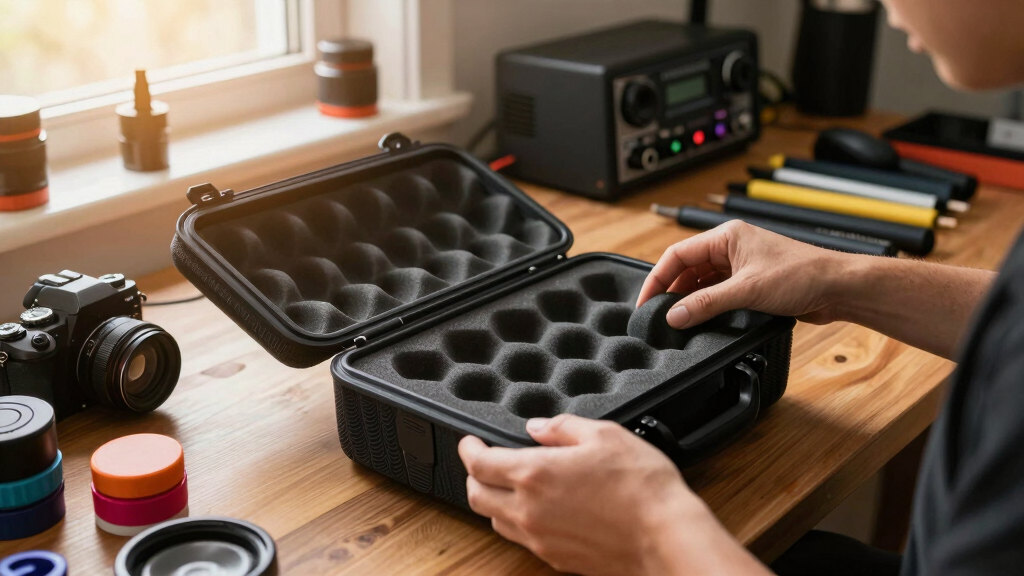
I treated camera protection as the primary requirement. Foam needs to hold a body, lens, flash, or recorder firmly enough to limit movement while leaving enough material between cavities to absorb shocks. I gave higher positions to designs that support useful spacing and depth control without demanding specialist cutting tools.
I then compared customization method and learning curve. Pick-and-pluck grids are approachable because a buyer can form cavities by removing small sections, but they can also encourage overly tight cuts and thin dividers. Multi-layer foam offers better depth management for uneven equipment, although it asks for more careful layout planning.
My ranking also accounts for kit size and likely buyer behavior. A compact insert can be excellent for one camera yet restrictive for a photographer carrying multiple lenses. Conversely, a larger foam set adds layout freedom but occupies a heavier, bulkier case. I assigned every model a distinct role so the ranking reflects real packing priorities, not foam volume alone.
Finally, I examined the supplied specifications, stated compatibility, installation approach, and reported limitations. I did not treat generic clothing-style fields in a listing as meaningful camera protection features. Since these inserts fit different cases, my order reflects overall editorial usefulness; the correct purchase still begins with the case model already owned.
| foam inserts for camera case | Material | Compatibility | Customization |
|---|---|---|---|
| Pelican 1301 Foam Set | Foam | Pelican 1301 case | — |
| NANUK Multi-Layer Cubed Foam I | Polyurethane foam | Matching NANUK cases | Hand-shaped removable cubes |
| Pelican Foam Set for Micro-Cas | — | Pelican 1060 Micro-Case | — |
| Pelican 1200 Foam Set | Foam | Pelican 1200 case | Pick-and-pluck |
| Pelican 1450 Foam Set | Foam | Pelican 1450 case | Pick N Pluck |
Factors to Consider When Choosing Best Foam Inserts For Camera Cases
I would begin with the case model, then work inward from the largest piece of camera equipment. The best insert is the one that fits the shell correctly, supports the deepest item, and leaves enough foam between cavities to resist tearing.Match the Exact Case Before Comparing Foam
Exterior case names are not interchangeable measurements. The Pelican 1060, 1200, 1301, and 1450 inserts are formed for different interiors, while the NANUK product belongs in its matching NANUK case. I would verify the full model number on the case itself before ordering. Trimming an insert designed for another shell can produce gaps along the walls, letting the entire foam block move even when individual cavities appear snug.
Plan Around the Largest and Heaviest Items
I would position the camera body and heaviest lenses first, leaving broad foam bridges between them and the case wall. Small accessories can fill remaining areas, but they should not dictate the initial layout. Heavy lenses need more support than memory cards, and placing two dense items across a narrow divider can cause tearing or unwanted contact after repeated transport.
Choose Between Simple Grids and Layered Foam
A pick-and-pluck grid favors accessibility: I can plan an outline, remove cubes gradually, and avoid buying a cutting system. Multi-layer cubed foam offers better depth control when a kit contains thin accessories beside tall lenses. The tradeoff is more setup work. Buyers who rarely change gear may appreciate the tailored result, while frequent kit changes can expose the limits of any permanently removed layout.
Leave Room Without Allowing Movement
The cavity should hold equipment securely without forcing pressure onto controls, lens mounts, or screens. I would leave room for fingers to lift each item and keep caps attached during planning. Foam should contact durable surfaces, not press hard against delicate switches. If a device rattles inside its opening, a thin removable pad may help, but a badly oversized cavity usually points to a layout that needs replacement.
Plan for the Kit You Will Actually Carry
I would not choose the largest insert automatically. The Pelican 1450 foam supports more equipment, yet unused cavities add case bulk without improving protection. The 1060 is easier to carry but leaves almost no growth room. For many buyers, the best balance lies in a moderate case with deliberate spacing. A written equipment list helps distinguish genuine capacity needs from space that will remain empty.
Frequently Asked Questions
Is pick-and-pluck foam safe for camera lenses?
Yes, when the layout leaves adequate foam around each lens and prevents movement. I would store lenses with caps fitted, avoid resting delicate glass against the foam, and keep a generous divider between heavy items. A cavity that is too tight can make removal awkward, while one that is too loose allows impact inside the case. The Pelican grids make shaping easy, but careful spacing still determines protection.
How much foam should I leave between camera components?
I would preserve at least several grid sections where space permits, with wider barriers around heavy lenses and camera bodies. There is no single spacing rule for every foam density or equipment weight. A thin wall may separate cables, but it is a poor divider between two dense lenses. The goal is a barrier that stays upright during removal and provides enough material to absorb movement.
Can I reuse the foam after changing camera gear?
Minor changes may work if the replacement equipment is similar in size, but removed cubes do not regain their original structural strength. I would treat pick-and-pluck customization as semi-permanent. Loose blocks can temporarily fill a gap, though they may shift during travel. Buyers who revise kits often may prefer the NANUK layered design for added flexibility, while accepting that major layout changes can still require new foam.
Should cameras be stored with lenses attached?
That choice depends on case space and shooting needs. An attached lens permits faster setup, but it creates a longer shape and can place leverage on the camera mount if the cavity is poorly supported. I would give an attached combination continuous support beneath both body and lens. Separate storage uses space more efficiently and may reduce mount stress, provided both parts have properly fitted individual cavities.
Is foam enough to protect a camera during air travel?
Foam is only one part of the system. I would pair a well-planned insert with a properly sized hard case, secure latches, and sound seals. Equipment should not move when the closed case is gently repositioned, and fragile accessories should remain separated. Airline handling can involve strong impacts, so an overly thin divider or loose cavity remains a weakness even inside a rugged shell. Case condition and layout quality work together.
Conclusion
For a balanced Pelican 1301 camera kit, I would choose the Pelican 1301 Foam Set; its four-piece format and one-inch grid give it the best blend of approachable customization and useful depth control. NANUK owners who carry equipment of varied heights should choose the Multi-Layer Cubed Foam Insert, accepting the extra planning time in exchange for a more detailed layout.
For minimal carry, the Pelican 1060 foam is the clear compact option. A first-time Pelican 1200 owner gets the simplest starting point from the three-piece 1200 set, while photographers carrying multiple lenses and a flash should move toward the Pelican 1450 Foam Set. My final choice would always follow the exact case model, kit size, and amount of future expansion rather than the ranking number alone.
Fall Picks
fall essentials
As an affiliate, we earn on qualifying purchases.