
TL;DR
Open a free Amazon Business account
Business pricing, bulk buying and tax-exempt orders.
Create a free accountAs an affiliate, we earn on qualifying purchases.
Shooting through windows, fences, and obstacles creatively starts with one decision: should the barrier disappear, frame the subject, or become part of the story? Move close to unwanted barriers, control reflections around glass, focus deliberately, and preserve visible obstacles when they add depth or meaning.
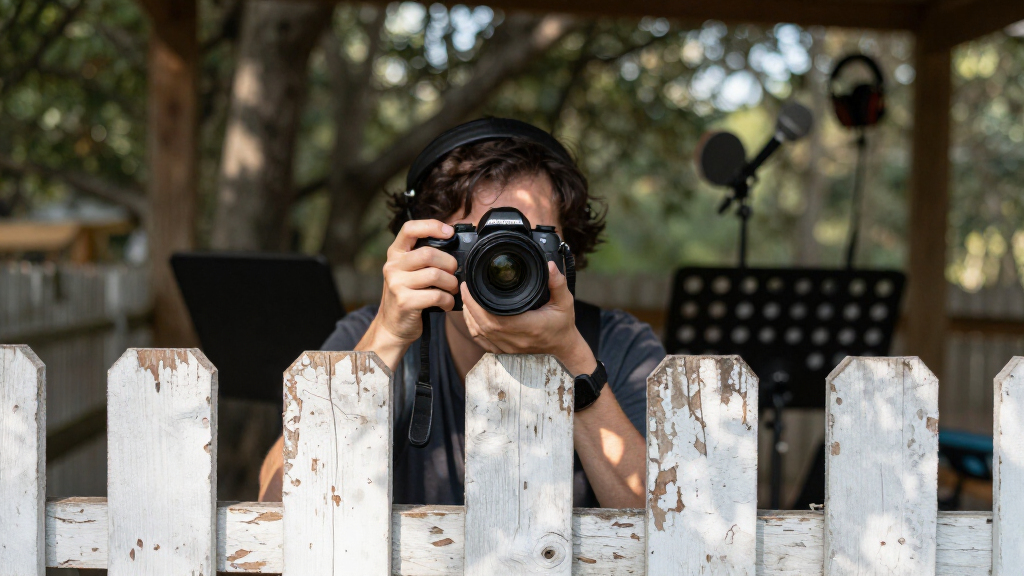
A chain-link fence can ruin your photograph, or it can become a silvery foreground haze that makes the subject feel almost three-dimensional. The difference may come from moving your lens five centimeters closer, opening the aperture, or shifting sideways until one bright wire stops crossing an eye. Small moves. Big change.
You will learn how to decide whether an obstacle should vanish, frame, distort, or explain what you are photographing. I will show you practical ways to handle fences, windows, rain, foliage, fabric, reflections, autofocus errors, and tinted glass. You will also see when a technically imperfect barrier gives an image its emotional weight.
This approach has helped me in zoos, trains, cafés, crowded streets, and buildings where the clean viewpoint simply was not available. The common belief says you need an unobstructed view; the reality is that photographing through an obstacle can turn an ordinary scene into a layered image with depth, context, and atmosphere. Think of the barrier like a musician using silence: what blocks part of the scene can guide your attention toward what matters most.
Decide whether the obstacle should disappear, frame the subject, add texture, or explain the scene before choosing your settings.
To blur fencing, move the lens close to an opening, use a wide aperture, focus well beyond the mesh, and increase the fence-to-subject distance.
Reduce window reflections by darkening the camera side, moving near the glass, blocking stray light, and testing both angle and polarization.
Use single-point focus, subject detection started on the subject, or manual focus when scratches, droplets, and wire pull autofocus forward.
Keep barriers visible when they add context, and disclose heavy removal or reconstructed detail when documentary accuracy matters.
Shooting Through Windows, Fences, and Obstacles Creatively
Every barrier has a job: disappear, frame, texture, or explain. Decide which one before touching the settings, then use distance, angle, aperture, focus, and light to transform obstruction into atmosphere.
Give the barrier one clear job
Ask what the photograph loses if the obstruction vanishes. Context, tension, weather, privacy, or depth may matter more than a technically clean view.
Disappear
Blur the obstacle when it interrupts expression, wildlife behavior, gesture, or a decisive moment.
Frame
Use a doorway, railing, window edge, arch, or crowd gap to pull the eye toward the subject.
Texture
Let foliage, fabric, condensation, scratches, or colored glass soften and tint the foreground.
Explain
Keep the barrier recognizable when it communicates travel, separation, confinement, or social distance.
Make the mesh fade
The camera does not see through a fence. It renders nearby wire as a broad blur when the mesh sits far outside the focused depth of field.
The five-move recipe
- 1Find a clean opening and keep wire away from eyes or essential detail.
- 2Move the front element as close as safety and access rules allow.
- 3Open the aperture—often f/2.8 or f/4 is a practical starting point.
- 4Place a small focus point directly on the distant subject.
- 5Shift sideways to remove bright lines, glare, or repeating moiré.
Relative fence-blur influence
A practical ranking of factors—not laboratory percentages. Distance relationships usually matter more than any single setting.
Best relationship: minimal lens-to-fence distance plus maximum practical fence-to-subject distance.
Control glare without erasing the story
Bring the lens close, darken the camera side, block stray light, and test your angle. A polarizer is a selective control—not a universal reflection eraser.
| Technique | Primary benefit | Best use | Tradeoff or caution |
|---|---|---|---|
| Lens near glass | ✓Reduces reflected area | Trains, cafés, observation decks | Dirt and vibration may still soften detail |
| Rubber lens hood | ✓Blocks side light | Stable, permitted window surfaces | Never press against fragile or moving glass |
| Perpendicular angle | ✓Improves clarity | Architecture and accurate detail | May restrict the composition |
| Polarizing filter | ~Controls some glare | Nonmetallic reflections in angled light | Cuts light and can remove useful layering |
| Dark cloth or jacket | ✓Hides interior reflections | Night interiors and bright screens | Do not obstruct people or equipment |
| Steep shooting angle | ✗Usually adds distortion | Only when distortion is intentional | More softness, fringing, and reflections |
Scan the edges
A tiny gap beside the lens can admit a bright crescent of glare that is easy to miss in the center.
Watch treated glass
Laminated or coated panes may produce purple patches, uneven darkness, bands, or color shifts.
Protect highlights
Tinted glass lowers contrast. Check the histogram, preserve bright areas, and use RAW when available.
Choose the plane that tells the story
Raindrops, scratches, leaves, and wire attract autofocus. Direct the camera deliberately—or let the foreground win when abstraction is the real idea.
Single-point AF
Place the smallest reliable point on an eye, face, animal, vehicle, or distant high-contrast edge.
Start tracking
Initiate subject detection directly over the subject so the camera does not begin on the barrier.
Manual focus
Override autofocus when droplets, scratches, fabric, or mesh repeatedly pull the focus plane forward.
Touch and lock
Tap the distant subject, lock focus and exposure when possible, then recompose without refocusing.
From obstacle to intentional image
Treat the barrier as a sequence of creative decisions. Each choice changes the next technical move.
Observe
Notice lines, glare, texture, color, repetition, and narrative meaning.
Assign
Choose disappear, frame, texture, or explain.
Position
Move closer, shift sideways, change height, or correct the glass angle.
Focus
Select the subject plane or intentionally prioritize the foreground.
Verify
Inspect eyes, highlights, reflections, moiré, contrast, and frame edges.
A visible barrier may communicate weather, separation, confinement, travel, or the act of observing.
Never bypass protective barriers, photograph through private windows, or endanger equipment, people, or wildlife.
When documentary accuracy matters, identify heavy removal or rebuilt detail created during editing.
Technical flaws can add emotional weight when they clearly support the image’s subject and story.
Choose the Barrier’s Job Before You Touch the Camera
Shooting Through Windows, Fences, and Obstacles Creatively works best when you give the barrier one clear job: disappear, frame the subject, add texture, or tell part of the story. That choice guides your position, aperture, focus, and exposure before technical problems begin stealing your attention.
Start by asking what the photograph loses if you remove the obstruction. A dark doorway around a sunlit street vendor can provide framing and pull your eye inward. A fence beside a zoo animal may communicate separation and confinement, while the same fence crossing the animal’s face may feel like a careless mistake.
I use a simple test in the field: I make one clean-looking frame, then another in which I let the foreground become obvious. During a rainy train journey, for example, you could focus through the glass for a clear portrait of someone on the platform, then focus on the droplets so the person dissolves into soft color and broken light. Neither version is automatically better; each tells a different story.
- Make it disappear when it distracts from expression, gesture, wildlife behavior, or a decisive moment.
- Keep it recognizable when a doorway, railing, window edge, or crowd explains where the subject is.
- Turn it into texture when leaves, fabric, condensation, or scratched glass add color and atmosphere.
- Make it dominant when repetition, silhouettes, or reflections create the real visual idea.
The obstacle can become a kind of visible invisibility: physically present, yet soft enough to guide the eye without demanding attention. According to PhotoMocha’s practical guidance, the central skill is deciding whether the obstruction should disappear, remain identifiable, or become the main element [1]. Make that decision early, and your settings become much easier to choose.
As an affiliate, we earn on qualifying purchases.
Make a Fence Fade Without Losing Your Subject
Shooting Through Windows, Fences, and Obstacles Creatively can make a nearby fence nearly disappear when you place the lens close to an opening, select a wide aperture, and focus well beyond it. A longer focal length and greater space between fence and subject strengthen the blur.
- Find a clean opening and check that no wire crosses the subject’s eyes or other important detail.
- Move the front of the lens as close as safety allows without touching an unstable, dirty, electrified, or restricted barrier.
- Choose a wide aperture, such as f/2.8 or f/4, when your lens and subject distance permit.
- Place a small focus point on the subject, or start subject tracking directly over the eye, face, animal, bird, or vehicle.
- Inspect the frame for bright fence lines, then shift a few centimeters or find a shaded section of mesh.
The technique works through depth of field, not magic. A fence sitting inches from your lens becomes a broad blur because it lies far outside the focused zone. If the animal stands directly behind the wire, even f/2.8 may leave a recognizable pattern; if it stands 10 meters farther back, the same fence can melt into a faint gray wash.
Imagine photographing a football match from behind mesh. A 200mm lens placed near the fence may produce smooth foreground haze, while a 35mm lens held half a meter away records every diamond. The longer lens helps, but distance relationships matter just as much as focal length.
Direct sunlight can make wire glow like white chalk, even when the fence is blurred. Move into shade, wait for a cloud, or choose a darker part of the field behind the mesh. If fine fencing produces rainbow-like moiré, change your distance, angle, focal length, or aperture; even a slight sideways move can break the repeating interference pattern.
Never defeat a safety barrier for a cleaner photograph. Keep straps, hands, lenses, and tripods away from traffic, wildlife enclosures, balcony edges, and moving machinery.
As an affiliate, we earn on qualifying purchases.
Cut Window Glare While Keeping the Reflections You Want
Window glare falls when you bring the lens close to the pane, darken the camera side, block stray light, and shoot near a perpendicular angle. A polarizer can reduce some nonmetallic reflections, but it can also erase the layered reflection that makes your composition special.
| Technique | What it improves | Tradeoff |
|---|---|---|
| Lens close to glass | Reduces the area catching reflections | Vibration or dirt may still soften detail |
| Rubber lens hood | Blocks side light and protects both surfaces | Use only against stable, permitted glass |
| Perpendicular camera angle | Gives clearer detail and less color fringing | May limit your composition |
| Polarizing filter | Controls some glare and boosts contrast | Cuts light and may create uneven color |
| Dark cloth or jacket | Hides bright interior reflections | Must not obstruct people or equipment |
In a café at night, the window may reflect ceiling lamps, your pale shirt, and a glowing phone screen. Turn off nearby lights when you have permission, wear or hold something dark behind the camera, and shade the lens with your hand. Watch the frame edges; a tiny gap can admit a bright crescent of glare.
A polarizing filter is a control, not a reflection eraser. Rotate it while watching the viewfinder because its effect changes with the light angle and surface. Laminated, coated, or treated windows can show purple patches, bands, or uneven darkness, and metallic reflections often resist polarization.
Glass quality also matters. Aircraft windows, windshields, and train windows may be thick, curved, scratched, or made from several layers, producing softness, flare, double edges, and strange color. Keep the lens close without pressing hard, avoid steep angles, and use a faster shutter speed for vibration or moving scenery.
The common instinct is to attack every reflection. A better approach is selective control. Remove the fluorescent strip crossing a face, yet keep the blue street lights floating across a dark coat; that mix of clarity and ambiguity can feel richer than perfectly clean glass.
As an affiliate, we earn on qualifying purchases.
Turn Reflections, Rain, and Foliage Into Useful Layers
An obstacle becomes creative when it adds depth, rhythm, color, or meaning without confusing the subject. Focus through leaves for a soft green veil, place raindrops in sharp focus for abstraction, or combine a window reflection with the scene behind it to create two readable layers.
Foreground blur works best when it has shape and placement. Hold your camera near a cluster of leaves and let their sunlit edges soften around a portrait, leaving the eyes clear. The result resembles stage curtains around an actor: the foreground does not tell the whole story, but it directs attention toward the center.
For raindrops, choose which plane owns the photograph. Focus on the glass and a city beyond becomes smeared amber, red, and cobalt behind crisp droplets. Focus on the distant cyclist instead, and those drops become round highlights and translucent streaks that convey the wet weather without hiding the action.
Reflections reward patient camera movement. A step left can place a reflected cloud inside a dark office window; lowering the camera can float a neon sign over a passenger’s silhouette. It feels like a controlled accident, but the strongest frames come from aligning edges, faces, and bright shapes with care.
- Use doorways and arches for a frame within the frame.
- Let blinds, railings, or screens create pattern and tension.
- Shoot through translucent fabric for muted color and a gentle wash of texture.
- Use curved or wet glass for intentional stretching, bending, and doubled highlights.
- Partly conceal a subject when the hidden area adds mystery or intimacy.
Watch for visual collisions. A reflected lamppost growing from someone’s head will still look awkward, however beautiful the light. Make several small adjustments, then review the whole frame rather than only the subject; the best layered photographs work like organized chaos, with every apparent accident landing in the right place.
As an affiliate, we earn on qualifying purchases.
Keep Focus, Motion, and Color Under Control
Shooting Through Windows, Fences, and Obstacles Creatively becomes technically reliable when you use deliberate focus placement, protect important highlights, and select a shutter speed for the subject rather than trusting stabilization alone. RAW capture gives you more room to correct tinted color, haze, and reduced contrast.
Modern subject-recognition autofocus can hold an eye, bird, animal, or vehicle behind partial obstructions, according to recent camera developments summarized by PhotoMocha [2]. It still needs a clear starting point. If the camera keeps grabbing scratches, droplets, or wire, switch to a small single focus point, tap the subject on a phone, or focus manually.
Wide apertures help dissolve nearby clutter, yet shallow depth of field makes focus errors more obvious. For a portrait through foliage at f/1.8, place focus on the nearest eye and shoot a short burst if leaves move in the wind. If both a carved window frame and the distant person need detail, use a smaller aperture or make several focus-stacked frames when the scene is static.
A useful starting setup is aperture-priority mode, a wide aperture, subject detection or single-point autofocus, RAW capture, and auto ISO with a minimum shutter speed suited to movement. Try around 1/250 second for a walking person and faster speeds for animals, traffic, or scenery passing a vehicle. Image stabilization reduces camera shake; it does not freeze a moving subject.
Tinted windows may add green, blue, or magenta color, while dirty glass lowers contrast and lifts blacks into a dull gray. Check the histogram, protect bright signs and skies, and include a neutral gray or white object when practical. Back at the computer, adjust white balance before saturation; pushing color first often exaggerates the cast.
For video, an obstruction can make autofocus pulse between foreground and subject. Lock focus manually, or start tracking on the subject and slow the camera’s focus-response setting when available. That calm, steady focus looks intentional, while repeated hunting pulls the viewer out of the scene.
Protect People, Places, and the Truth of the Photograph
A strong obstacle photograph respects physical barriers, personal privacy, and documentary honesty. Keep your equipment secure, follow venue rules, and disclose heavy reconstruction when accuracy matters. No image is worth leaning across traffic, disturbing wildlife, invading a private room, or presenting invented detail as recorded fact.
Start with the barrier’s intended purpose. A railing at a viewpoint marks a safe standing area; a zoo fence protects you and the animal; a museum case protects fragile work. You can move along the permitted side for a better angle, but never place a camera through a restricted opening or rest hard equipment against valuable or unstable surfaces.
Privacy deserves the same care. Photographing through someone’s home window may be intrusive even when local law appears unclear or permissive. A lit private interior at night is not a public invitation, and a longer lens does not turn personal access into ethical access.
Editing creates another choice. Local contrast, dehaze, healing, cloning, and AI-assisted tools can reduce reflections, fencing, noise, or distracting foreground marks. Inspect reconstructed areas at high magnification because generated bricks, feathers, fingers, lettering, and facial details can look plausible while being factually false.
For personal art, you have broad room to reshape a photograph if you describe the work honestly. Journalism, evidence photography, documentary projects, and competitions often apply stricter rules. Removing a fence can change the meaning from an animal living behind a barrier to one appearing free, which alters more than the surface appearance.
Editing away an obstacle can edit away context. Preserve the original file, check the rules governing the image, and disclose substantial generative removal or reconstruction when authenticity carries weight.
Think back to that chain-link fence from the opening. Blurring it in-camera keeps the scene truthful because the barrier still shaped the captured light. Digitally replacing the covered area creates information the lens never recorded, a distinction that matters whenever your photograph claims to show what was really there.
Frequently Asked Questions
How do I photograph through a fence without showing it?
Place the lens close to a fence opening, choose a wide aperture, and focus on a subject well behind the barrier. A moderate or long focal length often makes the foreground wire easier to blur, but subject distance and fence distance remain just as important.
Why can I still see bright fence lines at a wide aperture?
The wire is probably catching direct or strongly angled light, which makes even a blurred fence appear as pale streaks. Shift position, use a shaded patch of fence, choose a darker background, or wait for softer light to reduce those glowing lines.
Should I use autofocus or manual focus through obstacles?
Use subject-recognition autofocus when it holds the intended eye, animal, bird, or vehicle reliably. Switch to a small focus point or manual focus when the camera repeatedly locks onto mesh, scratches, or raindrops; on a phone, tap the distant subject and lock focus if the camera app allows it.
Does a polarizing filter remove window reflections?
A polarizer can reduce some nonmetallic glare, but it does not remove every reflection. Its effect changes with angle, it cuts the light reaching the sensor, and coated or laminated glass may develop uneven colors or dark patches.
Can I place my lens directly against a window?
A soft rubber lens hood can rest gently against stable, permitted glass to block side light. Do not press hard lens parts against the pane, and never touch fragile displays, moving vehicle windows, restricted surfaces, or anything that could endanger your camera, the glass, or nearby people.
What settings help when shooting through glass at night?
Darken the camera side of the glass, hold the lens close, and expose for bright exterior highlights such as signs and streetlamps. Use RAW, stabilize the camera when permitted, and keep a shutter speed fast enough for your subject; 1/250 second or faster is a practical starting point for people in motion.
Can I remove fences or reflections during editing?
You can reduce small distractions with masking, healing, cloning, or AI-assisted removal, but inspect the result for false textures and invented detail. Keep the original file and disclose substantial reconstruction when the image serves journalism, evidence, documentary work, or a competition with editing restrictions.
Conclusion
Your best move is simple: before trying to defeat an obstacle, decide what it can contribute. Move closer, shift a few centimeters, change the focus plane, and compare one clean frame with one layered frame. You will quickly see whether the barrier is visual noise or the element giving the photograph depth and emotional bite.
The next time glass throws a neon reflection across your subject or a fence fills the viewfinder, pause before walking away. That apparent blockage may be the raw material for your strongest composition. Let the obstacle become a frame, veil, pattern, or story, then press the shutter when all the layers click into place.
Fall Picks
fall essentials
As an affiliate, we earn on qualifying purchases.