
TL;DR

Get audio and creator gear delivered free with Prime
- Fast, free delivery on millions of items
- Prime Video, Amazon Music and more included
- Member-only deals all year
Low-key and high-key lighting describe an image’s overall brightness and contrast, not a fixed number of lights or a camera setting. With one light, a modifier, and a reflector, you can make a dramatic low-key portrait by controlling spill and reducing fill, then create a bright high-key look by softening the key, adding fill, and lighting the background as needed.
One light can make a portrait feel like a whispered secret or a sunlit greeting. The difference often comes down to where you place it, what it hits, and how much shadow you choose to keep.
Low-key and high-key lighting are two ways to shape brightness and contrast. You can create both with the same compact kit: a light, a softbox or umbrella, and a reflector can take you a long way. I’ll show you how to build each look, keep the subject readable, and handle the background without turning a small room into a gear puzzle.
Think of this as a practical lighting exercise. You’ll see why low-key does not mean underexposed, why a high-key background needs attention of its own, and how a few deliberate changes can shift the mood while your camera stays put.
Low-key describes a dark tonal range with controlled contrast; it does not mean the subject should be underexposed.
For low-key portraits, place the key to one side, reduce fill, and keep light off the background with distance, flags, or a grid.
For high-key portraits, soften the key, add reflector or light fill, and illuminate the background separately when it needs to appear white.
A white wall can bounce light into a low-key scene, while an overly bright background can spill onto a high-key subject.
One light, a modifier, and a reflector can support both looks; change direction, spread, fill, and background exposure one at a time.
Portrait lighting · Field guide 01
Low-Key and High-Key Lighting: Two Moods, One Kit
One light can make a portrait feel like a whispered secret or a sunlit greeting. Shape the mood with direction, spread, fill, and background control while your camera stays put.
The key insight
Change where the light goes—and how much shadow stays.
Low-key and high-key describe the image’s overall brightness and contrast, not a fixed number of fixtures or a camera setting.
Hold shadow; keep key detail readable.
Lift shadows; retain gentle shape.
Light, modifier, reflector.
Expose for the detail viewers need.
01 / Read the frame
Two tonal moods, one lighting language
Neither look is about placing a light “low” or “high.” You are choosing how brightness and contrast are distributed—and preserving enough tonal cues for the subject to read.
Low-key · dramatic control
Keep most tones dark. Place the key to one side, reduce fill, and limit spill onto the background. Protect important details in the eye, skin, or product.
Shadow with intentionHigh-key · open and bright
Keep most tones bright with softer contrast. Broaden the key, add reflector or light fill, and illuminate the background separately when it needs to appear white.
Brightness with shape02 / Build the low-key look
Direct the beam. Keep the detail.
Start with a softbox about 45° to one side and slightly above eye level. Feather its edge across the face, then watch where the light lands before changing camera settings.
Place the key to the side
Aim at the face, not the wall behind it. Let the far cheek roll gently into shadow while the near eye stays readable.
Reduce fill and spill
Remove or move the reflector farther away. Use a flag, grid, or greater subject-to-background distance to keep dark areas dark.
Expose for the subject
Turn off room lights and review the eye, skin, or label. Keep a hint of texture and a glint; don’t crush every shadow to black.
Low-key is a dark tonal range with readable subject detail—not an underexposed frame.
03 / Build the high-key look
Fill the frame, not the face flat
Bring a broad, soft source near the subject and lift the opposite side with a reflector. A white background may need its own light; keep that brightness from washing around the subject.
Broaden the key
Use a softbox, umbrella, or bounce to create gentle face light. Keep a little direction so cheeks and fabric retain form.
Add controlled fill
Reflect light into the shadow side or add a second source. A soft chin shadow can keep the portrait dimensional.
Light the background as needed
Test the wall or paper. If it records gray, add background light, then check hair, shoulders, and pale clothing for spill or flare.
High-key means bright and relatively even—not pure white everywhere or shadow-free.
04 / One kit · two directions
Make four deliberate changes
Keep the camera and core kit steady. Change one variable at a time so you can see how the subject, room, and background respond.
| Choice | Low-key direction | High-key direction |
|---|---|---|
| Key light | ✓ Side-lit and more directional | ✓ Broad, softened, near camera axis |
| Fill | ✓ Reduce or remove it | ✓ Reflect or add light to lift shadows |
| Background | ✓ Keep the beam off it; use distance or flags | ~ Light separately if white is needed |
| Watch for | ! White walls bouncing unwanted fill | ! Flare or spill washing out the outline |
| Subject detail | ✓ Preserve eye, skin, or product texture | ✓ Keep soft contour and tonal variation |
Trace the light, then shape the mood
Room size, wall color, subject distance, and available power all affect the result. Make a frame, inspect the edges, and adjust with purpose.
01 · PLACE
Set the key
Direction shapes the face.
02 · SPREAD
Shape the source
Focused or broad and soft.
03 · FILL
Choose shadow depth
Subtract or lift the dark side.
04 · BACKDROP
Control spill
Keep it dark or light it on purpose.
05 · REVIEW
Protect readable detail
Check expression, contour, and edges.
Know the difference before you move a light
Low-key and high-key lighting describe the image’s overall tonal range and contrast. Low-key images hold a large share of their tones in the darker range, with deliberate highlights and shadows; high-key images keep most tones bright, with gentler contrast. Neither label tells you how high the light sits or how many fixtures you need.
The tonal range changes how viewers read a scene. In a low-key portrait, darkness directs attention toward the illuminated face and can make the image feel private or tense. That effect depends on preserving enough detail to understand the subject: shadows that merge every feature into black can obscure the expression instead of emphasizing it. In a high-key portrait, bright tones and softer contrast can feel open and calm, but if every shadow disappears, the face may lose its shape and the image can feel flat.
Low-key is not simply underexposure. If you darken the whole frame until the face loses its important detail, you’ve made the picture dim, not expressive. Check the exposure on the eye, skin, or product detail you need viewers to read. High-key also needs shape: a nose shadow or a soft contour along a white shirt keeps the subject from looking flat. The practical distinction is that exposure determines whether important tones are recorded, while lighting placement and fill determine where those tones fall in the frame.
The same distinction matters in video and product work. A dark bottle photographed against a dark field can still show its outline through a controlled edge highlight, while a bright product shot can retain gentle shadow under the object. You are choosing the distribution of light and dark, not applying a preset mood. The outline or shadow gives the viewer cues about form, so removing all contrast can make even a well-exposed subject harder to read.
Products Worth Considering

Amazon Kindle Scribe Colorsoft 64GB (1st Generation)

LG UltraGear 27-Inch QHD OLED Gaming Monitor, 240Hz, 0.03ms, G-SYNC Compatible, FreeSync Premium Pro, HDMI 2.1

Bose QuietComfort Wireless Noise-Cancelling Over-Ear Headphones, Black
As an affiliate, we earn on qualifying purchases.
Build a low-key portrait with one controlled light
Low-key lighting creates a dark, contrast-rich frame by directing the key light onto the subject and limiting fill and background spill. Place the light off to one side, then watch where its beam falls before you change camera settings. A dark background helps, but control matters more than simply choosing black fabric.
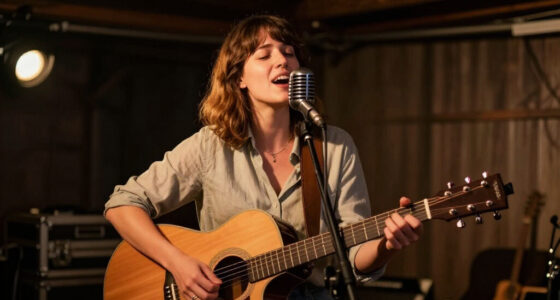
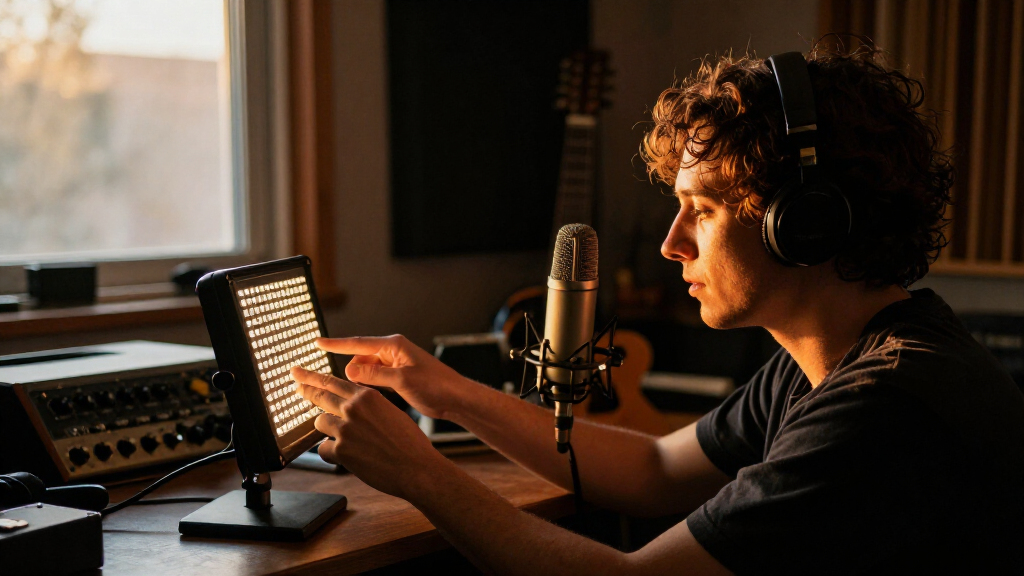
For example, imagine a musician in a small home studio. Put a softbox about 45 degrees to one side and slightly above eye level, then turn the subject’s shoulders toward the dark side of the room. Feather the softbox so its edge, rather than its brightest center, reaches the face. The result can preserve detail in the near eye while the far cheek rolls gently into shadow.
Take these steps before you shoot:
- Turn off room lights that brighten the background or contaminate the color.
- Place the key light to one side and aim it at the face, not the wall behind it.
- Check the shadow side. Remove the reflector or move it farther away if the shadows look too open.
- Control spill with a flag, grid, or greater distance between subject and background.
- Expose for the important detail, such as the eyes, skin, or product label, and review the result.
A white wall can bounce light back into the shadow side, even when you only use one lamp. Move your subject farther from it, turn the key away from the wall, or hang a dark cloth nearby. Keep the blacks intentional, but don’t crush every shadow; a faint fold in a jacket or glint in an eye gives the darkness somewhere to breathe.
Make high-key light bright without flattening your subject
High-key lighting makes the frame bright and relatively even by filling deep shadows and giving the background enough light. Begin with a broad, soft source near the subject, then use a reflector or second light to lift the opposite side. If you want a white background, light it deliberately instead of expecting a pale wall to turn white on its own.
On a simple portrait set, place the subject a few feet in front of a white wall or paper. A softbox near the camera gives gentle face light; a reflector opposite it brightens the shadow side. If the background still records gray, add a separate light aimed at it, then check that it doesn’t spill around the subject’s shoulders and wash out the edges. Keeping the background and subject light under separate control makes it easier to brighten the field without sacrificing facial detail or a clear outline.
Bright does not have to mean shadow-free. A small, soft shadow under the chin keeps the face dimensional, and light direction gives a white shirt enough shape to separate it from a pale background. Filling every shadow can remove the tonal cues that show the curve of a cheek or the folds of fabric. Retaining a little contrast often makes the bright frame feel more natural while preserving its airy quality.
Background brightness depends on distance, room size, and available power. If you push a background light too hard, the glow can flare into the lens or wrap around the subject. Take a test frame and check the hairline, shoulders, and pale clothing. For a product, watch reflective edges as closely as the background: a bright field may need a strip of dark card beside the object to restore a clean outline. These checks help balance a white field against the detail that gives the subject its shape.
Use one kit for both moods by changing four things
You can make one lighting kit create both looks by changing the key’s direction and spread, the amount of fill, and the background exposure. The same light can feel hard and focused when you control its beam, then broad and gentle when you use a larger diffusion surface or bounce it. These are two approaches to shaping a scene, not a shopping list.
| Choice | Low-key direction | High-key direction |
|---|---|---|
| Key light | Place it to one side; aim carefully | Bring a broad, soft source closer to the camera |
| Fill | Use little or none; add negative fill if needed | Reflect light back or add a gentle second source |
| Background | Keep it dark by limiting spill | Light it separately if you need it bright or white |
| Modifier | Use a softbox, grid, or flag for control | Use a larger softbox, umbrella, or bounce for spread |
For a quick before-and-after, keep the camera and subject in the same place. First, turn the key to the side, remove the reflector, and flag light off the wall for a moody portrait. Then rotate the key toward the camera, bring in the reflector, and add a background light if the wall needs to read white.
You don’t need two separate lighting kits. A reflector can act as high-key fill and, when turned around, a black surface can absorb bounce for deeper low-key shadows. An umbrella spreads light quickly but can spill everywhere in a tight room; a softbox is easier to aim. A grid narrows the beam, while a larger modifier makes soft light easier. Room size, wall color, and light output all shape the result, so make one change at a time and look at what it does.
Keep the background under control in a small room
Background control comes from distance, light direction, and spill management. In a small room, the subject may sit close to a white wall, so light from the key bounces back and brightens shadows you hoped to keep dark. For high-key work, the reverse problem can appear: a background light spills forward and softens the subject’s edges.
Say you’re photographing a chef in a spare bedroom. You don’t have space for a long studio runway, so move the subject as far from the wall as the room allows and place the key close to the face, aimed across it rather than straight at the wall. A black flag or piece of dark cloth between subject and wall can block bounce. Watch the background in a test frame; your eyes adapt quickly, while the camera records what the light actually did.
For a bright portrait, keep the subject forward of the backdrop and aim a background light so its brightest area sits behind the person rather than around their outline. If your light is too powerful or too close, turn it down or move it back and check again. Brightness that spills onto a white shirt may erase the fabric’s edge, while a little gray near the subject can help preserve shape.
There is no fixed distance that works in every room. Wall color, source size, and available power change the result. If you only have window light, use a dark curtain or board to cut bounce for low-key; for high-key, place a white reflector opposite the window and let a pale background receive more light. Listen for the little “click” of your process: change one thing, take a frame, and compare.
Fix the exposure without losing the mood
Set exposure to preserve the subject’s important detail, then shape the scene with lighting rather than relying on underexposure or overexposure. A low-key frame can contain deep blacks while keeping the eye, hair, or product texture clear. A high-key frame can hold bright tones without washing away the nose, fabric, or product edges.
Imagine a portrait where the subject wears a black sweater and sits against a dark background. If the sweater blends into the wall, raising exposure may brighten both and still leave the shape unclear. Instead, adjust the key’s angle or add a subtle edge light so the shoulder separates. For a high-key version, watch pale skin and clothing: if their texture disappears, reduce the background light or reposition it to stop spill.
With a strobe, use your camera’s meter or a flash meter if you have one, and review a test frame. With continuous LEDs or a window, you can watch the light change in real time, but the same checks apply. Look at the histogram and highlight warnings as aids, not as a replacement for checking the face or object itself. Screen brightness can fool you, especially in a dim room.
Color temperature matters too. A warm household lamp mixed with cool window light can leave skin with uneven color, which can distract from either mood. Turn off unrelated lights when you can, or set a consistent white balance for the sources you use. The goal is not a technically perfect histogram; it is a clear subject and a deliberate tonal range.
Frequently Asked Questions
Does low-key lighting mean underexposing the image?
No. Low-key means a darker overall tonal range, not an accidentally dark subject. Expose so the important detail remains readable, then reduce fill and control light on the background to keep the shadows deep.
Does high-key lighting always need a white background?
No. High-key describes a bright, relatively even image; the background can be pale or bright without being pure white. If you want white, light the background separately and watch for spill that erases the subject’s edges.
How many lights do I need for low-key or high-key portraits?
You can make a low-key portrait with one light by placing it carefully and limiting fill. For high-key, one light plus a reflector can lift shadows, though a second light makes it easier to brighten the background independently.
Can I create both looks with window light?
Yes. Use a window as your key, then add a dark curtain or board to absorb bounce for a low-key portrait. For a high-key look, bring a white reflector opposite the window and place the subject near a bright background; check that the face still has shape.
Which modifier should I use for these lighting styles?
A softbox gives you a more directed source, especially with a grid, while an umbrella spreads light broadly and can spill onto nearby walls. A reflector adds gentle fill without another powered light. The room and the amount of control you need matter as much as the modifier itself.
Conclusion
Start with one light and decide where you want the shadows to land. For a low-key frame, control the beam and let the dark areas stay dark while protecting the subject’s detail. For high-key, soften and fill the light, then give the background its own attention.
Make one adjustment, take a frame, and look closely at the eyes, edges, and background. A small change in direction can turn a quiet shadow into the whole story.