
TL;DR
Open a free Amazon Business account
Business pricing, bulk buying and tax-exempt orders.
Create a free accountAs an affiliate, we earn on qualifying purchases.
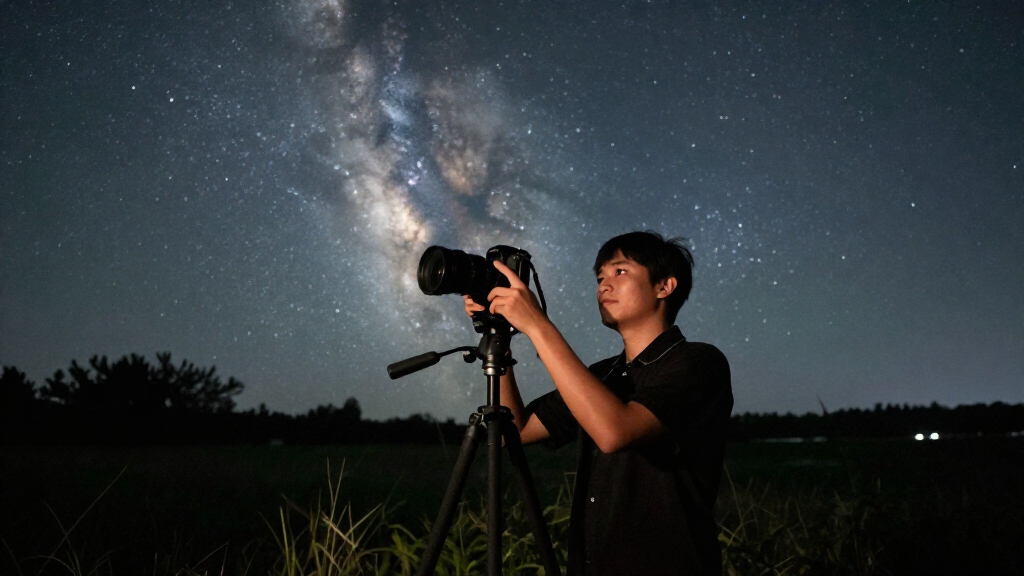
For your first Milky Way shot, find a dark location, shoot RAW from a sturdy tripod, focus manually, and begin near f/2.8, 10–15 seconds, and ISO 3200. Check every test frame for star movement and clipping, then capture 10–20 matching exposures that you can stack for cleaner detail.
The first time I photographed the Milky Way, the camera saw far more than my eyes did. A pale smudge above the hills became a river of stars, threaded with dark dust lanes and a warm glow near the horizon. That transformation feels like magic, but your first successful frame comes from planning and careful exposure, not luck.
Night sky photography asks you to work close to several limits at once. You need a shutter speed long enough to gather faint light but short enough to keep stars sharp, an aperture wide enough to reveal detail without turning the corners into a swarm of wing-shaped stars, and an ISO that makes the file usable without hiding mistakes. The Milky Way is mainly an exercise in collecting light while controlling movement.
This guide gives you a field-tested route from an empty memory card to your first Milky Way photograph. You will learn when and where to shoot, which equipment earns its place in your bag, what settings provide a dependable starting point, and how to focus in darkness. You will also see why a strong foreground, a short image stack, and natural editing can do more for your photograph than another expensive camera upgrade.
Plan around astronomical darkness, galactic-core position, moonlight, smoke, haze, and safe daylight access; a cloud-free forecast alone is not enough.
For a full-frame camera with a 20 mm fast lens, begin near f/1.8, 10–15 seconds, and ISO 3200, then judge the actual stars at high magnification.
Treat the 500 rule as a rough ceiling, not a promise; high-resolution cameras often reveal trailing well before its suggested exposure time.
Capture 10–20 identical sky frames for stacking and make a separate longer foreground exposure when the land is too dark.
Use restrained processing and disclose stacks, tracked skies, separate foregrounds, and composites so viewers understand how the image was made.
Night Sky Photography: Your First Milky Way Shot
A successful first frame comes from planning, accurate focus, and controlled exposure—not luck. Find clean darkness, stabilize the camera, gather enough light, and inspect the stars before committing to a full sequence.
The sky must be clear—and clean.
Cloud-free is only the beginning. Light pollution, smoke, haze, humidity, thin cloud, moonlight, and distant city glow can erase the contrast that makes the Milky Way visible.
Find true night
Plan for astronomical darkness. Check moonrise, moonset, lunar phase, and the hour when the galactic core clears your horizon.
Check transparency
Review smoke, haze, humidity, dust, wind, and thin-cloud forecasts. A technically clear sky can still scatter city light.
Scout in daylight
Confirm legal access, safe paths, parking, firm tripod ground, and strong silhouettes such as trees, ridges, cabins, or water.
Begin here, then judge the stars.
These settings are a dependable launch point for an untracked full-frame camera with a fast 20 mm lens. Focal length, sensor size, lens quality, and sky brightness will change the final choice.
Open wide enough to gather faint light; stop down slightly if corner stars show strong coma.
Long enough to collect signal, but short enough to protect star shape on many modern sensors.
Creates a useful starting file and preview without pretending ISO can replace captured light.
Control movement before chasing brightness.
A shutter that is too long permanently stretches stars. A slightly noisy file can be improved through stacking, but motion blur cannot be restored into points.
From forecast to finished frame.
Each decision protects the next. Strong processing cannot recover detail that was lost to poor timing, unstable support, inaccurate focus, or excessive star movement.
A dependable 12-step workflow.
Follow the same order on every outing. The routine reduces forgotten settings and makes it easier to isolate the cause when a test frame does not work.
Arrive before dark
Confirm safe access and choose stable ground.
Build the composition
Use one clear foreground anchor and leave room for the core.
Select RAW + manual
Keep full editing latitude and direct exposure control.
Open the aperture
Choose the widest setting that keeps stars acceptably clean.
Set 10–15 seconds
Start conservatively to protect star shape.
Begin at ISO 3200
Adjust after reviewing the histogram and highlights.
Set 3500–4200 K
Create a neutral, useful preview; RAW remains adjustable.
Focus manually
Magnify a bright star and make it as small as possible.
Prevent vibration
Use a two-second timer or remote shutter release.
Inspect at high zoom
Check center focus, corner coma, and star movement.
Read the histogram
Gather usable data without clipping bright highlights.
Capture the stack
Make 10–20 identical sky frames without moving the camera.
Pack for problems, not prestige.
A manual camera, wide lens, and sturdy tripod solve the essential challenge. Darker skies and better technique often improve the result more than a costly camera upgrade.
| Kit choice | What you gain | What you give up | First-night fit |
|---|---|---|---|
| Full-frame camera | Strong high-ISO performance and wide field of view | More weight, cost, and larger lenses | ✓ Excellent |
| APS-C or Micro Four Thirds | Compact equipment with capable results | Shorter exposure for equivalent framing | ✓ Strong |
| Fast wide-angle lens | More light within a short exposure | Possible coma and soft corners when wide open | ✓ Priority |
| Star tracker | Longer sky exposure at lower ISO | Polar alignment and a blurred foreground | ~ Later |
| Phone astrophotography mode | Simple automated multi-frame capture | Less control and less fine detail | ~ Usable |
Treat this result as a rough ceiling, not a guarantee. High-resolution sensors often reveal trailing much sooner.
Sharpness usually wins before the formula does.
10–15 seconds: practical starting zone. 25 seconds: the traditional estimate, with a greater risk of visible movement. Always inspect the actual stars at high magnification.
Small stars, clean stack, natural edit.
Accurate focus is unforgiving in darkness. Once it is locked, a short sequence of matching frames can reduce random noise while retaining real detail in the dust lanes.
Make one star as small as possible.
Use live view, enlarge a bright star or distant light, and rotate the focus ring slowly. Do not trust the printed infinity mark.
- Recheck after changing or moving the lens.
- Recheck after a large temperature change.
- Recheck after reframing or touching the ring.
- Tape the ring if it moves too easily.
Collect repeatable data.
Turn long-exposure noise reduction off for a stack, keep every exposure identical, and avoid moving the tripod. Capture a separate longer foreground exposure when the land is too dark.
- Stack 10–20 matching sky frames.
- Keep highlights below clipping.
- Use restrained contrast, clarity, and noise reduction.
- Disclose stacks, tracked skies, and composites.
Zoom in before shooting the sequence. If stars are stretched, shorten the shutter. If they are soft in every direction, refine focus. If corners look wing-shaped, stop the lens down slightly.
Choose a Night When the Milky Way Will Actually Show Up
Night sky photography begins with darkness, timing, and clear air. Choose a night near the new moon, confirm that the bright galactic core will be above the horizon, and travel beyond the main glow of towns. A clear forecast helps, but transparent air matters just as much as an empty cloud map.
The Milky Way remains in the sky throughout the year, yet its bright core is seasonal. In much of the Northern Hemisphere, the main core-photography window runs from spring through early autumn; Southern Hemisphere photographers often see the core higher in the sky and across a longer season [1]. A planetarium or astrophotography-planning app can show its direction, height, and angle for a chosen place and time.
I once arrived at a rural overlook under a forecast marked clear, only to find the horizon washed in a dull orange veil. Smoke from distant fires had scattered the town lights across the sky. The stars were visible, but the fine Milky Way contrast had vanished, proving that clear is not always clean.
- Plan for astronomical darkness, not merely sunset.
- Check moonrise, moonset, and lunar phase.
- Review smoke, humidity, haze, wind, and thin cloud forecasts.
- Look for distant city glow in the direction you plan to photograph.
- Visit during daylight to find parking, stable ground, safe paths, and foreground shapes.
A thin crescent Moon is not automatically a problem. When it sits away from the galactic core, it can brush a tree, cabin, or rock face with soft side light. A bright Moon near the Milky Way acts more like a giant streetlamp, flattening the sky and washing out the dark lanes you came to photograph.
Dark skies often improve your photograph more than a camera upgrade. Before buying new equipment, give your current kit a night under cleaner air.
Suppose you can choose between a familiar viewpoint 20 minutes from town and a darker ridge 75 minutes away. The ridge usually wins, provided you can reach it safely and legally. Once you have found that darker stage, the next question becomes much simpler: what equipment genuinely helps?
As an affiliate, we earn on qualifying purchases.
Pack the Small Kit That Solves the Biggest Problems
Night sky photography needs a camera with manual control, a wide lens, and a stable tripod. A full-frame body can provide cleaner high-ISO files, but APS-C, Micro Four Thirds, and recent phones can all work under dark skies. Your lens, focus, and location often matter more than sensor size.
A wide lens between roughly 14 and 24 mm full-frame equivalent gives you room for both sky and foreground. An aperture of f/2.8 or wider helps collect faint starlight, though some fast lenses produce coma or smeared corners at their widest setting. Closing an f/1.4 lens to f/1.8 or f/2 can trade a little light for noticeably cleaner stars.
| Kit choice | What you gain | What you give up |
|---|---|---|
| Full-frame camera | Strong high-ISO performance and a wide field of view | Usually more weight and larger lenses |
| APS-C or Micro Four Thirds | Compact equipment and capable results | Shorter shutter times for the same lens focal length |
| Fast wide-angle lens | More light in 10–15 seconds | Possible soft corners, coma, and shallow focus tolerance |
| Star tracker | Longer sky exposures at lower ISO | Extra setup, polar alignment, and a blurred foreground |
| Phone astrophotography mode | Simple automated stacking | Less control and less fine detail |
My working bag for a short walk is deliberately plain: camera, wide lens, sturdy tripod, spare battery, roomy memory card, lens cloth, and a headlamp with a red setting. Cold drains batteries, dew fogs front elements, and a loose tripod plate can spoil an hour of otherwise careful work. Small practical failures end more shoots than a lack of advanced gear.
Bring warm layers even when the afternoon felt mild. You may stand still for 30 minutes while wind slides across an exposed hillside, and the metal tripod can feel icy against bare fingers. Add water, a charged phone, and any safety equipment suited to the terrain, tides, wildlife, or local weather.
A portable tracker can wait. It improves sky detail, but it also follows the stars while the ground drifts, forcing you to capture and blend a separate foreground. For your first outing, a tripod and image stack teach the core skills with fewer moving parts—and those skills lead directly to the settings that make the first frame work.
As an affiliate, we earn on qualifying purchases.
Use This 12-Step Workflow for a Dependable First Frame
Night sky photography becomes manageable when you follow the same sequence every time. Arrive before dark, build the composition, set manual exposure, focus on a star, and inspect a test image at high magnification. A reliable starting point is f/1.8 to f/2.8, 10–15 seconds, and ISO 3200.
- Arrive before darkness and choose a safe, stable camera position.
- Level the tripod and frame a clear foreground shape.
- Set the camera to RAW and manual exposure.
- Open the lens to its widest usable aperture.
- Choose a shutter speed short enough to keep stars sharp.
- Begin at ISO 3200.
- Set white balance near 3500–4200 K for a usable preview.
- Turn off autofocus and focus manually on a bright star.
- Use a two-second timer or remote release to prevent vibration.
- Magnify the test frame and inspect focus, corners, and star movement.
- Check the histogram and adjust the exposure.
- Capture 10–20 identical frames for stacking.
With a full-frame camera and a 20 mm f/1.8 lens, I would start around f/1.8, 10–15 seconds, ISO 3200. On an APS-C body with a wider-equivalent field of view, I might shorten the exposure because the crop factor makes star movement more visible. These numbers open the conversation; your test frame makes the decision.
Do not force the preview to resemble the dark scene in front of you. Your eyes have adapted to the night, while the camera screen may be glowing like a tiny television. Aim for a bright but unclipped sky file, then judge it through the histogram and highlight warning rather than screen appearance alone.
If the histogram is crushed against the left edge, opening the file later will expose weak color and rough shadow noise. Increase light capture by opening the aperture or lengthening the shutter within the star-motion limit. Raise ISO after those two choices; ISO brightens the recorded signal, but it cannot replace light that never reached the sensor.
Turn tripod-mounted image stabilization off unless your camera or lens manual specifically supports tripod detection. Turn long-exposure noise reduction off while capturing a stack because the camera otherwise takes a matching dark exposure after every frame, doubling the wait. At that pace, a planned 10-frame sequence can consume the entire period when the core sits in the right place.
After the sky sequence, make a longer or lower-ISO exposure for the ground if needed. A dark rock arch that becomes noisy at 12 seconds may look clean after a two-minute foreground exposure. Keep the tripod fixed, because the next challenge is preserving pinpoint stars while every part of the sky keeps moving.
wide angle fast lens for astrophotography
As an affiliate, we earn on qualifying purchases.
As an affiliate, we earn on qualifying purchases.
Keep Stars Sharp Instead of Stretching Them Into Tiny Dashes
Sharp stars require precise manual focus and a shutter speed matched to your focal length, sensor, and resolution. Magnify a bright star in live view until it becomes the smallest possible point, then test the exposure. Never trust the infinity mark or the traditional 500 rule without inspecting the result.
The 500 rule estimates maximum exposure time by dividing 500 by the full-frame-equivalent focal length. At 20 mm, that calculation suggests 25 seconds. Modern high-resolution cameras often reveal movement much sooner, so the same setup may need 10–15 seconds; using 300, 200, or a pixel-aware calculator gives a more conservative estimate [2].
This is the central tension of untracked night work: longer exposures gather more light, but they also turn stars into streaks. Inspect the center and corners at high magnification, because a small mark that looks round on the rear screen can become an obvious dash on a large monitor. If the stars trail, shorten the shutter before blaming focus.
Focus errors have a different look. Activate live view, locate a bright star or distant lamp, enlarge it as far as the camera allows, and rotate the focus ring slowly through the sharp point. The star will shrink, brighten, and then swell again; return to the position where it looked smallest and most concentrated.
During one cold shoot, I focused perfectly at dusk and then spent an hour wondering why later frames looked soft. The temperature had fallen sharply, and a loose focus ring had shifted while I changed the battery. Now I recheck after a lens change, a strong temperature drop, an accidental touch, or any suspicious frame, then secure a loose ring with a small piece of removable tape.
- Use a two-second delay or remote release.
- Hang no swinging bag from the tripod in gusty wind.
- Shield the lens from direct wind when practical.
- Check for dew, fingerprints, and condensation between sequences.
- Review actual stars at high magnification, not just the whole image.
A sharp, slightly noisy star is easier to repair than a clean-looking streak. When exposure time and movement disagree, protect the star shape first.
Once your stars are crisp, technical correctness stops being the main goal. You now need to turn a field of bright points into a photograph with place, scale, and a reason to linger.
As an affiliate, we earn on qualifying purchases.
Give the Sky a Foreground That Makes It Feel Enormous
Night sky photography becomes compelling when the foreground gives the stars scale, location, and visual direction. Place a mountain, tree, building, person, or reflection beneath the galactic core, and let its shape guide the eye upward. The sky supplies wonder; a recognizable foreground turns that wonder into a story.
I often begin by walking around the site before sunset with the camera still in my bag. A bent pine may echo the curve of the Milky Way, while a path can lead from the bottom edge toward the core. At night, you will miss branches crossing the frame and bright road lights hiding at the edges unless you discovered them in daylight.
A vertical composition works well when the core rises steeply over one subject. A horizontal frame gives you space for a low mountain chain or calm lake, while a multi-frame panorama can capture the Milky Way as a broad arch. Do not center every element by habit; a core placed off-center often creates room for the sky to flow through the frame.
Imagine a lone hiker standing on a ridge. If the person appears as a clean silhouette, the viewer instantly feels the size of the sky. If you need detail in the figure, use a brief, subtle light or a separate short exposure, ask the person to remain still, and avoid blasting other photographers or wildlife with a white beam.
The foreground and sky rarely want the same settings. The sky needs a short exposure to freeze star movement, while the ground may benefit from a longer, lower-ISO frame. Capture both without moving the tripod, then blend them carefully with a believable horizon and consistent light direction.
A crescent Moon can help by laying a silver edge across rocks or grass. Heavy light painting can look artificial, disturb animals, and violate site rules, so keep any added light restrained and brief. When the place is already receiving soft natural illumination, I usually let that light do the work.
- Choose bold shapes that remain readable in near darkness.
- Use roads, shorelines, fences, or shadows as leading lines.
- Check every frame edge for clipped trees and stray lamps.
- Keep the horizon level unless a deliberate angle serves the scene.
- Leave enough space around the galactic core for the composition to breathe.
The best test is simple: cover the sky on your preview with your hand. If the lower part still has structure and intent, you have built a photograph rather than recorded a celestial object. The remaining work happens at the computer, where restraint matters as much as technique.
Build Cleaner Detail Without Making the Sky Look Artificial
Cleaner Milky Way files come from stacking several well-exposed frames and editing them with restraint. Capture at least 5–10 matching exposures, align the stars in stacking software, and combine them to reduce random noise. A sequence of 10–30 frames can reveal smoother color and finer dust lanes without a tracker.
Stacking works because random noise changes from frame to frame while real stars stay in predictable positions. The software aligns the sky, averages or rejects inconsistent pixels, and preserves repeated detail. If a plane crosses one exposure or a hot pixel glows red, modern stacking tools can often identify and remove it.
For example, a single ISO 6400 frame from a small camera may show blotchy violet shadows and rough grain around the core. Stack 15 frames made without shifting the tripod, and the same region becomes smoother while faint star clouds remain visible. You gain usable detail without turning the file into plastic.
A star tracker offers another route. It moves the camera with the sky, allowing longer exposures at lower ISO, but the tracked ground becomes blurred because the camera no longer follows Earth. You must capture a separate stationary foreground, align the setup accurately, and disclose the method if the finished image combines exposures.
Begin editing by correcting lens distortion and chromatic aberration, then set white balance and overall brightness. Reduce orange or green light-pollution casts, add local contrast gently, apply noise reduction, and sharpen stars selectively. The Milky Way contains warm dust, cool stars, and dark lanes; forcing everything toward one neutral gray removes its natural character.
Aggressive dehaze can make the core look carved from stone, while heavy saturation creates electric blue shadows and orange clouds that were never supported by the file. Machine-learning noise reduction can help, but a strong setting may erase faint stars or invent waxy texture. Zoom out often and ask whether the sky still feels like open air rather than printed wallpaper.
Editing should reveal captured information, not hide weak capture behind heavy effects. Clean data gives you room to work; restraint keeps the result believable.
Ethical processing also means describing what you made. If you stacked 20 sky frames, blended a longer foreground, used a tracker, or combined images captured at different times, say so. A composite remains a photograph, but clear disclosure preserves trust and helps beginners understand why their single frame looks different.
Back in the field, treat the location with the same care. Stay on legal access routes, keep artificial light low, give wildlife room, and pack out everything you carried in. The photograph matters, but the dark place matters more; leave it quiet enough for the next person to hear the grass moving in the night wind.
Frequently Asked Questions
Can I photograph the Milky Way with a phone?
Yes, a phone can photograph the Milky Way if it has a dedicated astrophotography or long-exposure mode and sits on a stable tripod. Dark skies make the largest difference because the small sensor needs every clean photon it can collect. Expect less fine detail than a larger camera, but modern multi-frame processing can produce a convincing first result.
Do I need a full-frame camera for night sky photography?
No. Full-frame cameras usually provide cleaner high-ISO files and a wider view for a given focal length, but they are not a requirement. An APS-C or Micro Four Thirds camera with a suitable lens, accurate focus, dark skies, and careful stacking can produce excellent Milky Way photographs.
Why can I barely see the Milky Way with my eyes?
Your eyes do not collect light for 10 or 15 seconds and process it like a RAW file. Light pollution, moonlight, haze, smoke, poor dark adaptation, or the wrong season can make the Milky Way appear as only a faint gray band. Give your eyes about 20 minutes away from bright light, then check that the core is above the horizon and facing away from city glow.
What ISO should I use for my first Milky Way shot?
ISO 3200 is a practical starting point, with ISO 1600–6400 covering many cameras and conditions. Set the aperture and longest acceptable shutter speed first, then use ISO to place the recorded brightness in a useful range. A higher ISO cannot replace light the sensor never captured.
How many photographs should I stack?
Even 5–10 matching frames can reduce random noise, while 10–30 often produces a visibly cleaner sky when conditions remain steady. Keep the exposure, aperture, focus, and framing unchanged throughout the sequence. Turn off long-exposure noise reduction so the camera does not pause for a dark frame after every shot.
Conclusion
Your first successful Milky Way photograph does not begin with a new camera. It begins when you choose a dark, transparent night, place the tripod with intention, focus on one tiny star, and make a test frame you are willing to inspect closely. Protect sharp stars and usable exposure before chasing dramatic color.
Plan one simple outing, arrive while the path is still visible, and start near f/2.8, 10–15 seconds, and ISO 3200. Make corrections one at a time, capture a short stack, and leave the landscape as quiet as you found it. By midnight, that faint silver haze above the horizon may be glowing on your screen like a road through the dark.
Flea & tick season Picks
flea and tick prevention
As an affiliate, we earn on qualifying purchases.