TL;DR

Get audio and creator gear delivered free with Prime
- Fast, free delivery on millions of items
- Prime Video, Amazon Music and more included
- Member-only deals all year
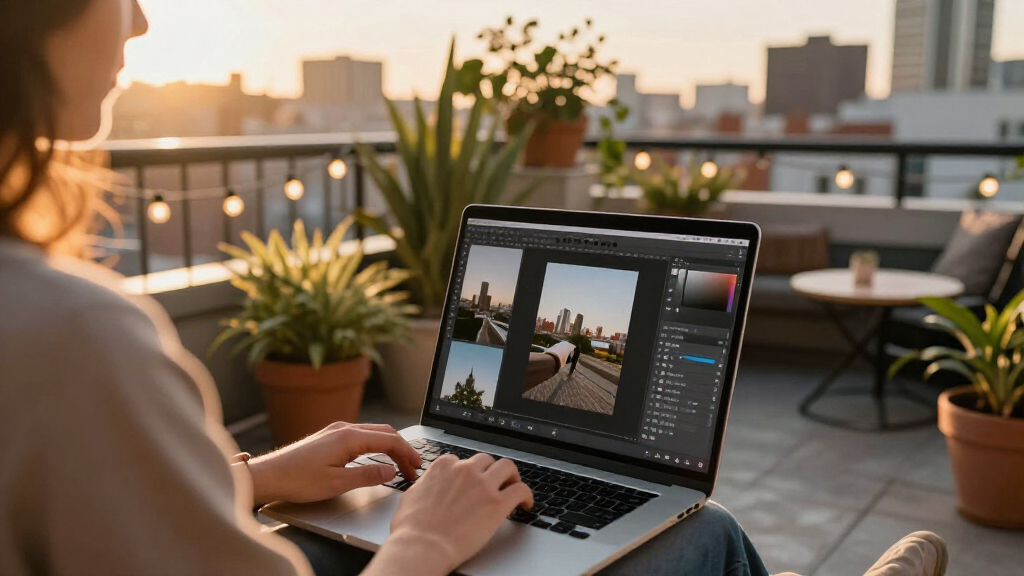
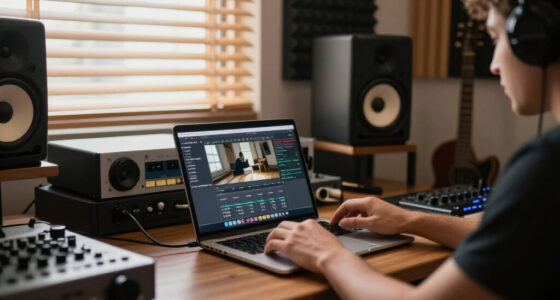
Capture One Styles and Lightroom presets serve the same basic purpose: they apply a saved look or collection of adjustments to a photograph. Capture One favors layer-based color work, tethered production, and modular grading, while Lightroom offers adaptive AI presets, a larger preset ecosystem, and stronger editing across desktop, web, tablet, and phone.
A preset can change in one click, yet the photograph underneath may change even more when you switch editing applications. Feed the same RAW portrait into Capture One and Lightroom, apply two recipes with matching contrast and saturation values, and you can get different skin color, highlight texture, and shadow depth.
The reason sits deeper than the sliders. Capture One and Lightroom interpret the camera file through their own RAW engines, profiles, curves, lens corrections, and default sharpening. I treat a Style or preset as a set of cooking instructions: the recipe matters, but so do the ingredients, the pan, and the heat beneath it.
This guide shows you where Capture One Styles vs Lightroom Presets differ in everyday editing, from layers and AI masks to stacking, profiles, batch work, and mobile access. You will also learn how to test a saved look on your own files, because a polished sample made under soft window light tells you little about the same recipe under green office fluorescents or hard midday sun.
Compare both applications with at least 12 RAW files covering skin, saturated color, mixed light, deep shadows, white fabric, and bright highlights.
Choose Capture One for layer-based grading, tethered Sessions, Style stacking, and detailed color control.
Choose Lightroom for adaptive AI presets, a larger learning ecosystem, catalog-driven work, and editing across desktop and mobile devices.
Keep exposure, white balance, crop, healing, and geometry out of general-purpose saved looks unless those settings serve a narrow repeatable job.
Rebuild a look visually in the target application instead of trusting direct conversion, because profiles, curves, masks, and color controls do not map one to…
Capture One Styles vs Lightroom Presets
Both apply a saved photographic look in one click. The decisive difference is the system beneath that click: RAW rendering, profiles, layers, masks, color tools, and device workflow all influence the final image.
Matching contrast and saturation values can still produce different skin color, highlight texture, and shadow depth.
Separate creative color from corrective edits and control intensity with layer opacity.
Apply region-aware looks and continue editing across desktop, web, tablet, and phone.
Two routes to a finished look
Capture One emphasizes modular color work, layers, tethered production, and Sessions. Lightroom emphasizes adaptive selection, catalog-driven organization, a broad preset market, and connected editing across devices.
Precision through layers
A Style saves adjustments from multiple tools. Capture One separately uses “Preset” for an individual tool configuration, such as sharpening.
- Creative grading on its own layer
- Layer and Style opacity control
- Detailed Color Editor workflow
- Style stacking when enabled
- Strong tethering and Session workflows
Reach through intelligence
A Lightroom preset commonly contains settings from many panels and can act as a broad recipe or an adaptive, region-aware starting point.
- AI masks for detected image regions
- Amount control on compatible presets
- Large commercial and community ecosystem
- Catalog and cloud-connected workflows
- Desktop, web, tablet, and phone access
Differences that change the edit
The strongest choice depends less on the appearance of a sample image and more on how the saved look interacts with selective editing, file organization, production speed, and the devices you use.
| Editing need | Capture One Styles | Lightroom Presets |
|---|---|---|
| Base rendering | Capture One engine with camera-specific ICC profiles | Adobe Camera Raw with Adobe or Camera Matching profiles |
| Selective work | Layer-led Layers, masks, and Style Brushes |
AI-led AI masks and adaptive presets for detected regions |
| Strength control | Style opacity or layer opacity, depending on version and workflow | Amount slider on compatible presets |
| Combining looks | Styles can stack when stacking is enabled | Overlapping settings usually replace earlier values; targeted presets can combine |
| Organization | Style packs and folders within Sessions or catalogs | Preset groups within desktop catalogs or cloud libraries |
| Cross-device editing | Depends on product, platform, and synchronization setup | Strong Connected desktop, web, tablet, and phone workflow |
| Direct compatibility | Cannot directly use Lightroom XMP presets | Cannot directly use Capture One Style files |
| Best-known workflow | Studio production, tethering, modular grading, and detailed color | AI selection, broad preset access, catalogs, and mobile continuity |
Why matching sliders do not match color
A RAW file contains sensor measurements, not a finished photograph. Each application translates those measurements through its own profile, tone mapping, color science, corrections, and defaults before the saved recipe begins its work.
That means “+10 contrast” describes a similar intention, not an equivalent calculation. A steeper starting curve may compress shadows earlier; different highlight mapping may preserve or flatten white fabric; different color ranges may push skin and saturated clothing in different directions.
Follow the look from sensor to screen
A Style or preset is a set of cooking instructions. The recipe matters, but so do the ingredients, the pan, and the heat beneath it. Trace the whole processing chain before blaming the final slider values.
Where each system feels strongest
These bars are a qualitative workflow map based on the documented strengths in this comparison. They describe emphasis, not universal image quality or objective accuracy.
Capture One emphasis
Designed around granular control and production-oriented editing.
Lightroom emphasis
Designed around intelligent selection, scale, and connected access.
Control-to-convenience spectrum
Both applications can produce polished images. Their natural centers of gravity differ.
Test the recipe on your own files
A polished sample made under soft window light says little about the same look under green office fluorescents or hard midday sun. Compare both systems using at least 12 RAW photographs.
Keep the recipe portable
General-purpose looks work best when they concentrate on creative intent. Corrections tied to one photograph can make a reusable recipe fragile, unpredictable, or destructive when applied in batches.
Separate correction from style
Keep exposure, white balance, crop, healing, and geometry out of broad creative looks unless the recipe serves a narrow, repeatable job.
Build camera-aware variants
If several camera bodies render strong colors differently, create profile-specific or camera-specific versions instead of forcing one universal preset.
Rebuild by eye
When moving a look between applications, match the visible result instead of copying numbers. Profiles, curves, masks, and color controls do not map one-to-one.
The look belongs on its own layer
You prioritize layer opacity, modular grading, Style stacking, tethered Sessions, and close control over color during professional or studio production.
The look must travel and adapt
You prioritize adaptive AI presets, a larger learning and preset ecosystem, catalog-driven work, and consistent access across desktop and mobile devices.
Neither engine is universally more accurate or attractive. Judge skin, saturated color, highlights, shadows, batch consistency, and editing speed on the cameras and lighting conditions you actually use.
See the Differences That Actually Change Your Edit
Capture One Styles vs Lightroom Presets differ most in RAW rendering, selective-editing tools, look intensity, organization, and the wider workflow around them. Both save time by applying several adjustments at once, but Capture One leans toward layers and studio production, while Lightroom leans toward AI selection and connected devices.
| Editing need | Capture One Styles | Lightroom presets |
|---|---|---|
| Base rendering | Capture One engine with camera-specific ICC profiles | Adobe Camera Raw with Adobe or Camera Matching profiles |
| Selective work | Layers, masks, Style Brushes, and layer opacity | AI masks and adaptive presets for detected regions |
| Adjusting strength | Style opacity or layer opacity where supported | Amount slider on compatible presets |
| Combining looks | Styles can stack when stacking is enabled | Overlapping settings usually replace earlier values |
| File organization | Sessions or catalogs, with strong tethering tools | Desktop catalogs or cloud-connected libraries |
| Cross-device editing | Varies by product and synchronization setup | Strong desktop, web, tablet, and phone connection |
| Direct compatibility | Cannot directly use Lightroom XMP presets | Cannot directly use Capture One Style files |
The naming alone catches new users. A Capture One Style stores adjustments from several tools, while a Capture One Preset usually saves settings from one tool, such as sharpening. A Lightroom preset commonly stores settings from many panels, so the word preset describes a broader recipe there.
Imagine editing a set of restaurant portraits at a stainless-steel counter. In Capture One, you might place the color grade on a layer and lower its opacity when the chef’s face turns too warm. In Lightroom, an adaptive portrait preset could find the person automatically while leaving the silver counter alone. The destination can look similar, but the route feels very different.
A saved look is only one part of an editing system. The surrounding RAW engine, masks, profiles, and file-management tools shape both the result and the time you spend reaching it.
As an affiliate, we earn on qualifying purchases.
Understand Why Matching Sliders Still Produce Different Color
Capture One Styles vs Lightroom Presets can produce different color even when their visible slider values match because each application develops the RAW file differently. The camera profile, base curve, highlight mapping, sharpening, and color controls establish a starting image before your saved adjustments begin shaping it. That starting image matters because every later adjustment responds to tones and colors the RAW engine has already interpreted.
A RAW file is not a finished photograph. It contains sensor measurements that must be translated into visible color, brightness, and contrast. Capture One uses camera-specific ICC profiles, while Lightroom uses Adobe profiles and Camera Matching options through Adobe Camera Raw [1][2]. These profiles do more than add a superficial color cast: they determine how the application maps the camera’s red, green, and blue response into working color. A subtle difference at this stage can become much larger after saturation, curves, or selective color adjustments are applied.
The base tone curve creates another important difference. If one application begins with deeper shadows and a steeper midtone curve, adding the same numerical contrast increase can compress dark detail sooner. If the other protects highlights more aggressively, the same exposure and highlight values may preserve texture in a white shirt that appears flatter or brighter elsewhere. Matching controls describe similar intentions, not equivalent calculations.
I see this most clearly with skin beside a strong color. Take a portrait of a red-haired subject wearing a cobalt jacket under cloudy light. One engine may keep the cheeks peachy while pushing the jacket toward electric blue; the other may render warmer skin and a quieter jacket before you touch a single color control. Increasing blue saturation by the same amount then exaggerates two different starting blues, while a skin adjustment may affect a different range of oranges and reds in each program.
This interaction explains why a look that succeeds on one camera can drift on another. Two camera models may record the same red fabric with different spectral responses, and their profiles must compensate differently. A preset built around one camera’s restrained reds may oversaturate another camera’s files, even inside the same application. The practical implication is that photographers using several camera bodies may need camera-specific versions of a look or a smaller set of corrections applied before the creative recipe.
Exposure and white balance also change how a recipe behaves. A preset built on a bright, neutral image can turn a one-stop-underexposed frame muddy, while its contrast curve may clip a sunlit forehead in an overexposed frame. White balance is especially influential because it changes the color values entering later tools: warming a file can move skin, wood, and orange fabric into the same editable range. The same recipe does not mean the same result when the starting files carry different light, color, and camera profiles.
This is why copying slider values between applications rarely gives you an exact match. Capture One’s Color Editor does not map neatly onto Lightroom’s HSL and Color Mixer controls, and their clarity, texture, structure, grain, and tone curves respond differently. Even similarly named controls may operate at different spatial scales or protect edges and skin tones differently. You can match the visual character, but you cannot copy the numbers and expect identical pixels.
The tradeoff is between numerical consistency and visual consistency. Numerical consistency is quick to document, but it assumes that equivalent values perform equivalent work. Visual consistency takes longer because you must compare reference images and adjust each application by eye, yet it is more useful when the final photographs must share a recognizable identity. For client work, the better question is not whether two recipes contain matching settings, but whether skin, product colors, contrast, and highlight detail remain acceptably consistent at delivery.
When comparing the programs, use at least 12 representative RAW files: daylight skin, tungsten interiors, saturated clothing, foliage, deep shadows, white fabric, and a bright sky. Compare the files first with neutral settings, then with the saved looks applied, and note where the difference grows. If the neutral render already disagrees, the profile or RAW engine is probably responsible; if the gap appears only after the recipe, investigate curves, color ranges, sharpening, and masks. That small contact sheet tells you far more than one dramatic mountain image selected to flatter a preset.
Lightroom presets for portrait editing
As an affiliate, we earn on qualifying purchases.
As an affiliate, we earn on qualifying purchases.
Use Capture One Styles When You Want the Look on Its Own Layer
Capture One Styles vs Lightroom Presets becomes a meaningful choice when you want to separate creative color from corrective editing. Capture One’s layer system lets you apply, mask, and soften many adjustments without mixing every decision into one global recipe, giving you hands-on control over where the look appears.
On a studio portrait, I may want a cool, polished background while keeping the subject’s skin warm and believable. I can put the creative treatment on a masked layer, erase it from the face, and lower the layer opacity until the gray paper backdrop carries a clean blue whisper. The layer holds the color and holds back the excess.
Capture One can also stack Styles when stacking is enabled. That works well when each Style has a narrow job: one handles a tone curve, another shapes color, and a third adds grain. If two Styles both change the same tools, the later values may replace or interact with earlier settings, producing blocked shadows or color that feels heavy.
Start with exposure and white balance before applying a creative Style. A saved look cannot rescue a badly chosen starting point with consistent results.
Apply the main Style and reduce its Style opacity where your version and workflow support it. Watch skin, white fabric, and saturated objects as you move the control.
Move the creative treatment to a separate layer when you need local control. Build or refine a brush, gradient, radial, luminosity, or AI-assisted mask.
Add only modular Styles that affect different tool groups. Check the tool values after each click so one recipe does not quietly overwrite another.
According to Capture One’s documentation, Styles contain saved adjustments across multiple tools, while individual-tool settings are called Presets [1]. That distinction supports a tidy working method: use a sharpening Preset for the tool, a Style for the broad look, and layers for local decisions.
This setup suits tethered portrait, fashion, product, and commercial work especially well. During a shoot, you can apply a preview Style as files arrive and give the client a useful sense of direction. Treat that preview as a conversation starter, not the final grade; retouching, output paper, client notes, and fine color work still come later.
As an affiliate, we earn on qualifying purchases.
Use Lightroom Presets When Speed Depends on AI and Multiple Devices
Capture One Styles vs Lightroom Presets favors Lightroom when you want a large preset library, fast AI-based selections, and edits that follow you between computers and mobile devices. Lightroom’s adaptive presets can analyze each photograph, create fresh masks, and target a subject, sky, background, or person instead of applying everything globally.
A conventional preset applies recorded values to the whole image or to masks already defined in the recipe. An adaptive preset works differently: it looks at the new photograph when applied and generates a mask for detected content [2]. On a wedding frame, it can brighten the couple while leaving the glowing string lights and dark garden closer to their original mood.
This automation saves real time, but it still needs your eyes. Fine hair against bright windows, a glass bottle on a white table, or two people overlapping in similar clothes can confuse an AI selection. Zoom to 100 percent around hair, fingers, veils, transparent objects, and low-contrast edges before copying the edit across a set.
Lightroom’s Amount slider can weaken or strengthen compatible presets without forcing you to visit every panel. A crisp travel preset may feel balanced at 65 percent on a misty street but harsh at full strength, where blue shadows turn inky and brickwork starts to crunch. Some settings and older presets do not scale evenly, so check the result rather than trusting the number.
The larger Lightroom ecosystem gives you many options, tutorials, and commercial packs. Quantity also brings clutter. A useful pack shows varied cameras, several kinds of light, natural skin tones, required profiles, supported versions, and sensible strength choices; a weak pack often relies on extreme orange shadows, crushed blacks, and one flattering sample.
Cloud-connected editing matters when your work moves. You might flag photographs on a phone during a train ride, refine color on a desktop, and show a synchronized album on a tablet that evening. Lightroom Classic remains centered on desktop catalogs and local storage, while the cloud-based Lightroom experience makes cross-device editing a central part of the workflow.
As an affiliate, we earn on qualifying purchases.
Avoid the Profile and File Traps That Break a Saved Look
Profiles and source-file types can change a Style or preset more than any strength slider. A profile defines the underlying color interpretation, while the saved recipe applies editable adjustments on top. Change that foundation, and your warm, airy portrait may become ruddy, flat, or unexpectedly dark.
In Lightroom, a preset may select an Adobe, Camera Matching, or creative profile. In Capture One, a Style can depend on a particular camera-specific ICC profile and curve. If the required profile is missing, the application may substitute another starting point, leaving violet flowers too blue or olive skin too yellow.
Think of the profile as the stage lighting and the preset as wardrobe. A burgundy coat does not look the same under a cool spotlight and an amber lamp, even though the coat never changed. For that reason, record the required profile and curve whenever you build or share a reusable look.
JPEG, TIFF, HEIF, smartphone, and RAW files also react differently. A JPEG has already received tone mapping, sharpening, color rendering, and compression before it enters your editor. Apply a punchy RAW preset to a camera JPEG, and you may get chalky highlights, crunchy edges, and skin with the warmth of a heat lamp.
Create separate RAW and JPEG versions when you regularly edit both file types.
Avoid saving fixed exposure, white balance, crop, healing, and geometry settings unless the recipe has a narrow, repeatable use.
Document any custom profile, supported application version, and camera limitation.
Test the look on mixed light, dark skin, pale skin, saturated fabric, foliage, metal, and white objects.
Direct conversion between the applications is unreliable. Lightroom commonly stores presets as XMP files, while Capture One uses its own Style format and processing controls. A third-party converter or LUT may approximate the color mood, but it can lose profile behavior, highlight recovery, AI masks, Color Editor work, grain, sharpening, lens corrections, and nonlinear curve interactions.
If a client wants the same visual identity in both programs, rebuild it by eye. Use a varied reference set, match broad tone and color, then make application-specific versions. That approach takes longer than converting a file, but it produces a repeatable working look instead of a fragile imitation.
Choose the Workflow That Saves Time After the First Click
Your complete workflow should decide the winner, not the number of Styles or presets in a folder. Choose Capture One when tethering, Sessions, layers, and precise color work shape your day; choose Lightroom when catalogs, adaptive masks, broad learning resources, and editing across several devices save more time.
For a commercial product shoot, Capture One can apply a controlled preview Style while images arrive from the tethered camera. The stylist, art director, and photographer see a closer version of the intended mood on set. That immediate feedback can reveal that a navy package is reading too purple before you photograph another 80 nearly identical frames.
For a wedding, Lightroom Classic can keep a large catalog searchable by date, camera, rating, keyword, and collection. You can group reception photographs by lighting, correct one representative frame, and synchronize the settings through the group. An adaptive people preset may then add selective face brightness without lifting every candlelit background.
Neither application automatically fixes a batch with mixed exposure and white balance unless the selected recipe includes automatic or adaptive behavior. Even then, group photographs by lighting condition. Ten frames captured beside the same window form a sensible batch; mixing those with orange dance-floor light and blue twilight invites uneven color.
Performance claims also need a fair test. Use the same RAW files, comparable preview sizes, similar mask complexity, matching export dimensions, active GPU support, and realistic catalog or Session sizes. A quick export of five clean files tells you little about a working job containing 2,000 RAW images, layered masks, previews, and background synchronization.
When you test each workflow, edit one complete assignment rather than playing with a hero image for ten minutes. Import or tether, cull, color-match, apply local corrections, export, find an older frame, and back up your custom recipes. The system that feels faster at the final delivery is usually the better fit, even if the other program gave you a prettier first click.
Do not switch applications for one preset pack. A fashionable look fades quickly; a file-management and editing workflow touches every photograph you make.
Build Saved Looks That Survive Real Photographs
A durable Style or preset acts as a flexible starting point, not a finished edit. It shapes repeatable color and tone while leaving image-specific choices such as exposure, white balance, cropping, healing, and subject masks in your hands. Good recipes bend; brittle recipes break as soon as the light changes.
Start with a contact sheet that reflects your actual work. If you photograph families, include backlit hair, dark suits, white dresses, flushed cheeks, deep skin tones, green grass, and warm living-room lamps. A recipe tested only on one pale face beneath soft north-window light has not met the messy color of a Saturday afternoon session.
Correct each reference image to a sensible neutral starting point. Keep exposure and white balance out of the reusable recipe unless automatic behavior is deliberate.
Build color, tone, grain, and sharpening as separate modules. This lets you change the seasoning without rebuilding the meal.
Test at three practical strengths, such as 40, 70, and 100 percent, or create lighter versions when the application cannot scale every setting cleanly.
Inspect faces, white objects, saturated reds, blue shadows, and clipped highlights at normal viewing size and 100 percent magnification.
Export samples to the format you deliver. A subtle shadow color on a wide-gamut monitor may disappear in a small web JPEG or print much darker on matte paper.
I judge a saved look by how little repair it creates across a whole set. If it gives 40 portraits a shared voice but forces me to fix every orange forehead, it did not save time; it merely moved the work. The best recipe applies a recognizable mood and leaves room for the photograph.
Back up your custom Styles, presets, and required profiles outside the application’s main folder. Software upgrades, computer replacements, and damaged catalogs have no respect for your favorite curve. Keep a dated copy with your other working assets and write down the application version, profile, and any installation steps.
Frequently Asked Questions
Can Lightroom presets be imported directly into Capture One?
No direct, reliable import path exists because Lightroom commonly uses XMP presets and Capture One uses its own Style format and processing controls. Conversion tools or LUTs may copy part of the color mood, but profiles, masks, curves, grain, sharpening, and highlight behavior can change or disappear.
Why does the same look appear different in Capture One and Lightroom?
Each application uses a different RAW-processing engine, profile system, tone mapping, sharpening, and color model. Even identical slider values can produce different skin tones, highlights, and shadow color, especially across different camera models or lighting conditions.
Are Capture One Styles better for portrait photography?
Capture One Styles suit portraits when you value tethered capture, layers, and detailed skin-color control. Lightroom can be faster when you want adaptive masks for people, faces, clothing, and backgrounds, so the better choice depends on how you photograph and deliver the job.
Can Styles and presets damage a RAW file?
No, both applications edit nondestructively. A Style or preset changes processing instructions while leaving the original RAW sensor data untouched. Your source file remains intact unless you deliberately replace, move, or delete it outside the normal editing process.
Should a reusable preset include exposure and white balance?
General-purpose looks should usually leave exposure and white balance under your control because those settings depend heavily on the photograph. Include them only for a repeatable setup, such as a fixed studio with controlled lights, or when you intentionally use automatic adjustment behavior.
Conclusion
Choose the editing workflow before you choose the saved look. Capture One Styles make sense when layers, tethering, Sessions, and deliberate color work match how you shoot. Lightroom presets make sense when AI masks, catalog tools, abundant learning material, and cross-device editing remove more friction from your week.
Whichever route you take, test the recipe on the photographs that usually fight back: mixed light, bright fabric, dark skin, red cheeks, glass, hair, and blue shadows. Let the Style or preset set the rhythm, then use your eyes to finish the frame. The one-click look opens the door; your judgment decides what walks through it.
Fall Picks
fall essentials
As an affiliate, we earn on qualifying purchases.

![Mike Love Rejoins The Beach Boys On Stage Amid Health Issues [Updated]](https://photomocha.com/wp-content/uploads/2026/10/mike-love-rejoins-the-beach-boys-on-stage-amid-health-issues-updated-featured-260x140.jpg)