
TL;DR

Get audio and creator gear delivered free — and shop member deals
- Fast, free delivery on millions of items
- Access to Prime Big Deal Days deals on October 6–7
- Prime Video, Amazon Music and more included
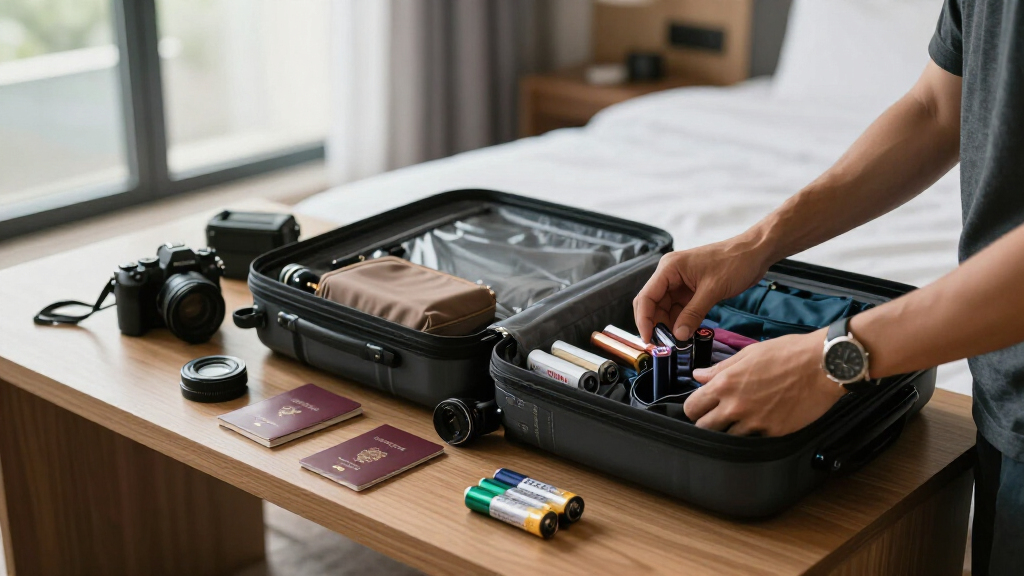
A reliable travel photography checklist covers four things: gear you will carry, documents you can reach, enough power and storage, and two verified copies of every important photograph. Pack for the pictures you expect, then prepare for one realistic failure such as a dead battery, damaged card, stolen bag, or unavailable internet connection.
A camera rarely ruins a trip by being one feature short. Trips fall apart when you discover a flat battery at sunrise, leave your tripod plate at home, or lose three days of photographs because your only memory card failed. The smallest forgotten item can silence an otherwise capable camera.
This guide gives you a practical travel photography checklist built around real shooting conditions: crowded trains, wet coastlines, strict baggage limits, patchy Wi-Fi, and hotel rooms with one inconvenient outlet. You will learn what to pack, which documents to carry, and how to create backups that survive bad luck.
I approach packing as a working photographer, not as a collector trying to fit an equipment cabinet into a backpack. That means choosing gear for a specific job, testing every connection, and planning recovery before departure. You will also find clear packing steps, a kit comparison, and field-tested habits, along with common mistakes that can turn a beautiful morning into a frantic search through tangled cables.
Choose one dependable camera and a versatile lens before adding specialist equipment that may spend the trip inside the bag.
Carry passport, permits, insurance details, serial numbers, and offline copies in locations separate from your camera gear.
Keep at least two verified copies of every important photograph on separate devices, with one copy outside the camera bag.
Test the full chain from capture to backup at home, including cards, chargers, cables, tripod plates, and file verification.
Split batteries, cards, documents, and storage devices across different locations so one lost or wet bag cannot ruin the trip.
Travel Photography Checklist
Gear, documents, power, storage, and a backup plan built for crowded trains, wet coastlines, strict baggage limits, unreliable Wi-Fi, and hotel rooms with one inconvenient outlet.
Pack for the photographs you expect
Start with one camera you will actually carry and one lens that handles most planned subjects. Add specialist equipment only when it creates a clear capability. The smallest support item often protects the usefulness of the entire kit.
Camera body
Test the complete capture path before packing.
- Buttons, sensor and card slots
- Correct date, time and file format
- Weather protection within reach
Primary lens
Choose a versatile lens before adding specialist glass.
- Standard zoom for mixed travel
- Telephoto only when reach matters
- Wide lens for a defined visual need
Energy chain
A flat battery at sunrise turns every other feature into dead weight.
- Charged spare batteries
- Correct charger and cables
- Compatible power bank and adapter
Memory cards
Several smaller cards reduce the impact of one loss or failure.
- Format and test before departure
- Separate fresh and used cards
- Split cards across locations
Support system
Bring support only when low light, long exposures, or the subject justify it.
- Tripod or compact monopod
- Matching quick-release plate
- Filters and required adapters
Keep it working
Salt, dust, rain, and fingerprints can defeat an otherwise excellent setup.
- Blower and microfiber cloths
- Lens caps and small weather cover
- Padded, discreet carry system
Build a backup plan that survives a lost bag
Do not format a card until two verified copies exist on separate devices. Keep at least one copy away from the camera bag so theft, water, or impact cannot remove the photographs and both backups at once.
Capture
Keep the original card intact and mark it as used.
Copy
Transfer files to a second device such as a portable drive.
Verify
Confirm file counts and open representative photographs.
Separate
Place one verified copy outside the camera bag.
Nightly verification
Plan for one realistic failure
Match capability to the pace of the trip
Weight changes how you travel. A lighter bag preserves curiosity and movement; a specialist kit buys reach and redundancy but adds security burden, slower transitions, and more opportunities for small parts to go missing.
| Kit style | What to carry | Best fit | Mobility | Main tradeoff |
|---|---|---|---|---|
| Phone or compact | Phone or compact camera, power bank, cable, cleaning cloth | Day trips, family travel, discreet street photography | ✓ Highest | ✗ Less reach and direct control |
| Light camera kit | One body, standard zoom, spare battery, several cards | City breaks, hiking, documentary travel | ✓ High | ~ Limited body or lens fallback |
| Flexible two-lens | One body, standard zoom, wide or telephoto lens | Landscapes, portraits, wildlife, architecture | ~ Balanced | ~ More weight and lens changes |
| Specialist kit | Two bodies, dedicated lenses, support, filters, extra storage | Paid assignments or subject-led expeditions | ✗ Lowest | ✗ Heavy bag and greater security burden |
Qualitative capability scale: more equipment expands specialist coverage but does not measure photographic quality.
Carry the records that keep you moving
Keep primary documents on your person, protected digital copies separately, and location-specific permissions available offline. A camera in your bag does not grant permission to use it.
Identity and entry
Passport, visas, required ID, and protected offline copies.
Insurance
Travel and camera coverage, claim contacts, and policy details.
Equipment records
Serial numbers, item photographs, receipts, and ownership details.
Travel logistics
Itinerary, accommodation, transport bookings, maps, and emergency funds.
Location permits
Park, property, commercial, tripod, and photography permissions.
Offline access
Save official pages, approvals, maps, and contacts as PDFs or screenshots.
Test every connection before departure
Run the real workflow at home. Make photographs, change batteries, fill a test card, connect the reader, create both copies, verify files, mount the tripod plate, and confirm that each document opens offline.
Camera, lens, battery, card
Charger, cable, adapter, bank
Reader, drive, file verification
Identity, insurance, permits
Split cards, copies, power, records
One giant memory card
A single card concentrates the entire trip into one failure point.
Backups in one bag
Two devices offer little resilience when theft or water reaches both.
Untested accessories
A wrong cable, reader, adapter, or tripod plate can break the full chain.
Pack the Gear That Will Actually Earn Its Place
Your Travel Photography Checklist should start with the camera you will actually carry, one versatile lens, spare power, enough storage, and simple cleaning tools. Build around the photographs you plan to make, because usable gear beats impressive gear when you are climbing station stairs or walking six humid miles.
For a city trip, I often favor a camera body and a standard zoom that covers roughly wide-angle to short telephoto views. That combination handles narrow streets, café interiors, portraits, and architectural details without constant lens changes. A wildlife trip calls for different priorities: reach and fast autofocus matter more than a tiny shoulder bag.
According to PhotoMocha’s travel guidance, multiple memory cards, spare batteries, charging equipment, a stabilizing support, filters, and cleaning supplies form the practical core of a camera kit [1]. I divide cards across several smaller cases instead of keeping every card beside the camera. If one pouch vanishes, the whole trip does not vanish with it.
- Camera body: Test the buttons, sensor, card slots, date, and time before packing.
- Primary lens: Choose the lens that can handle most of your planned subjects.
- Second lens: Add it only when it creates a clear capability, such as wildlife reach or very wide views.
- Power: Carry charged batteries, the correct charger, cables, and a compatible power bank.
- Storage: Pack formatted memory cards in a case that separates fresh cards from used ones.
- Care: Bring a blower, microfiber cloths, lens caps, and a small weather cover.
On an early coastal shoot, salt mist can coat a front element in minutes and turn points of light into pale halos. A clean microfiber cloth fixes that problem faster than another lens would. That little example captures my packing rule: bring the small tools that keep your main equipment working.
travel camera backpack with rain cover
As an affiliate, we earn on qualifying purchases.
As an affiliate, we earn on qualifying purchases.
Choose a Kit Size That Matches the Way You Travel
Choose your kit by matching its weight and capability to the pace of the trip. A phone or compact kit suits long walking days, a single-camera kit covers most holidays, and a larger specialist kit makes sense only when the subject demands equipment you cannot replace with technique.
| Kit style | What to carry | Best fit | Main tradeoff |
|---|---|---|---|
| Phone or compact | Phone or compact camera, power bank, cable, cleaning cloth | Day trips, family travel, discreet street photography | Less control over reach, handling, and low-light movement |
| Light camera kit | One body, standard zoom, spare battery, several cards | City breaks, hiking, documentary travel | Limited backup if the body or lens fails |
| Flexible two-lens kit | One body, standard zoom, wide or telephoto lens | Mixed landscapes, portraits, wildlife, and architecture | More weight and more lens changes |
| Specialist kit | Two bodies, dedicated lenses, tripod, filters, extra storage | Paid assignments or subject-led expeditions | Heavy bag, slower movement, greater security burden |
A phone-only kit is suitable for a relaxed city weekend when your pictures will mostly live in messages, albums, and small prints. Modern phones handle broad daylight and static night scenes remarkably well. They struggle sooner with fast wildlife, distant subjects, heavy cropping, and situations where you need direct control over shutter speed.
Weight changes how you see. Carry a swollen backpack for ten hours and you begin skipping side streets, leaving the tripod behind, and shooting from the first available viewpoint. A lighter bag keeps you curious; a heavier bag buys capability but can quietly reduce the number of places you explore.
For example, a standard zoom and one small prime can cover a rainy weekend in Lisbon far better than four overlapping lenses. You can move through polished cobblestone lanes without a hard case knocking against your hip. Pack for real photographs rather than imaginary emergencies, while keeping one sensible fallback for the equipment most likely to fail.
portable external hard drive for travel photos
As an affiliate, we earn on qualifying purchases.
As an affiliate, we earn on qualifying purchases.
Carry the Documents That Keep You Moving and Shooting
Your Travel Photography Checklist needs documents that prove who you are, where you may travel, and whether you have permission to use specialist equipment. Keep primary documents on your person, store protected digital copies separately, and make permits easy to retrieve when an official asks to see them.
The important aspects of document preparation include your passport, visas, travel insurance, camera insurance details, itinerary, accommodation information, transport bookings, and location-specific permits. I also keep equipment serial numbers with clear photographs of each item. Those records make an insurance report or ownership question much easier to handle.
Imagine arriving at a national park before sunrise with a drone in your bag. The sky is violet, the air is still, and the landscape seems made for an aerial photograph. If the park prohibits takeoff or requires prior approval, the photograph is off limits, however tempting it looks.
According to the destination’s official aviation, park, or local government guidance, you should check drone registration, flight restrictions, privacy rules, and permit requirements before departure [2]. Rules can differ between a country, a city, and a protected site. Save the relevant official page as a PDF or screenshot because a weak signal at the gate will not help.
A camera in your bag does not grant permission to use it. Respect private property, cultural boundaries, protected places, and anyone who declines to be photographed.
Create an offline folder containing document copies, emergency contacts, permits, and policy details. Keep a paper copy of your passport identification page apart from the original, but treat it as sensitive information. A locked hotel safe, encrypted device, or protected account offers better care than a loose sheet sitting in the outer pocket of your camera bag.
compact travel power bank for cameras
As an affiliate, we earn on qualifying purchases.
As an affiliate, we earn on qualifying purchases.
Build a Backup Plan That Survives a Lost Bag
Your Travel Photography Checklist needs a backup routine that creates two verified copies on separate devices before you format a card. Keep one copy away from the camera bag, retain the original cards when space allows, and use cloud transfer as an extra layer rather than your only rescue plan.
- Label cards before departure. Number them and mark one side of the case for empty cards and the other for exposed cards.
- Copy each shooting day. Transfer files to a laptop, tablet, phone, or portable storage device before going to bed.
- Create a second copy. Duplicate the folders onto another drive or a trusted cloud service when the connection permits.
- Open sample files. Check photographs from the beginning, middle, and end of each card at full size.
- Compare file counts. Confirm that the copied folder contains the expected number of files and occupies a believable amount of storage.
- Separate the copies. Carry one drive with you and place the other in a locked, different location.
- Format only after verification. Never erase a card because a progress bar reached the end.
A practical travel version of the 3-2-1 backup idea is three copies, on two kinds of storage, with one copy in another location. You may have the original card, an external drive, and a cloud copy. Slow hotel internet can block the third step, so the card and drive still need to carry you safely until connectivity returns.
On a rain-soaked assignment, a zipper can remain open just long enough for water to reach a drive. If that drive and every used card share the same pocket, one spill threatens everything. Physical separation turns one accident into a minor problem instead of the end of the trip.
According to PhotoMocha’s backup guidance, cloud storage and portable drives address different risks [1]. Cloud storage helps when physical gear disappears, while a drive works without internet and moves large files quickly. The strongest setup uses both online and offline copies, then verifies them before any card returns to the camera.
As an affiliate, we earn on qualifying purchases.
Protect Your Camera Without Turning the Trip Into Guard Duty
Protect travel gear by keeping it close, making it unobtrusive, and preparing for the weather you are likely to meet. A padded weather-resistant bag, ordinary-looking outer layer, secure zippers, and a few practiced habits provide more value than carrying a bag that feels like a locked equipment vault.
In a crowded market, your attention follows faces, light, and movement while another person’s attention may follow your open backpack. Swing the bag to your front before changing lenses, close every zipper, and never place it on the back of a chair. Control beats concealment: you do not need to look anxious, but you do need to know where the bag is.
Weather creates quieter trouble. Dust grinds against lens barrels, condensation fogs glass, sea spray leaves sticky crystals, and sudden rain finds every half-closed compartment. Pack a simple rain sleeve, a dry cloth, and resealable bags large enough for vulnerable accessories.
When you move from freezing air into a warm lodge, seal the cold camera inside its bag or a plastic pouch before entering. Moisture will gather on the outer barrier while the camera warms slowly. This protects internal electronics and glass surfaces from the wet haze that forms when warm air touches cold equipment.
- Keep memory cards and identification in different places.
- Use a wrist strap or neck strap near water, cliffs, and moving vehicles.
- Never leave visible equipment in a parked car, even for a quick meal.
- Record serial numbers and ownership photographs before leaving home.
- Check seals, caps, and zippers after every shooting stop.
I treat the bag as a mobile workspace, not a storage bin. Every item has one home, so an empty slot tells me that a battery, card wallet, or filter is missing. That habit makes packing faster and catches mistakes while the café, overlook, or train seat is still within reach.
Run This Final Check Before You Leave Home
Your Travel Photography Checklist becomes useful only when you test it against a complete shooting day. Charge everything, assemble the camera, make photographs, transfer the files, and pack the bag exactly as you will carry it. This short rehearsal exposes missing pieces while your desk drawer is still nearby.
Start at least a day before departure rather than packing during the taxi countdown. Insert each battery and card, attach every lens, mount the camera on the tripod, and connect every charging cable. A tripod without its quick-release plate is a three-legged luggage ornament, while the wrong cable turns a full power bank into dead weight.
Then walk around the block with the loaded bag. Listen for filters rattling like coins, feel where straps rub, and notice whether the weight pulls you backward. Ten minutes of walking can reveal that your beautifully organized bag is miserable to carry.
For a travel photography trip built around a coastal sunrise, I would rehearse the exact chain: alarm, clothing, route, camera setup, filter holder, tripod plate, exposure, file review, and backup. If the headlamp has a weak battery or the filter adapter sticks, I want that discovery under a warm kitchen light, not beside black water at 5:30 in the morning.
- Twenty-four hours before: Charge batteries, download maps, confirm permits, and check transport details.
- Before closing the bag: Photograph the packed layout and compare it with your checklist.
- Before leaving the room: Check camera, lens, card, battery, phone, wallet, documents, and keys.
- After the first shooting day: Adjust the kit based on what you used, not what looked useful at home.
This final pass also gives you permission to remove gear. If two lenses cover nearly identical views, leave one behind. Your bag should feel like a well-edited photograph: nothing missing, nothing distracting, and every element earning its place.
Frequently Asked Questions
What camera gear does a beginner really need for travel?
A beginner needs a camera or capable smartphone, one versatile lens if applicable, spare power, enough storage, and a cleaning cloth. Add equipment only when it solves a specific problem; a simple kit used confidently will produce better travel photographs than a heavy bag you avoid carrying.
How many memory cards should I take on a trip?
Carry enough card capacity for the full trip, even if you plan to copy files every night, and split that capacity across several reliable cards. Four moderate cards are often safer than one enormous card because a single failure cannot take every photograph, but card capacity depends on file size, video use, and trip length.
Should I travel with a laptop for photo backups?
A laptop helps when you need large transfers, file review, editing, or verified copies, but it adds weight and another valuable item to protect. For lighter travel, a tablet, phone, or dedicated storage device can work if you test the whole process and can confirm copied files actually open.
Can cloud storage replace an external drive?
Cloud storage should not be your only travel backup because hotel Wi-Fi can be slow, capped, or unavailable. Use it as a separate off-site copy while keeping a local copy on a drive or other device; online and offline storage protect against different failures.
Where should I keep used memory cards while traveling?
Place used cards in a closed, water-resistant card case separate from the camera and mark them so you cannot mistake them for empty cards. Once files are copied and verified, keep the cards in another secure location when practical; separation limits the damage from theft, water, or a misplaced bag.
Conclusion
Your best move is simple: rehearse one complete shooting day before departure. Make photographs, drain some power, copy the files twice, open them, and carry the packed bag for ten minutes. That single exercise catches more trouble than adding another lens to an already crowded kit.
A good checklist fades into the background once the trip begins. Your batteries are full, your documents are reachable, and your photographs exist in more than one place. Then you can stop guarding equipment and watch the morning light slide across wet stone, with your attention on the photograph where it belongs.
Fall Picks
fall essentials
As an affiliate, we earn on qualifying purchases.