
TL;DR

Get audio and creator gear delivered free — and shop member deals
- Fast, free delivery on millions of items
- Access to Prime Big Deal Days deals on October 6–7
- Prime Video, Amazon Music and more included
Roller cases protect heavy camera kits and spare your shoulders on smooth airport, hotel, and studio floors, while backpacks give you hands-free mobility on stairs, crowded streets, and rough ground. Choose around your route, working kit, and access needs; many professionals use both because no single bag handles every assignment well.
A silent airport concourse can make a roller case feel perfect—right until you meet a broken escalator, three flights of stairs, and a cobbled street shining with rain. I have learned to judge camera luggage by those awkward minutes, not by how handsome the dividers look under studio lights. Your bag succeeds when the route gets difficult and your attention needs to stay on the assignment.
This guide will help you compare roller cases vs backpacks for working photographers through the details that shape a real shooting day: protection, body strain, access, capacity, security, and movement across different ground. You will also see where hard-shell or semi-hard-shell construction, quick-access panels, and hybrid designs fit into the decision [1].
I am not going to claim one format wins every time. A roller can feel effortless during a convention-center job, while the same case becomes a noisy anchor on gravel; a backpack can float through a train station, then punish your shoulders during a ten-hour corporate shoot. The useful question is simple: where will you carry the load, and how often must you open it?
Choose around the hardest part of your route: smooth floors favor a roller, while stairs, gravel, mud, and crowded transport favor a backpack.
Weigh the loaded bag; removing an unused lens or duplicate accessory can reduce strain more effectively than changing luggage styles.
Place heavy backpack items close to your spine, and organize a roller as a visible equipment map with frequently used gear near the opening edge.
Use a roller as a protected base and a smaller backpack as the active shooting bag when an assignment combines heavy travel with mobile photography.
Test every access panel, zipper, and empty compartment before leaving a location; good organization protects both equipment and your attention.
Roller Cases vs Backpacks for Working Photographers
Rollers protect heavy kits and spare your shoulders on smooth floors. Backpacks deliver hands-free mobility on stairs, crowded streets and rough ground. The best choice is determined by your route, working kit and access pattern—not by the bag’s appearance in a studio.
Choose for the hardest ground
A silent airport concourse can make a roller feel perfect—until the route reaches a broken escalator and three flights of stairs. Select around the difficult segment, because that is where inconvenience becomes a physical problem.
Airports, hotels, offices and studios
Long polished corridors, lifts and fixed workstations favor wheels. A roller keeps the load off your torso and opens into a visible equipment map.
Best fit: rollerStairs, trails, gravel and old streets
Wheels catch, chatter and collect dirt. A fitted backpack keeps the kit near your center of gravity while leaving both hands available for balance.
Best fit: backpackHeavy travel plus mobile shooting
Use a roller as the protected transport base and transfer the active kit into a smaller backpack. Hybrid bags add flexibility but also hardware and empty weight.
Best fit: two-bag systemSee where each format wins
Capacity alone rarely decides the result. Controlled movement, physical strain, access speed and impact structure matter more during a real shooting day.
| Working need | Roller case | Camera backpack |
|---|---|---|
| Long airport corridors | ✓Easy to pull; removes sustained shoulder load | ~Fast on stairs, tiring with a heavy load |
| Rough ground | ✗Wheels catch, shake and collect dirt | ✓Stable and hands-free when fitted well |
| Impact protection | ✓Often hard-shell or frame-reinforced | ~Depends on padding, dividers and packing |
| Fast visual access | ✓Broad opening creates a visible gear map | ~Side doors help; full access may require removal |
| Crowded spaces | ✗Trails behind and may clip people or furniture | ✓Stays attached and responds quickly |
| All-day mixed terrain | ~Excellent while rolling; awkward when lifted | ✓Better across changing ground with a good harness |
| Security features | ✓Commonly offers lockable zippers or latches | ~Close to the body but softer and less rigid |
✓ strong fit ✗ weak fit ~ condition-dependent
Protection is controlled space
Strong protection comes from structure, snug organization and sensible handling—not stiffness alone. Gear should not rattle, press against bare hardware or sit beneath loose accessories that can become small hammers.
Changing bag styles does not make mass disappear. Removing one unused lens or duplicate accessory can reduce strain more effectively than replacing the entire carrying system.
Mobility profile
Stop movement
Dense dividers should prevent heavy items from building momentum when you step off a curb.
Buffer hardware
Cover tripod plates, isolate batteries and leave padded space around screens and viewfinders.
Plan for rain
Water-resistant fabric is not waterproof. Use a fitted cover or sealed case for prolonged exposure.
Organize for the way you work
Good organization protects attention as much as equipment. The aim is to retrieve gear without rummaging and to spot an empty compartment before leaving the location.
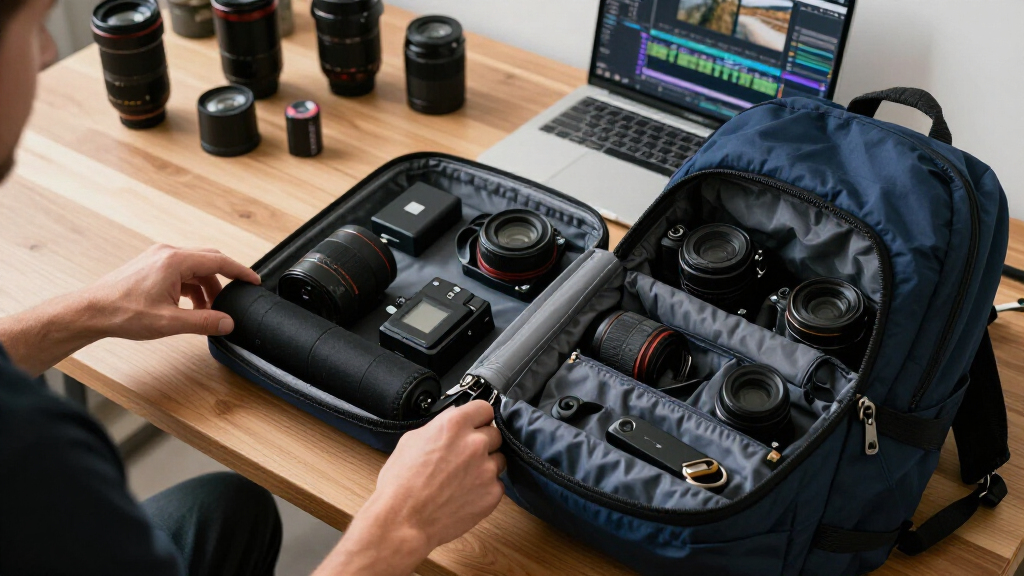
Build a visible equipment map
Treat the open case like a shallow equipment drawer. Keep frequently used bodies, lenses, batteries and radio triggers near the opening edge.
- Assign one permanent compartment to every item.
- Use empty lens spaces as a visual departure check.
- Keep loose metal parts away from screens and barrels.
Keep mass close to the spine
Place dense bodies and long lenses close to your back. Use side or top access for the active camera so the complete bag does not need to be opened in the street.
- Balance left and right compartments to limit twisting.
- Use the hip belt to transfer weight away from shoulders.
- Confirm zippers and quick-access panels after every stop.
Protected base station
Commercial interiors, conferences and studio work reward the roller’s broad opening, stable footprint and low shoulder strain.
Attached working kit
City portraits, public transport and outdoor locations reward the backpack’s hands-free control and ability to cross uneven ground.
From assignment to final check
A repeatable decision chain keeps the bag serving the shoot. Start with the route, reduce the kit, configure the carry system, control access and verify every compartment.
Map
Find the hardest terrain and longest carry.
Weigh
Measure the complete loaded bag.
Edit
Remove gear without a defined job.
Configure
Place active tools within fast reach.
Verify
Check panels, zippers and empty spaces.
Many professionals use both formats.
Choose around the hardest route segment. Smooth floors favor rollers; stairs, mud, gravel and crowds favor backpacks.
Weigh the loaded bag. Removing unused equipment often improves comfort more than changing luggage styles.
Organize according to format. Keep backpack weight close to the spine; arrange a roller as a visible gear map.
Combine formats for mixed assignments. Travel with a protected roller base and shoot from a smaller mobile backpack.
Test every closure before departure. Empty compartments and unsecured panels are operational warnings.
Choose the Bag That Handles the Hardest Part of Your Route
Roller cases vs backpacks for working photographers comes down first to terrain: rollers suit long stretches of smooth flooring, while backpacks work better when your route includes stairs, gravel, mud, curbs, or packed crowds. Base your choice on the hardest ten minutes of the journey, because that is where an inconvenient bag becomes a physical problem.
Imagine you are photographing a conference in a city hotel. You leave the car park, cross a polished lobby, ride a lift, and work from one carpeted ballroom all day. A roller case keeps 12 kg off your back, moves quietly, and gives you a tidy equipment station beside the lighting desk.
Now change the assignment to an outdoor portrait session above a rocky beach. Wheels chatter over the path, wet sand grips the case, and every low wall asks you to lift the full load with one arm. A properly fitted backpack leaves both hands free for balance and keeps the kit close to your center of gravity.
Do a route check before packing:
- Airports, hotels, offices, and studios: rollers usually move with less effort.
- Stairs, public transport, trails, and old streets: backpacks usually move with less fuss.
- Mixed routes: a hybrid or two-bag setup can cover the weak spots.
Hybrid designs add wheels and shoulder straps to one case, reflecting the growing demand for flexible transport [2]. The tradeoff is extra hardware and weight; wheels, handles, and strap storage all occupy space that could otherwise hold gear or padding.
As an affiliate, we earn on qualifying purchases.
See Exactly Where Rollers and Backpacks Win
Roller cases vs backpacks for working photographers has no universal winner: a roller offers easier movement on smooth floors and stronger impact protection, while a backpack offers better mobility over broken ground. This side-by-side view shows which format fits your working conditions, not an imaginary average photographer.
| Working need | Roller case | Camera backpack |
|---|---|---|
| Long airport corridors | Easy to pull; keeps weight off your shoulders | Fast on stairs but tiring with a heavy kit |
| Rough ground | Wheels catch, shake, and collect dirt | Stable and hands-free when fitted well |
| Impact protection | Often uses a hard or reinforced outer structure | Relies more heavily on padding and careful packing |
| Fast access | Opens into a broad, visible equipment layout | Varies; side doors help, but full access may require removal |
| Crowded spaces | Trails behind you and can clip ankles or furniture | Stays close but adds depth behind your body |
| All-day carrying | Excellent while rolling, awkward when lifted | Better across mixed terrain if the harness fits |
On a commercial interior shoot, I may work from one room for two hours at a time. A roller opens like a shallow equipment drawer, so batteries, lenses, radio triggers, and cloths remain visible. That reduces rummaging and helps me spot an empty lens space before leaving.
During a fast city portrait session, I want the opposite behavior. A backpack stays attached while I cross streets, step onto a tram, or move through a narrow café. The deciding advantage is not capacity; it is controlled movement in tight spaces.
As an affiliate, we earn on qualifying purchases.
Protect Your Gear Without Carrying a Plastic Fortress
Roller cases vs backpacks for working photographers differ most clearly in how they handle impacts: rollers often use a rigid shell or reinforced frame, while backpacks use padding, internal dividers, and distance from the ground. Strong protection comes from structure, snug organization, and sensible handling, not stiffness alone [1].
A hard case can absorb the ugly knocks of loading bays, luggage trolleys, and vehicle boots. If a lighting stand falls against it, the shell spreads the force instead of letting the metal press directly into a lens barrel. Lockable zippers or latches also add a useful security layer, though no portable lock can defeat a determined thief.
A good backpack can still protect expensive bodies and lenses. Dense dividers should hold each item firmly enough that it does not build momentum when you step off a curb. If you hear lenses knocking together as you walk, rebuild the compartments immediately; soft fabric between two heavy objects is not meaningful protection.
Protection is controlled space. Your gear should not rattle, press against bare hardware, or sit beneath a loose accessory that can become a small hammer.
For example, place a 70–200mm lens vertically only when the compartment depth supports it without pressing on the mounted caps. Keep loose batteries in fitted pockets, cover metal tripod plates, and leave a padded buffer around screens and viewfinders. In rain, remember that water-resistant fabric is not waterproof; use a fitted cover or sealed case when exposure will be prolonged.
As an affiliate, we earn on qualifying purchases.
Cut Body Strain Before a Long Assignment Cuts Your Focus
The safest way to reduce carrying strain is to weigh the complete loaded bag, remove gear without a clear job, and match the carrying system to the route. Rollers reduce sustained shoulder load on smooth floors; backpacks spread weight across your shoulders, hips, and torso when their harness fits correctly.
A 4 kg bag carrying 10 kg of cameras, lenses, flashes, and batteries creates a 14 kg transport problem. Swapping bag styles will not make that mass disappear. Before a full-day assignment, challenge yourself to explain why every body, lens, charger, and grip deserves a place.
Use this quick fitting process:
- Load the actual working kit. Empty-bag comfort tells you very little.
- Tighten the hip belt first. It should transfer part of the load onto your pelvis rather than merely circle your waist.
- Adjust the shoulder straps. Bring the bag close without pulling your shoulders backward.
- Walk, climb, and bend for ten minutes. Check for bouncing, hot spots, and restricted arm movement.
- Test repeated access. Removing a backpack twenty times can matter more than wearing it continuously.
During an event, a roller can become a fixed base near the production desk while you carry one camera and lens. On a woodland shoot, the backpack remains with you, but a lighter kit protects your balance and energy. Comfort supports better decisions: tired shoulders make you rush lens changes, ignore angles, and lose patience with small refinements.
As an affiliate, we earn on qualifying purchases.
Pack for Faster Lens Changes and Fewer Missing Accessories
Pack each bag around the order of your working day: primary camera and lens closest to the access point, backup equipment deeper inside, and small items grouped by task. Clear organization reduces open-bag time, prevents forgotten accessories, and makes empty spaces immediately visible when you leave a location.
For a corporate portrait job, I might place the tether cable, radio trigger, meter, and spare camera battery in one bright pouch. Gaffer tape, clamps, and a multi-tool sit in another. When the client changes rooms with five minutes’ warning, I can lift one task-specific pouch instead of digging through black pockets filled with black objects.
A roller rewards a flat, map-like layout. Put frequently changed lenses near the handle side if that edge faces you when the lid opens, and keep heavy items low so the case does not tip while rolling. A backpack works better when you place dense lenses close to your spine and between your shoulder blades, rather than in the outermost pockets.
Useful packing habits include:
- Cap every loose contact point, including batteries and exposed cable ends.
- Separate used and charged batteries with labeled pockets or a consistent orientation.
- Keep memory cards in one dedicated case, never loose in several pockets.
- Photograph the finished layout so assistants can repack it correctly.
One caution: quick-access doors save time only when they close reliably. Sand, overfilled pockets, and twisted fabric can obstruct a zipper. Before lifting the bag, run your fingers around every access panel and main closure.
Build a Two-Bag System When One Bag Cannot Do Both Jobs
A two-bag system works best when you separate transport gear from shooting gear: use a protected roller for the full kit and a small backpack or shoulder bag for the equipment carried during the assignment. This approach gives you capacity during travel and lighter movement while photographing.
For an editorial job, the roller might hold two bodies, four lenses, chargers, a compact flash kit, and backup cables. Once on location, you move one body, two lenses, batteries, cards, and a rain cover into the backpack. The roller stays in a locked room or supervised base, rather than following you through every doorway.
This is also a practical answer to roller cases vs backpacks for working photographers who switch between airports and outdoor locations. You gain flexibility, but you must track two pieces and avoid leaving valuable equipment unattended. A consistent checklist matters more here because gear moves between compartments during the day.
Modern hybrid cases attempt the same trick in one body, combining wheels with deployable backpack straps [2]. They make sense when rough sections are short—perhaps a railway staircase or a gravel car park. For a two-hour uphill walk, their wheel assemblies and telescoping handles become dead weight against your back.
Try your system on a low-risk local job before taking it through an airport. Load it, move between two rooms, change lenses, repack, and leave as if a taxi were waiting. That rehearsal exposes forgotten caps, awkward zipper directions, and bags that fight your natural workflow.
Make the Final Choice With a Five-Minute Assignment Test
Choose your bag by scoring terrain, total load, access frequency, protection, and security for the next assignment. If smooth travel and heavy equipment dominate, take the roller; if mixed ground and constant movement dominate, take the backpack. When the scores split evenly, use a hybrid or two-bag system.
Start with the route. Count stairs, estimate the longest walking stretch, check whether you will use public transport, and ask where the bag can remain during the shoot. A single 300-meter gravel path may outweigh several kilometers of polished terminal floor because it forces you to lift or drag a roller.
Then inspect your equipment list. Backpacks for working photographers should carry the kit needed while moving, not every item you own. If you need three large zooms, two bodies, lighting controls, and a laptop beside a conference stage, rolling capacity can preserve your energy.
Finally, plan access and security. A roller on the floor can act like an open tool chest, but it needs a safe position away from feet and spilled drinks. A backpack stays connected to you, yet someone can reach an outer pocket in a crowded train; keep passports, cards, and drives in protected internal compartments.
Write your choice at the top of the call sheet and add one sentence explaining it. If your reason is vague, review the route again. The right bag should solve a specific physical or working problem, not simply match your usual habit.
Frequently Asked Questions
Which is better for air travel, a roller case or a backpack?
A roller case usually feels better in large airports because it removes a heavy load from your shoulders across long, smooth corridors. A backpack handles stairs, trains, and hurried connections better, so check your full door-to-door route rather than judging the terminal alone.
Can a camera backpack protect professional equipment well enough?
Yes, a well-padded camera backpack can protect professional gear when the dividers fit tightly and heavy items cannot collide. For example, a lens should sit in a snug cell with covered metal accessories stored elsewhere; if the contents rattle while you walk, the layout needs adjustment.
Are roller cases practical for outdoor photography?
Roller cases work outdoors when the route includes firm paths, paved areas, or a short walk from a vehicle. They become awkward on sand, deep gravel, mud, roots, and steep ground; on a rocky coastal path, a backpack gives you better balance and free hands.
How large should a working photographer’s camera bag be?
Choose the smallest bag that holds your assignment kit with safe padding and a little room for batteries, cards, weather protection, and job-specific accessories. Extra space often invites extra weight, so build the equipment list first and select the bag around what the photographs require.
Are hybrid roller backpacks a good compromise?
A hybrid suits routes with mostly smooth flooring and brief rough sections, such as an airport followed by a railway staircase. The wheels and handle add weight during backpack use, so a hybrid is less appealing when you expect to carry it for hours over uneven ground.
How should I organize lenses in a roller or backpack?
In a roller, arrange lenses as a clear visual map and keep frequent choices near the opening edge. In a backpack, place the heaviest lenses close to your spine, isolate metal accessories, and leave each item snug enough that nothing knocks together while you move.
Conclusion
Choose for the route, then pack for the photograph. A roller earns its place when smooth floors let the wheels carry a heavy, organized kit; a backpack wins when stairs, rough ground, and quick movement define your day. If your work regularly contains both, stop asking one bag to perform two opposing jobs and build a simple two-bag system.
Before your next assignment, load the exact kit and walk the real route in your mind—from car boot to final shooting position. Make the choice that leaves your hands steady, your attention sharp, and your gear easy to reach when the light turns beautiful for thirty brief seconds.
Fall Picks
fall essentials
As an affiliate, we earn on qualifying purchases.