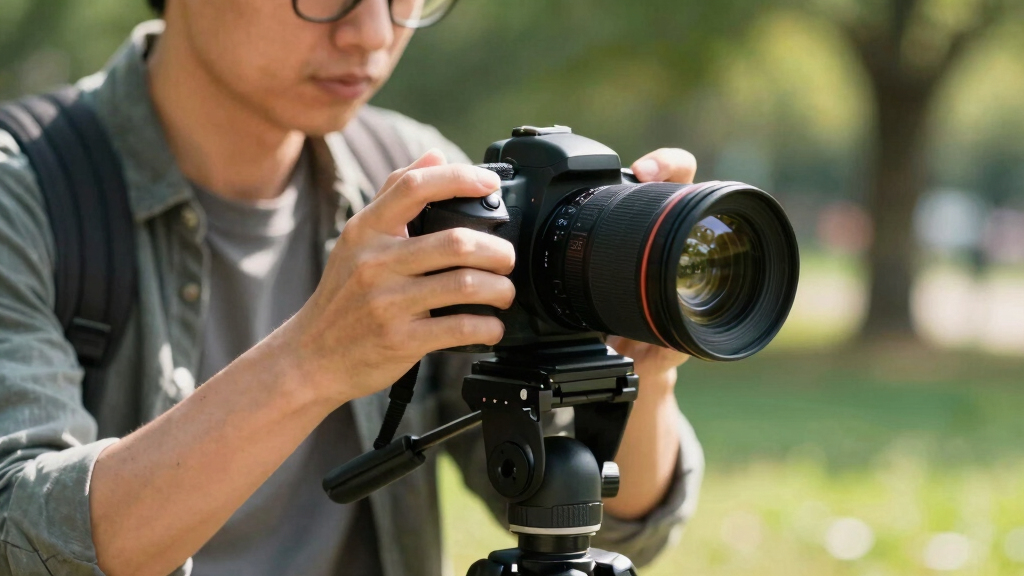

TL;DR

Get audio and creator gear delivered free with Prime
- Fast, free delivery on millions of items
- Prime Video, Amazon Music and more included
- Member-only deals all year
Kit lens mastery comes from controlling light, shutter speed, distance, focus, and perspective—not buying sharper glass. Use the lens deliberately at 18mm, 35mm, and 55mm, practice in good light, and upgrade only when a repeated technical limit blocks the photographs you want to make.
Your kit lens is probably better than your last ten photographs suggest. That may sound blunt, but it is meant as encouragement. The light, shutter speed, camera position, and background usually leave a far larger fingerprint on an image than the difference between a basic zoom and expensive glass.
A typical 18–55mm kit zoom covers wide scenes, natural-looking everyday views, and short-telephoto portraits. Its variable f/3.5–5.6 aperture does place limits on low-light work and strong background blur, yet those limits teach useful habits. You learn to watch the light, steady the camera, clean up the frame, and move your feet instead of asking equipment to rescue a loose idea.
Modest lenses can be the sensible choice when rain, dust, tight spaces, or simple convenience matter. When the light is good and the composition has purpose, the files can carry colour, texture, and feeling just fine. This guide shows you how to make great photos before you upgrade, then recognise the point when a new lens would solve a real problem rather than soothe a passing gear itch.
Use 18mm to show place, roughly 35mm for natural everyday scenes, and 55mm to isolate portraits or details.
Set shutter speed for the subject first: start near 1/125 second for relaxed people, 1/250 for active children, and 1/500 or faster for quick movement.
Create softer backgrounds at 55mm by moving close to your subject and placing the background several metres farther away.
Choose open shade, window light, or low directional sunlight before relying on heavy editing to repair harsh or dim conditions.
Track repeated limitations for a month and buy another lens only when the same problem appears across several real shoots.
Kit Lens Mastery: Great Photos Before You Upgrade
Technique leaves the larger fingerprint. Control light, shutter speed, distance, focus, and perspective before asking sharper glass to rescue the frame. Your kit lens is probably better than your last ten photographs suggest—and that is good news.
Turn the zoom ring to change the story
Focal length is not merely magnification. Pair it with camera position to control how spacious, intimate, compressed, or observational the scene feels.
18mm
Show the placeMove close when the setting adds meaning. Keep the camera level when straight buildings matter, and inspect the corners for stretched faces and bright distractions.
- Interiors and narrow spaces
- Landscapes and establishing frames
- Groups with environmental context
30–35mm
Stand beside the subjectA relaxed everyday view on many APS-C cameras. It includes useful context without making faces near the edge look excessively stretched.
- Markets and family routines
- Pets, travel, and daily life
- People within believable surroundings
55mm
Observe the detailStep back for portraits or move close for details. Longer framing simplifies busy scenes and makes distant background elements appear larger and calmer.
- Faces and quiet expressions
- Patterns, hands, and small details
- Layered landscapes and compression
Set shutter speed for the subject first
A technically sharp lens cannot freeze a child at 1/30 second. A basic zoom can deliver crisp detail when movement, focus, support, and exposure all work together.
What actually solves the photograph?
Before blaming the lens, identify the visible failure. Most everyday problems have a technique-first response that costs nothing and improves future photographs too.
| Photographic problem | Technique-first response | Kit lens capable? | Upgrade signal? |
|---|---|---|---|
| Subject is motion-blurred | Use 1/250–1/800s and raise ISO | ✓ Yes | ✗ No |
| Background is distracting | Use 55mm, move close, increase background distance | ✓ Yes | ~ Maybe |
| Faces look stretched | Move faces from frame edges or use 35–55mm | ✓ Yes | ✗ No |
| Scene looks flat | Change height, distance, foreground, or direction of light | ✓ Yes | ✗ No |
| Indoor shutter speed stays too low | Use window light, stabilization, support, and higher ISO | ~ Often | ~ Repeated? |
| Need strong blur in dim light | Maximize distance separation and use 55mm wide open | ~ Limited | ✓ Possibly |
Soft, consistent faces
Place the subject near the bright edge of shade and turn them until the eyes catch clean, directional light.
Shape without extra gear
Move closer to the window for brighter, softer light; rotate away from it for deeper shadows and more texture.
Colour and dimension
Shoot across the light for texture, or place it behind the subject and expose carefully for a luminous edge.
Great files begin before the shutter
Editing can refine contrast, colour, and sharpness. It cannot fully restore missed focus, recover a careless background, or invent the right camera position.
Zoom to 55mm → choose the widest available aperture → move physically closer to the subject → place the background several metres behind them → focus precisely on the nearest eye.
Track the limit for one month
A new lens is worthwhile when the same technical barrier blocks several real shoots—not when a single difficult frame triggers a passing gear itch.
The limitation log
After every shoot, record the frame you could not make and the exact reason. Patterns reveal whether equipment or technique is the real constraint.
Know What Your 18–55mm Lens Can Already Do
Kit Lens Mastery: Great Photos Before You Upgrade begins with knowing that an 18–55mm zoom is three useful lenses in one: a wide lens for space, a normal view for daily life, and a short telephoto for details and portraits. Each position changes perspective, background, and emotional distance—not merely magnification.
Most entry-level camera kits pair an APS-C body with an 18–55mm lens, often offering a variable maximum aperture of roughly f/3.5 at 18mm and f/5.6 at 55mm [1]. Published manufacturer specifications also show that many current kit lenses include optical stabilization or work with stabilized camera bodies, while some newer mirrorless kits use brighter ranges such as f/2.8–4 [2]. Your exact controls vary, so check the markings on your barrel rather than assuming every kit behaves alike.
At 18mm, you can photograph a narrow kitchen, a sweeping hillside, or a group around a small table. Keep the camera level when buildings matter; tilt it upward and vertical lines lean inward like tired fence posts. In a cramped apartment, stepping into a doorway, staying low, and using the doorframe as a dark border can give structure to a sunlit breakfast scene.
Around 30–35mm, the view often feels relaxed and natural on an APS-C camera. It works well for markets, family routines, pets, and travel details because you can include context without making faces near the edge look stretched. At 55mm, you can isolate a face, compress rows of trees, or pull a quiet detail from a busy street.
Treat the zoom ring as a storytelling control. Decide whether you want the viewer to feel inside the scene, beside the subject, or quietly observing from farther away.
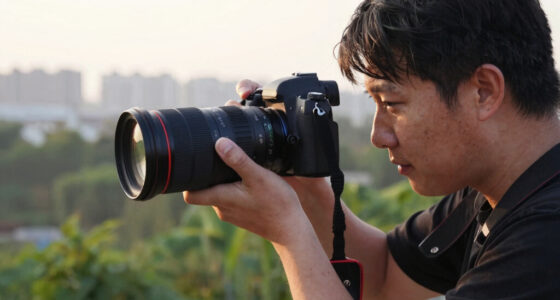
18-55mm kit lens photography guide
As an affiliate, we earn on qualifying purchases.
As an affiliate, we earn on qualifying purchases.
Change the Story Every Time You Turn the Zoom Ring
Kit Lens Mastery: Great Photos Before You Upgrade means choosing focal length for the relationship between subject and background, then moving to frame the photograph. Zooming from one spot changes the crop; changing focal length and camera position changes how near, spacious, crowded, or calm the scene feels.
Try this with a friend beside a café window. Make one frame at 18mm from close range, then step back and make another at 55mm with the face the same size. The wide frame pulls the tables, window, and street into the story, while the longer view presses the background into softer blocks of colour.
Many beginner photographers stay planted and use the zoom ring like a pair of binoculars. Your lens can frame the subject that way, but the photograph often loses depth. Walk left and a bright sign may disappear behind your subject; kneel and wet pavement may catch the red glow of a shop window; step forward and a foreground railing can become a bold leading line.
A simple three-frame exercise can help when a scene feels flat. Photograph it wide to show place, at a middle focal length to show action, and long to isolate the detail that carries the mood. At a harbour, that could mean boats under a silver sky, a worker coiling rope, and salt-crusted hands at 55mm.
- Use 18mm when the setting adds meaning, but inspect every corner for stretched faces, stray bags, and bright distractions.
- Use 35mm for a balanced view that keeps both the person and their surroundings believable.
- Use 55mm when expression, pattern, or a small detail matters more than the wider location.
The frame is a stage, and focal length decides how much scenery enters with the actor. Before pressing the shutter, ask one direct question: Does the background help the photograph? If it does not, move, zoom, or wait until the clutter clears.
As an affiliate, we earn on qualifying purchases.
Get Sharper Photos with This Five-Step Exposure Routine
Kit Lens Mastery: Great Photos Before You Upgrade depends on choosing a shutter speed that matches subject movement and camera shake. A technically sharp lens cannot freeze a child at 1/30 second, while a basic lens can deliver crisp detail when you give it enough speed, accurate focus, and steady support.
- Choose the aperture. Start near f/5.6 or f/8 for a daylight scene with several depth layers. Use the widest available aperture when light falls or you want more separation.
- Set a safe shutter speed. Try at least 1/125 second for relaxed people, 1/250 for active children, and 1/500 or faster for running pets.
- Raise ISO when needed. A sharp ISO 1600 photograph is usually more useful than a clean ISO 100 file blurred by movement.
- Place the focus point. Put it over the nearest eye for a portrait or over the main textured subject in a still scene.
- Check one enlarged frame. Review eyelashes, lettering, fur, or another fine detail, then correct the weak link before making twenty more photographs.
Imagine photographing a dog racing through amber autumn leaves. At 1/100 second, the paws and muzzle smear even if stabilization keeps the background steady. Move to 1/800 second, open the lens as far as it allows, raise ISO, and use continuous autofocus; now the flying leaves look suspended in cool air.
For a still landscape at 55mm, use a firmer stance and a conservative shutter speed. Brace your elbows against your ribs, exhale gently, and press rather than jab the shutter. If the camera has stabilization, it can help with your movement, but stabilization cannot freeze a moving subject.
Do not chase one supposedly perfect aperture. Many kit lenses give strong central detail around f/5.6 to f/8, yet distance, focus accuracy, camera shake, and sample variation all matter. Test your own lens by photographing the same brick wall, newspaper, or textured tree trunk at several apertures in steady daylight.
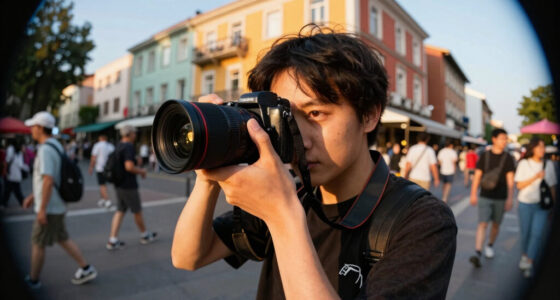
camera lens for portraits and landscapes
As an affiliate, we earn on qualifying purchases.
As an affiliate, we earn on qualifying purchases.
Create Softer Backgrounds Without Buying a Fast Prime
You can create visible background blur with a kit lens by combining its longest focal length, widest available aperture, close subject distance, and a distant background. At 55mm and f/5.6, these spacing choices matter more than many beginners expect, especially for head-and-shoulders portraits, flowers, food, and small details.
Suppose you photograph a friend in a park. If they stand against a hedge and you use 18mm from two metres away, every leaf competes with their face. Move them five metres in front of the hedge, step back, zoom to 55mm, and frame tightly; the foliage melts into round green shapes like paint pressed through wet glass.
Distance is your quiet assistant here. Move closer to the subject and depth of field becomes shallower; move the background farther away and its detail softens. Your lens may stop opening from f/3.5 to f/5.6 as you zoom, but the longer focal length and better spacing can still give you clean separation.
Background blur is not the only path to a strong portrait. A textured wall, dark doorway, or shaft of window light can separate the subject through tone and colour contrast. A musician photographed at f/5.6 against a nearly black rehearsal-room curtain may stand out immediately through pale hands and a worn wooden instrument, even when the background is not dramatically blurred.
- Use 55mm and the widest aperture available at that focal length.
- Keep the subject well away from the background whenever the location permits.
- Move close enough for a tight composition, while respecting the lens’s minimum focusing distance.
- Choose backgrounds with few bright spots, since white signs and sunlit gaps pull the eye even when blurred.
What if you need a full-length portrait in a small room? The kit lens may not give strong blur because you cannot create enough distance. Use a plain background and soft window light instead; clean separation beats forced blur.
As an affiliate, we earn on qualifying purchases.
Use Better Light to Make Basic Glass Look Expensive
Your kit lens performs best when you give it directional, manageable light rather than asking it to fight a dim room or harsh overhead sun. Soft window light, open shade, and the hour near sunrise or sunset reveal texture, colour, and shape while keeping shutter speeds and ISO within comfortable ranges.
At midday, direct sun can carve black eye sockets and bleach skin highlights. Move your subject beneath an awning or beside the shadow edge of a building, where the light wraps around cheeks like a broad silk ribbon. Watch for green light reflected from grass or coloured walls, since open shade can still carry a tint.
For an indoor portrait, place your subject about one metre from a window and turn their face until a small catchlight appears in the eyes. Switch off orange ceiling bulbs if they mix badly with cool daylight. A white cupboard door opposite the window can act as a reflector, lifting the shadow side of a baker’s flour-dusted face without adding another lamp.
Golden-hour light can be beautiful, but it is not automatic magic. If the low sun hits the front element, flare may wash the frame with a pale veil. Shade the lens with your hand—keeping your fingers outside the frame—or shift a few centimetres until a tree trunk blocks the direct beam.
Do not stare through an optical viewfinder at the sun. Strong sunlight can injure your eyes, and concentrated light may damage equipment. Frame with care, avoid prolonged direct aiming, and use the camera maker’s solar-photography guidance for any photograph of the sun itself.
When light levels drop, choose your compromise deliberately. A tripod suits a blue-hour cityscape with still buildings, while a higher ISO and faster shutter suit people walking under neon signs. Noise has texture; motion blur erases detail. The grainy glow of ISO 3200 is often preferable to sacrificing an unrepeatable expression to a shutter speed that is too slow.
Edit with Restraint and Let Repeated Limits Guide Your Upgrade
A good edit should reveal what your kit lens captured, while an upgrade should solve a repeated photographic problem. Correct exposure, colour, crop, and moderate sharpening first. If the same limitation still blocks several shoots—low light, reach, close focus, or subject separation—you have useful evidence for choosing another lens.
Start with white balance and exposure, then adjust highlights and shadows until the scene feels believable. Add contrast carefully; a small S-curve can give a misty landscape shape, while heavy clarity can turn skin and clouds gritty. Apply lens corrections when your software has a matching profile, especially for wide-angle distortion and dark corners.
Sharpening works like seasoning. A little defines eyelashes, bark, and stone; too much leaves bright halos around every edge. View the photograph at 100 percent while sharpening, then judge it again at its final display or print size, because a social image and a large print do not need identical treatment.
| Repeated problem | Technique to try first | Lens capability that may help |
|---|---|---|
| People blur in dim rooms | Raise ISO, use window light, and choose a faster shutter | Wider maximum aperture |
| Wildlife remains tiny at 55mm | Move safely closer, crop carefully, and visit locations with predictable activity | Longer focal length |
| Portrait backgrounds stay busy | Use 55mm, move closer, and increase subject-to-background distance | Faster portrait lens |
| Small subjects never fill the frame | Check minimum focus distance and crop from a sharp file | Macro capability |
| Interiors feel too cramped at 18mm | Step back, level the camera, or stitch a careful panorama | Wider angle of view |
Keep a note on your phone for a month. Record every time the lens stops a photograph, along with the focal length, aperture, shutter speed, and ISO. If your notes repeatedly say 55mm was not long enough, that points toward telephoto reach; if they say f/5.6 forced ISO 6400, a brighter lens addresses a different need.
This record separates technical limits from problems caused by timing or composition. Buying a prime will not remove a bright bin behind your subject, and a telephoto will not teach you to track a bird in flight. Let your photographs write the shopping list.
Build Kit Lens Mastery with One Focused Week of Practice
Kit Lens Mastery: Great Photos Before You Upgrade grows faster when you set a narrow assignment and repeat it for seven days. Use one focal length or one kind of light each day, review the files while the memory is fresh, and change one choice during the next session.
On day one, lock the zoom at 18mm and photograph spaces without tilting the camera. On day two, use roughly 35mm for ordinary moments: hands making coffee, a bicycle against a wall, or commuters under umbrellas. On day three, stay at 55mm and search for compressed layers, small gestures, and distant details.
Spend day four photographing one person beside a window, changing only their distance from the glass. Use day five for motion, testing 1/125, 1/250, and 1/500 second on cyclists, pets, or falling water. On day six, make the same still subject at each full aperture and inspect where focus, shake, or depth of field changes the result.
Day seven is for editing and selection. Choose ten photographs, then cut them to three. That reduction can feel severe, but it trains your eye to notice the raised eyebrow, cleaner edge, or shaft of light that turns a record into a photograph.
Contact sheets are useful for this kind of review because patterns become obvious. Six near-identical frames may show that the shutter was consistently pressed half a beat early, or that every strong image used side light. Your camera settings are clues, but the visual pattern matters more.
- Keep the exercise small enough to repeat after work or during a short walk.
- Change one variable at a time when testing sharpness, exposure, or background blur.
- Write one sentence about why each selected frame works.
- Repeat the weakest day before deciding the lens caused the problem.
This routine is suitable for a new camera owner, yet it also challenges an experienced photographer. Restrictions sharpen attention. When the zoom ring stops being an escape hatch, your feet, timing, and sense of light begin doing the real work.
Frequently Asked Questions
Can a kit lens produce professional-looking photographs?
Yes. A kit lens can produce portfolio-ready photographs when you use good light, accurate focus, a suitable shutter speed, and deliberate composition. Its limits become more visible in very low light, extreme enlargements, fast action, or scenes demanding strong background blur, but those limits do not make every image look amateur.
What aperture gives the sharpest results on an 18–55mm lens?
Many kit lenses give strong central detail around f/5.6 to f/8, but there is no universal sharpest setting. Test your copy on a flat, textured subject in steady light, and remember that focus accuracy and camera movement often matter more than a one-stop aperture change.
Why are my indoor kit-lens photos blurry?
Indoor blur usually comes from a shutter speed that is too slow for the person or camera movement. Open the aperture, raise ISO, move closer to a window, and try 1/125 second or faster for people who are sitting relatively still.
Should I use 18mm or 55mm for portraits?
Use 55mm for most head-and-shoulders portraits because it lets you work from a comfortable distance and keeps facial proportions natural. Use 18mm when you intentionally want an environmental portrait, but keep the person away from the frame edges and avoid placing the camera very close to their face.
When have I genuinely outgrown my kit lens?
You have outgrown it when a repeated technical limit blocks photographs you regularly attempt. Examples include insufficient reach for wildlife, an aperture that forces unusably slow shutter speeds indoors, or a minimum focus distance that prevents the close-up work you enjoy.
Do I need a prime lens to get a blurred background?
No. At 55mm and the widest available aperture, move close to your subject and place the background much farther away. A fast prime can create stronger blur in tighter spaces, but distance and background choice can give a kit-lens portrait clean separation without new gear.
Conclusion
Use your kit lens until its limits become specific. Not frustrating in a vague way. Specific enough that you can identify the need for more reach for birds, a wider aperture for indoor people, or closer focusing for small details—and support that conclusion with photographs and camera settings.
Until then, set the lens to one focal length, find clean light, choose a safe shutter speed, and make ten thoughtful frames instead of one hundred hurried ones. Your kit lens is not a waiting room before real photography begins. It is a compact workshop, and every worn patch on the zoom ring can mark a lesson learned in rain, window light, crowded streets, and those brief expressions that disappear like breath on cold glass.
Fall Picks
fall essentials
As an affiliate, we earn on qualifying purchases.