
TL;DR
Archiving old photos means scanning valuable originals at 300 to 600 dpi, saving archival masters as TIFF files, adding names and dates, and keeping multiple copies in separate locations. Start with the photographs your family values most, protect the physical originals, and treat every unidentified face as a story that could disappear.
The face you cannot name today may become the mystery no one can solve ten years from now. Old photographs rarely announce that they are fading; they quietly collect fingerprints, silvered edges, curled corners, and missing stories while sitting in a biscuit tin or warm attic.
This guide shows you how to identify which photos deserve attention first, scan them without damaging fragile surfaces, choose useful file formats, and build a backup system that does not depend on one hard drive. You will also learn how to capture names, places, dates, and family context before those details vanish.
I approach family photographs with the same care I bring to commissioned work: control the light, protect the original, and keep a master file that leaves room for future choices. You do not need a studio or rare equipment. You need a clean workspace, consistent settings, and the patience to preserve the story along with the pixels.
Start with ten unique, damaged, labeled, or historically meaningful photographs instead of trying to scan the entire collection at once.
Scan ordinary prints at 300 to 600 dpi, save an untouched TIFF master, and make JPEG copies for sharing.
Record names, approximate dates, locations, relationships, and the person who supplied each identification.
Keep three copies across two storage types, with one copy stored in another location and one backup disconnected when practical.
Preserve physical originals in photo-safe enclosures and label AI-restored images so invented details never replace the historical record.
Family archive field guide · scan · identify · protect
Archiving Old Photos: Scanning and Storing Family Memories
Preserve the story along with the pixels. Start with the photographs your family values most, scan carefully, keep an untouched master, and record the names that future generations may otherwise never recover.
01 · triage the collection
Scan what matters first
Work through one box at a time. Sort photographs into scan first, scan later, duplicates, and uncertain. Value comes from the image, its condition, and the clues attached to the physical object.
Unique or endangered
Only copies, cracked or fading prints, older processes, military portraits, immigration records, and people still awaiting identification.
Meaningful with backup
Important family photographs that also survive as a duplicate, negative, album print, or another safer copy.
Repeated snapshots
Commercial prints, near-identical frames, and photographs with little family context. Keep copies carrying handwriting or studio stamps.
02 · match method to material

Canon Canoscan Lide 300 Scanner (PDF, AUTOSCAN, Copy, Send)
Scanner type: Document
As an affiliate, we earn on qualifying purchases.
As an affiliate, we earn on qualifying purchases.
Choose the right capture tool
A flatbed supports fragile prints, a film scanner captures transmitted detail, and a phone is useful when speed or an intact album matters more than maximum consistency.
| Method | Best use | Main strength | Tradeoff |
|---|---|---|---|
| Flatbed scanner | Loose prints and delicate photographs | ✓ Even light and steady support | ~ Slower for large batches |
| Film scanner | Negatives and mounted slides | ✓ Captures small film detail | ~ Dust removal takes care |
| Phone scanning app | Albums and quick family sharing | ✓ Fast and portable | ✗ Glare and lower consistency |
| Camera copy setup | Large batches or items that cannot lie flat | ✓ Fast once aligned | ~ Needs stable, controlled light |
For phone capture: use soft side light, turn off conflicting room lamps, keep the phone parallel, and move the album—not the camera—when glare appears.
03 · capture usable detail

HULISEN Photo Storage Box with Lid & Dividers, Linen Photo Organizer for up to 2000 4×6 Pictures, Keepsake Memory Box with Side Handle for Family, Wedding & Baby Photos, Cards, Scrapbook
Photo Storage Box for 4×6 Pictures with 8×10 Mesh Pocket: Designed as a photo storage box for 4×6…
As an affiliate, we earn on qualifying purchases.
As an affiliate, we earn on qualifying purchases.
Settings that leave room for the future
Scan in color—even for monochrome photographs—and create an untouched master before restoration. Resolution should record the detail present in the original, not simply produce the largest possible file.
Resolution by purpose
Master versus access copy
Lossless, untouched, and suitable for future editing. Treat it like a digital negative.
Smaller and widely supported. Ideal for email, family albums, websites, and everyday viewing.
04 · controlled workflow

Photo Picture Frame Diversion Safe with Fireproof & Waterproof Money Bag, Valuable Storage, Home Security, ANZAKY Mini Box with Hidden Compartment to Shield your Money, Cash, 5"x7"
★ 【PICTURA FRAME DIVERSION SAFE + EXTRA FIREPROOF MONEY BAG – MORE SAFETY】: Anzaky picture frame diversion safe…
As an affiliate, we earn on qualifying purchases.
As an affiliate, we earn on qualifying purchases.
From physical print to protected file
Consistency is more valuable than elaborate equipment. Keep the work surface clean, use repeatable settings, and verify each file before returning the original to a photo-safe enclosure.
Inspect
Check for mold, flaking, cracks, adhesive, and writing on the reverse.
Clean gently
Use a soft photographic brush or hand air blower for loose surface dust.
Scan
Capture in color at 300–600 DPI with automatic restoration disabled.
Verify
Check focus, edges, orientation, color, and whether the file opens correctly.
Protect
Save the master, create access copies, add metadata, and return the original safely.
Never overwrite the first faithful scan
Keep restoration decisions reversible. AI-repaired or colorized images should be clearly labeled as derived versions so invented detail never replaces the historical record.
05 · preserve meaning and access
photo backup hard drives
As an affiliate, we earn on qualifying purchases.
As an affiliate, we earn on qualifying purchases.
Back up the story, not just the file
A scan without names or context may become an anonymous image. Pair every file with reliable metadata, then keep redundant copies across different storage types and locations.
The 3–2–1 backup pattern
A memory becomes an archive
The complete chain preserves the object, its faithful digital representation, and the human knowledge that gives the picture meaning.
Choose the Photos That Carry the Most Family History
Archiving old photos starts with selecting the images that hold the greatest family, historical, or emotional value. Work first on unique photographs, damaged prints, labeled portraits, and pictures tied to relatives who can still explain them. A careful first pass keeps a large collection from becoming an endless scanning chore.
Spread one box at a time across a clean table and make four groups: scan first, scan later, duplicates, and uncertain. If you find three nearly identical picnic photographs, keep the sharpest print and any copy with handwriting on the back. A faded note saying Hamburg, summer 1962 may carry more value than a technically better duplicate.
Your first challenge is simple: find ten photographs today that would be painful to lose. Look for only copies, older processes, cracked surfaces, military portraits, wedding groups, immigration records, and homes that no longer exist. This small batch gives you a finish line and helps you test your system before handling hundreds of prints.
- Highest priority: unique images, active damage, or people awaiting identification.
- Medium priority: meaningful photographs with safer duplicates or negatives.
- Lower priority: repeated snapshots, commercial prints, and images with little family connection.
- Separate materials: keep negatives, slides, albums, and loose prints in their own groups.
Do not discard a duplicate merely because it looks redundant. One copy may show richer shadow detail, while another carries a date, studio stamp, or relative’s handwriting. The important aspects of selection are image content, physical condition, and the clues attached to the object itself.
Pick a Scanning Method That Matches the Original
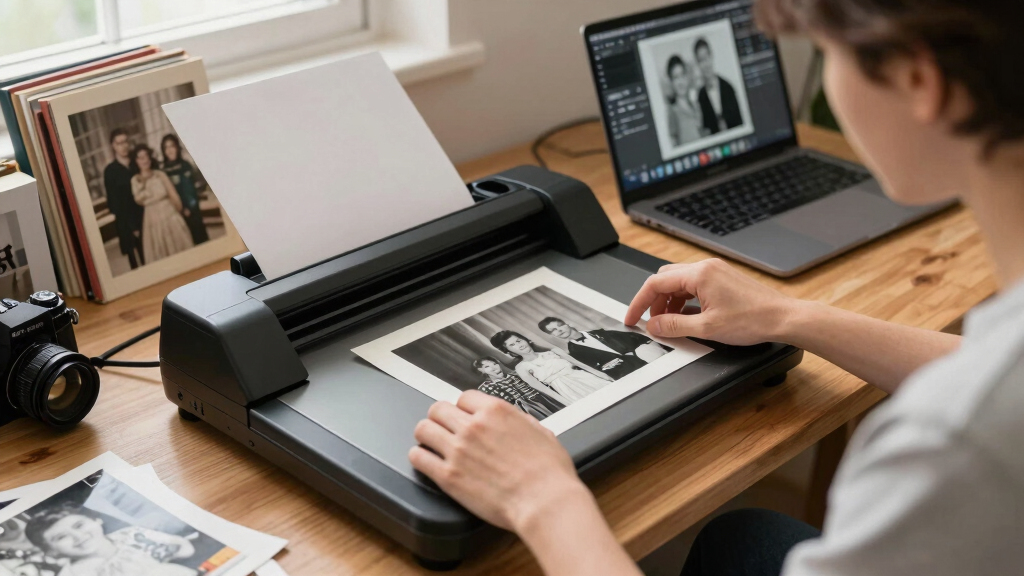
Archiving old photos works best when your scanning method matches the material in front of you. A flatbed scanner gives fragile prints steady support, a film scanner captures detail from negatives and slides, and a phone handles quick copies when speed matters more than maximum quality.
| Method | Best use | Main strength | Tradeoff |
|---|---|---|---|
| Flatbed scanner | Loose prints and delicate photographs | Even lighting and no camera shake | Slow for large batches |
| Film scanner | Negatives and mounted slides | Captures small film detail | Needs careful dust removal |
| Phone scanning app | Albums and quick family sharing | Fast and portable | Lower consistency and possible glare |
| Camera copy setup | Large collections or items that cannot lie flat | Fast once aligned | Needs stable support and controlled lighting |
A phone is suitable for a quick sharing project, especially when an album should not be pulled apart. Place the album near a window with soft side light, turn off the room lamps, and hold the phone parallel to the page. If you see a bright rectangle of glare, shift the album rather than tilting the phone and bending the image into a trapezoid.
Use a flatbed for a brittle school portrait with a curling corner. Lower the lid gently without pressing the print flat; a clean sheet of archival-safe polyester can help control a mild curl. If the photograph sticks to glass, is flaking, or has a cracked surface, stop and seek a photograph conservator rather than forcing it loose.
Never place a wet, moldy, flaking, or glass-adhered photograph on scanner glass. Scanning pressure can turn recoverable damage into permanent loss.
For negatives, the scanner must shine light through the film rather than reflect light from its surface. A print scanner without a transparency unit cannot recover the full information in a negative. That difference is like photographing a stained-glass window from a dark hallway instead of letting daylight pass through it.
Use Scan Settings That Preserve Detail Without Wasting Space
The right scan settings preserve the detail present in the original without filling your archive with oversized files. Scan ordinary prints at 300 to 600 dpi, use higher resolutions for small negatives and slides, capture color even when the photograph looks monochrome, and save an untouched archival master before editing.
According to the Library of Congress, 300 dpi is a practical minimum for digitizing many photographic prints [1]. I prefer 600 dpi for small or historically valuable prints because it gives you more room to inspect faces, handwriting, and surface detail. A 4-by-6-inch print at 600 dpi becomes 2400 by 3600 pixels.
- Clean the scanner glass with a lint-free cloth, following the maker’s instructions.
- Remove loose dust from the print with a clean, soft photographic brush or hand air blower.
- Scan in color at 600 dpi for small, valuable prints; use 300 dpi for larger, lower-priority batches.
- Save a TIFF master without sharpening, aggressive contrast, or automatic restoration.
- Create a JPEG copy for email, family albums, and everyday viewing.
Imagine scanning a tiny 1940s contact print showing six people beside a black car. At 300 dpi, the faces remain small; at 600 dpi, you gain enough pixels to study a hat brim, uniform badge, or expression. You do not create new detail, but you record more of what the paper still holds.
TIFF files preserve image data without the repeated compression losses associated with editing and resaving JPEGs. JPEG remains excellent for convenient copies because it is smaller and widely supported. Think of the TIFF as your digital negative and the JPEG as the print you pass around the kitchen table.
Avoid automatic color fixes during the master scan. Scanner software may turn a warm sepia portrait gray, crush detail in a dark jacket, or smooth away paper texture. Make those changes on a duplicate so the unaltered master remains available when editing tools improve.
Name Every File So Your Family Can Find It Again
Archiving old photos becomes useful only when another person can find and understand the files. Give every scan a consistent filename, place it in a simple date or family folder, and record known names, locations, events, and uncertainties. A clear label turns an isolated image into searchable family history.
A filename such as 1962-07_Hamburg_Keller-family_picnic_001.tif tells you far more than Scan0047.tif. If the year is uncertain, use circa-1962 or 1960s rather than guessing. Put surnames in a consistent order, and use leading zeros so files sort correctly from 001 through 120.
Metadata can hold family knowledge inside or beside the file, including important aspects such as maiden names, relationships, addresses, and the person who supplied the information. For example: Identification provided by Aunt Maria during a family call, May 2026; date uncertain. That note separates a remembered fact from a later assumption.
- Date: exact, approximate, or unknown.
- People: full names, maiden names, and positions in group photographs.
- Place: town, street, building, or recognizable landmark.
- Event: wedding, school day, holiday, military service, or ordinary family life.
- Provenance: album, envelope, photographer’s stamp, or relative who owned the print.
Here is a useful real-world test: send one file to a cousin without explaining it. Can your cousin tell who appears in it, where it belongs, and whether the date is certain? If not, the archive still depends too heavily on your memory.
Do not rename or reorganize thousands of files in one sitting. Work in batches of 25 to 50 photographs, then check for spelling variations and duplicate numbers. Consistency beats cleverness; your folder system should feel like a well-labeled set of drawers, not an escape room.
Build Backups That Survive One Drive Failing
A dependable photo archive keeps at least three copies on two kinds of storage, with one copy in another location. This widely used 3-2-1 approach protects your family scans from drive failure, theft, fire, accidental deletion, and account trouble. One external drive is storage, not a full backup plan.
Your working folder might live on a computer, with a second copy on an external drive and a third in cloud storage. If a spilled drink kills the computer, the drive still helps. If a fire reaches both devices, the remote copy becomes the quiet hero you hoped you would never need.
PhotoMocha recommends keeping copies in different locations and checking digital storage over time [2]. Hard drives, cloud accounts, and file formats change; none deserves blind trust forever. Once or twice a year, open a sample of TIFF and JPEG files, confirm that folders are complete, and replace storage media showing errors or unreliable behavior.
Sync is not always backup. If deletion or corruption automatically spreads to every synchronized device, you can lose every visible copy at once.
Keep one backup disconnected when you are not updating it. That simple habit can protect the archive from ransomware, a mistaken mass deletion, or an electrical fault. Label the drive with the archive name and update date, then store it somewhere cool, dry, and separate from the computer.
Cloud storage makes family sharing easy, but account access can vanish when passwords, payment details, or recovery emails are lost. Give a trusted relative clear instructions for locating the archive. A short text file named READ-ME-FIRST can explain folder structure, file formats, backup locations, and who holds the physical originals.
Protect the Originals and Share Copies Without Rewriting History
Digital scans do not replace physical originals; they reduce handling while preserving the image content in another form. Store prints in acid-free, photo-safe enclosures, keep them away from sunlight and damp rooms, and share edited copies rather than altering your only master. The paper object may hold evidence the scan misses.
A studio stamp, handwritten recipe, thumbprint, deckled edge, or album caption can reveal where a photograph came from. Scan the back whenever it carries writing or marks, and give both sides matching filenames such as 001-front.tif and 001-back.tif. That pairing keeps the clue attached to the image.
Store photographs in a stable part of the home rather than an attic, garage, or basement. A bedroom cupboard usually changes temperature and humidity more slowly. Place prints in photo-safe sleeves or boxes, keep food and drinks away, and never use rubber bands, pressure-sensitive tape, or sticky album pages against valuable originals.
AI restoration tools can reduce scratches, rebuild missing corners, and colorize monochrome photographs, but they also invent pixels. A restored face may look convincing while changing an eye, tooth, medal, or line of clothing. Keep the original scan untouched, label the edited version clearly, and tell relatives when an image includes generated detail.
Suppose you repair a torn wedding portrait for a family anniversary. Share a gentle restoration for display, but include the unedited scan in the family folder. Side by side, the files offer both experiences: the clean image people enjoy and the honest record historians need.
Sharing creates another layer of preservation because relatives may identify people you cannot. Send a small group of images with specific questions, such as Who is standing second from the left? Five carefully chosen photographs invite better answers than a link to 2,000 unlabeled scans.
Frequently Asked Questions
Should I scan old photos at 300 or 600 dpi?
Use 300 dpi for larger, lower-priority prints and 600 dpi for small, valuable, or detailed photographs. A 600 dpi scan gives you more room to inspect faces and make careful crops, though it creates a larger file and cannot recover detail missing from the original.
Is TIFF or JPEG better for archiving family photos?
TIFF is the better archival master because it can store image data without repeated lossy compression. Keep JPEG copies for email, phones, and family sharing, since they use less space and open easily on almost any device.
Can I scan old photographs with my phone?
Yes. A phone is suitable for a fast family project, an album that should remain intact, or a first-pass record of a large collection. Use soft, even light, keep the camera parallel to the photograph, avoid glare, and use a flatbed or camera copy setup for your most fragile or valuable originals.
How should I handle a photograph stuck to glass?
Do not pull the photograph away or soak it without guidance. The image layer may be bonded to the glass and can tear away from the paper, so photograph it through the glass and contact a qualified photograph conservator if the original matters to your family.
What information should I save with each scanned photo?
Record names, dates, places, events, relationships, and ownership history, along with any uncertainty. Add who supplied the identification and when; a note such as identified by a relative in 2026 helps future readers separate family testimony from a guessed caption.
How often should I check my photo backups?
Review the archive once or twice each year and after any major computer or storage change. Open sample files, compare folder counts, check that the remote copy is reachable, and update the READ-ME-FIRST instructions when passwords, drives, or family contacts change.
Conclusion
Your most valuable task is not buying a better scanner. It is creating one careful, labeled, backed-up batch while the people who know the stories can still answer your questions. Start with ten photographs, scan both sides when needed, save the masters, and ask relatives to identify every uncertain face.
A family archive grows through steady, ordinary work. Years from now, someone may open a file and find not just a silent portrait, but a name, a place, and a life connected to their own. That is the moment your careful work leaves the screen and becomes memory again.