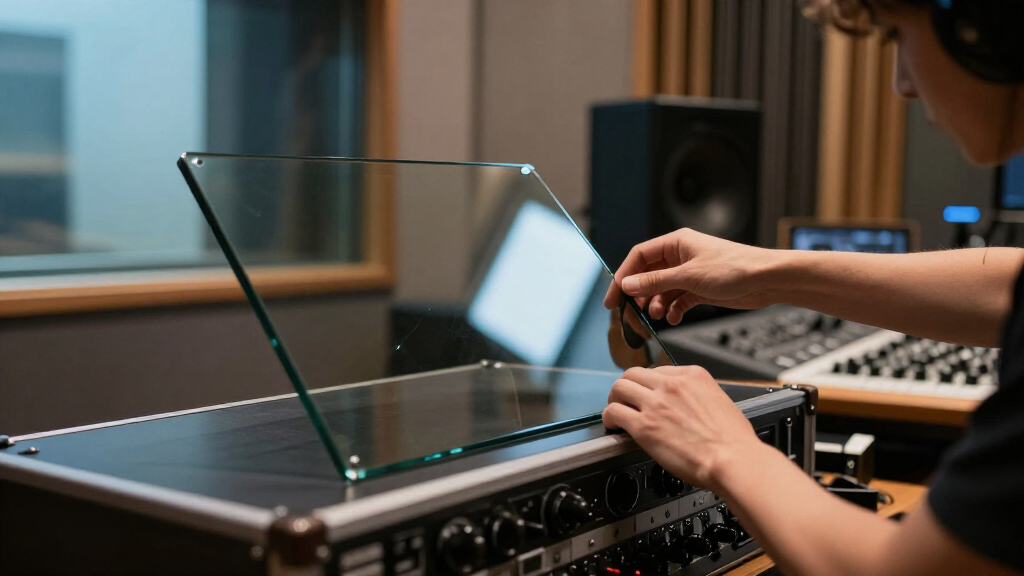

TL;DR
Listen free for 30 days with Audible
Thousands of audiobooks and originals — cancel anytime.
Start your free trialAs an affiliate, we earn on qualifying purchases.
Lighting glass, metal, and other reflective nightmares means designing the reflections visible to your camera. Lock your viewpoint, use oversized diffusion, and place white or black cards where the subject can reflect them; controlled gradients reveal shape better than extra lamps.
A polished cocktail shaker once gave me a perfect photograph of everything except the shaker. I could see two light stands, my striped shirt, the camera, and a bright rectangle of ceiling in its silver skin. The object sat motionless, yet its surface felt as busy as a crowded railway platform.
Glass, polished metal, glossy ceramics, jewelry, and screens are difficult to light for one fundamental reason: your camera sees the environment reflected in the subject. Your job is not simply to illuminate the product, but to design what the product reflects. Once you make that shift, these surfaces stop behaving like unpredictable monsters and start behaving like mirrors with rules.
You will learn how to build broad gradients, create bright-field and dark-field glass, shape chrome with cards, use polarization without stripping away the gloss, and combine locked-off exposures when one frame cannot do everything. I will also show you a repeatable workflow you can use with one light, basic diffusion, and a few pieces of foam board. Here is the challenge: before you add another lamp, identify the exact reflection you want to change.
Lock the camera first, then move cards and modifiers while judging every reflection from the lens position.
Use diffusion panels larger than the visible reflective surface and move the lamp behind them to shape smooth gradients.
Create dark glass edges on a bright background with black cards; create bright edges on black with illuminated side panels.
Treat black cards as visible design tools that define rims, separate metal parts, and restore contrast inside a light tent.
Use polarization selectively, and capture locked-off lighting passes when the body, label, liquid, screen, or gemstone need different treatment.
Lighting Glass, Metal, and Other Reflective Nightmares
The surface is not the problem. The environment inside its reflection is. Lock the viewpoint, build oversized diffusion, and place deliberate white or black shapes where the camera can see them reflected.
Lock the camera before shaping reflections
Dependable glass modes: bright-field and dark-field
Repeatable moves from cleaning to capture
Incidence angle equals reflection angle
01 / Read the surface
The five rules of reflection design
Matte objects reveal form through light and shadow. Reflective objects reveal form through the size, position, brightness, and transition of reflected shapes. Build those shapes deliberately.
Camera first
Judge every move from live view or a tethered display. A card that looks misplaced from the table may be perfect from the lens.
Go oversized
A small source makes a sharp hotspot. A large scrim or panel produces a broad reflection with room for a controlled fade.
Design gradients
Move the lamp behind a stationary scrim. The reflected outline stays stable while its brightness rolls from light to dark.
White adds presence
White cards create clean highlight bands, reveal shoulders, and place purposeful brightness on glass, chrome, or glaze.
Black creates definition
Black cards draw rims, divide adjoining metal parts, hide studio clutter, and restore contrast inside a light tent.
Change the angle
A few centimeters can replace a broken hotspot with a clean line. Position usually beats added power.
02 / Choose the field
Two reliable ways to reveal glass
Transparent glass becomes visible through its edges, contents, distortions, and reflections. Choose the background first, then create an opposing edge treatment.
| Setup | Background | Edge treatment | Visual character | Best fit |
|---|---|---|---|---|
| Bright-field | White or pale | Black cards just outside frame | Dark, precise outlines | Clear bottles, laboratory glass, catalog work |
| Dark-field | Black or very dark | Bright side panels or illuminated scrims | Glowing rims and premium contrast | Drinks, fragrance, dramatic advertising |
Rule of thumb / bright background needs dark edges; dark background needs bright edges.
Bright-field
Light a large pale background evenly, then slide black cards inward until their reflections trace the glass.
Ideal when clear glass must feel clean, technical, and precisely outlined.
Dark-field
Keep the background black and place bright diffusion panels at the sides to reflect only in the edges.
Add a controlled rear glow when colored liquid needs luminosity without flattening the silhouette.
03 / Shape the transition
The gradient carries the form
A uniformly bright reflection can flatten a curved object. A long transition from bright to dark gives the eye the information it needs to read volume.
Fixed panel, moving lamp
The diffusion panel is the source the product sees. Move the lamp behind it to change the internal fade without changing the reflected panel’s outer shape.
Reflection quality spectrum
Relative effectiveness for describing smooth reflective form.
Conceptual scale based on apparent source size and transition control, not lamp power.
04 / Repeatable workflow
Build the photograph in 10 moves
Change one variable at a time. This sequence makes each improvement traceable and prevents random lamp collecting.
Clean and place
Use gloves and microfiber. Check dust, seams, labels, fingerprints, and the base.
Lock the camera
Set angle, focal length, focus plan, and tripod position before moving modifiers.
Darken the room
Switch off ambient lights and cover bright windows or strongly colored objects.
Audit reflections
Find the camera, ceiling, stands, walls, clothing, and every unwanted bright shape.
Add one broad source
Start with diffusion larger than the visible reflective surface.
Shape the gradient
Move or feather the lamp behind the panel while the panel remains fixed.
Place cards
Use white for highlights and black for edges, gaps, and controlled contrast.
Light the background
Control it independently so background brightness does not wash over the product.
Add only what is needed
A small hard light may animate a gemstone, foil edge, texture, or embossed mark.
Inspect and capture
Check clipping, flare, dust, color, focus, branding, and alternate lighting passes.
05 / Traceability
Every reflection has a controllable cause
Follow the chain from camera to modifier. If the result is wrong, identify the earliest controllable link instead of adding another light.
Before adding another lamp, identify the exact reflection you want to change.
See What the Camera Sees Before You Move a Light
Lighting Glass, Metal, and Other Reflective Nightmares becomes easier when you treat the whole studio as part of the subject. A reflective surface records the shape, angle, and brightness of nearby objects, even when those objects sit outside the frame. Start by studying the reflections from the camera position, not from beside the table.
On a matte vase, light and shadow reveal the curve. On a chrome vase, the curve appears through stretched bands of reflection. A tall white card may become a clean silver stripe, while a black flag becomes a dark contour that makes the rim readable. Brightness shows presence; contrast shows form.
According to the law of reflection, the angle at which light reaches a surface equals the angle at which it leaves [1]. That simple rule explains why pointing a lamp straight at a metal bowl can produce no useful highlight. If the bowl sends that light toward the ceiling rather than the lens, increasing power only creates more wasted light.
Lock your camera before moving modifiers. Then wave a white card slowly around the subject while watching a tethered display or live view. When the desired area flashes bright, you have found the reflection path; place diffusion or a card there. With a curved perfume cap, moving a card by only 2 or 3 centimeters can turn a broken hotspot into a smooth vertical line.
Do not ask where the object needs more light. Ask what bright or dark shape its surface needs to reflect.
A longer focal length often helps because you can move the camera farther away and reduce its apparent reflection. It will not make the lens invisible, but a small black lens opening is easier to manage than a camera, tripod head, and photographer looming like a dark island in chrome.
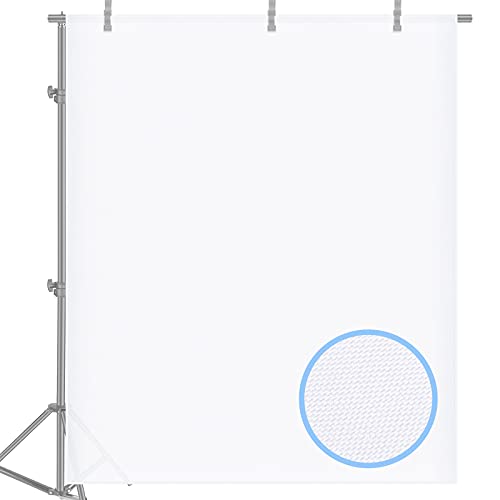
Neewer 2 Yard x 60 Inch/1.8M x 1.5M Polyester White Seamless Diffusion Fabric for Photography Softbox,Light Tent and Lighting Light Modifier
- Size: 2 yards x 60 inches (1.8m x 1.5m)
- Material: Non-yellowing white nylon textile
- Light Diffusion: Reduces light by approximately 1 f-stop
As an affiliate, we earn on qualifying purchases.
As an affiliate, we earn on qualifying purchases.
Choose the Glass Setup That Gives You Clean, Visible Edges
Lighting Glass, Metal, and Other Reflective Nightmares calls for one of two dependable glass setups: bright-field lighting creates dark edges against a light background, while dark-field lighting creates bright edges against darkness. Choose by deciding whether you want a clean catalog result or a moodier, more sculpted photograph.
| Setup | Background | Edge treatment | Best fit |
|---|---|---|---|
| Bright-field | Illuminated white or pale surface | Black cards create dark outlines | Clear bottles, laboratory glass, catalog work |
| Dark-field | Black or very dark surface | Bright side panels create glowing rims | Drinks, fragrance bottles, dramatic advertising |
For bright-field lighting, place the glass in front of a large, evenly lit white background. Move two black cards inward from the sides until their reflections trace the outer edges, keeping the cards just outside your composition. A clear wineglass that looked almost invisible will gain two crisp charcoal lines, like ink following the bowl.
For dark-field lighting, keep the background black and position bright diffusion panels on either side. The panels should reflect in the glass edges without spilling across the center. I use this arrangement when a bottle contains amber liquid: a small rear light adds a warm honey-colored glow, while the side panels separate the shoulders from black.
Glass often contains several lighting problems at once. The transparent body, colored liquid, paper label, foil neck, and embossed logo may each want a different angle. If the label turns dull while the glass looks beautiful, make a separate label exposure without moving the camera or bottle.
Clean before the first frame. Wear lint-free gloves, use a clean microfiber cloth, and inspect the base and shoulder with a flashlight. A fingerprint that seems faint to your eye can become a milky crescent under edge lighting, and retouching twenty frames takes far longer than wiping one bottle.

Selens Polarizing Film 2 PCS 7.8×11.8 inches Adhesive Polarized Sheets
- Linear Polarizer: Suitable for photography and LCD screens
- Educational Use: Ideal for science projects and physics learning
- Premium Material: Made from high-quality PET for durability
As an affiliate, we earn on qualifying purchases.
As an affiliate, we earn on qualifying purchases.
Build a Controlled Reflection in 10 Repeatable Moves
Lighting Glass, Metal, and Other Reflective Nightmares works best as a controlled sequence: clean the subject, lock the camera, simplify the room, add one broad source, and shape its reflection before adding accents. This 10-step workflow prevents random lamp collecting and lets you identify which change improved the frame.
- Clean and place the subject. Handle polished surfaces with gloves and check seams, labels, and dust.
- Lock the camera. Set the angle, focal length, focus plan, and tripod position before shaping reflections.
- Darken the surroundings. Switch off room lights and cover bright windows or colored objects.
- Study the existing reflections. Look for the camera, ceiling, stands, walls, and your clothing.
- Add one large diffusion panel. Start with a panel that appears larger than the visible reflective surface.
- Shape the gradient. Move the lamp behind the panel or feather it across the material.
- Add white and black cards. Use white for highlights and black for edges, gaps, and contrast.
- Light the background separately. Keep background brightness from washing over the product.
- Add small accents only where needed. A hard light may animate a gemstone or embossed mark.
- Inspect and capture alternatives. Check clipping, flare, dust, color, focus, and unwanted reflections.
The diffusion material effectively becomes the source your product sees. If the panel stays still while you move a lamp closer to its left edge, the reflected rectangle keeps the same outline but develops a bright-to-dark fade. That fade rolls around a curved kettle like evening light across a hill, giving the metal volume.
For a small chrome cosmetic jar, I might begin with a diffusion panel roughly three times its height. I place a narrow black card beside the panel to cut a dark line into the lid, then rotate the jar until that line follows its geometry. One lamp, two cards, and patience can outperform a ring of uncontrolled fixtures.
Change one variable at a time and save reference frames. If you move the jar, camera, panel, and lamp together, you will not know why the result improved or collapsed. A quick phone photograph of the physical setup also helps when you need to repeat the shot for another color or product size.
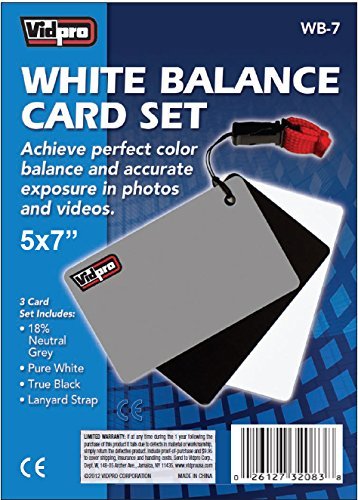
Vidpro White Balance Card Set – 18% Neutral Gray Pure White & True Black Cards – Reference Reflectors Ensures Accurate Exposure & Color Balance Use in Pre or Postproduction in Any Lighting Condition
- Includes three color reference cards: Neutral gray, white, black
- Suitable for all lighting conditions: Pre- and post-production use
- Available in multiple sizes: 2×3 inches or 5×7 inches
As an affiliate, we earn on qualifying purchases.
As an affiliate, we earn on qualifying purchases.
Follow a One-Light Example From Problem Frame to Finished Image
Imagine photographing a stainless-steel water bottle with a paper label and a glossy black cap. In the first frame, the bottle shows a square softbox, the label looks gray, and the camera appears as a dark oval in the center. Adding more light would brighten the clutter without improving the shape, so treat each visible problem as a reflection with a specific source.
First, lock the camera and place a diffusion panel just outside the left side of the frame. Aim one lamp through the panel, then move the lamp toward the panel’s rear edge. The bottle now reflects a long highlight that fades from white to gray, much like a wide brushstroke wrapped around a cylinder. The body immediately looks rounder because the gradient changes gradually across the steel.
Next, slide a narrow black card beside the diffusion panel. Its reflection becomes a dark vertical line between the bright body and the silver rim, giving the bottle a clean boundary. If the line bends awkwardly, rotate the bottle a few degrees instead of moving every part of the setup. The changing curve shows exactly how the bottle’s surface redirects the card toward the lens.
The label may still look dull because the broad source reaches it from an unhelpful angle. Without touching the camera or bottle, move a small white card near the lens until the label brightens, then capture a second exposure. For the black cap, move another narrow white card above and slightly behind the bottle so the cap gains a thin edge reflection while its center remains black.
Finally, shoot through a small opening cut between black cards around the lens. The camera reflection shrinks from a large dark oval to a neat circle that can be removed in a locked-off cleanup pass. Blend the brighter label exposure within the label boundary and retain the original steel gradient and cap reflections. The finished image may use two captures, but every highlight still describes a real surface, angle, or material.
Think of the bottle as a curved editing screen. The diffusion panel paints the broad tone, the black card draws the contour, and the small white cards add only the details the material needs.

Syyavrrta Durable Acrylic Reflection Board, 12×12 Inch Mirror Surface for Jewelry and Cosmetic Product Photography Studio Setup
- High-clarity acrylic surface: Seamless reflective surface for photography
- Durable and lightweight: Resists shattering, long-lasting use
- Sharp, distortion-free images: Ideal for jewelry, cosmetics, electronics
As an affiliate, we earn on qualifying purchases.
As an affiliate, we earn on qualifying purchases.
Make Polished Metal Look Curved Instead of Flat
Lighting Glass, Metal, and Other Reflective Nightmares requires long gradients and deliberate dark breaks when the subject is polished metal. Uniform white surroundings can erase curvature, while tiny sources create distracting hotspots. Give the metal broad bright shapes, controlled dark lines, and enough variation to describe its three-dimensional form.
A cylindrical travel mug provides a clear example. Place a tall diffusion panel beside it, then feather a softbox or bare lamp across that panel so the reflection fades from white to gray. Add a narrow black card near one edge. The resulting pattern wraps around the cylinder like a ribbon around a bottle, making the body feel round.
White cards add highlights, but black cards do more than remove fill. In mirror-like metal, a black card becomes a visible dark reflection that can separate the lid from the body, define a handle, or break two adjoining silver surfaces apart. A light tent without black accents often turns a chrome product into a pale, shapeless blob.
Brushed metal behaves differently because its fine grooves scatter reflections along the brushing direction. Aligning a long source with that grain can emphasize its satin texture, while lighting across the grain may reveal scratches and uneven finishing. When photographing a brushed-steel watch clasp, rotate either the clasp or panel a few degrees and watch the texture move from smooth silver to a harsh field of tiny scars.
Glossy black products use the same logic, but you must protect the black tone. Broad frontal fill can make a black speaker look gray. I usually create two narrow edge reflections, keep the center dark, and separate the product from the background with a restrained rim or background gradient.
Large glossy subjects simply require larger surroundings. A car reflects the ceiling, walls, doorways, and sky, so the location becomes a giant modifier. Long overhead silks and clean architectural lines create the sweeping highlights that reveal bodywork; a small lamp creates a bright dot but says little about the fender’s shape.
Use Polarization Without Erasing the Product’s Character
A polarizer works as a reflection-control dial, not a universal eraser. It can reduce glare from glass, water, paint, and many plastics, but it generally cannot remove reflections from bare polished metal. Rotate it while watching the subject, then stop when you have reduced the distraction without losing shape and gloss.
According to Nikon MicroscopyU’s explanation of polarized light, polarizers pass light vibrating in selected directions [2]. That is why the effect changes as you rotate a circular polarizing filter. On a framed print behind glass, you may see a pale window reflection darken smoothly, then return as the filter continues through its rotation.
Curved glass rarely responds evenly because each part of the surface sits at a different angle. A polarizer may clean one shoulder of a bottle while leaving another reflection untouched. It can also darken an LCD screen or create uneven patches, so test the whole frame rather than admiring one repaired corner.
Cross-polarization goes further by placing polarizing material over the lights and another polarizer on the lens. When aligned, it can suppress a great deal of specular glare from nonmetallic surfaces. The tradeoffs are real: you lose light, alignment takes time, some materials shift color, and removing every highlight can make a glossy object look lifeless and synthetic.
I once photographed a glazed ceramic tile whose texture vanished under a strong crossed-polarization setup. The surface became accurate in color but looked like a flat digital sample. Backing off the lens polarizer restored a thin streak of reflection, and that streak told the viewer, This surface is glazed.
Keep the reflections that explain the material. Remove the ones that explain your studio.
If metal glare remains, return to geometry. Rotate the object, alter the camera angle, or move a black or white surface into the reflection path. No filter can replace a reflection that has been deliberately designed.
Protect Highlights and Combine Exposures Without Faking the Product
Reflective photographs stay believable when you protect highlight detail, keep color consistent, and combine only exposures captured from a locked camera. Watch the histogram or highlight warning, expose for meaningful bright areas, and record separate passes when glass, labels, screens, or gemstones demand conflicting lighting.
A clipped highlight contains no texture or color information. Yet a clean specular reflection may naturally reach white, so the goal is not to save every bright pixel. Protect the bright areas that carry engraving, texture, colored coating, or the soft edge of a gradient. When uncertain, I capture a second frame roughly one stop darker.
Mixed reflections cause color problems that ordinary white balance cannot repair. A daylight window, warm ceiling lamp, green wall, and red shirt may all appear in a chrome appliance at once. Switch off stray lamps, cover colored surfaces, and wear black or neutral clothing. A broad highlight should look clean, not like a faint rainbow of the room.
Commercial product photographs often combine separate captures for the body, label, liquid, metal trim, screen, gemstone sparkle, and background. Keep the camera, subject, perspective, and broad lighting logic fixed. For a smartwatch, you might expose the black case with soft edge reflections, photograph the display separately to avoid refresh bands, then blend the screen within its exact physical boundary.
Modern tethered capture makes small reflection changes easier to judge, while high-resolution cameras reveal dust and modifier texture with ruthless clarity. LED mats, tubes, and panels can produce precise highlight shapes for stills or video, but some fixtures can show flicker, colored spectral gaps, multiple shadows, or visible diode patterns. Test at the intended shutter speed and diffuse the fixture enough that individual LEDs disappear.
Automated retouching can remove routine dust quickly, but labels, engravings, jewelry facets, and product geometry deserve close inspection. A cleanup tool that changes a letter or straightens an intentional bevel has changed the product. Retouch accidental clutter while preserving material clues, truthful color, and functional detail.
References: [1] OpenStax, University Physics Volume 3, geometric optics and the law of reflection. [2] Nikon MicroscopyU, educational reference on polarized light microscopy and polarizer behavior.
Frequently Asked Questions
Why does my polished metal product look flat?
Your metal probably reflects an area with too little variation. Add a large graduated reflection, place a black card beside a white panel, or rotate the subject until bright and dark bands follow its curve. A smooth fade usually describes roundness better than a bright hotspot.
Why does moving my light make almost no difference?
The surface is sending that light somewhere other than the camera. Keep the camera fixed and move a white card around the subject until you see its reflection in the problem area. That position reveals where your modifier needs to go.
Is a light tent the best choice for reflective products?
A light tent is useful for fast, even catalog lighting, especially with small products. It can also surround the object with featureless white and make chrome or glossy plastic look flat. Add black cards or narrow openings to restore edges and contrast.
Can a polarizing filter remove every reflection from glass?
No. A polarizer can reduce many reflections from glass, but its effect depends on surface angle and filter rotation. Curved glass may respond unevenly, and total glare removal can strip away the highlights that reveal its shape.
How do I hide the camera in a chrome object?
Move the camera farther away with a longer focal length, surround the lens with black material, or shoot through a small opening in a diffusion panel. Keep the opening neat because chrome will record its outline. A final locked-off cleanup pass can remove the small remaining lens reflection.
Can I photograph reflective products with one light?
Yes. One lamp placed behind a large diffusion panel, supported by white and black cards, can create a sophisticated result. The cards and panel determine the visible reflection pattern, so their placement often matters more than the number of lamps.
Conclusion
Your best tool for reflective subjects is not a brighter lamp. It is the habit of looking at the reflection itself, identifying the surface that created it, and replacing that surface with a cleaner bright, dark, or graduated shape. Lock your camera, work with one broad source, and let each card earn its place before adding anything else.
The next time chrome shows your tripod or glass disappears against white, do not wrestle with exposure for twenty minutes. Move a card, rotate the subject a few degrees, and watch the surface redraw itself. You are not merely lighting an object; you are building the small world mirrored in its skin.
Back to school Picks
back to school
As an affiliate, we earn on qualifying purchases.