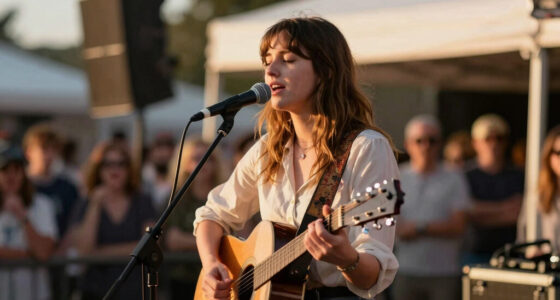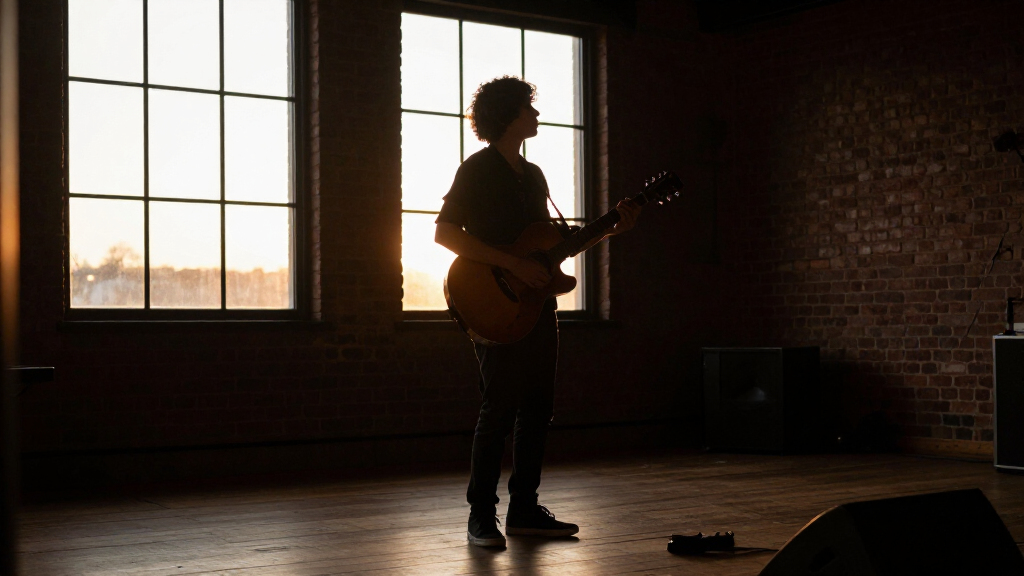
TL;DR
Listen free for 30 days with Audible
Thousands of audiobooks and originals — cancel anytime.
Start your free trialAs an affiliate, we earn on qualifying purchases.
Silhouette photography reduces a subject to shape and gesture by placing it against a brighter background and exposing for that background’s highlights, deliberately underexposing the subject by roughly 1–3 stops. Success depends less on your camera and more on three things: a clean bright backdrop, a recognizable outline with no overlapping limbs, and protecting the highlights that carry the color and mood.
The first silhouette I ever shot on purpose was an accident I refused to repeat by luck. A friend stepped in front of a burning orange sunset, my camera meters tried to “help” by brightening her, and the frame turned into a muddy compromise — washed-out sky, half-lit face, no mood at all. That’s the moment you learn the core lesson: your camera wants to ruin your silhouettes, and drama comes from stopping it.
Silhouette photography reduces a subject to shape, gesture, and outline by placing it against a brighter background and exposing for the highlights. Done well, it creates mystery because it withholds facial and surface detail while emphasizing form, color, and atmosphere. Done lazily, it looks like an underexposed mistake.
In this guide, I’ll walk you through exactly how to expose, where to meter, which shapes work, and the mistakes I still see (and occasionally make) after years of shooting backlit. You don’t need expensive gear. You need a bright background, a readable outline, and the confidence to deliberately underexpose.
Meter from the bright background near your subject, never from the dark figure — around –1 to –3 EV relative to overall metering is a starting range, but the h…
Shape beats gear: shoot profiles, keep limbs and faces separated, and direct poses actively, because a silhouette succeeds or fails on outline legibility alone.
You don’t need a sunset — windows, stage light, neon, fire, fog, and water reflections all provide the brightness difference that creates the effect.
Decide your degree of darkness deliberately: pure black for graphic mystery, partial detail for emotion, rim light for separation when the background is busy.
Shoot RAW, focus on the subject’s edge with a single AF point or manual focus, and disable auto HDR or shadow recovery that can erase the effect you intended.
Shooting Silhouettes: Exposing for Drama
Silhouette photography reduces a subject to shape and gesture by placing it against a brighter background and exposing for that background’s highlights — deliberately underexposing the subject by roughly 1–3 stops. Your camera wants to ruin your silhouettes; drama comes from stopping it.
The One Rule That Makes a Silhouette Work
Meter from the bright sky, window, or illuminated surface — never from the subject. Think of it like a shadow puppet theater: the puppet only reads as a shape because the screen behind it glows, and the glow is what you measure. One metering decision, two completely different photographs.
Compose
Place the subject against the brightest relevant area — sky, window, water reflection.
Set Low ISO
ISO 100–200 for clean, smooth gradients in the background.
Choose Aperture
Pick f-stop for the depth of field and edge definition you want.
Set Shutter
Adjust until the background is properly exposed — this is where the silhouette happens.
Check Histogram
Pull back exposure if important highlights are clipping.
full black –2 EV –1 EV
partial 0 EV
metered
You Don’t Need a Sunset
Sunrise and sunset are popular for good reason — colorful backgrounds and manageable contrast — but any sufficiently bright background works. The strongest color often appears before sunrise or after the sun drops below the horizon.
Open Sky & Windows
Bright interior doorways at noon, open sky, fog, and water reflections all provide the brightness difference that creates the effect.
Neon & Streetlight
Stage and concert lighting, neon signs, vehicle headlights, and artificial lights placed directly behind a subject.
Flame, Smoke, Fog
Fire and smoke deliver warm, flickering backdrops; fog diffuses light into a glowing curtain that separates any dark form.
Sunrise & Sunset
Manageable contrast and saturated color. Meter the sky just beside the subject — a spot-metered sunset at default settings renders dull gray.
High-Key Backdrop
A bright, evenly lit studio background gives total control over outline, pose, and the exact degree of darkness.
Starburst Effect
A small aperture of f/11–f/16 produces a starburst — though lens design, diffraction, and sensor size also affect the result.
Why Your Shape Matters More Than Your Camera
A silhouette succeeds through outline alone. Flagship bodies have produced confusing black blobs while a decade-old kit lens nailed a jumping figure against a doorway. The difference was the pose.
Shoot Profiles
The human face stays recognizable in outline: nose, chin, lips, hair. Turning a head 90 degrees is often the difference between “who is that?” and instant recognition.
Separate Every Limb
Give space between arms, legs, faces, and nearby objects. Overlaps turn a strong pose into an indistinct dark mass — like wet laundry stuck together.
Direct the Pose Actively
Small changes in head angle, hand position, or spacing dramatically improve legibility. For groups, stagger depths and angles and shoot continuously as outlines shift.
Use Readable Objects
Bicycles, trees, architecture, and birds have inherently recognizable outlines. Motion — jumping, running, fabric in wind, waves — adds energy to a static idea.
Decide Your Degree of Darkness Deliberately
A silhouette need not be pure black. Editing should strengthen the lighting decision you made in the field — not manufacture a silhouette that was never there.
Pure Black
Maximum abstraction and graphic mystery. The subject carries zero surface detail — the outline does all the storytelling.
Partial Detail
A hint of shadow detail retained in clothing or hair adds emotion and context while preserving the dramatic shape.
Rim Light
A bright edge separates the figure when the background is busy — a middle ground between silhouette and portrait.
| Camera Setting | Recommended | Why It Matters | Silhouette Risk If Ignored |
|---|---|---|---|
| File Format | ✓ RAW | Retains more highlight color and latitude for contrast, white balance, and shadow density. | ✗ JPEG clips highlights permanently |
| Focus Mode | ✓ Single-point AF / Manual | Autofocus may lock onto the bright background instead of the subject’s edge. | ✗ Soft, undefined outline |
| Metering | ✓ Spot / Highlight-weighted | Meter the bright area near the subject; add 1–2 stops back if it should stay luminous, not gray. | ~ Medium-gray, colorless sky |
| Auto HDR / Shadow Recovery | ✗ Disable | Auto corrections can brighten the subject and erase the very effect you intended. | ✗ Muddy compromise — half-lit subject |
| Mode Priority | ~ Aperture Priority | Best when light changes fast — the last ten minutes of sunset dim by a stop every minute or two. | ~ Missed frames while re-metering |
Which Outlines Read Fastest
Not all shapes survive reduction to pure black. These are the forms that stay instantly recognizable even at small scale — ranked by outline legibility.
LEGIBILITY INDEX — RELATIVE OUTLINE RECOGNIZABILITY AT SMALL SCALE. HEAD-ON FACES FLATTEN INTO ANONYMOUS OVALS; OVERLAPPING LIMBS MERGE INTO ONE LUMP.
The One Rule That Makes a Silhouette Work: Expose for the Background
Expose for the background, not the subject — that’s the entire technique in five words. When you meter from the bright sky, sunset, window, or illuminated surface behind your subject instead of the subject itself, you deliberately underexpose the foreground until it falls to black or near-black. Think of it like a shadow puppet theater: the puppet only reads as a shape because the screen behind it glows, and the glow is what you’re measuring. If you exposed for the puppet instead, the screen would blow out to white and the whole effect would vanish.
Here’s a concrete example of the trap. At that first sunset shoot, my camera’s evaluative metering averaged the whole scene toward medium brightness — it saw a dark figure against a bright sky and tried to split the difference. The result was a pale orange sky with a half-lit, gray face: neither a portrait nor a silhouette. If I had instead spot-metered the sky just beside her head and accepted that reading, the sky would have held its saturation and she would have dropped cleanly into shadow. One metering decision, two completely different photographs.
Another everyday example: a child leaning on a bright interior doorway at noon. Meter the glare of the outside through the door, and the child becomes a crisp dark outline. Meter the child, and the doorway blows out into a featureless white rectangle. Same scene, same moment — the effect lives entirely in where you point the meter.
A reliable manual setup, step by step
- Compose your subject against the brightest relevant area — sky, window, water reflection.
- Set a low ISO (100–200) for clean gradients in the background.
- Choose your aperture for the depth of field and edge definition you want.
- Adjust shutter speed until the background is properly exposed — this is where the silhouette happens.
- Check the histogram and highlight warnings, and pull back exposure if important highlights are clipping.
Prefer aperture priority when light is changing fast — say, the last ten minutes of a sunset when the sky dims by a stop every minute or two? Use negative exposure compensation, typically –1 to –3 EV depending on the brightness difference. A hazy window behind a subject might only need –1 EV, because the contrast is gentle; a figure against a tropical midday sky might need –2 or –3 EV to fall fully black. Treat those numbers as starting points only. The histogram and image preview matter more than any fixed number, because contrast varies wildly between scenes.
One metering subtlety that trips people up: if you spot-meter a bright area and accept the camera’s default recommendation, that area renders as medium gray. A spot-metered sunset sky at the camera’s suggested settings comes out looking like overcast weather — dull, dense, colorless. To keep that sky luminous, you typically add one to two stops of exposure back. Metering is a tool, not a truth-teller; it always assumes whatever you point at should be medium brightness, and it’s up to you to tell it otherwise.
camera exposure meter for silhouettes
As an affiliate, we earn on qualifying purchases.
As an affiliate, we earn on qualifying purchases.
Why Your Shape Matters More Than Your Camera
A silhouette succeeds through outline alone — camera brand is almost irrelevant. If the shape doesn’t read clearly as a dark form against brightness, no amount of exposure precision will save it. I’ve watched photographers with flagship bodies produce confusing black blobs while someone with a decade-old kit lens nails a jumping figure against a doorway. The difference was the pose.
Profiles work beautifully because the human face stays recognizable in outline: nose, chin, lips, hair. Facing the camera head-on flattens a face into an anonymous oval. That single adjustment — turning a head 90 degrees — is often the difference between “who is that?” and instant recognition.
Separation is the other half. Give your subject space between arms, legs, faces, and nearby objects. Overlaps turn a strong pose into an indistinct dark mass, like wet laundry stuck together. The classic beginner failure: two people hugging, arms wrapped around each other, merging into one lump. Ask them to stand slightly apart, arms clearly away from torsos, and the outlines snap into legibility.
Direct the pose actively. Small changes in head angle, hand position, or spacing between people dramatically improve how the shape reads. For groups, position people at slightly different depths and angles, ask for distinct gestures, then shoot continuously as their outlines shift — somewhere in that burst, the shapes separate.
- Profiles and gestures read fastest — a held hand, a hat, an outstretched arm.
- Bicycles, trees, architecture, and birds have inherently recognizable outlines.
- Widely separated limbs keep the form readable even at small scale.
- Motion — jumping, running, fabric in wind, waves — adds energy to a static idea.
As an affiliate, we earn on qualifying purchases.
Finding Light That Delivers Drama (No, You Don’t Need a Sunset)
Sunrise and sunset are popular for good reason — colorful backgrounds and manageable contrast — but any sufficiently bright background works. The strongest color often appears before sunrise or after the sun drops below the horizon, during blue hour, when the sky glows without blowing out. I’ve gotten some of my favorite frames fifteen minutes after the sun vanished, when everyone else had packed up — a lone fisherman still standing in the shallows, reduced to a perfect dark arc against a sky that went from gray to violet over the next ten minutes.
The principle is simple: your subject must sit between your lens and something brighter. Think of it like a shadow puppet theater — the puppet only reads when the screen behind it glows. That opens far more possibilities than golden hour alone:
- Bright windows and doorways — picture a child leaning on a windowsill in a dim farmhouse kitchen, her whole outline carved against the noon glare outside. No sunset required.
- Stage and concert lighting — a guitarist mid-solo against a wall of white spotlights; performers were practically built for silhouettes.
- Streetlights, neon signs, vehicle headlights — a commuter waiting under a sodium lamp at a rainy bus stop, umbrella tilted, framed against a glowing diner sign.
- Fire and fog — campers circled around a bonfire at dusk, smoke catching the orange light, each figure edged in glow.
- Reflections on water — a paddleboarder at dawn on a glass-still lake, the sky’s pink doubling beneath their feet for built-in symmetry.
- High-key studio backgrounds — a dancer against a seamless white backdrop; full control, no weather forecast required.
When the sun itself is in frame, stop down to f/11–f/16 for a starburst. The exact result depends on lens design, diffraction, sensor size, and focus, but those apertures reliably turn a harsh dot into radiating points — I once shot a hiker on a ridge line with the sun grazing the horizon at f/14, and the starburst rays fanned out like guide lines pointing straight at her silhouette.
Safety note: Never stare at the sun through an optical viewfinder, especially with a telephoto lens — magnified sunlight can damage your eyes. Use live view, and stay alert near roads, cliffs, water, and crowds when you’re absorbed in the frame.
Unwanted flare is the other hazard of strong backlighting. It lowers contrast and hazes the outline — like looking at the scene through a dirty windshield. Use a lens hood, clean the front element, drop unnecessary filters, or shade the lens with your hand. Or embrace it: a veiling flare across a beach proposal silhouette can read as dreamy rather than as a mistake, if you choose it deliberately.
As an affiliate, we earn on qualifying purchases.
Pure Black or Partial Detail? Choosing Your Degree of Drama
A silhouette doesn’t have to be pure black — the degree of darkness is a creative dial, not a rule. A complete silhouette maximizes abstraction and mystery: pure graphic shape, maximum color in the sky, total anonymity. A partial silhouette retains a whisper of shadow detail — the texture of a jacket, a hint of a jawline — which can carry more emotional or environmental information. Neither is correct. Decide what the image needs before you set exposure.
Modern sensors with wide dynamic range complicate this in an interesting way. Shoot a backlit scene today and you can often recover foreground detail in editing that would have been lost on film. That flexibility cuts both ways: it lets you choose between a pure silhouette and a detailed backlit image after the fact, but automatic HDR and shadow recovery can also reveal detail you wanted hidden. Many cameras and phones will cheerfully “fix” your silhouette into a flat, balanced photo. Turn off auto HDR, use exposure lock, or switch to manual controls to preserve the effect.
| Approach | Exposure | Mood | Best for |
|---|---|---|---|
| Complete silhouette | Background correctly exposed; subject falls to black | Graphic, mysterious, anonymous | Sunsets, dancers, symbolic portraits |
| Partial silhouette | Background bright; slight shadow lift in editing | Emotional, environmental | Story-driven portraits, editorial work |
| Rim-lit silhouette | Backlit with a narrow edge highlight | Sculptural, dimensional | Sports, hair and fabric detail, separation |
Rim light deserves special mention. When a fully black shape would merge into a dark background element, a narrow rim of light around the subject restores separation without breaking the silhouette effect. Watch how stage lighting does this at concerts — the performer stays dark, but a bright edge keeps them carved out of the chaos behind them.
As an affiliate, we earn on qualifying purchases.
Focus, Sharpness, and the Technical Traps Nobody Warns You About
The most common technical failure in silhouette photography is focus — specifically, autofocus locking onto the bright background instead of the dark subject. Your camera’s AF system hunts for contrast, and in a backlit scene, the contrast is behind your subject. The result: a razor-sharp sunset and a soft, smeared outline.
The fix is control. Focus on the subject’s edge — the boundary between dark and bright is where autofocus finds something to grip. Use a single focus point placed deliberately on that edge, try subject-detection AF if your camera offers it (performance varies, but it can latch onto a dark figure even without facial detail), or switch to manual focus with focus peaking. Then verify at 100% zoom on the back of the camera. Edges are everything in this genre; a slightly soft outline reads as an error, not a style.
Shutter speed is the second trap. If your subject moves — a jumper, a bird, a dancer — insufficient shutter speed blurs the very outline you’re showcasing. Unless motion blur is intentional, keep speeds high enough to freeze the gesture: 1/500s or faster for people in motion, faster still for birds. And here’s one from hard experience: shoot RAW. RAW files retain more highlight color and give you far more latitude for adjusting contrast, white balance, and shadow density afterward. A clipped JPEG sky is gone forever; a clipped RAW sky often still holds recoverable gradient.
Finally, the humble one: check your sensor and lens. Dust spots and smears that hide in textured scenes become glaringly obvious against a smooth, bright sky. Clean before you shoot, not after you’ve spent an hour in post clicking clone stamps across a gradient.
Editing: Deepening the Drama Without Breaking It
Editing should strengthen the lighting decision you made in the field, not manufacture a silhouette that was never there. If the outline is weak, the sky is badly clipped, or the limbs merge into confusion, no software convincingly repairs it. Start with good light, a clean pose, and a deliberate exposure — then polish.
My typical silhouette edit is short and restrained:
- Lower the blacks and shadows until the subject reaches the density you intended.
- Refine the black point with a curve — a gentle S-curve adds richness without crushing.
- Recover any blown highlight detail in the sky, especially cloud texture.
- Adjust white balance for mood — warmer for nostalgia, cooler for isolation.
- Enhance color selectively rather than globally saturating everything.
- Remove sensor spots and distractions, and apply noise reduction to any lifted shadow areas.
The one adjustment that deserves real caution: local masks that darken the subject. AI-assisted masking makes isolating a figure fast, but automated selections on low-contrast edges produce halos — bright or dark outlines hugging the subject’s shape. Inspect edges at high magnification after any aggressive mask, strong dehaze, or heavy contrast work. Banding in smooth sky gradients is the other artifact to watch, usually caused by overprocessing rather than capture.
Resist the temptation to crank saturation and clarity. The image’s power comes from withholding information; overprocessing shouts where the technique whispers. If your silhouette needs a loud edit to work, the frame itself probably isn’t working.
Frequently Asked Questions
Where should I meter when shooting a silhouette?
Meter from the bright background near your subject — the sky, sunset, window, or illuminated surface — not from the dark figure. Then check the histogram and highlight warnings. If you spot-meter a bright area and it renders as medium gray, add back a little exposure so the sky stays luminous rather than dull.
How much should I underexpose for a silhouette?
Often between one and three stops relative to the camera’s overall-metering recommendation, but contrast varies by scene. A hazy window needs less; a tropical midday sky may need more. Judge the background highlights and decide how much shadow detail you want to retain — there’s no single correct exposure.
Why does my camera keep brightening the subject?
Evaluative metering, automatic HDR, or computational shadow recovery may be trying to balance the scene. Use negative exposure compensation, exposure lock, or manual exposure, and disable HDR or shadow-enhancing features. On smartphones, tap and hold to lock focus and exposure, then drag the exposure slider downward.
Should the subject be completely black?
Not necessarily. A pure silhouette feels graphic and mysterious; a partial silhouette retains a little shadow detail for emotional or environmental context. Rim light is a third option — a narrow bright edge that keeps the subject separated from a busy background while staying essentially dark.
Can I shoot good silhouettes with a phone?
Yes. Lock focus and exposure by tapping and holding on the subject, then drag the exposure control down until the background is correctly exposed. Disable or reduce automatic HDR, since computational processing often lifts shadows and erases the effect. Compose against a clean, bright background and keep outlines simple.
Why is the sky in my silhouette photos white instead of colorful?
The highlights are probably overexposed, washing out sunset color and cloud texture. Reduce exposure and watch the histogram or zebras. Timing matters too — the strongest color often appears before sunrise or after the sun drops below the horizon, during blue hour, rather than when the sun is high and harsh.
Conclusion
Here’s the whole craft in one sentence: a silhouette is a decision about what to hide. You choose the light, you choose the shape, and then you deliberately expose for everything except your subject — the drama lives in that act of withholding. Your camera will fight you on it every time, brightening shadows and balancing the scene into blandness. Overriding that instinct is the technique.
So the next time you’re out at sunset and someone steps in front of the color, don’t reach for fill flash. Turn their head to profile, pull the exposure down until the sky glows, and let them become pure shape against the light. Some of the most memorable photographs ever made are of people you can’t see at all.
College move-in / dorm season Picks
dorm essentials
As an affiliate, we earn on qualifying purchases.