
TL;DR

Get audio and creator gear delivered free with Prime
- Fast, free delivery on millions of items
- Prime Video, Amazon Music and more included
- Member-only deals all year
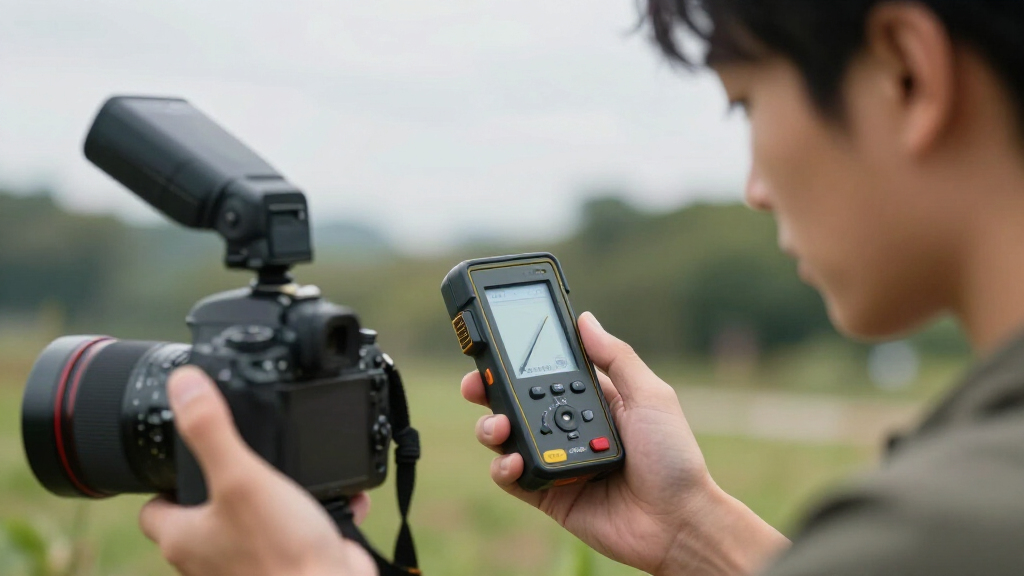
Camera meters read reflected light through the lens, while handheld incident meters measure the light falling on your subject. Use the camera meter for speed, an incident meter for consistency, a spot meter for deliberate tonal placement, and the histogram or zebras to check what the sensor actually recorded.
Your camera can produce a technically centered meter reading and still give you the wrong photograph. A bride’s white dress turns dull gray, a black jacket looks washed out, or a face under a bright window falls into muddy shadow. The meter worked; it simply made a different decision than you wanted.
Accurate metering is less about finding one universal exposure than deciding which highlights, midtones, and shadows you want to preserve. Camera and handheld meters help make that choice, but they measure different kinds of light. Once you understand that distinction, the moving scale in your viewfinder stops feeling like a traffic signal and starts working like a useful measuring tape.
In this guide, you will learn how to read reflected, incident, spot, and flash measurements; choose settings from equivalent exposures; and check the result with histograms, zebras, and highlight warnings. I will also show you the practical habits I use around white clothing, dark products, backlit faces, studio strobes, and saturated stage lights. The goal is simple: repeatable exposure decisions you can explain, adjust, and trust.
Treat zero on the camera meter as a middle-tone recommendation, then add exposure for bright subjects or subtract it for intentionally dark scenes.
Use matrix metering for changing action, incident metering for stable portraits and products, spot metering for tonal placement, and flash metering for manual…
Point an incident dome from the subject toward the camera for a general reading, and use the same dome position whenever you recreate the setup.
Control conventional flash mainly with aperture, ISO, power, and distance; control ambient brightness mainly with shutter speed below sync speed.
Verify every critical reading with RGB histograms, zebras, highlight warnings, or waveform displays because meters predict exposure but do not reveal recorded…
Metering Light: Using Your Camera and a Handheld Meter
Accurate metering is not one universal exposure. It is the deliberate choice of which highlights, midtones, and shadows deserve detail. Camera and handheld meters help make that choice—but they measure different light.
Three readings, three different questions
A reflected reading is influenced by the subject’s tone. An incident reading largely ignores subject reflectivity. A flash reading isolates or compares a brief burst with the ambient exposure.
Reflected light
Measures light bouncing from the scene toward the camera. White, black, shiny, backlit, or unusually saturated subjects can pull the recommendation away from your intention.
Incident light
Measures the illumination falling on the subject. Because the dome reads the light rather than the subject’s reflectivity, results stay consistent when clothing or backgrounds change.
Selective light
A spot meter reads a narrow reflected area for tonal placement. Flash mode captures the strobe burst and commonly reports an aperture or flash-to-ambient relationship.
Why the meter makes snow gray
The reflected meter sees brightness—not “snow,” “velvet,” or “skin.” Centering the indicator attempts to move the measured area toward a middle tone, even when the scene should remain bright or dark.
Zero is a measuring mark, not a traffic signal.
Fresh snow can be pulled downward into dull gray. Black velvet can be pushed upward into dusty charcoal. A luminous window can dominate the frame and leave the face beneath it muddy.
Intentional placement
Same brightness. Different photograph.
At the same ISO, these combinations record approximately equal brightness. Aperture changes depth of field, shutter speed changes motion rendering, and ISO changes noise, dynamic range, and highlight headroom.
A dependable reading in five steps
Choose the photograph first and match the meter second. Metering and focusing remain separate jobs—even when the camera biases exposure toward a face or active autofocus point.
Choose priority
Decide whether motion, depth of field, highlight protection, or clean shadows matters most.
Set ISO
Start at the lowest practical value; raise it when aperture or shutter becomes restrictive.
Select pattern
Matrix for general work, spot for placement, highlight-weighted for intense bright areas.
Read + adjust
Change settings or compensation according to how the measured subject should appear.
Check capture
Use histogram, RGB channels, zebras, waveform, or highlight warnings—not screen brightness.
Camera meter or handheld meter?
This is not a contest between old and new tools. Choose through-the-lens speed when the scene moves; choose incident or flash measurement when repeatability matters more than automation.
| Practical need | Camera meter | Handheld meter | Best fit |
|---|---|---|---|
| Fast-changing event | ✓Fast and always available | ~Slower to position | Camera |
| Steady portrait | ~Can shift with clothing | ✓Consistent incident result | Handheld |
| Lens-mounted filter | ✓Reads through the filter | ~Needs filter compensation | Camera |
| Manual studio flash | ~Often needs test frames | ✓Measures the flash burst | Handheld |
| Distant subject | ✓Useful through the lens | ✓Useful with spot attachment | Either |
| Automatic exposure | ✓Direct integration | ~Best with manual settings | Camera |
Know which control moves which light
Below normal sync speed, conventional flash and ambient can be shaped semi-independently. Meter the flash, set its contribution, then watch the recorded channels for clipping.
Main controls
Aperture, ISO, flash power, subject distance, and modifier efficiency primarily govern manually controlled flash exposure.
Main controls
Shutter speed primarily changes ambient brightness below sync speed; aperture and ISO still affect both ambient and flash.
Five habits to trust
The moving scale becomes useful when it acts like a measuring tape: repeatable, explainable, and always interpreted in relation to the photograph you intend to make.
Why Your Meter Makes Snow Gray—and How You Fix It
Metering Light: Using Your Camera and a Handheld Meter begins with one distinction: most camera meters measure reflected light and interpret the measured area as a middle tone. Bright or dark subjects can fool that assumption, so you must adjust the recommendation when the subject should not look medium-bright.
Think of the meter as a waiter carrying every dish toward the same table. Point it at fresh snow, and it tries to pull that brilliant white down toward gray. Fill the frame with a black velvet jacket, and it pushes the fabric upward until the black looks dusty. The meter sees brightness, not the identity or intended tone of what you photographed.
Reflected meters are often described through the shorthand of roughly 18% gray, though calibration is more nuanced than one universal gray value. According to the exposure-meter relationships standardized in ISO 2720 [1], manufacturers work within defined calibration principles rather than forcing every surface to match one literal card. For you, the useful lesson remains practical: zero on the scale is a recommendation, not a verdict.
During a winter portrait, for example, matrix metering may darken the snow until it resembles wet cement. Adding around +1 to +2 stops of exposure compensation often restores its bright character, provided you watch the highlights. A low-key portrait against black curtains may need negative compensation because the meter otherwise lifts the shadows and drains the scene of its intended mood.
The meter does not know what you photographed. It only knows how much light returned from the area it measured.
Backlighting creates another common trap. A bright window occupies much of the frame, the camera protects that glowing rectangle, and your subject’s face becomes a silhouette. You can meter the face, add positive compensation, or accept the silhouette deliberately. That choice—exposure than deciding what deserves detail—belongs to you, not the meter.
handheld incident light meter for photography
As an affiliate, we earn on qualifying purchases.
As an affiliate, we earn on qualifying purchases.
How to Get a Dependable Camera-Meter Reading in Five Steps
- Choose the visual priority. Decide whether motion, depth of field, or clean shadows matters most.
- Set ISO. Start with the lowest practical value, then raise it when shutter speed or aperture becomes restrictive.
- Select a metering pattern. Use matrix for general work, spot for precise placement, or highlight-weighted metering for intense bright areas.
- Read and adjust. Change settings or exposure compensation according to how the measured subject should appear.
- Check the capture. Review the histogram, RGB channels, zebras, or highlight warnings rather than trusting screen brightness alone.
Using your camera meter well means choosing the photograph first and matching the meter second. Set the aperture, shutter speed, and ISO that serve your scene, then use the scale or exposure compensation to place brightness where you want it. The meter guides the adjustment; it does not choose your creative priority.
Suppose you are photographing a cyclist on a cloudy afternoon. You might choose 1/1000 second to freeze flying grit, f/4 for some background separation, and Auto ISO to handle small light changes. Matrix metering is quick here because both the rider and the clouds keep moving, while manual incident readings would slow you down.
The same logic changes for a quiet portrait beside a window. You may choose f/2.8 for soft depth of field, keep the shutter above 1/125 second to control hand movement, and let ISO land where it must. If the sitter wears a white shirt, check the fabric’s highlights and apply positive or negative compensation based on the face and shirt—not merely the meter’s zero mark.
Each full stop doubles or halves the light. At one ISO, f/8 at 1/125 second, f/5.6 at 1/250 second, and f/11 at 1/60 second produce roughly equal exposure. They do not produce the same photograph: aperture changes depth of field, shutter speed changes motion rendering, and ISO changes noise, dynamic range, and highlight headroom.
Metering and focusing also remain separate jobs, even when the camera uses a face or autofocus point for both. Some models bias exposure toward the active subject; others read a wider portion of the frame. Test your camera with a face moving between a dark wall and a bright window, because meter behavior varies by model.
As an affiliate, we earn on qualifying purchases.
Camera Meter or Handheld Meter? Choose the Faster Fit
| Practical need | Camera meter | Handheld meter |
|---|---|---|
| Fast-changing street or event work | Fast and always available | Usually slower to position |
| Portraits under steady light | Can shift with clothing or background | Consistent incident readings |
| Filters mounted on the lens | Reads through the filter | Needs filter compensation |
| Manual studio flash | Usually needs test frames | Measures the flash burst |
| Distant subjects | Useful through the lens | Useful with a reflected spot attachment |
| Changing automatic exposure | Integrates directly | Best suited to manual settings |
Metering Light: Using Your Camera and a Handheld Meter is not a contest between old and new tools. Choose the camera meter when speed and through-the-lens measurement matter; choose a handheld meter when stable light, incident readings, or flash measurement makes repeatability more valuable than instant automation.
At a wedding reception, I would favor the camera meter while people move between candles, ceiling lights, and a bright doorway. The light changes before you could walk over and lift an incident dome. Evaluative or highlight-weighted metering, paired with exposure compensation and warning displays, keeps you responsive when a white dress crosses a dark dance floor.
For a catalog portrait against a seamless background, I prefer an incident meter. Once the key light reads f/8, you can photograph a white blouse, a navy suit, and a red coat without the exposure wandering with each garment. The reading remains tied to light falling on the subject, not the amount each fabric reflects.
A camera meter also reads through the lens, so it automatically accounts for a polarizer, neutral-density filter, and much of the lens’s transmission loss. An external incident meter cannot see those items. If a filter removes three stops of light, you must enter that factor or alter the transferred settings yourself.
Neither tool wins every assignment. A handheld reading can disagree with the camera because they measured different light, used different calibration, or encountered a lens, filter, or actual ISO response that shifted the result. Treat disagreement like two maps drawn from different viewpoints: identify what each one measured before deciding which route fits the photograph.
As an affiliate, we earn on qualifying purchases.
How to Take an Incident Reading You Can Repeat Tomorrow
- Match the ISO. Enter the same ISO shown on your camera.
- Choose one working setting. Enter your shutter speed for stills or frame-rate-based shutter setting for video.
- Move into the subject’s light. Stand at the subject or in a place receiving identical illumination.
- Aim the dome consistently. Point it toward the camera for a general viewpoint reading.
- Trigger and transfer. Take the reading, set the recommended aperture, and make a test frame.
An incident reading measures the light falling on your subject through a white diffusion dome. Place the meter in the same illumination as the subject, point the dome according to your chosen method, and transfer the reading to the camera. Consistency matters more than switching methods from frame to frame.
Imagine a portrait subject standing two metres from a large softbox. Hold the meter near the person’s chin without casting your own shadow over the dome, aim it toward the camera, and trigger the reading. If it reports f/5.6 at 1/125 second and ISO 100, that becomes your clean starting point regardless of whether the subject wears cream linen or black wool.
Pointing the dome toward the camera blends the light relevant to that viewpoint. Pointing it toward the key light gives that dominant source more influence and may produce a different aperture. Neither method acts like a sacred rule; pick the approach that matches your lighting plan and repeat the same dome position when you recreate the setup.
Use the extended dome for a face, bottle, or other three-dimensional object receiving light from several directions. A retracted dome or flat diffuser helps when you measure one studio light at a time, flat artwork, or illumination across a wall. For a reproduction job, I take readings at the four corners and center; a variation of one-third stop can become visible across pale paper.
You cannot take a useful incident reading beside the camera when the subject stands in different light. If you are in open shade and your subject stands in hard sun, the dome measures your shade, not their sunlight. In that case, reach the subject, find matching illumination, or use a reflected spot reading from your position.
As an affiliate, we earn on qualifying purchases.
Place Bright and Dark Tones Without Guessing
Spot metering gives you control by reading a small, chosen area, but the raw reading treats that area like a middle tone. You must decide whether the measured detail belongs near the middle, above it, or below it. Precise aim and deliberate tonal placement turn the spot meter into a powerful tool.
A spot reading works like placing one musician on a stage mark. The mark tells you where the player stands, not how loudly the whole orchestra should perform. If you meter a bright cheek, white cloud, or black coat and simply center the scale, you ask the camera to render each one with similar middle brightness.
For a medium-toned face in soft light, the direct reading may provide a sensible starting point. A bright textured cloud that must stay luminous usually belongs several stops above the meter’s middle recommendation, while detailed dark bark belongs below it. The exact placement depends on your camera’s usable dynamic range, raw processing, and how much texture you need.
Consider a singer under a narrow red spotlight. A wide matrix reading may react to the black stage and brighten the singer until the red channel clips, even when the overall luminance histogram looks safe. Spot the illuminated skin or costume, reduce exposure enough to preserve texture, then check the individual RGB channels and zebras.
For a backlit portrait you cannot approach, meter the face with the smallest reliable area. Decide whether you want a bright, open face and a blown window, or a detailed window with the face held darker or lifted by flash. Spot metering exposes the tradeoff clearly; it cannot fit unlimited brightness into the sensor.
Protect the highlights that carry meaning, not every tiny reflection. A clipped sparkle on chrome may look natural; a blank white wedding dress may erase the photograph’s most valuable texture.
After the exposure, verify the result rather than treating the spot reading as final. Raw files often hold more highlight and shadow detail than the JPEG preview suggests, yet fully clipped color channels cannot be reliably rebuilt. Your meter predicts; the recorded data tells you what survived.
Balance Flash and Room Light Without Endless Test Frames
Metering Light: Using Your Camera and a Handheld Meter becomes especially useful with manual flash because a flash-capable handheld meter can capture the brief burst and report an aperture. Set ISO and shutter speed, measure ambient and flash separately, then adjust background brightness and subject brightness with different controls.
With conventional flash below the camera’s synchronization limit, shutter speed mainly changes the continuous room light. Aperture and ISO affect both ambient and flash, while flash power and flash-to-subject distance strongly shape the flash exposure. This separation acts like two volume knobs: one controls the room’s glow, and the other controls the burst lighting your subject.
Start a studio portrait by switching off every light except the key. Meter it at the subject, adjust until you reach your planned aperture, then measure the fill, rim, and background lights separately. Turn everything on and take a combined reading before shooting. This routine catches overlapping light that individual readings may not reveal.
For example, set ISO 100 and 1/125 second in a room where the ambient reading suggests f/2.8. If your flash reads f/8, the subject receives much more flash than room light, while the background falls rich and dark. Slow the shutter to 1/30 second, and the room warms into view without greatly changing the conventional flash burst on the subject.
Distance changes flash intensity rapidly. Under the inverse-square law [2], doubling the distance from a compact light source reduces illumination at the subject to roughly one-quarter, a loss of about two stops under ideal point-source conditions. Real softboxes depart from that ideal at close range, but the rule still explains why moving a light from one metre to two metres can produce a dramatic drop.
High-speed synchronization changes this behavior because the flash pulses across the moving shutter slit and loses effective power. Long-duration flashes can also interact with shutter time near synchronization limits. If the edge of your frame turns black or the meter and photograph disagree, check sync speed, trigger timing, and flash duration before recalibrating anything.
Use Histograms and Calibration to Catch What the Meter Misses
A histogram is a report of captured tones, not a light meter. The meter predicts exposure before the photograph; the histogram, zebras, waveform, and highlight warnings show what the camera recorded or previewed. Use both because measurement and verification answer different questions.
A night street photograph may pile most values against the left side and still be correctly exposed. A white-on-white product image may lean heavily right without being too bright. The histogram resembles a skyline: its shape describes where the buildings stand, but it cannot tell you which building matters or whether one blown window ruins the view.
Check RGB histograms when photographing saturated flowers, stage lights, neon signs, or painted products. A scarlet dress can clip the red channel while the luminance display appears comfortable. During a theater shoot, highlight-weighted metering and red-channel warnings can save the folds of a costume that otherwise turn into a flat, glowing patch.
Mirrorless exposure simulation, live histograms, zebras, and false color make feedback available before you press the shutter. They remain tied to camera settings, preview profiles, and display choices. A high-contrast JPEG profile may show clipping earlier than the raw file, while a bright rear screen in a dark room can make an underexposed frame look deceptively open.
If your handheld meter regularly recommends f/8 but your raw workflow consistently looks best near f/7.1, test the whole chain under steady light. Photograph a neutral target, keep the software and profile fixed, inspect the raw data, and record a stable calibration offset. Differences can come from actual ISO response, lens transmission, filters, shutter behavior, or converter interpretation; ISO speed definitions themselves follow standardized measurement methods such as ISO 12232 [2].
Do not calibrate by glancing at an unstandardized monitor. Screen brightness, room light, and processing presets can move your judgment like sand under a tripod. Repeat the test across the camera and lenses used for critical work, then keep notes. Reliable metering grows from a consistent chain, not blind agreement between two displays.
- [1] ISO 2720:1974: General-purpose photographic exposure-meter calibration and product guidance.
- [2] ISO 12232:2019: Methods for digital-camera exposure index and ISO speed ratings; the inverse-square relationship is a standard physical model for illumination from a point source.
Build a Metering Routine That Survives Real Shoots
Your best metering routine matches the pace and contrast of the assignment. Use automation when the light changes faster than you can measure it, lock manual exposure when the illumination stays fixed, and verify important highlights after capture. Repeatable choices beat habitual loyalty to one meter or mode.
For street photography under broken clouds, matrix metering with aperture priority and exposure compensation keeps you quick. If a person in a black coat crosses a pale wall, watch whether the exposure shifts even though the light on the person stays constant. Manual exposure can stop the background from tugging your settings back and forth like a dog pulling at its lead.
For a portrait under steady window light, take an incident reading at the face, set manual exposure, and shoot without reacting to every shirt or backdrop. Recheck when the sun moves, a cloud clears, or the subject steps closer to the glass. A reading remains dependable only while the illumination remains the same.
For concerts, weddings, and other scenes with hard spotlights, start with highlight-weighted metering if your camera offers it. Add zebras or highlight warnings and watch individual color channels around saturated lighting. Protect skin, white fabric, and colored texture, but do not underexpose so severely that every shadow returns from processing covered in coarse, gritty noise.
For LED-lit video, brightness is only one part of the problem. Poor spectral output can distort color, and some fixtures flicker or create bands at certain shutter settings. Test the actual frame rate and shutter choice, inspect skin and neutral fabric, and use a waveform or false color display when your camera provides one.
- Changing light: use evaluative or matrix metering with compensation.
- Stable portraits and products: take an incident reading and lock manual settings.
- Distant or high-contrast subjects: use spot readings for chosen tones.
- Manual strobes: meter each light, then measure the combined setup.
- Critical color: check RGB clipping, not only the luminance histogram.
Before an important job, test the camera, meter, lens, filter, trigger, and raw converter as one system. Five quiet minutes with a neutral target can prevent an hour of rescuing thin shadows or blank highlights. That small rehearsal gives you a known baseline when the real scene gets loud, fast, and unpredictable.
Frequently Asked Questions
Is a handheld light meter still useful with a digital camera?
Yes, though it is not required. A handheld meter is especially useful for incident readings, repeatable portraits, products, film, video, and manual flash. Your digital camera remains faster for changing scenes, while the handheld meter gives you consistent measurements under stable light.
Why does my handheld meter disagree with my camera?
The devices may be measuring different light: the camera reads reflected light through the lens, while an incident meter reads light falling on the subject. Actual ISO response, lens transmission, filters, meter angle, shutter behavior, and raw processing can also create a small repeatable difference.
Where should I point the dome on an incident meter?
For a general portrait reading, place the meter at the subject and point the extended dome toward the camera. Some lighting setups point the dome toward the key light to emphasize that source. Pick the method that serves your lighting plan and use it consistently.
Should I use an extended or retracted meter dome?
Use the extended dome for three-dimensional subjects receiving light from several directions, such as a face lit by a softbox and fill. Use a retracted dome or flat diffuser for individual lights, flat artwork, and illumination across a plane. The diffuser shape changes which directions of light influence the reading.
How should I meter a backlit portrait?
Take an incident reading at the face, spot-meter the face from the camera, or use face-aware metering with positive compensation. Then decide whether the bright background needs detail. If both face and background exceed the sensor’s range, add fill light, move the subject, or accept clipping deliberately.
Does shutter speed change flash exposure?
Below normal synchronization speed, shutter speed mainly changes the continuous ambient light, while aperture and ISO affect both flash and ambient. Flash power and distance control the burst reaching the subject. High-speed sync and long-duration flash behave differently, so test those modes directly.
Should I trust the meter, histogram, zebras, or rear screen?
Use them together. The meter predicts exposure, while histograms and zebras show recorded or previewed tonal limits. The rear screen helps judge appearance, but its brightness and surrounding light can mislead you; for critical work, inspect RGB channels and consistent raw files.
Can I take an incident reading from the camera position?
Only when the camera position receives the same light as the subject. If you stand in shade while the subject is in direct sun, your reading describes the shade. Move into matching illumination, reach the subject, or take a reflected spot reading instead.
Conclusion
Choose what deserves detail before you chase the meter’s zero mark. If the light changes quickly, let the camera meter help you react. If the illumination stays steady, measure it once with an incident meter, lock manual settings, and preserve that consistency. In both cases, use the histogram, zebras, or waveform as your record of what the sensor actually caught.
The habit to build is small: measure, decide, verify. Do that with every difficult white dress, black coat, glowing stage, or backlit face, and exposure stops feeling like a lucky guess. You begin shaping brightness with intent—one highlight, one shadow, and one deliberate stop at a time.
Halloween Picks
halloween
As an affiliate, we earn on qualifying purchases.