TL;DR

Get audio and creator gear delivered free with Prime
- Fast, free delivery on millions of items
- Prime Video, Amazon Music and more included
- Member-only deals all year
Light stands, booms, and clamps support and position lights, modifiers, flags, and reflectors while keeping your set stable. Match every support to its load, keep weight over the widest part of the base, counterbalance boom arms, add ballast, and check each connection before anyone steps in front of the camera.
A portrait client once leaned forward just as a softbox began a slow, sickening tilt toward the set. I caught the stand before it fell, but the lesson landed hard: beautiful light means nothing when the hardware beneath it cannot hold position. That quiet aluminum stand had become the weakest link in an otherwise careful setup.
Light stands, booms, and clamps may not be as glamorous as cameras or lenses, but they are the bones of a lighting setup. They carry the weight, place light where your hands cannot, and keep a reflector from drifting every time someone walks past. When they work well, the set feels calm; when they fail, you hear slipping metal, see a modifier sag, and suddenly everyone moves at once.
This guide gives you a practical way to choose and use these fundamental tools in photography. You will learn how height, footprint, material, load, leverage, ballast, and grip affect real shoots, along with common mistakes that can damage equipment or hurt someone. My aim is simple: help you build a setup that stays exactly where you put it, so your attention can return to expression, timing, and light.
Choose a stand for the complete light-and-modifier load at working height, leaving capacity in reserve rather than relying on the maximum extension.
Place one leg beneath an offset load and keep sandbags low enough to touch the floor instead of swinging from the stand.
Shortening a boom arm reduces leverage and can improve stability more effectively than piling on extra counterweight.
Match each clamp to the surface and direction of force, then add an independent safety attachment for elevated equipment.
Recheck the whole rig after changing its height, angle, modifier, boom extension, or fixture.
Light Stands, Booms, and Clamps
The unglamorous essentials are the bones beneath every controlled lighting setup. Match support to the complete load, manage leverage, add low ballast, and verify every connection before anyone steps onto the set.
Three tools. One stable system.
Stands carry vertical load, booms create reach, and clamps connect equipment to structure. Each solves a different positioning problem—and each introduces its own failure point.
Light stands
Choose by working height, full equipment weight, footprint, construction, and side-load resistance. Aluminum travels well; steel adds reassuring mass.
Boom arms
Booms place hair lights and modifiers overhead, but extension multiplies turning force. Shortening the arm often improves stability more than adding weight.
Clamps & grip
Match the clamp to the surface, load direction, and mounting point. Rubber padding protects finishes; independent safety attachments protect people.
Reach creates turning force.
A fixture farther from the stand’s center creates more torque—even when its weight never changes. Moving the light inward can produce a larger safety gain than piling on extra counterweight.
Load × distance = the force trying to rotate the rig.
Keep the working arm short, position the load over a supporting leg, and secure the counterweight so it cannot slide. More reach always demands more control.
Relative leverage as reach increases
Illustrative comparison for the same fixture and modifier load.
Match the support to the real setup.
Count the fixture, battery, bracket, modifier, grid, adapter, working height, and environmental conditions. Rated capacity is a ceiling—not a target.
| Stand type | Best fit | Portability | Stability profile | Main tradeoff |
|---|---|---|---|---|
| Standard aluminum | Small flashes, compact LEDs, indoor travel kits | Best for centered, modest loads | Lightweight, but less resistant to broad modifiers and side loads | |
| Air-cushioned | Lights requiring frequent height changes | Controlled descent protects hands and gear | Cushioning does not increase load capacity | |
| Heavy-duty steel | Large modifiers, heavier fixtures, busy sets | Mass and rigidity improve planted feel | Stable and durable, but tiring to move | |
| Wide-base / C-stand | Flags, grip arms, precise studio placement | Wide footprint handles controlled offset loads | Excellent positioning, but bulky in tight rooms |
A five-step support routine.
Use the same sequence every time. Repetition catches loose locks, awkward cable paths, poor balance, and drifting hardware before the camera starts rolling.
Open fully
Use a broad, level footprint. Never work with partially spread legs.
Aim a leg
Place one leg beneath the boom, tilted fixture, or offset modifier.
Weight low
Drape the sandbag across the critical leg so it remains in contact with the floor.
Route safely
Run cables beside a leg, preserve adjustment slack, and cover every crossing.
Push gently
Check from several directions. Fix rocking, creeping, twisting, or visible flex.
The final safety pass.
Recheck the complete rig after any change to height, fixture angle, modifier, boom extension, counterweight, clamp position, or cable route.
Five non-negotiables
- ✓Leave capacity in reserve at the actual working height.
- ✓Keep the center of gravity inside the widest part of the base.
- ✓Use rated grip hardware and tighten every connection deliberately.
- ✓Add an independent safety attachment to elevated equipment.
- ✓Use a trained spotter when people, wind, or traffic raise the risk.
Choose a Light Stand That Stays Steady at Working Height
Light stands, booms, and clamps work safely only when the stand can support the complete load at the height you plan to use. Choose by working height, load capacity, footprint, and construction, not by folded size alone. A stand that feels firm at chest level can become springy when fully extended.
Standard light stands commonly adjust from roughly 3 to 12 feet, though the useful height is often lower than the advertised maximum [1]. Raising every section turns a compact stand into a tall lever, and a large umbrella catches moving air like a sail. During a home portrait session, an eight-foot ceiling may make a modest stand suitable for a small LED panel, while a large octagonal softbox calls for a wider, heavier base.
| Stand type | Best fit | Main tradeoff |
|---|---|---|
| Standard aluminum stand | Small flashes, compact LEDs, and indoor travel kits | Easy to carry, but less resistant to large side loads |
| Air-cushioned stand | Lights that need frequent height changes | Slower descent protects hands and equipment, but it does not increase load capacity |
| Heavy-duty steel stand | Large modifiers, heavier fixtures, and busy sets | Stable and durable, but tiring to move |
| Wide-base or C-stand style support | Flags, grip arms, and controlled studio placement | Excellent positioning, but bulky in tight rooms |
Example: A compact flash and bracket may weigh less than one kilogram, but adding a 120-centimetre umbrella moves a broad surface away from the stand’s centre. At six feet indoors, the combination may feel steady; at nine feet beside an open door, the same rig can sway with every draft. The modifier and working height, not just the flash weight, determine which stand is appropriate.
Aluminum saves carrying weight; steel adds mass and often feels more planted. Air cushioning acts like a gentle brake when you loosen a riser, preventing a mounted light from slamming downward [1]. I still keep one hand on the upper section while lowering it because cushioning softens a drop; it does not replace controlled handling.
Check the complete package: fixture, battery, bracket, softbox, grid, and any adapter. A light may weigh only two kilograms, yet its modifier can create the larger problem by moving the center of gravity away from the column. Leave capacity in reserve, particularly outdoors, and stop extending the stand when visible flex or wobble tells you the setup has reached its practical limit.
studio light stand with adjustable height
As an affiliate, we earn on qualifying purchases.
As an affiliate, we earn on qualifying purchases.
Place the Legs and Ballast Where They Can Stop a Fall
Light stands, booms, and clamps stay upright when the load sits over a broad, level footprint and ballast resists the direction of a possible fall. Spread the legs fully, point a leg beneath an offset load, and place weight low on the stand. Never rely on friction locks alone.
On a location portrait, I once watched a gentle courtyard breeze pulse against a white umbrella. The stand barely moved at first, then rocked with each gust like a metronome. A sandbag across the correct leg, plus lowering the light by about 30 centimetres, changed the setup from nervous to solid without changing the character of the light.
- Open the base completely. Partial leg spread narrows the footprint and makes the stand easier to tip.
- Aim one leg under the load. Place that leg beneath a boom arm, extended modifier, or tilted fixture.
- Add ballast at the base. Drape a sandbag so it contacts the floor instead of swinging from the stand.
- Route cables beside a leg. Tape or cover any cable crossing a walkway, leaving enough slack for adjustments.
- Push gently from several directions. If the stand rocks, creeps, or twists, fix the setup before shooting.
Example: If a softbox is tilted forward over a seated subject, imagine drawing a line from the centre of the softbox straight down to the floor. Pointing one stand leg toward that line gives the load more base beneath it. A sandbag draped across that same leg and touching the floor then resists the direction in which the rig is most likely to tip.
Ballast works best when it stays low, still, and close to the base. A weight hanging several inches above the floor can swing when the stand is bumped, adding movement instead of damping it. According to PhotoMocha, stable surfaces, properly engaged locks, and sandbags or weights are core safeguards for stands and booms [2].
Warning: Outdoors, a large umbrella or softbox can overpower a weighted stand in a sudden gust. Use a trained assistant, reduce the modifier area, lower the stand, or stop using the setup when the wind becomes unpredictable.
People create another kind of weather. Children run, clients step backward, and crew members focus on the subject instead of the floor. Keep legs and cables outside natural walking paths where possible, use a spotter on crowded sets, and make trip hazards visible rather than hoping everyone notices black hardware against a dark floor.
heavy-duty C-stand clamps for photography
As an affiliate, we earn on qualifying purchases.
As an affiliate, we earn on qualifying purchases.
Balance a Boom Without Turning It Into a Levered Trap
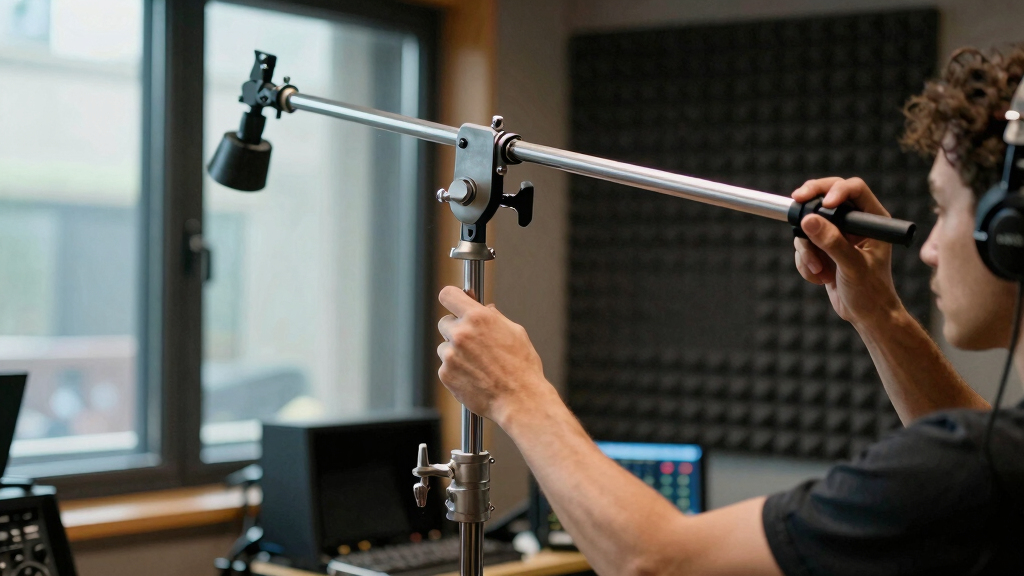
Light stands, booms, and clamps make overhead lighting possible, but a boom must balance the fixture against a secure counterweight. Keep the arm as short as the composition allows, place its load above a supporting leg, and use rated hardware at every connection. More reach always demands more control.
A boom is a lever. Moving a two-kilogram light twice as far from the stand roughly doubles its turning effect at the pivot, even though the light itself has not gained a gram. That is why an overhead softbox can feel manageable near the column yet become stubborn and unstable after another metre of extension.
For example, place a two-kilogram light one metre from the boom pivot and it creates roughly the same turning effect as a one-kilogram light two metres away. Think of a door: pushing beside the hinges is difficult, while pushing at the handle swings it easily. A boom behaves the same way, which is why shortening the arm can improve stability more effectively than adding another counterweight.
For a food shoot, I often place a small diffused light above the table so no stand legs appear beside the plates. I build the rig low, attach the light, add the counterweight, and raise the complete assembly only after it balances. This sequence keeps heavy parts near hand level while I make adjustments and prevents a loose arm from swinging through the set.
- Mount the empty boom first and lock the stand on level ground.
- Position the fixture close to the pivot before extending the arm.
- Add a secure counterweight made for the boom; never hang a loose camera bag from a thin cord.
- Rotate the arm so tightening forces do not loosen the grip head under load.
- Attach a secondary safety cable when a light hangs over a person or valuable set.
Counterweights do not grant unlimited reach. They add load to the stand and grip hardware, and too much weight can overload the risers even when the arm appears balanced. If the system groans, twists, or slowly droops, shorten the arm, use a stronger support, or change the lighting plan.
Keep people out from beneath the fixture while you adjust it. I also mark the stand position with tape after a stable test, which makes accidental movement obvious. The goal is not merely to stop the boom from falling; it is to create a predictable overhead rig that stays quiet while you work.
boom arm with counterweights for studio lighting
As an affiliate, we earn on qualifying purchases.
As an affiliate, we earn on qualifying purchases.
Pick the Clamp That Matches the Surface and the Load
Light stands, booms, and clamps hold reliably when the clamp matches the surface, load direction, and mounting point. Use padded jaws on finished furniture, a super clamp on sturdy round or square structures, and a grip head for controlled arm positioning. A tight clamp is not automatically a safe clamp.
A spring clamp can hold a sheet of black foam board beside a tabletop, but it is a poor choice for a heavy lamp above a subject. A super clamp offers stronger mechanical pressure and mounting sockets, while a C-clamp can grip a suitable edge with deliberate screw pressure [1]. Grip heads let you rotate flags and arms, though their orientation matters because weight should encourage the head to tighten rather than unwind.
During a small office portrait, I may clamp a lightweight reflector to a sturdy shelf instead of squeezing another stand into the room. Before mounting it, I test the shelf, inspect the clamp pads, and pull firmly in the expected load direction. If the wood creaks or the reflector can twist the clamp, I move to a floor stand. The building surface becomes part of the rig, so it must carry the load too.
Example: A padded spring clamp may be ideal for holding a 100-gram card reflector to the edge of a desk. The same desk is not necessarily suitable for a two-kilogram LED panel on an articulated arm: the arm introduces sideways twisting, and a hollow desktop may crush before the clamp slips. In that case, a weighted floor stand is the safer choice even if the clamp itself is strong enough.
- Check the surface. Thin shelves, glass, hollow rails, and decorative trim can crack or deform.
- Protect the finish. Rubber padding reduces marks, but grit trapped beneath a pad can still scratch polished wood.
- Match the force direction. A clamp that resists downward pull may slip when twisted sideways.
- Use the correct stud or adapter. Loose thread combinations introduce play that tightening cannot cure.
- Add a safety attachment. Secure elevated equipment independently whenever a falling item could strike someone.
Do not extend a clamp handle with a pipe or wrench to gain more pressure. Excess force can strip threads, crush tubing, or damage the surface before the clamp looks distressed. Tighten by hand, test the load, and choose a larger or more suitable support if normal hand pressure cannot hold it.
As an affiliate, we earn on qualifying purchases.
Build Faster Sets With a Repeatable Support Routine
A repeatable setup routine helps you catch loose locks, poor balance, and awkward cable paths before they interrupt the shoot. Build from the floor upward, mount equipment near working height, test each load, and raise it only after the support feels stable. Speed comes from consistency, not rushed tightening.
On a corporate portrait day, you may photograph 20 people in the same corner while chairs, jackets, and laptops move around you. A marked stand position, a taped cable route, and a fixed boom length let you reset the lighting in seconds. More importantly, the set remains familiar enough that a small change—a loose knob or shifted sandbag—stands out immediately.
- Inspect the floor. Find uneven boards, soft rugs, slopes, wet patches, and walking routes.
- Build low. Open the legs, orient the base, mount the light, and attach the modifier at a comfortable height.
- Secure every layer. Check the stud, bracket, tilt lock, riser collars, boom pivot, and clamp jaws.
- Balance and ballast. Add the counterweight and sandbags before raising the system.
- Raise the thickest section first. Keep thinner upper sections nested until you need their reach.
- Run a movement test. Tilt the modifier, rotate the boom, and apply a gentle push in the likely fall direction.
- Recheck during the shoot. Inspect the rig after anyone bumps it or after a major height or angle change.
Example: Suppose you replace a small beauty dish with a large rectangular softbox halfway through the day. Even if the fixture and stand remain unchanged, the broader modifier moves the centre of gravity and catches more air. Return the stand to a comfortable height, check the tilt bracket, reposition the supporting leg and sandbag, then repeat the push test before raising it again.
Raising the thicker lower risers first generally keeps more rigid tubing in use. It also leaves the narrowest section available for fine height changes rather than asking it to carry the whole setup at full extension. When you hear a faint metallic tick after adjusting a light, pause; that small sound can be a collar settling or an adapter beginning to slip.
I keep frequently paired adapters attached to the appropriate fixtures and label unfamiliar cases by function. That small habit avoids the frantic search for a tiny threaded part while the subject waits under hot lights. Modular, compatible components can improve workflow [1], but only when you know which threads, studs, and load limits belong together.
Set rule: If you change the height, angle, extension, modifier, or fixture, treat the rig as a new load and test its stability again.
Keep Grip Gear Quiet, Clean, and Ready for the Next Shoot
Light stands, booms, and clamps last longer when you remove grit and moisture, inspect locks and threads, and store every part dry. Maintenance should preserve smooth movement without making gripping surfaces slippery. A two-minute inspection after each location shoot can reveal damage before the next fixture hangs from it.
Beach assignments are especially revealing. Fine sand works into collars with a dry rasp, while salty moisture leaves a pale crust on metal by the next morning. After one windy shoreline portrait, I wiped every tube with a slightly damp cloth, dried the parts fully, and opened the legs overnight; packing them wet would have invited corrosion and trapped grit inside the sliding sections.
- Wipe tubes, legs, clamps, and knobs with a soft cloth after dusty or wet work.
- Brush debris away from threads and joints rather than forcing gritty parts together.
- Check for bent risers, cracked castings, loose feet, worn pads, and damaged threads.
- Test air cushioning with an unloaded stand before trusting it beneath a light.
- Store stands and booms dry, with removable weights secured so they cannot roll or fall.
Example: If a riser collar turns smoothly while unloaded but the tube sinks a few millimetres after a light is attached, mark the stand and remove it from service. That slow movement may indicate a worn friction surface or damaged lock. Discovering it during inspection is far safer than compensating by overtightening the collar during a shoot.
Lubrication depends on the mechanism and manufacturer guidance. Keep oil and grease away from friction pads, grip-head discs, clamp jaws, and any surface that relies on dry contact. A silky adjustment feels pleasant, but a lubricated grip surface can create a slow, silent slide—the photographic equivalent of black ice.
Retire damaged parts instead of improvising a repair under load. Tape can keep a loose rubber foot from disappearing on the way home, but it cannot restore a cracked collar or stripped thread. When I find a suspect component, I mark it immediately and remove it from the working case so nobody grabs it during a hurried setup.
This gear does not need to look polished. Scratches and worn paint often tell the story of honest work. What matters is that every lock engages cleanly, every leg opens fully, and every connection holds without surprise; reliability is the finish that counts.
Frequently Asked Questions
How much load capacity should a light stand have?
Choose a stand rated above the combined weight of the fixture, power source, bracket, adapter, and modifier. Leave extra capacity for tilted loads and large modifiers because leverage and moving air can challenge a stand long before its vertical weight rating is reached.
Do I need sandbags for indoor photography?
Use sandbags indoors whenever a stand carries a large modifier, supports a boom, reaches above head height, or sits near moving people. A smooth studio floor does not stop a stand from tipping when someone catches a cable or brushes a softbox.
Why does my boom arm keep drooping?
A boom usually droops because the arm is extended too far, the pivot is under-rated, the counterweight is poorly placed, or a grip surface is worn or contaminated. Shorten the extension first, rebalance the load, and inspect every lock; do not solve slipping hardware by forcing the handle tighter.
Can I clamp a light to furniture?
You can clamp a lightweight fixture or accessory to sturdy furniture when the surface, clamp, and mounting adapter can safely carry the load. Protect the finish, test for twisting, and avoid glass, thin shelves, decorative edges, and anything that shifts when pulled.
Are air-cushioned stands safer than regular stands?
Air cushioning slows a riser when you loosen its collar, which can protect your hands and stop a light from dropping abruptly. It does not strengthen the stand, secure the base, or replace careful lowering, so you still need proper load capacity and ballast.
Which stand section should I extend first?
Extend the thicker lower section first and use thinner upper sections only when you need more height. This keeps more rigid tubing in service and usually reduces flex, particularly with softboxes or lights tilted away from the central column.
Conclusion
Your best support gear is the hardware you can trust without thinking about it during the exposure. Choose enough capacity, keep loads close to the stand, ballast the base, secure elevated equipment twice, and test every major adjustment. Those habits protect your equipment, your subject, and the quiet concentration that good photography needs.
Before your next shoot, build one complete lighting setup and give each stand a firm, controlled push from several directions. Listen for the click of a settling collar and watch for the smallest drift. When everything stays still, the hardware disappears—and the light is free to do its work.
Evergreen bestsellers Picks
bestsellers
As an affiliate, we earn on qualifying purchases.